This session is dedicated to the Vocoder, a device to modify the human voice. Furthermore, we use some patches to visualize sound and customize the appearance of MAX/MSP objects with the inspector.
Back in 1978, the music band "Kraftwerk" became popular with their title "The Robots" .
The music relies heavily on Synthezisers and Vocoder to create the unique sound of the band.
Record two audio clips to get some speech samples,
- a longer one with a duration of approx. 30 sec (maybe read a book or text?)
- another shorter clip with just a short sentence.
The video below shows you the basic process using Audacity. The interface of Audacity version 3.X has changed, but the elements used are still available on the user interface, only their location is different.
Before you start, you need to set in Audio Setup the proper Recording Device, your microphone. Also, activate the Record Meter
to see a level meter show the volume. Your voice should be around -6dB, avoid a red level.
[Quick introduction on how to record with Audacity][(https://www.youtube.com/embed/knL6uKBGyIg?si=72jXXYisA7fn-xv5)
At the end, do not forget to Export your audio clip, either in the .WAV or the .MP3 format.
REMINDER Do not forget to extract the zipped repository file you download from GitHub. Single file patches may still work, but patches containing several patches and the drag and drop of media files will not work on Windows machines! Furthermore, you need to copy the complete folder after extraction to your Desktop so that the patches are working properly!
As in previous sessions, download the repository with all contents on your computer, if required extract its files. Then find and laumch the patch 240226_VocoderBEAP1.maxpat.
REMINDER Do not forget to extract the zipped repository file you download from GitHub. Single file patches may still work, but patches containing several patches and the drag and drop of media files will not work on Windows machines!
Drag and drop on of your audio clips on the patch, a playlist~ object will be created. Patch it as it is shown for the existing player.
Then start the patch and experiment with various settings on the Vocoder module.
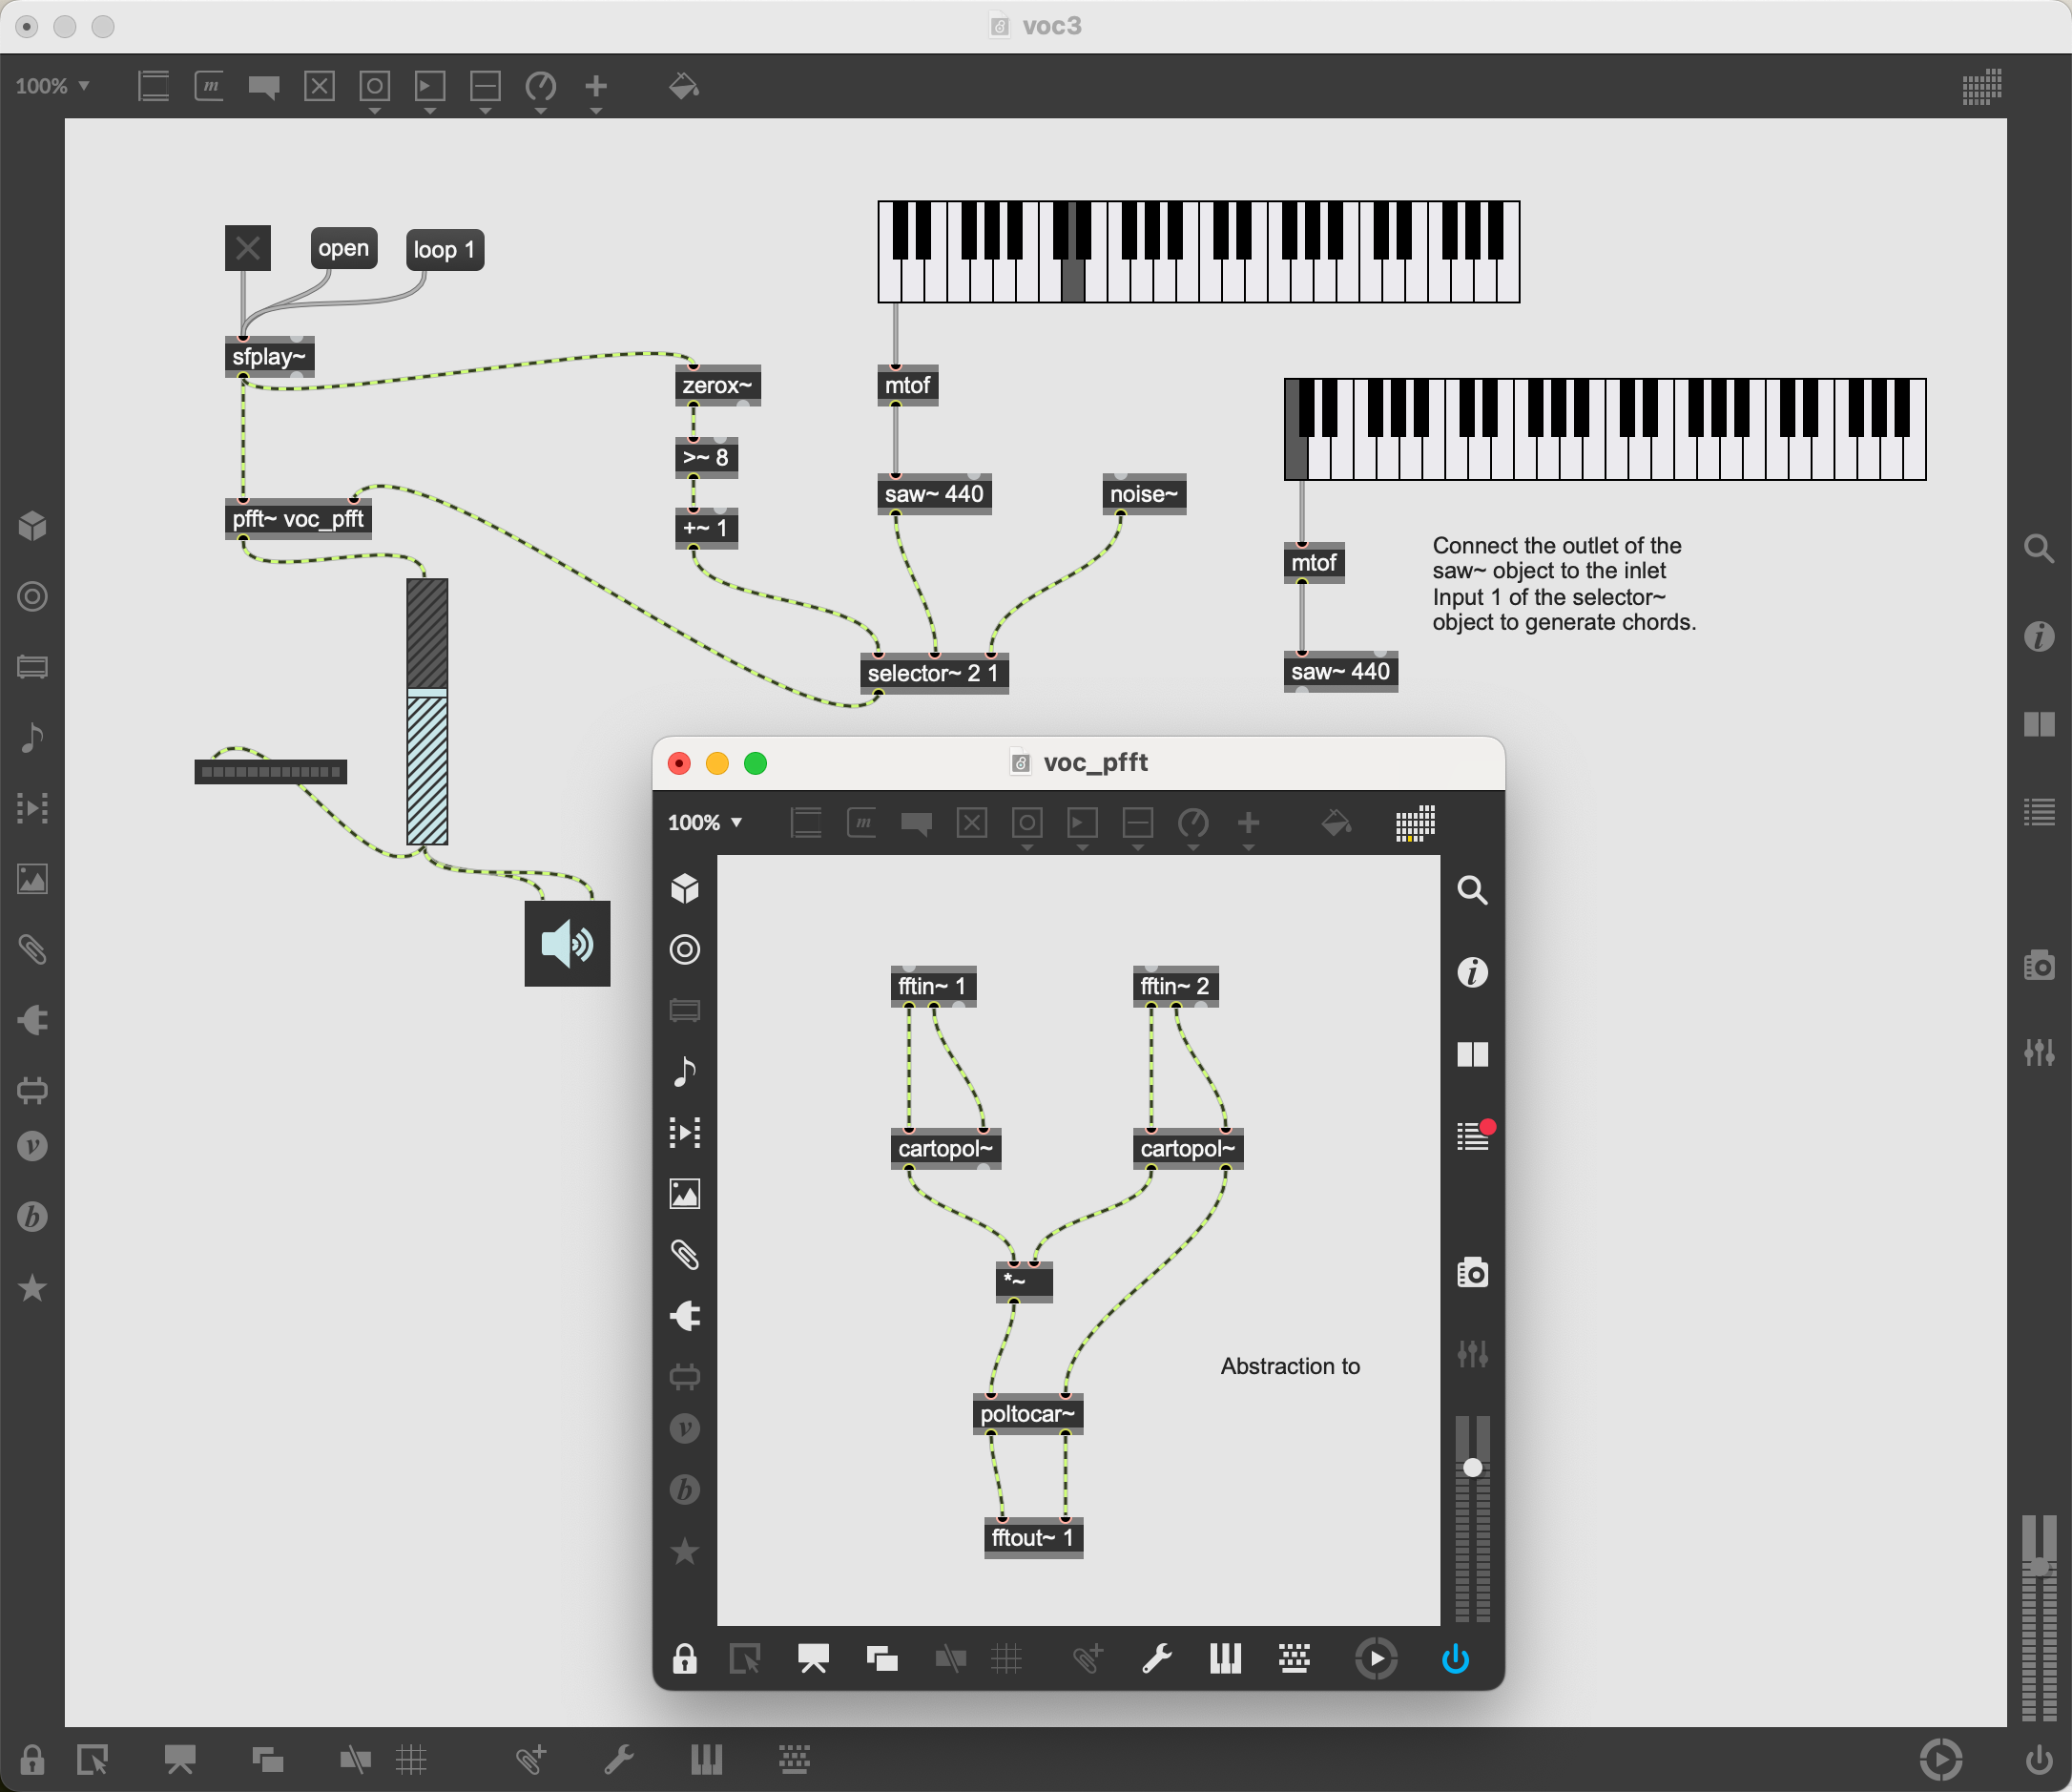
This Vocoder is described here in more detail. You find it in the folder Vocoder2. The project consists out of two patches. The main patch vox2.maxpat contains the main program, it uses a subprogram voc_pfft.maxpat. Subprograms in MAX are called Abstractions.
Launch the main patch voc2.maxpat, click on the open message, a widget will pop up that allows you to select an audio file. Then click on the toggle to start the patch. You can modulate the recorded voice by playing the kslider (keyboard).
If you listen attentively to the synthesized voice, you notice that it is difficult to hear your consonants. The new patch vox3.maxpat uses a technique called Zero Crossing Rate to identify consonants in the speech pattern and modulate those sounds with a noise. Compare the outcome with that of the previous one.
The two patches belonging to the project have been saved inside MAX as a project. This is a special folder format that contains links to the respective patches. So it is important that the patches are at the locations described there. If you copy and paste your folders as described above on your Desktop, you are all set.
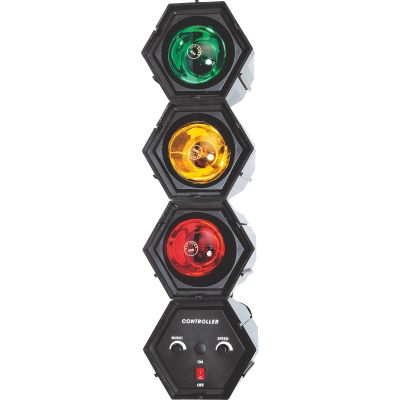
A Light Organ is a tool to visualize sound frequencies with different coloured lights. You find them inside discotheques. The sound signal is processed by several filters, arranged in parallel, each filter output connects to a different light.
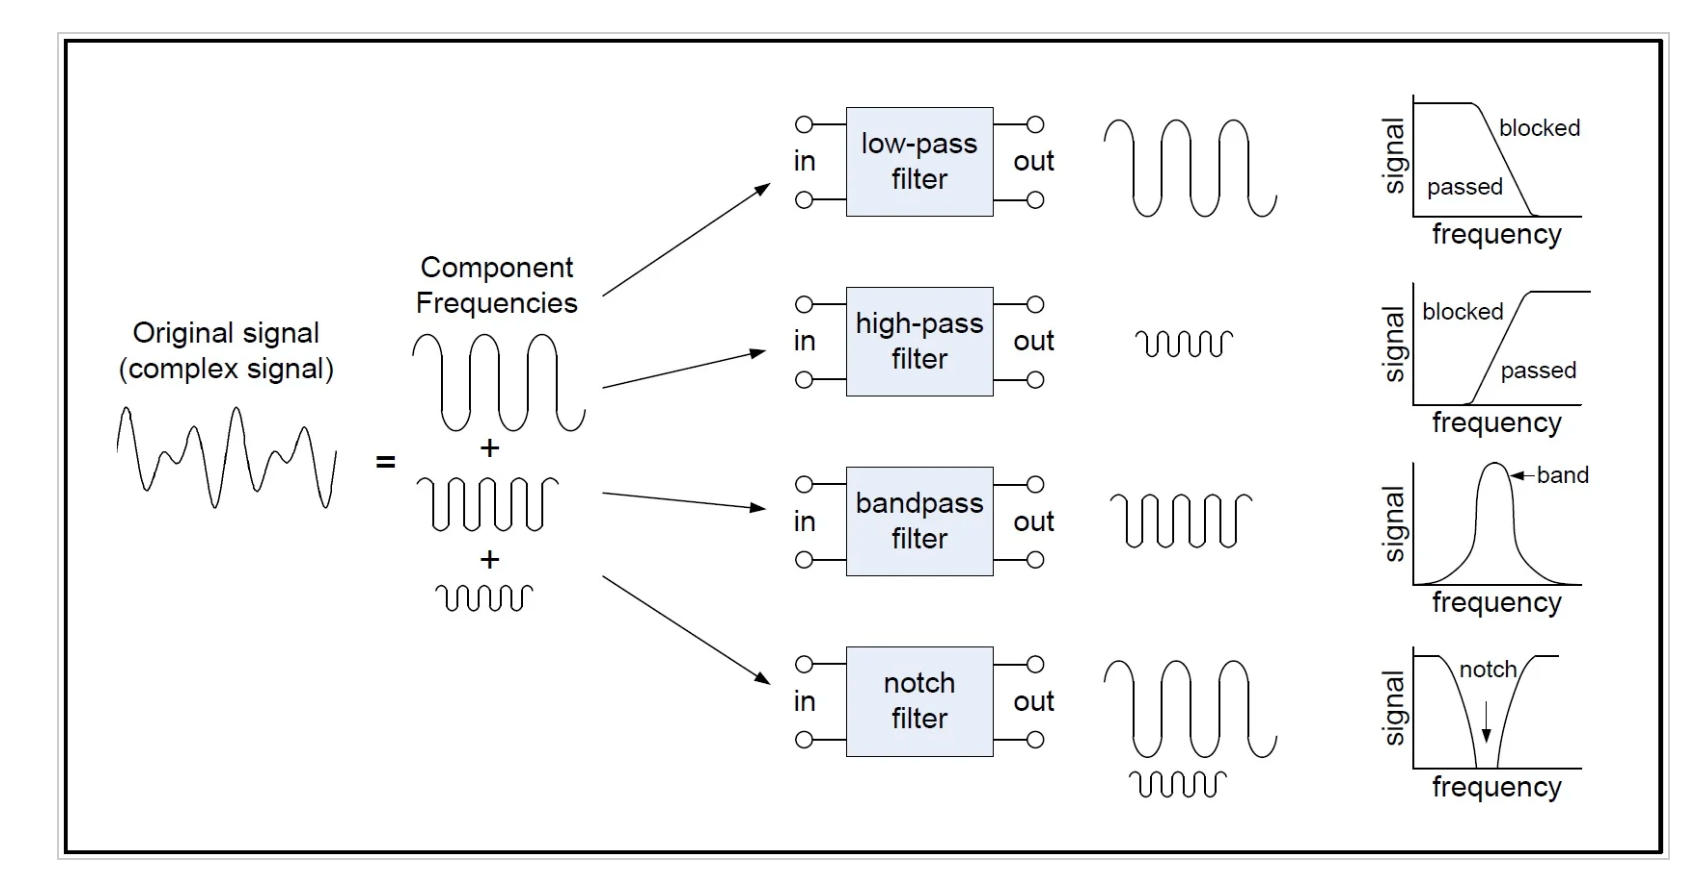
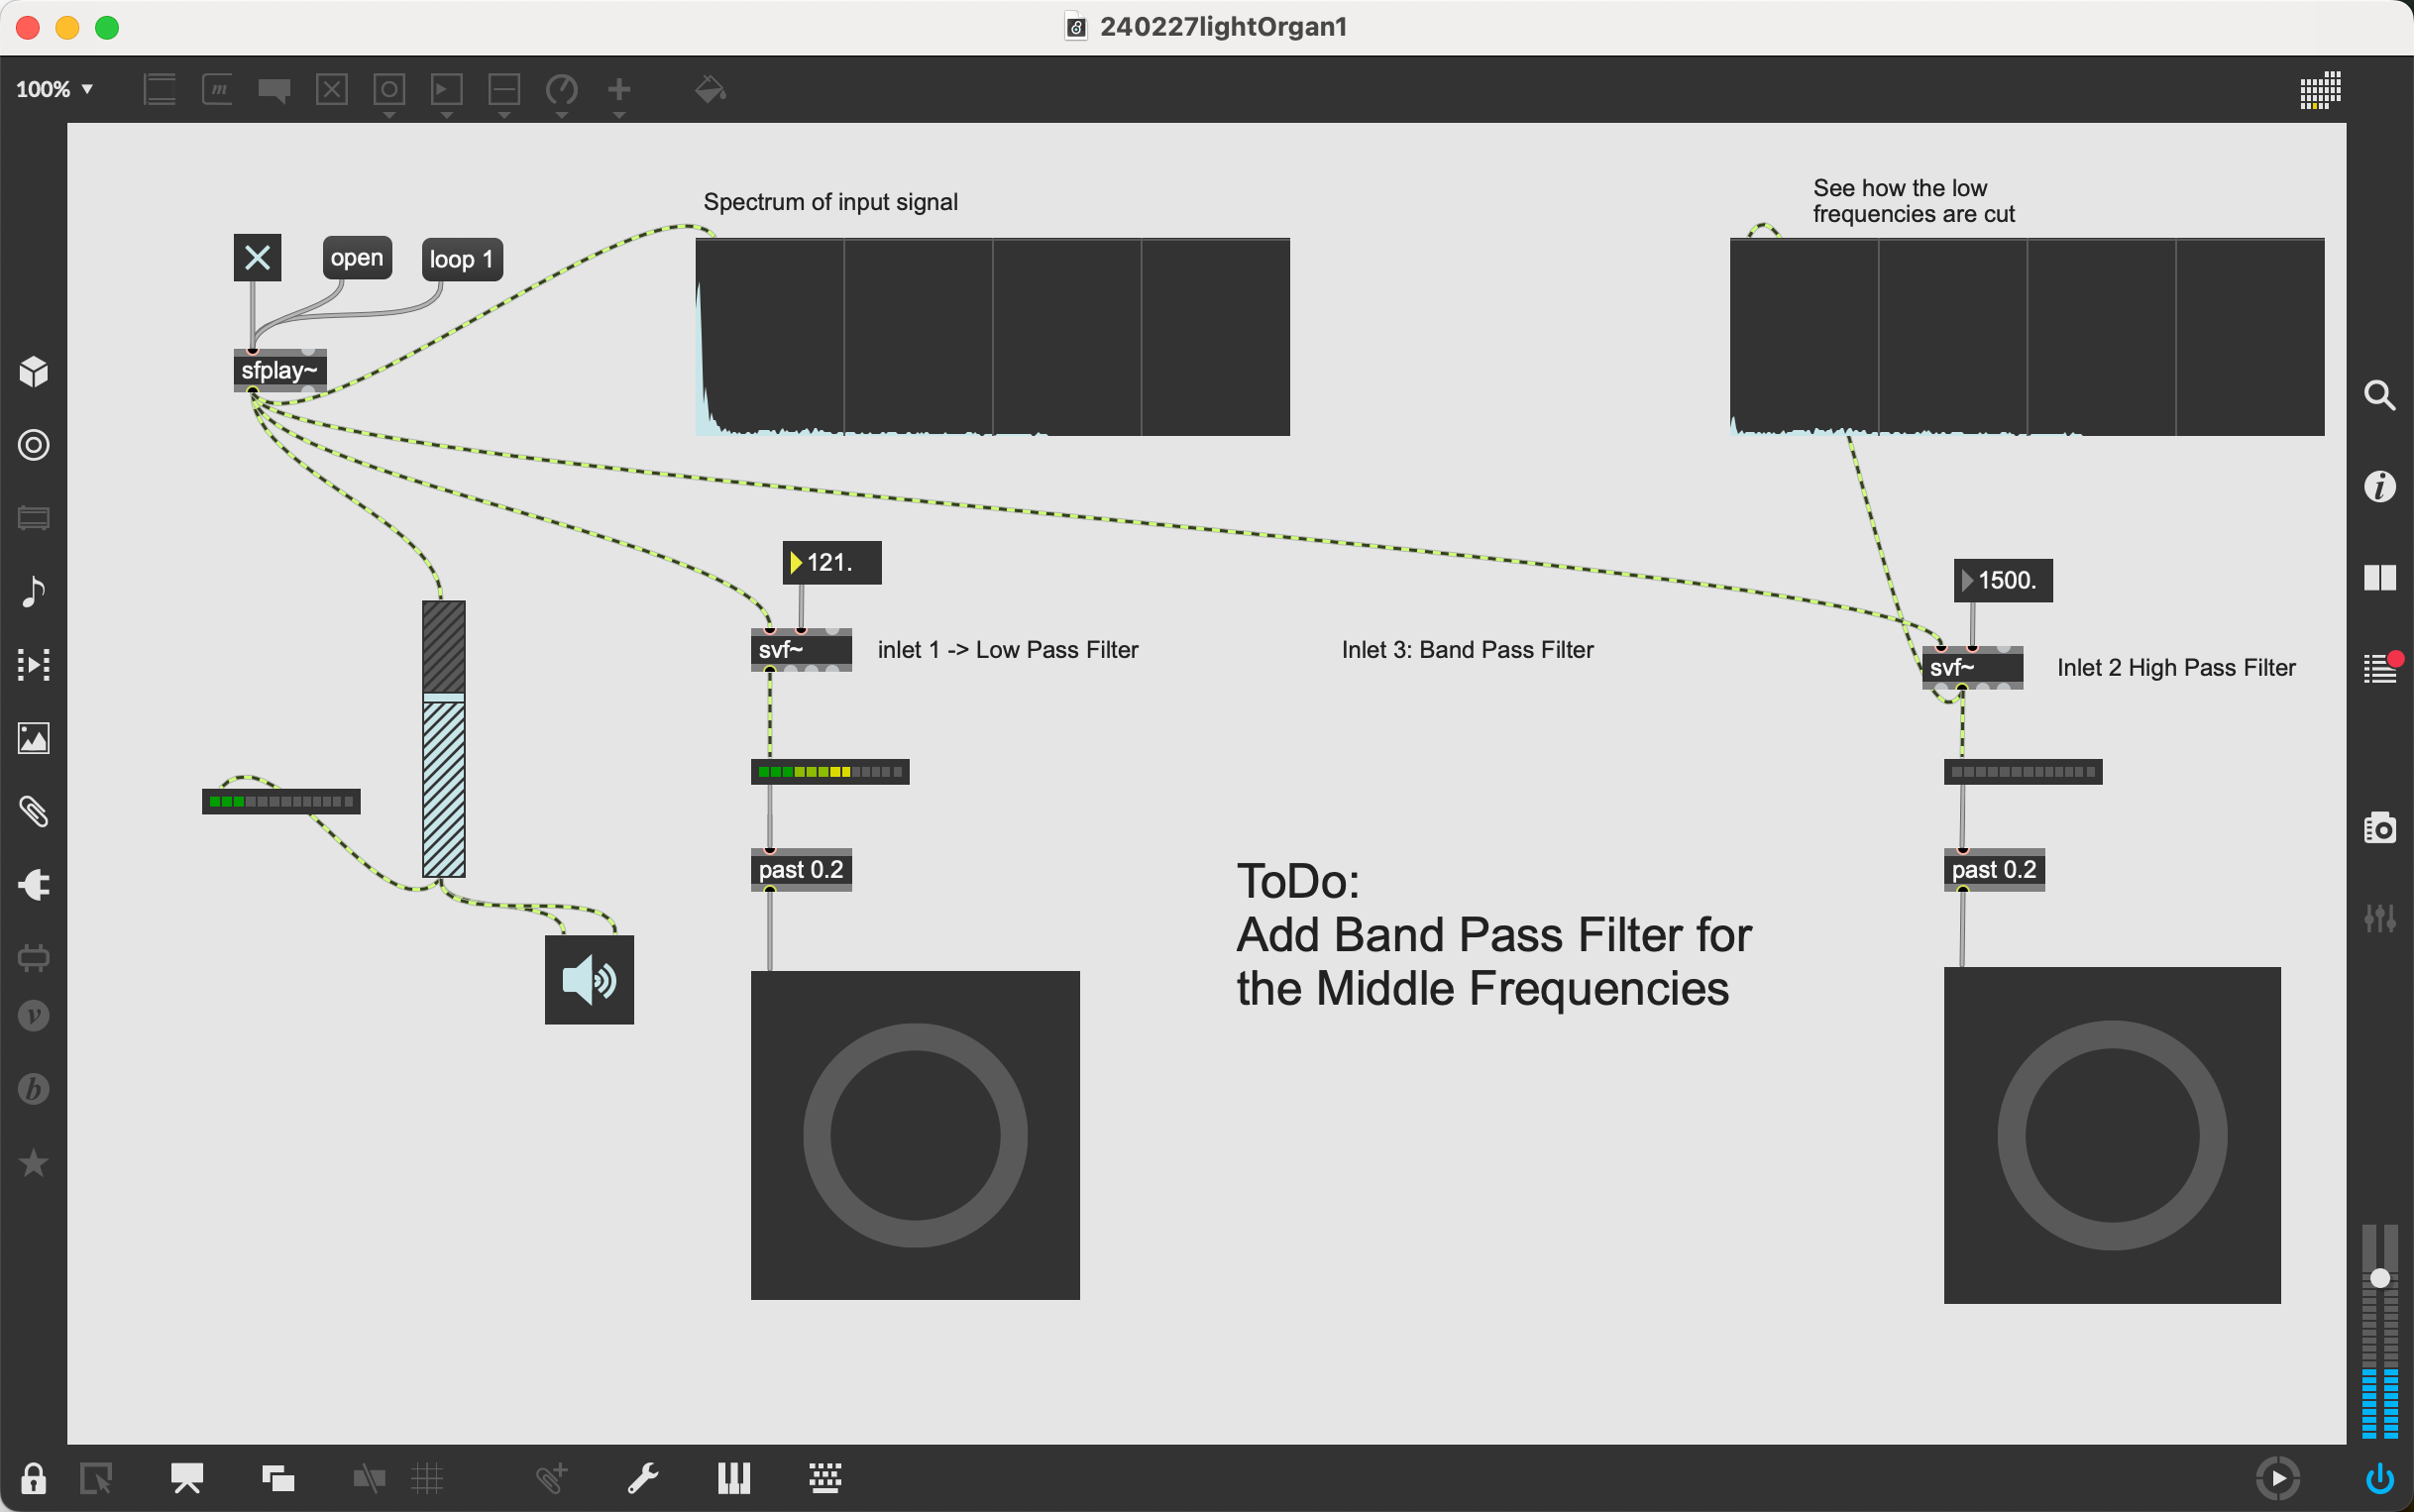
The svf~ object provides four different filters in one package, you select the filter by choosing one of the four outlets. The diagram shows the available options. The patch uses a low pass filter and a high pass filter, the band pass filter for the medium range frequences still needs to be implemented.
- Add one more block for the mid frequencies using the band filter outlet. Find a suitable frequency between low pass and high pass cutoff frequencies. You may use a
spectroscope~object. - Customise the button object with a different colour, You can do this by opening the object inspector ((i) icon at the right).
- Choose suitable frequencies for the three filters.


