This lab will teach you how to run tasks in parallel in the shell. This is the first steps in completing your twitter analysis homework.
Create a file in your home folder called script.sh with the following contents
#!/bin/sh

while true; do
    date
    sleep 1
done
This is a simple shell script that will print the current time in an infinite loop. Run the command
$ ls -l script.sh
to check the permissions of this file. You should get output that looks similar to
-rw-r--r-- 1 user user 52 Jan 22 13:16 script.sh
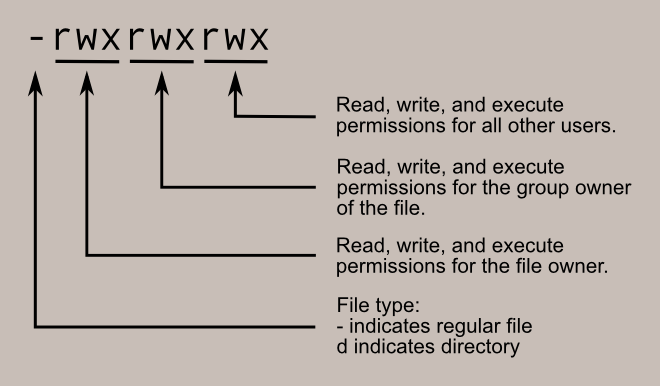
The left-hand sequence of -rw-r--r-- describes the permissions of the file,
and is particularly important to understand.
In this case, the file has read/write permissions for the user (you), and read permissions for everyone else.
The general semantics of the permission string are summarized in the following picture:
For more details on how to read these permission strings, see this link.
Now, try to execute your script by running the command
$ ./script.sh
This should fail with the following error message:
bash: ./script.sh: Permission denied
That's because we haven't given the file execute permissions yet.
Run the following command to give yourself execute permissions
$ chmod u+x script.sh
Run the ls -l command to verify that your permissions have changed,
and then run the file
$ ./script.sh
This should print the current date/time every second.
You can end the program by pressing ^C.
(The ^ symbol is the CTRL key on your keyboard.
For Mac users, ensure that you are pressing CTRL and not Command.)
Note that the ./ is required.
If you ommit it, then you will get the following error:
$ script.sh
bash: script.sh: command not found
Now restart the program by running
$ ./script.sh
again.
This time, however, press ^Z to end the process.
This will return you to the command prompt,
but unlike ^C it does not end the program.
^Z temporarily pauses the program,
and you can restart it by running
$ fg
(The fg stands for foreground.)
You can pause programs and restart them an arbitrary number of times.
Note that when the process has been paused with ^Z,
it is not running anymore.
To run the program in the background, enter bg (stands for background) instead of fg.
Notice that you can still type on the command prompt,
but that script.sh is continuing to print out messages while you type.
Press ^C.
Notice that this does not stop the background process.
To end the process,
first bring it back to the foreground with the command
$ fg
then press ^C to terminate the process.
List all the processes running in your current shell with the command
$ ps
You should get output that looks like
  PID TTY          TIME CMD
12906 pts/8    00:00:00 ps
31170 pts/8    00:00:00 bash
although the PID values will be different.
Each line corresponds to a process that has been started from your current session.
bash is the command interpreter that you are typing commands into,
and ps is the command that you just ran.
Later on we'll need more detailed information about the processes,
and you can get this more detailed output by adding the -f flag:
UID        PID  PPID  C STIME TTY          TIME CMD
user     14694 31170  0 13:52 pts/8    00:00:00 ps -f
user     31170 31166  0 10:24 pts/8    00:00:00 bash
Now run ./script.sh, type ^Z to pause it, then type ps again.
You should now see additional lines in your output, something like:
  PID TTY          TIME CMD
12900 pts/8    00:00:00 script.sh
12902 pts/8    00:00:00 sleep
12906 pts/8    00:00:00 ps
31170 pts/8    00:00:00 bash
The script.sh corresponds to the command you directly executed,
and the sleep corresponds to the command that is currently being executed by script.sh.
It is possible that instead of the sleep command, you will see the date command,
depending on where the program stopped.
The process id (pid) is how we communicate with processes.
Every time you start a program, a new process is created.
The PID column of ps's output will always be unique,
but the other columns may not be.
Run the following command in your terminal
$ ./script.sh > output
You should notice that the program is running, but no output is being printed to the screen.
RECALL: You know the program is running because no prompt (
$) is printed to the screen, and you can't enter commands. The>symbol is called output redirection, and sends all of the output of your program into theoutputfile. (outputcan be replaced with any filename you'd like, and is just an example filename.)
After waiting a few seconds, press ^C to end the program.
Now open the output file in Vim
$ vim output
You should see several lines printed out that contain results of running your ./script.sh file.
You can run this program in the background by running
$ ./script.sh > output
and then pressing ^Z to pause the program and then entering
$ bg
to run it in the background.
Now, the output file is being continually written to.
To verify this:
open the file in Vim;
check how many lines have been written;
close the file;
reopen the file in Vim;
now there should be more lines in the file.
Alternatively, the command wc -l shows how many lines are in a file.
Run the command
$ wc -l output
then wait a few seconds and run the command again. You should get different numbers both times.
We've already seen that we can stop the ./script.sh command by running the fg command and then typing ^C.
^C sends a special signal to a process called SIGINT,
and the default response to this signal is to terminate.
Another way to stop the program is by directly killing it with the kill command.
kill takes a pid as a command line argument,
and you should run
$ kill <PID>
where <PID> is the pid displayed by the ps command of your ./script.sh process.
Go ahead and kill the process that you currently have running in the background from the previous section.
The kill command has many uses for manipulating process.
The most common other variation that you will need to know is kill -9 <PID>.
Without the -9, kill asks the process to "politely" kill itself,
performing a clean shutdown by (for example) saving any open files.
When a program breaks, however, these polite killings sometimes may not happen or may take too long.
Adding the -9 flag forces the operating system to kill the process immediately without performing a clean shutdown.
This should be done if a polite kill request didn't work.
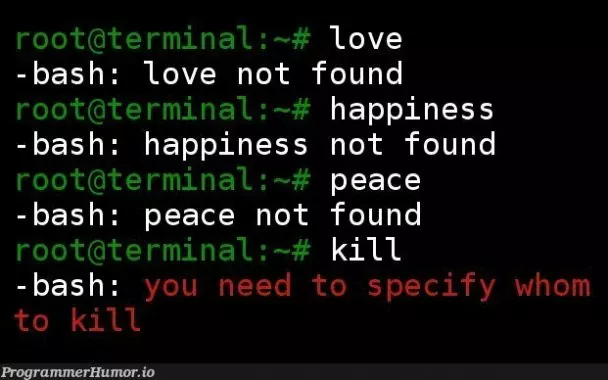
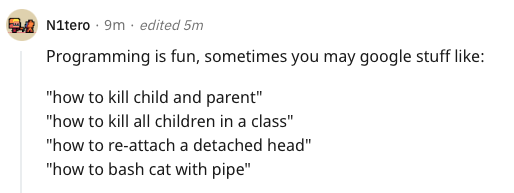
ASIDE: If you find the term "polite kill request" humorous, you're not alone. There's lots of programming jokes about these concepts. For example:


Create a second connection to the lambda-server with a separate terminal window and separate ssh session.
Run the command
$ ps
in both windows and notice that you get different outputs.
The ps command by default outputs only the processes that were created from your current connection.
To list all processes, run the command
$ ps -e
The -e flag causes ps to list "every" process on the system.
You should see a very long list that is multiple pages long.
Now run the command
$ ps -ef
The -f flag causes ps to print the "full" information about each process.
Note: All of the following commands are equivalent:
ps -e -f,ps -f -e,ps -fe, andps -ef. By convention, parameters that take only a single-and a single letter can be combined together into a single command, and the order that we apply them doesn't matter.
Importantly, the first column in the output is the username of the user who created the process.
We can therefore combine the ps -ef command with the pipe | and grep to list just the processes for a single user.
Run the command
$ ps -ef | grep <username>
replacing <username> with your actual username on the lambda server.
You should see all the processes created from both of your connected sessions,
and none of the extra processes owned by different users.
NOTE: If you have a particularly long username, the command above may not work for you as written. The output of
ps -efwill truncate usernames that are too long, and so thegrepcommand won't be able to find them. If you use the first 6 characters of your username in the grep command (instead of your full username), then the command should work.
Back to our script.sh command.
Go ahead and run it in one terminal session:
$ ./script.sh
then in the other, run our command for listing all of your processes:
$ ps -ef | grep <username>
You can see what processes other users are running with the same command.
Just replace <username> with their username instead.
We've seen three ways to kill processes:
pressing ^C, running the kill command, and running the kill -9 command.
Another way to kill processes is by sending the HUP signal.
The HUP signal is automatically sent to all "children" processes of your shell when the connection is closed (HUP stands for "hang up").
This ensures that you don't accidentally leave processes running on machines that you're not actively using.
If we didn't have the HUP signal, then everytime bad wifi disconnected you from the lambda server,
your vim and bash processes would continue running forever,
and eventually the lambda server would run out of resources.
To see how this works, run the command
$ ./script.sh > output2
then type ^Z and run
$ bg
to send your shell script to the background. Verify that this program is running in the background by executing the command
$ ps -ef | grep username
in the OTHER TERMINAL YOU HAVE OPEN.
Next, close the ssh session that you used to run script.sh by running the command
$ exit
In your second ssh session (that is still connected), again run the command
$ ps -ef | grep username
and notice that your script.sh process is no longer running.
This is because when you closed your ssh connection,
the HUP signal was sent to the script.sh process,
ending the process.
NOTE: Be default on most Linux machines, the
sshprogram sends theHUPsignal automatically when it disconnects. This is polite to do: Since we know we won't be using those processes any more, we should kill them and free their resources. But on some machines (especially Macs), thesshprogram is configured to not send theHUPsignal automatically. Therefore, the programs will not be immediately terminated. The lambda server waits about ten minutes before sending theHUPsignal and terminating the processes itself. (This delay is necessary to handle temporary disconnects due to things like bad wifi.) If you are using asshprogram configured in this way, then you won't immediately see your programs be killed by theHUPsignal when you logout. These programs will eventually be killed by the lambda server, but you don't need to wait for the server to kill them before progressing with the lab.
Sometimes we want to have long running processes that last longer than our current sessions.
To do this, we can use the nohup command to block the HUP signal.
(UNIX programmers like simple names :)
Reconnect a second terminal to the lambda server, and in this terminal run the command
$ nohup ./script.sh > output2
Notice that the only difference between this command and the previous section is the use of the nohup command.
Then type ^Z and run
$ bg
to send your shell script to the background. Verify that this program is running in the background by executing the command
$ ps -ef | grep username
in the OTHER TERMINAL YOU HAVE OPEN.
Next, close the ssh session that you used to run script.sh by running the command
$ exit
In your second ssh session (that is still connected), again run the command
$ ps -ef | grep username
and notice that your script.sh process is still running.
This command will run forever if it is not manually killed.
Use the kill command to end your script.sh process.
When you launch long-running processes on the lambda-server,
you will have to use the nohup command to ensure that they continue to run after you have disconnected.
In our previous experiments, we have been manually sending programs to the background by pressing ^Z and typing bg.
In our shell scripts, we will want to automate this process.
We can do this by placing an & at the end of a command.
Run the command
$ nohup ./script.sh > output3 &
and notice that the program seems to run and exit immediately. But it is in fact still running. You can verify this by running the
$ ps
command to view the process information, and you can run
$ cat output3
to watch the contents of output3 grow as script.sh appends to it.
(Try running the cat command multiple times, waiting a few seconds between each run.)
We now have all the tools we need to write a program to analyze terabytes of tweets massively in parallel. We'll start by counting how many times the word "coronavirus" was used in each month of the year 2020.
Create a file called lab.sh with the following code inside of it:
#!/bin/sh
for file in '/data/Twitter dataset/'geoTwitter20-*-01.zip; do
    echo "$file" "$(unzip -p "$file" | grep -i coronavirus | wc -l)" &
done
NOTE: Ensure that you understand what everything in the code block above does. For your homework, you will have to write files like this from scratch.
Give yourself execute permissions to the file by running
$ chmod u+x lab.sh
And then run the file with output redirection
$ nohup ./lab.sh > output
You'll notice that the program appears to finish immediately, but if you run
$ ps -ef | grep <username>
you'll see all of the running processes.
And there's a LOT of processes.
The output is rather complicated because there are many processes being created per file (e.g. unzip, grep, and wc).
We can simplify this output to see exactly one line per file by running another grep command to display only the running unzip commands:
$ ps -ef | grep <username> | grep unzip
Now, you should see one (very long) line per file,
and the line will contain the name of the file that was passed to unzip.
The only way for you to know that your data analysis has finally finished is to keep running this ps command until you don't get any more output;
at that point, all of the programs have terminated.
ASIDE: Actually, you can monitor your progress with more fine-grained control using the
topandatopcommands. Running$ top -u <username>will show you in real-time which of your processes are running and consuming the most CPU resources. Running
$ atopwill show you what resources are being consumed on the lambda server. In this case, our computation is very simple. The lambda server has 80 CPUs, but only 16 hard drives (HDDs). So the bottle-neck will be hard drive speed. The output of
atopwill show that the HDDs are being maxed out with these commands. Therefore, you are likely to not have your parallel program run 12x faster than your sequential program. My parallel program ran "only" about 8x faster due to this bottleneck. More CPU intensive code, however, can get up to an 80x speed up by running in parallel on the lambda server.
Once your analysis is done, you can view the results that you save with output redirection:
$ cat output
Unfortunately, you'll notice that the results are not in chronological order. Instead, they are listed in the order that the files finished processing. Parallel programming is what we call nondeterministic, which means that the order of the results will change everytime you run the program due to factors outside of our control.
Fortunately, we can easily recover a chronological ordering using the sort command:
$ cat output | sort
Paste the output of your
$ cat output | sort
command to sakai.
If you finish early, you should start the typespeed caveat task if you have not already done so. At this point, you have seen all of the terminal tricks needed to understand both the main task and the extra credit.
