This repository is the master repository which will contain all the course materials. That includes slides, coding challenges and starter code for larger projects.
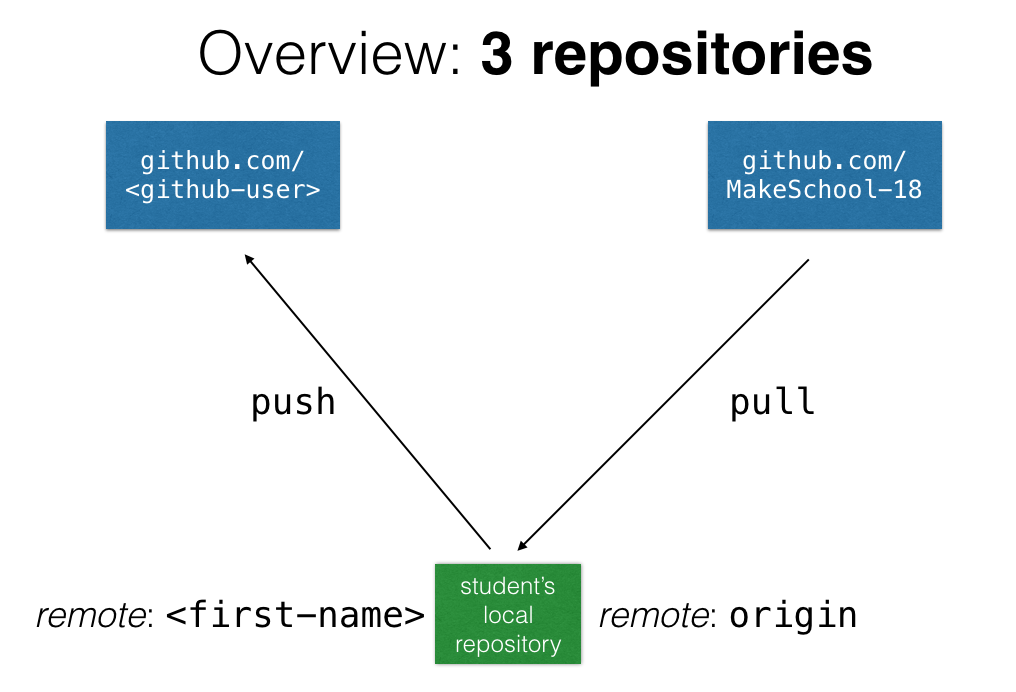
Note that you can not commit to this repository! However, you can still and go maintain your own version of it. In that case, this is what the whole setup looks like:
Here are the steps that you need to perform to setup this infrastructure:
-
clone the repository:
git clone https://github.com/MakeSchool-18/iOS-MVC -
create your own repository on your Github account named:
iOS-MVC -
add this repository as a remote to the local one (note: you need to give a name to the remote, e.g. your first name):
git remote add <first-name> https://github.com/<github-user>/iOS-MVC.git -
push the repo to the newly created remote:
git push -u <first-name> master -
when you want to access new materials now, all you need to do is:
git pull origin master -
when you worked on a challenge or a starter project, you can push it to your own remote repository with:
git push
You should get into habit of writing your code so that it's readable for other people (and for you!). An important factor for this is formatting. Here are some guidelines that you should try to apply in order to make your code more readable:
- Structure your code into sections, each section should have a title that you can insert in Xcode using
// MARK: - Methods in a class should be separated with one line break in between them
- Use two line breaks before starting a new section (this is the only time where using more than one line break is allowed!)
- Generally, line breaks should be used with great care! Make sure to only use line breaks when you want make it clear that a certain code chunk (paragraph) bundles similar functionality (in these cases, it is often a good idea to put a comment on top the paragraph that shortly describes what the functionality of this paragraph is)
- Use expressive variable and function names (no
var foo,var blaaa,var xxxx) - For debugging with
printstatements, use an indication of where the print statement happened:
#functionprints the name of the function that contains theprintstatement#filegives you the name of the file that contains theprintstatement#linegives you the line inside the file that contains theprintstatement- An example for a good print statement could be:
print(#file, #line, #function). Sometimes it is helpful to include some context as well, so if there are variables that you need to inspect, just append them to the statement:print(#file, #line, #function, userName, accountInfo)
- Remove boilerplate code from your files that doesn't do anything for you. For example, when you create a new
UIViewControllersubclass, there is usually some predefined boilerplate code generated for you. Apple means well, but if you don't use this code you should delete it. Examples for this aredidReceiveMemoryWarning()or the commented version ofprepare(for segue: UIStoryboardSegue, sender: Any?), evenviewDidLoad()if you don't end up using it.
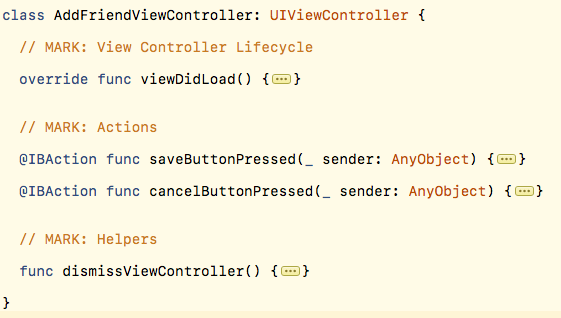
class AddFriendViewController: UIViewController {

  // MARK: View Controller Lifecycle

  override func viewDidLoad() {
    super.viewDidLoad()
  }


  // MARK: Actions

  @IBAction func saveButtonPressed(_ sender: AnyObject) {
    dismissViewController()
  }

  @IBAction func cancelButtonPressed(_ sender: AnyObject) {
    dismissViewController()
  }


  // MARK: Helpers

  func dismissViewController() {
    presentingViewController?.dismiss(animated: true)
  }

}
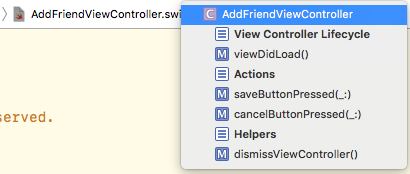
Here are two benefits that you get from this approach:
- You can now use the keyboard shortcut
cmd+alt+shift+←to collapse all methods and get a nice overview of the code
- You can now use the "quick viewer" in Xcode to see the whole content of your file nicely organized


