Homemade clone of the HyperCube by the Hyperspace Lighting Company.
- 6x beam
- 2x beam-w-hole
- 2x beam-bottom (one symmetry !)
- 2x beam-bottom-w-hole (one symmetry !)
- 4x corner
- 4x corner-bottom
- 5x corner-cache
- 1x corner-cache-w-hole
- 4x panel-holder
In doubt you can replace all beam variants by :
- 8x beam-w-hole
- 4x beam-bottom-w-hole (two symmetries !)
The no-hole variants use less material and are faster to print.
- 1x electronics-case
- 1x electronics-case-top
- 1x support
- 1x electronics-case-support
- 1x button
- 6x 210mm/2mm square one-way mirrors (or standard glass/PMAA with one-way film)
- 24x M2 15mm wood screws
- 6x 80cm WS2812 LED strips (60 LEDS/m)
- 1x 10A 5V power supply
- 3-wire cable
- 1x Arduino Nano
- 1x Bluetooth module
- 1x capacitive touch button (20x15mm)
- 1x Wemos D1 mini
- 1x mini push button (5.8x5.8mm)
- Start building the cube from the top panel, taking care where you use beams with or without holes to pass the wires. You will use all beams and corner pieces and five panels, dont put the last bottom panel yet
- Cut the LED strips to lenght en solder the wires, I recommend using dedicated power lines for each strip but you can use a single wire for the data line
- Glue the strips to each side and pass the wires in the beams, all wires must output on the same corner. I recommend adding CA glue as the standard 3M tape is not adhesive enough
- Check that every strip is working correctly
- Put the bottom panel and secure it in place by glueing the four panel holders
- Glue all height corner caches
The following diagram shows one way to arrange strips (flattened cube seen from top).

Edit the constants.h file according to your wiring :
LED_PINoutput pin use to control LEDSBUTTON_PINinput pin for the control buttonBLE_RXDRX pin for the BLE moduleBLE_TXDTX pin for the BLE module
Edit MAX_MILLI_AMPS according to the rating of your power supply (keep a safety margin, especially with cheap Chinese stuff).
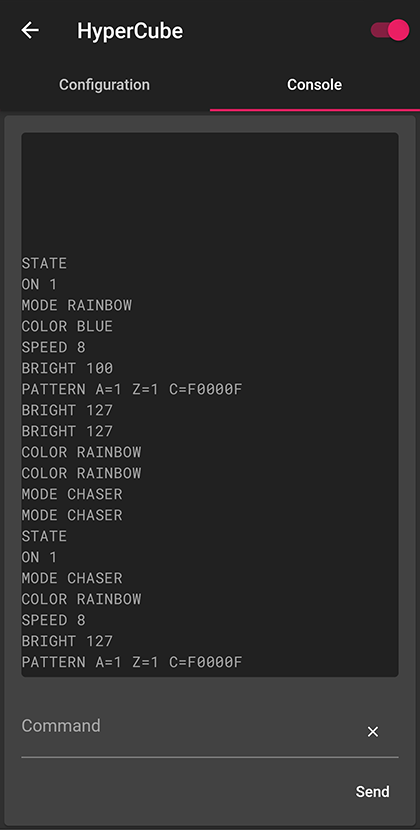
The cube is controlled via USB and Bluetooth and can received basic serial commands (\n terminated):
ONto turn on the lightOFFto turn off the lightBRIGHT X(X=0-255) to change the brightnessBRIGHT+to increase the brightness by 16BRIGHT-to decrease the brightness by 16MODE Xto change the current mode, modes are:RAINBOWRAINDROPPULSECYLONCHASERNOISEGRADIENTRIPPLES
MODE+to use the next modeMODE-to use the previous modeCOLOR Xto change the current color, hues are:RAINBOWREDYELLOWGREENBLUEPINKWHITE
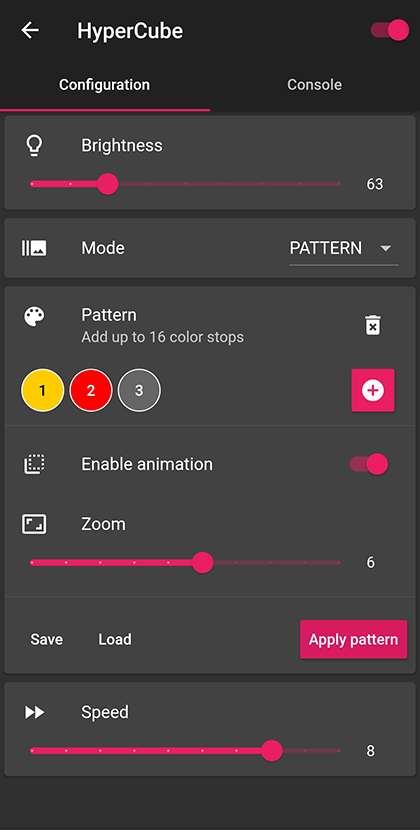
COLOR+to use the next colorCOLOR-to use the previous colorSPEED X(X=1-10) to change the speedSPEED+to increase the speed by 1SPEED-to decrease the speed by 1PATTERN [A=X] [Z=X] C=Xuse a custom color patternA=X(X=0/F/B): animate the pattern onForward orBackward direction (uses currentSPEED)Z=X(X=1-10): display the full pattern all at once or only a smaller portionC=X: definition of up to 16 color stops, three character each, from000toFFF
Note: When controlled over Bluetooth, the controller must send a single # char and wait for the OK response before sending the command.
This is done to pause the FastLED processing and have enough CPU cycles to consume the larger request.
C=f00: All redA=F C=000FFF: Animated Black/White gradientC=000FFF000FFF000FFF000FFF000FFF: Static checkerA=B Z=5 C=F0000F: Animated Red/Blue gradient with zoom appliedA=F Z=10 C=5F55F500000055F000: Pulsating Green/Blue
Note: Commands over 20 chars long must be splitted into multiple packets, by limitation of the Serial over Bluetooth protocol.
Only the last packet will be \n terminated.
A flutter application (Android only) allows to control the light from your smartphone. It is only compatible with HM-10 Bluetooth modules.
The SolidWorks files, Arduino code and Flutter code are distributed under the Creative Commons 3.0 BY-SA license.


