react-native e2e testing using detox
Step by step guide for end to end testing in react native (Android) using detox
About this app
This app has been created using react-native init and then edited to contain a login form for the demonstration of integration testing using detox.
Prerequisites
- You must have
nodeandnpmalready setup in your machine - Install Detox command line tool globally using
npm install -g detox-cli
Installing and setting up detox in Android
- Go to your react native project directory, e.g.
cd RnE2eTestingDetox/ - Install
detoxas dev dependencyyarn add detox -D - Add following configuration in
android/build.gradleinsideallprojects.repositories
maven {
    // All of Detox' artifacts are provided via the npm module
    url "$rootDir/../node_modules/detox/Detox-android"
}
- Inside
android/build.gradle, change minSdkVersion to 18 and addkotlinVersion = "1.3.41"inextblock
ext {
    buildToolsVersion = "28.0.3"
    minSdkVersion = 18
    compileSdkVersion = 28
    targetSdkVersion = 28
    kotlinVersion = "1.3.41"
}
- Inside
android/build.gradle, add the Kotlin Gradle-plugin to your classpath
dependencies {
    classpath("com.android.tools.build:gradle:3.4.2")
    classpath "org.jetbrains.kotlin:kotlin-gradle-plugin:$kotlinVersion"

    // NOTE: Do not place your application dependencies here; they belong
    // in the individual module build.gradle files
}
- Inside
app/build.gradle, add the following two lines inandroid.defaultConfigblock
defaultConfig {
  testBuildType System.getProperty('testBuildType', 'debug')  // This will later be used to control the test apk build type
  testInstrumentationRunner 'androidx.test.runner.AndroidJUnitRunner'
}
- Inside
app/build.gradle, add the following line inandroid.buildTypes.releaseblock
// Detox-specific additions to pro-guard
proguardFile "${rootProject.projectDir}/../node_modules/detox/android/detox/proguard-rules-app.pro"
- Inside
app/build.gradle, add the following lines independenciessection
androidTestImplementation('com.wix:detox:+') { transitive = true }
androidTestImplementation 'junit:junit:4.12'
implementation "androidx.annotation:annotation:1.1.0"
-
Add the file
android/app/src/androidTest/java/com/[your.package]/DetoxTest.java. Don't forget to change the package name to your project's. Refer DetoxTest.java -
Hit
detox init -r jestto use jest as test-runner. Its output will be something like-
detox[27185] INFO:  [init.js] Created a file at path: e2e/config.json
detox[27185] INFO:  [init.js] Created a file at path: e2e/init.js
detox[27185] INFO:  [init.js] Created a file at path: e2e/firstTest.spec.js
detox[27185] INFO:  [init.js] Patching package.json at path: ~rn-e2e-testing-detox/RnE2eTestingDetox/package.json
detox[27185] INFO:  [init.js]   json["detox"]["test-runner"] = "jest";
- Add the following configuration inside
package.json. (test-runnerwould already be there created in last step)
"detox": {
    "configurations": {
      "android.emu.debug": {
        "binaryPath": "android/app/build/outputs/apk/debug/app-debug.apk",
        "build": "cd android && ./gradlew assembleDebug assembleAndroidTest -DtestBuildType=debug && cd ..",
        "type": "android.emulator",
        "name": "Nexus_4_API_23"
      },
      "android.emu.release": {
        "binaryPath": "android/app/build/outputs/apk/release/app-release.apk",
        "build": "cd android && ./gradlew assembleRelease assembleAndroidTest -DtestBuildType=release && cd ..",
        "type": "android.emulator",
        "name": "Nexus_4_API_23"
      }
    },
    "test-runner": "jest"
  }
- Note that in above configuration, I am using
"name": "Nexus_4_API_23". This is the name of my emulator device. You can find yours using-
// ANDROID_HOME environment variable is set to Android Sdk directory (/Android/Sdk)
$ANDROID_HOME/emulator/emulator -list-avds
-
Build a debug apk using
detox build -c android.emu.debug -
Edit
./e2e/firstTest.spec.jsfile to have your app specific testing instructions. For this example app, it would be-
describe('Login flow test', () => {
  beforeEach(async () => {
    //await device.reloadReactNative();
  });

  it('should have login screen', async () => {
    await expect(element(by.id('loginView'))).toBeVisible();
  });

  it('should fill login form', async () => {
    await element(by.id('usernameInput')).typeText('varunk');
    await element(by.id('passwordInput')).typeText('test123\n');
    await element(by.id('loginButton')).tap();
  });

  it('should show dashboard screen', async () => {
    await expect(element(by.id('dashboardView'))).toBeVisible();
    await expect(element(by.id('loginView'))).toNotExist();
  });
});
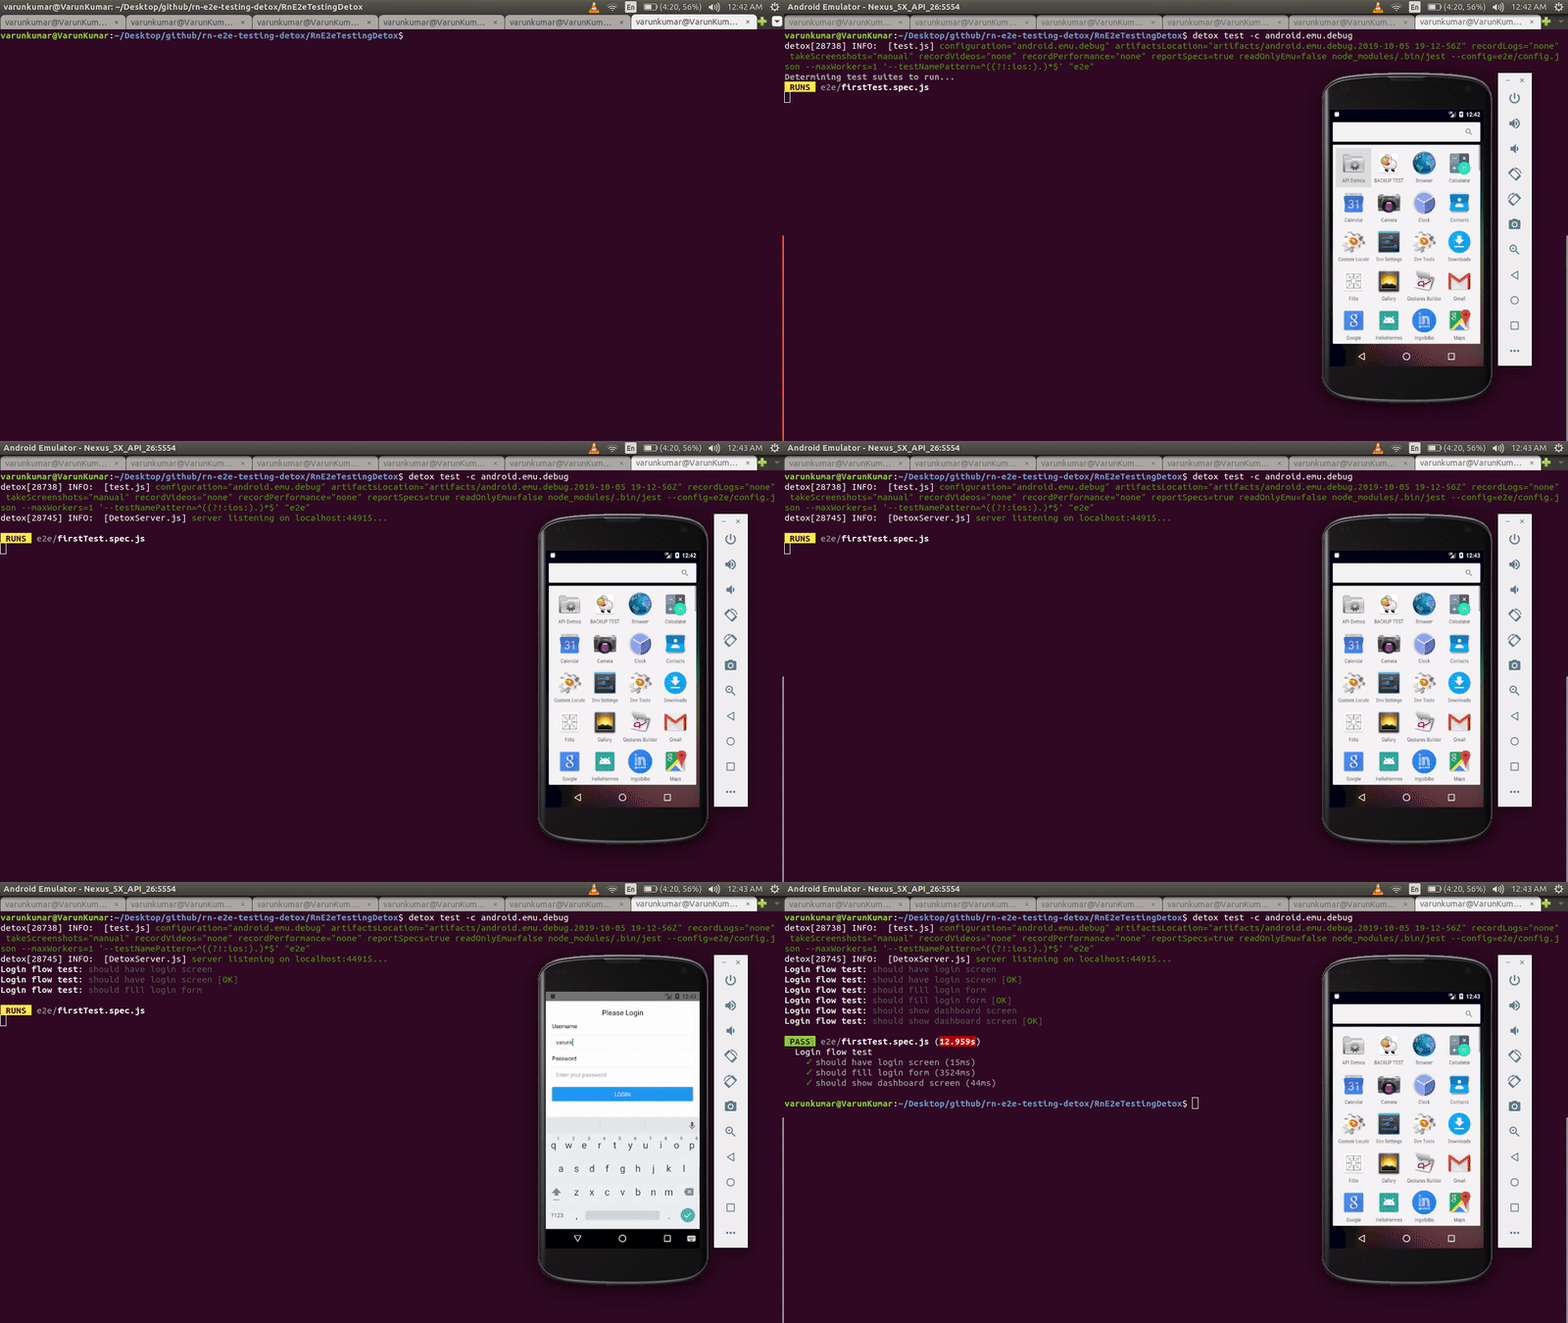
- Run e2e testing
detox test -c android.emu.debug
Demo
Git diff for setting up Detox in react-native Android
https://github.com/varunon9/rn-e2e-testing-detox/commit/8536e816cd256e75794a8327a94400f462326f03
