These instructions installs a Qlik Sense OAuth2 authentication module designed specifically for Google services. This will allow you to authenticate yourself in Qlik Sense through a Google (Gmail) account.
-
In the Google Developer Console, first create a new project.
-
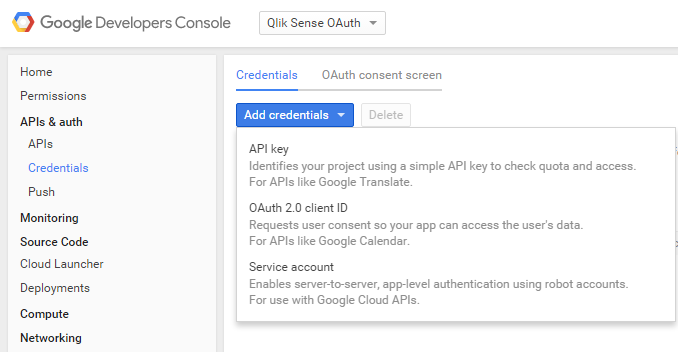
On the APIs & auth -> Credentials page select Add credentials and choose OAuth 2.0 client ID.
-
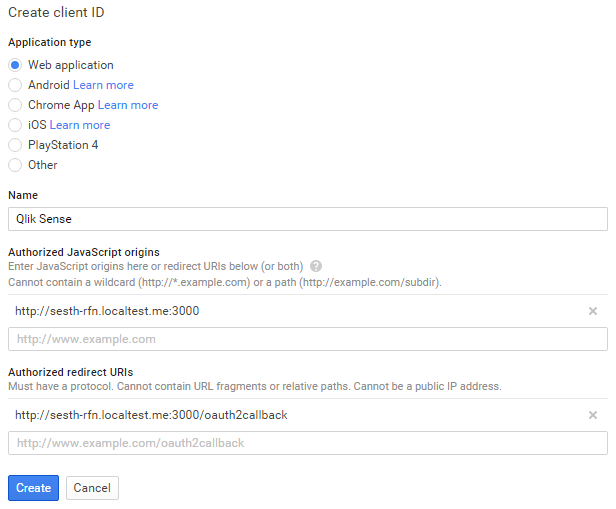
Select Web application and give it a name, authorized origin and redirect uri.
Note: The module we are installing need to run on it's own port and this is where you make that decision. The module will pick whatever port you use in the Authorized redirect URI. This port is also important to remember when configuring the Virtual Proxy. The Authorized redirect URI must end with /oauth2callback.
-
A popup screen will appear with your new Client ID and Client secret. Ignore this and close the popup. Instead, click on the new credentials that you created.
-
At the top of the page there is a Download JSON button. Click the button to download the json file.
-
Copy the client_secret*.json file to C:\Temp (for example).
-
Launch PowerShell in Administrator mode (right-click and select Run As Administrator)
-
Change directory to C:\Temp or where you placed the json file (enter cd \Temp)
-
Enter the below command exactly as it is (including parentheses):
(Invoke-WebRequest "http://bit.ly/qlik-auth-google" -OutFile setup.ps1) | .\setup.ps1This will download and execute the setup script.
When the downloading and installation of the modules including their dependencies are finished you will be prompted for some configuration options. If you copied the client_secret*.json file to the same directory above you can just confirm the questions regarding ClientID, Client Secret and Redirect URI by pressing return.
Note: The question regarding valid domain for email address is important. If you do not have your own domain, then it means that EVERYONE with a Google (gmail) account will be able to login to your Qlik Sense environment, so be careful! This will in many cases be a showstopper for this kind of solution.
Setup is now done, restart the Qlik Sense Service Dispatcher service to activate the module.
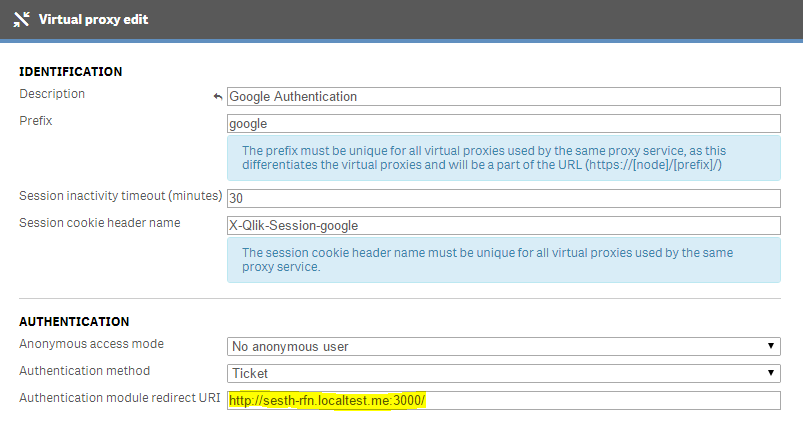
- Create a new Virtual Proxy in QMC
- For Authentication module redirect URI enter the same servername and port you used for Authorized redirect URI in the Google console.
- Finish the Virtual Proxy configuration. The proxy will restart and the new module should be good to go!
Missing client certificate or key If the module is unable to find a client certificate, please make sure the Qlik Sense Service Dispatcher service is running with the administrator account which was used to install Qlik Sense and that there is a QlikClient certificate in MMC->Certificates (Current User)->Personal->Certificates for this user.
I would like to ask for feedback regarding the module, especially if you run into problems with the setup script. There are a lot of parameters which can go wrong with different environments, please let me know if something doesn't work!
Currently the module does not support HTTPS which more or less is a requirement for production use. This is something I will be looking into shortly.
This software is made available "AS IS" without warranty of any kind under The Mit License (MIT). QlikTech support agreement does not cover support for this software.
- Code:
git clone git://github.com/braathen/qlik-auth-google.git - Home: https://github.com/braathen/qlik-auth-google
- Bugs: https://github.com/braathen/qlik-auth-google/issues