Over the next few days, you will build a clone of Trello.
The intention of this project is to practice building something a bit bigger on your own in preparation for the final project. This means that these instructions are intentionally vague.
Below you will find a both terse and detailed instructions. We challenge you to attempt the project using only the terse instructions, but the detailed instructions are also there as a safety net 🎁.
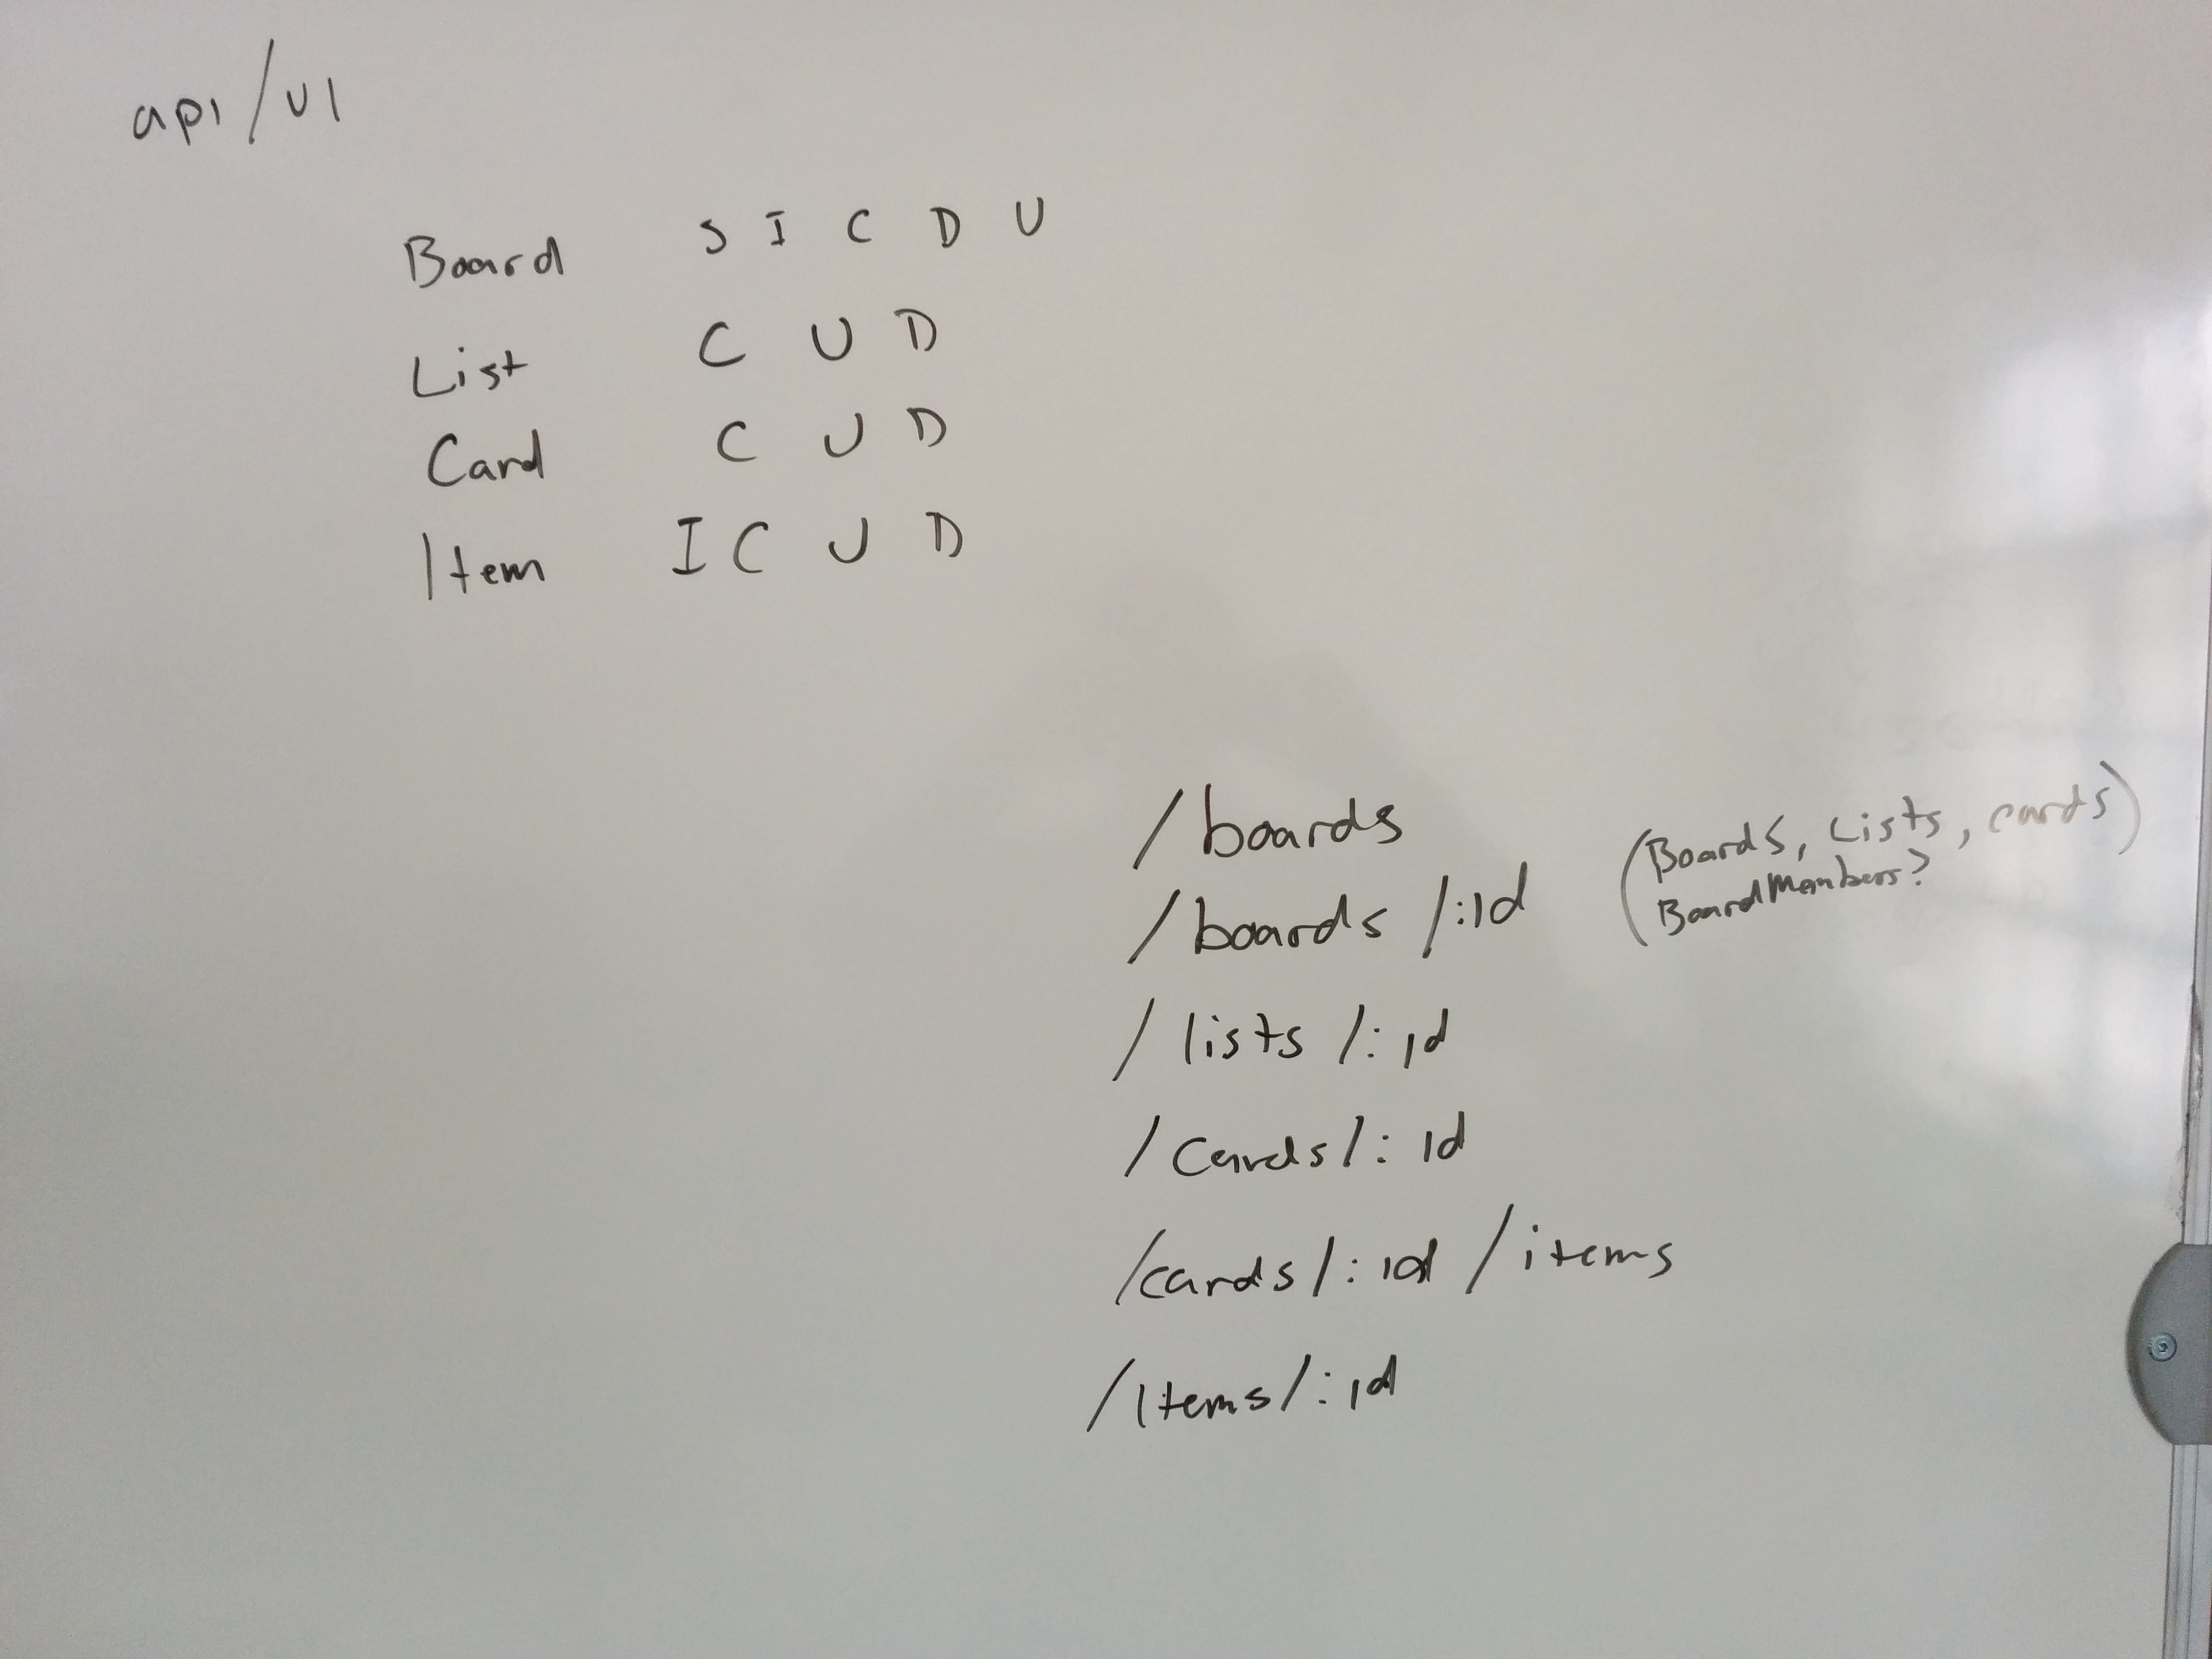
This project provides authentication and a Rails API so you can focus on Backbone, Bootstrap and jQuery UI.
Take some time to browse the code provided for you. In this project, you'll
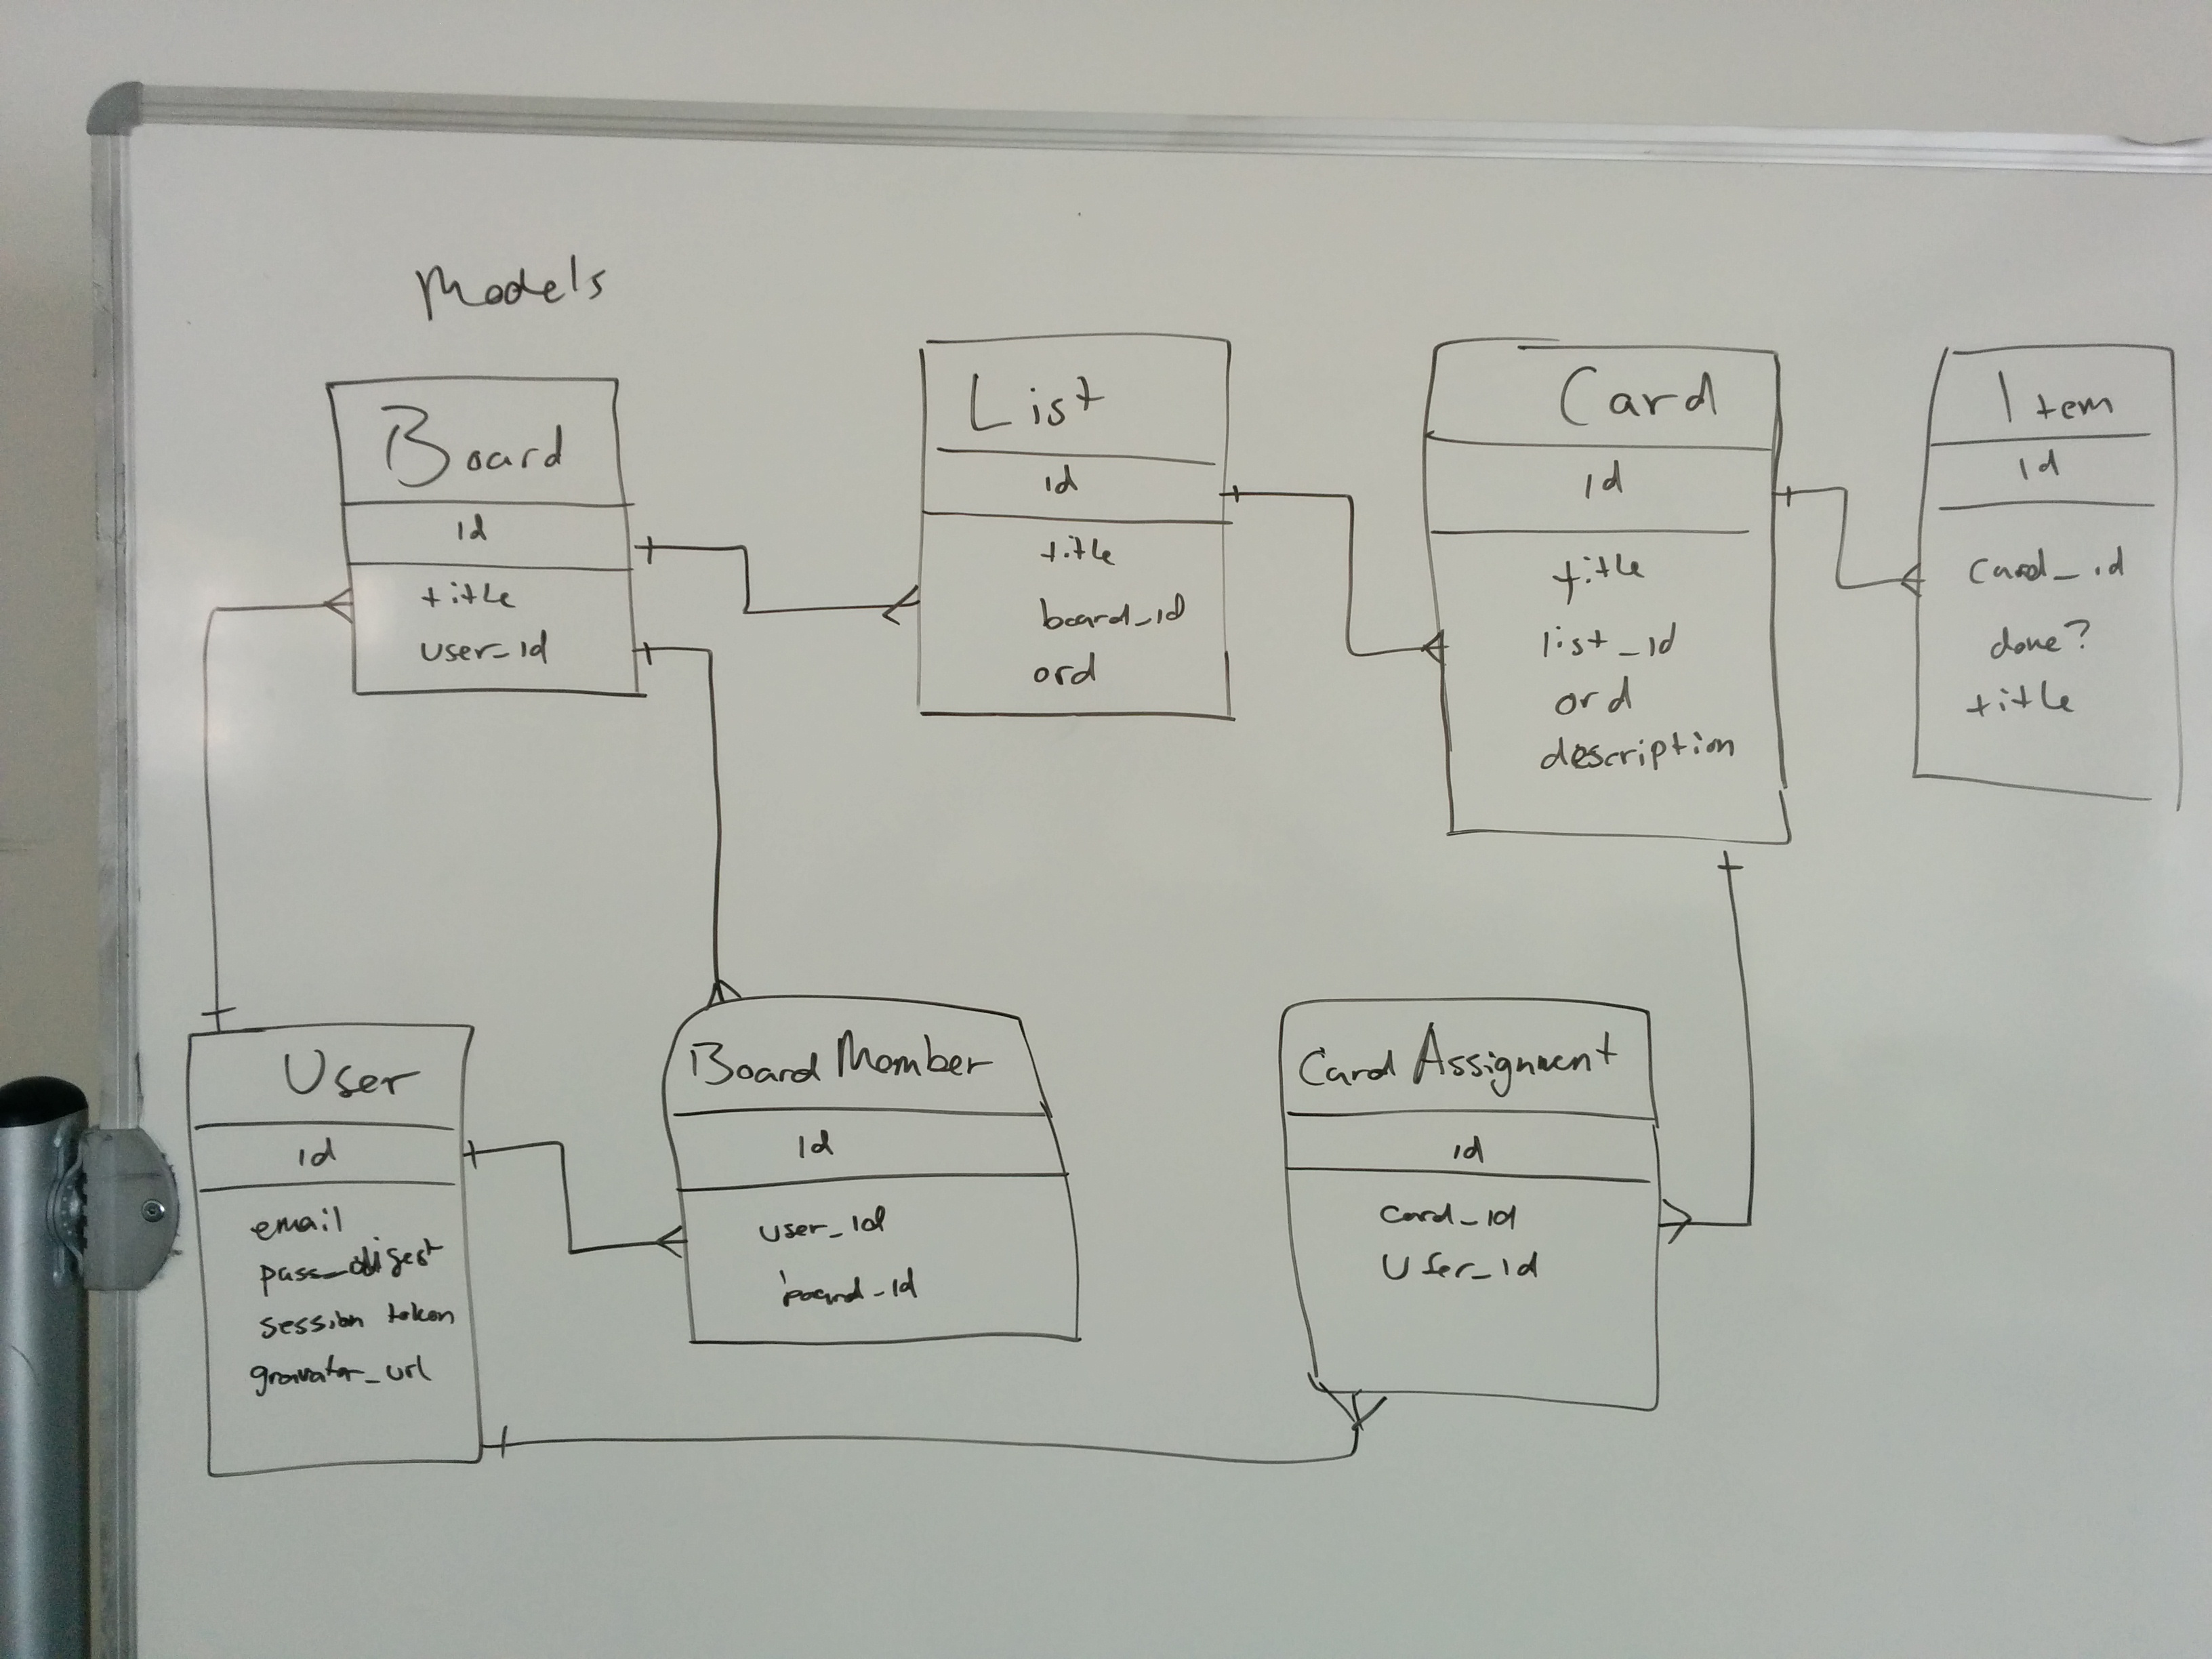
deal with the models in the following order: Boards, Lists, Cards,
TodoItems, and CardAssignments. Lists and Cards have an ord attribute
that corresponds to the order they're shown in. By the end of this project,
you'll be able to edit their order by dragging and dropping them.
Make the show, index, and new page for boards. Next, add lists to the boards. Then add cards to the lists. Then add drag and drop functionality. Then make that card modal view. Congratulations, you just made Trello. 🍻
- Start up Backbone. Remember to check that you're getting that annoying "Hello
from Backbone" alert.
- Make your Backbone model and collection for boards.
- Make a trello.js file in your javascripts folder. In it, initialize Backbone.
- Test out your Backbone model: if you use its
savemethod, it should save the model to the database.
- Build a
BoardsIndexview class. Itsrenderfunction should put an unordered list of our boards on the page. - Add a Backbone router: map "/" to the
BoardsIndexclass. At this point, you should be able to see all your boards on your index page. - Add a new board view class, so that you can create boards.
- Right now, the
/api/boards/:board_idroute shows nothing. That's because we left it to you to fill in the Jbuilder template. Open upapp/views/api/boards/show.json.jbuilderand fill it in so it returns the necessary JSON data. - On your index page, give every board a link to its show page.
- Make the board show page. Add a Backbone route to it. For the moment, just
have a board's show page contain the name of the board and a list of its lists.
You can just display a list's name, given that at the moment it has no other
content.
- Remember to display the lists in order of their rank. You might want to
overwrite the
comparatormethod of thelistscollection.
- Remember to display the lists in order of their rank. You might want to
overwrite the
- When the user creates a board, it should redirect them to the board's show
page. You can use
Backbone.history.navigate()or the router'snavigatemethod for this. - Add the ability to create lists, via a new list view.
- Add a button to delete the board.
- Make your board show page also show the cards for each list. You'll want to do this by adding functionality to the BoardShow.js render method. Again, remember to order them by rank, by overwriting the default comparator method.
- Make the lists appear next to each other by making each inside a div which you
give the CSS setting
float: left. - Add the ability to create and delete cards for each list. TODO: elaborate on
how to do this in Backbone. The card deletion should be accomplished by a
button for each card which only appears when you're hovering over the card. Use
CSS
:hoveror the jQuery hover event to get this effect.
- The whole fun of Trello is the dragging and dropping of the to-do items and lists. We'll be using jQuery UI Sortable (examples) to accomplish this. Read this example here.
- First get that working on the client, and then send the result back to the server.
- To make it prettier, you can give the cards a
.draggedCSS style which rotates them slightly and gives them a shadow while they're being dragged. - While we're making things pretty, change your forms so that if you enter invalid input, for example by not giving a card a name before creating it, the input element flashes. Use the jQuery UI Highlight effect for this.
- Also, go back to your Board show page. We want to make it harder to delete
your board by accident. So when you click the 'delete' button, a
modal should pop down asking if
you're sure you want to delete the board. Make this modal by displaying two
divs:
- The first div is to grey out the rest of the window. Just make it have a fixed height and width of 100%, and give it a semitransparent black color.
- On top of that div, make a centered div which has a button to confirm the deletion of the board.
- I know that Bootstrap has modals built in, but build this from scratch anyway.
- You can get advice on this part of the process from this tutorial.
- Add the ability to add board members. You should be able to type in a email and the website will add that person, or complain that they don't exist.
- We want to make a modal view to focus on a particular card. Refer to the advice included in part II on making modals.
- Within the card modal, we want to show to-do items.
- To-do items can be created and deleted, and each has a checkbox whose state should be saved to the server whenever it is changed.
- Also, we want assigned users.
- Cards have an arbitrary number of assigned users. Note that you only want to give the option of adding users who haven't already been added.
- Add Javascript prettiness everywhere. Make modals to confirm that you actually want to delete things. Think of more pretty things to do, then do them and add them to these instructions.

