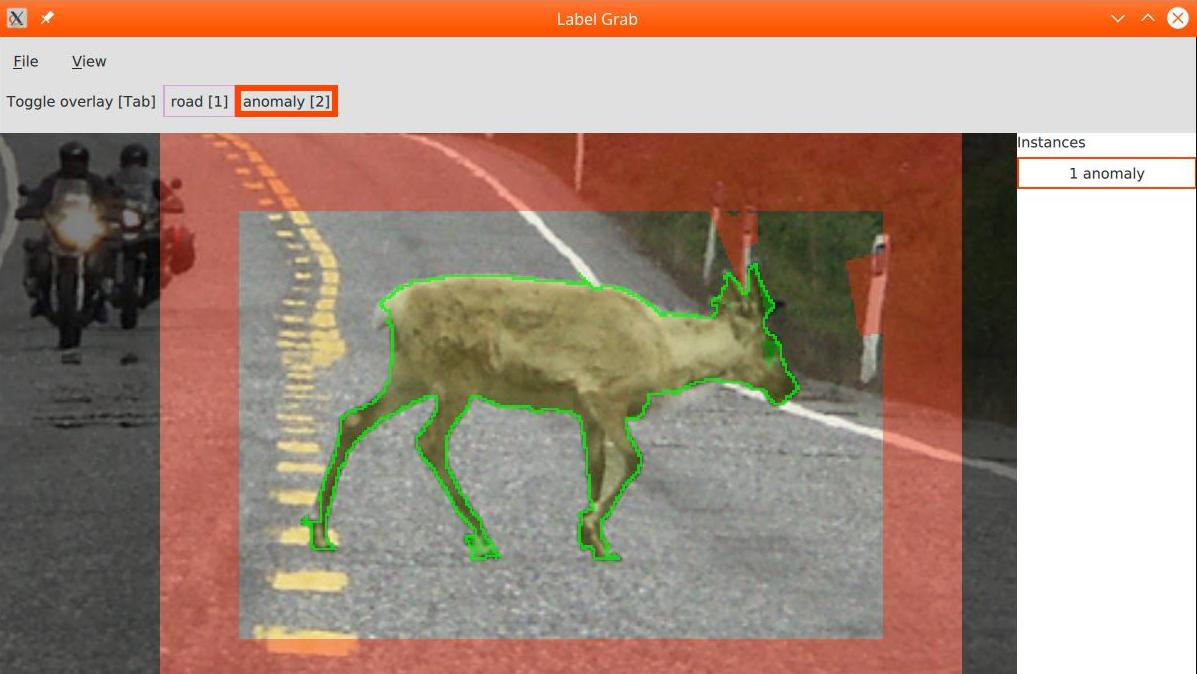
Annotation tool for semantic and instance segmentation, with automated help from the GrabCut algorithm implemented in OpenCV.
The algorithm attempts to find the foreground object in a user-selected bounding box. It presents a suggested per-pixel mask, the user can then correct its mistakes and next suggestion will take those into account.
This tool is part of the following article:
Detecting the Unexpected via Image Resynthesis
Krzysztof Lis, Krishna Nakka, Pascal Fua, Mathieu Salzmann
ICCV 2019

We provide packages make using pyinstaller. Running the executables below requires no installation.
- label-grab.AppImage - Linux - AppImage: to make it run, give the file the executable permission
- label-grab-win.exe - Windows - Single Executable: single .exe but takes some time to decompress on each start
- label-grab-win.7z - Windows - Directory: directory with the exe and all dependencies
Install the following python modules:
pip install --upgrade numpy opencv-python-headless pillow click qtpy pyside2 qimage2ndarray
and run
python -m label_grab --config my_config.json
If you have a conda python installation, it may happen that you have conda qt and pyqt packages installed (they get installed together with unrelated libraries like matplotlib).
These packages have an old Qt version and cause this program to crash.
There are several ways to solve this:
- Create a new conda environment and install the packages from pip using the command above.
- Remove the packages from conda if you don't need them:
conda remove qt pyqt --force
Run (for source installation)
cd path_to_cloned_repo
python -m label_grab --config my_config.json
or (for executable)
chmod +x label-grab.AppImage
./label-grab.AppImage --config my_config.json
The config file specifies the semantic classes, for example:
{
	"classes": [
		{"id": 1, "name": "road", "color": "plum"},
		{"id": 2, "name": "anomaly", "color": "orangered"}
	]
}
If the --config option is not specified, the default config above will be used.
-
Open
[Ctrl + O]the image to be labeled. If the image was annotated previously with this program, it will automatically load the state of the labeling. -
Save
[Ctrl + S]the labels. They are saved to the location of the image file, in a directory ending with.labels. The output files:labels_semantic.png- index of each pixel's semantic classlabels_semantic_color.png- color of each pixel's semantic classlabels_instance.png- the index of each pixel's instance.
- Zoom with scroll wheel.
- Move the image with the middle mouse button, or
Ctrl+ any mouse button. - Toggle the overlay by pressing
Tab
-
Create a new instance by pressing
Shiftand drawing a bounding box around the object with the left mouse button. The new instance will be initialized and you can now edit the instance's mask. -
Editing the mask of the selected instance.
-
Upon creation of an instance, GrabCut will make an initial suggestion of the foreground object's mask. You can correct this mask by marking areas which should be included or excluded from the object. GrabCut will update its suggestion based on your markings.
-
If there is a area that should be part of the mask, but is not, mark is as "sure object": left-click on points to draw a polygon and double-click to finish the polygon. Alternatively,
Alt+ click to mark a circle at cursor position. The "sure object" areas will be denoted by a green overlay. Cancel the polygon by pressingEsc -
If there is a area that should be part of the mask, but is not, mark is as "sure background": right-click on points to draw a polygon double-click to finish the polygon. Alternatively,
Alt+ click to mark a circle at cursor position. The "sure background" areas will be denoted by a red overlay.
-
-
Choose the semantic class of the currently selected instance using the buttons on the top bar (or corresponding keys
1,2, ...) -
Delete the selected instance with
Delete. -
Select which instance is selected from the instance list on right.
-
View all instances by pressing
Esc
The example image by Arno van den Tillaart under CC-SA 2.0 license, obtained from wikimedia commons.