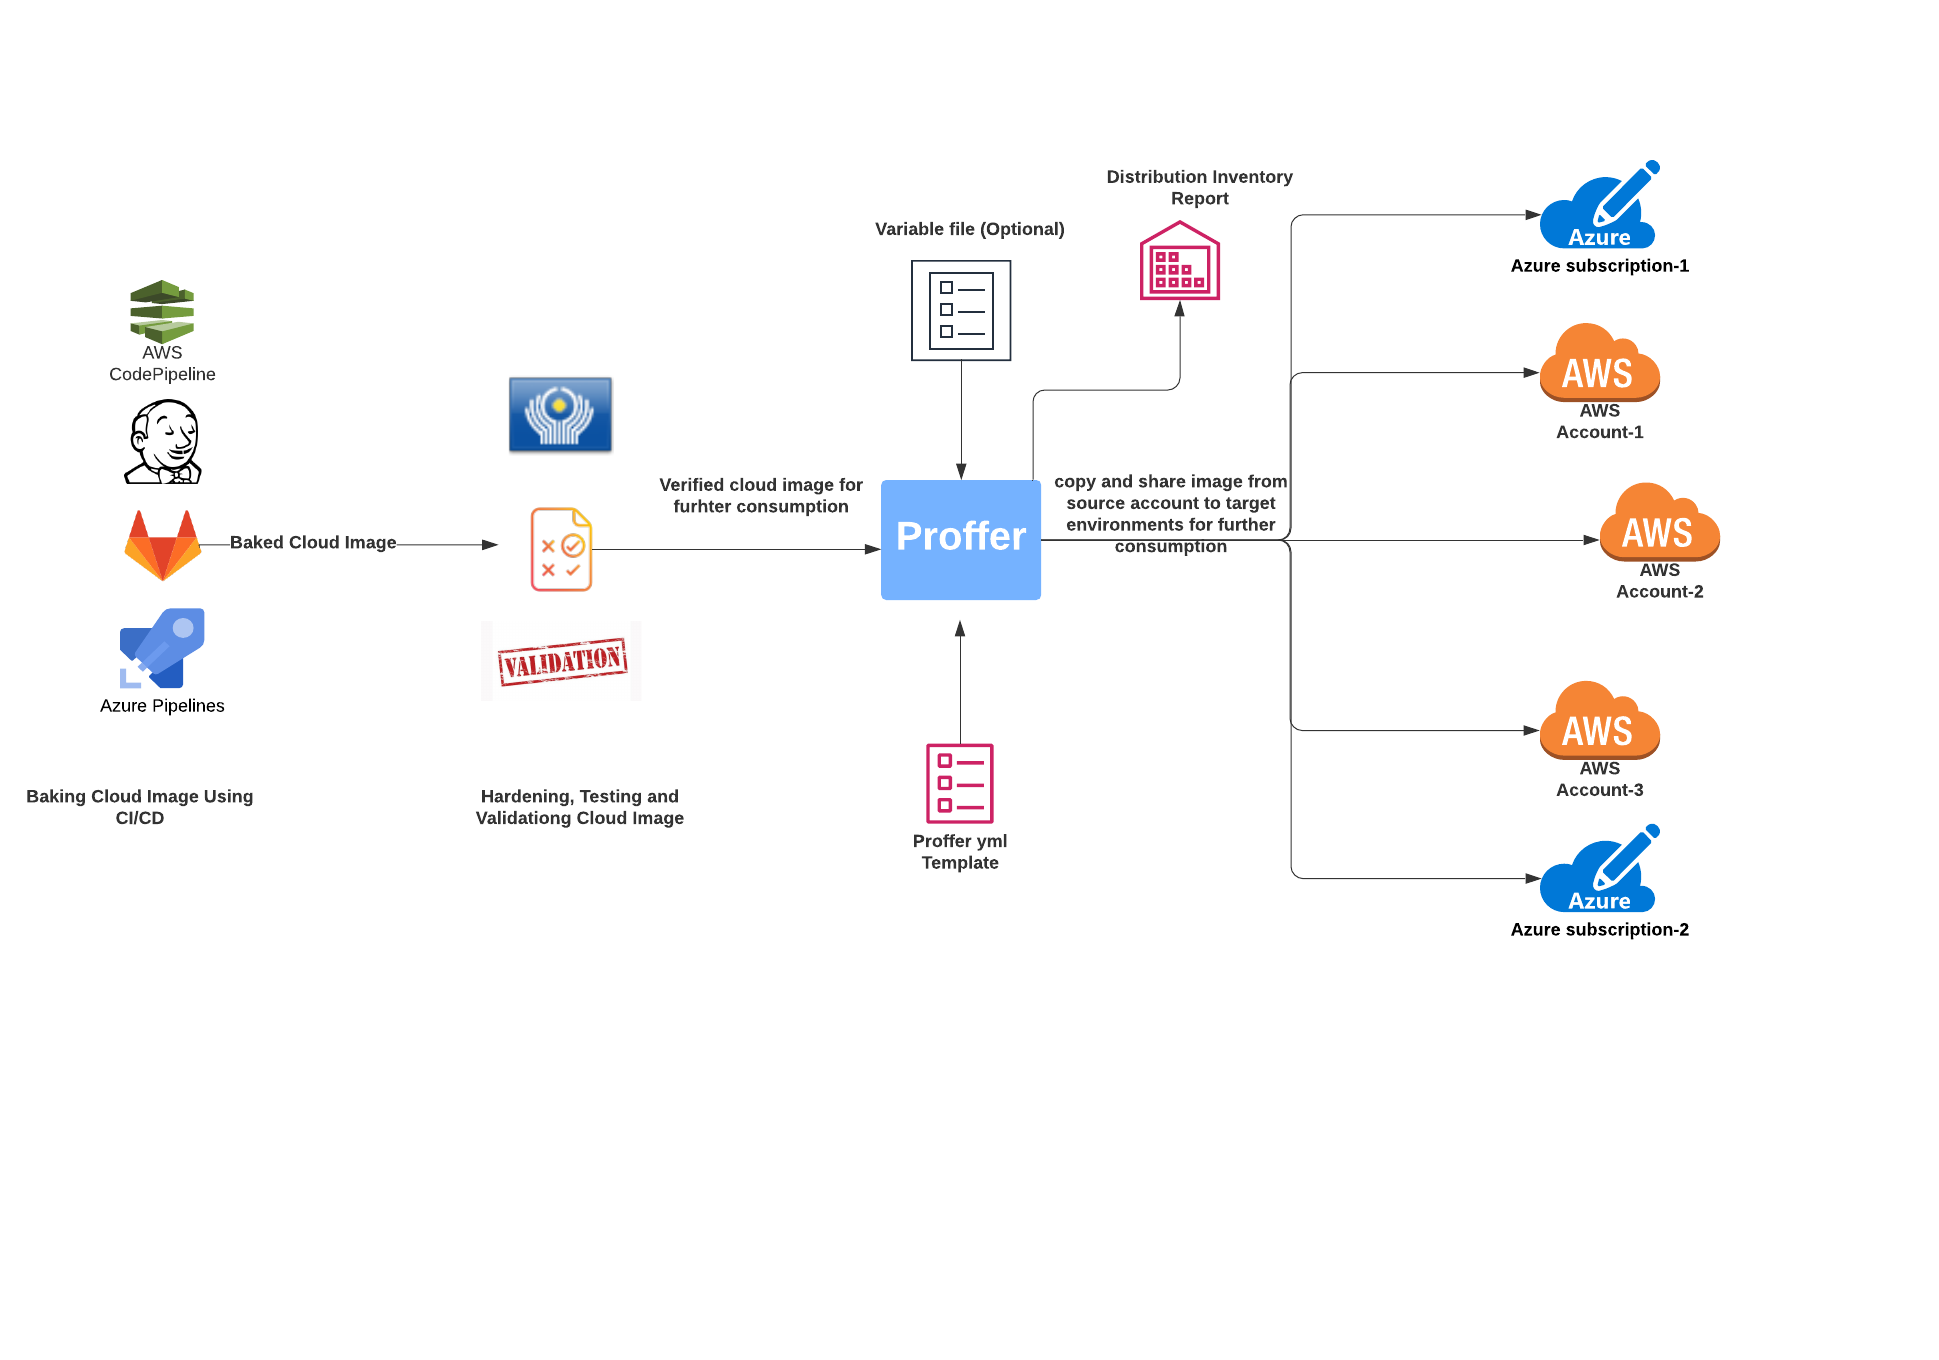
Proffer is a cross platform command line tool to copy and share the cloud images across multiple regions and accounts. It is a lightweight tool that can be used on any major platform.
There can be use-case where we are building cloud images and we don't want to distribute them until we are confident enough that the new image does not contains any vulnerabilities and it works as expected. So in those cases after confirming that we have a cloud image that can be consumed by different environments, we need some tool or custom scripts to copy and share these cloud images from CI account (source account) to target accounts (consumer accounts like, dev, pre-prod, and prod.).
Having custom scripts can be painful, because we need to maintain a separate set of things to just distribute the ami and its also not flexible and easy to use for everyone unless they know that process already. So to solve this problem, we have created a tool called Proffer that can solve these kinds of problem for any cloud provider. But currently it only support AWS, but support for other cloud providers can be added easily using resource plugin.
Some features of proffer:
- It uses a yml config file called proffer.yml, so its easy to define what we want.
- It is very fast and easy to use.
- In build bash and zsh completion.
- In build validation for yml config file.
- It allows to use dynamic and default variables in template file.
- It has lots of advanced features, like copy the tags across regions and accounts, share different kins of ami permission for target accounts, adding extra tags.
- It generates proffer inventory report on successful execution.
- AWS
- Azure(coming soon)
Support for the other cloud providers can be added via resource plugin.
Proffer command takes a template called proffer.yml written in yaml format and apply the resources defined in template. Each proffer template has a top-level section called resources that is list of proffer resources.
Each resource then have their own properties like type, keys and etc. To find all available proffer resources, visit Available Proffer Resources page.
In addition, proffer also allows us to use the dynamic and default variables defined at different places. To process dynamic variable's values in proffer template, we need to pass the variable file to proffer command using --var-file flag.
To quickly start with proffer , you can follow the quick-start-guide.
Resource is a component in proffer. Each resources is responsible to perform a particular set of operations. Proffer has different kinds of resources. For more details, check Available Proffer Resources.
To access the environment variables within proffer template , we can use below format:
Home: {{ env "HOME" }}If we want to set default value of a environment variable if its not set then we can use below format:
Home: {{ env "HOME" | default "default home dir path" }}Proffer also allows us to define the dynamic variables in a separate variable file and use them in proffer
template file. Similarly define default variables and use them in template file. To resolve their values in template file we need to pass this variable file in proffer validate and apply commands using --var-file argument.
For more details take a look at How to use variables in template file
Proffer generates an inventory report on the successful execution. This report contains all information about image distribution like where is the source image located ,where are target images created and with which accounts and regions source image was shared.
If we want to change the name of the inventory file generated, we can use --inventory option in proffer apply command to pass the custom name for inventory being generated. By default report name is inventory.yml.
Inventory report sample can be found at sample-inventory-report
To check what are the options are available in each proffer command and sub-command, visit cli-doc page.
Proffer is released under the Apache License, Version 2.0.


