First, what is Apache Camel K? According to its Github Readme, “Apache Camel K is a lightweight integration platform, born on Kubernetes, with serverless superpowers.” Essentially Camel K enables developers to run integrations on Kubernetes or OpenShift clusters which enables them to get Camel-based integration solutions up and running very quickly!
Our goal for the Tooling for Apache Camel K extension for Microsoft Visual Studio Code (VS Code) is to make that process even more seamless.
For more information about Camel K, be sure to check out its documentation and github pages.
In order to use our Tooling for Apache Camel K extension for VS Code, you must have the following software in place:
- An instance of Apache Camel K running on a Kubernetes or an OpenShift cluster that is accessible from your system on your network. You must also have Minikube (or the Kubernetes CLI) installed. See the Apache Camel K installation page for details: (https://camel.apache.org/camel-k/latest/installation/installation.html).
- Microsoft VS Code installed. You can get the most recent version from (https://code.visualstudio.com/) for your chosen operating system.
- To benefit from Java Language completion on standalone files, VS Code Language support for java needs to be installed.
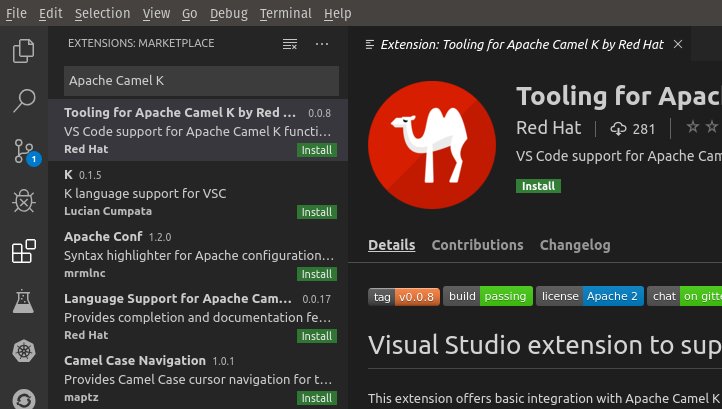
The Tooling for Apache Camel K extension is available in the VS Code Extension Marketplace (https://marketplace.visualstudio.com/items?itemName=redhat.vscode-camelk).
- Open your VS Code Integrated Development Environment (IDE).
- In the VS Code Activity Bar, select Extensions. (Alternately, press Ctrl+Shift+X).
- In the search bar, type Apache Camel K
-
In the Tooling for Apache Camel K box, click Install.
-
In addition, we encourage you to also install these VS Code extensions:
- Kubernetes Tools extension from Microsoft - This extension offers a number of supplemental tools you can use with Minikube and Apache Camel K to check pod status and more. It is available here (https://marketplace.visualstudio.com/items?itemName=ms-kubernetes-tools.vscode-kubernetes-tools).
- Language Support for Apache Camel (https://marketplace.visualstudio.com/items?itemName=camel-tooling.vscode-apache-camel) - This extension provides auto-completion for Camel components, attributes, and the list of attribute values in the Camel URI for integrations written in XML, Java, Groovy, JavaScript, and Kotlin.
You can install them by following the same steps except search for Kubernetes or Apache Camel in the list of extensions.
After your Apache Camel K/Minikube environment is running and you have installed the Tooling for Apache Camel K (vscode-camelk) extension, you can start a new Apache Camel K integration.
You can start a new Camel K integration with or without additional options such as ConfigMaps or Secrets. (For information about how to publish a ConfigMap or Secret, see Publishing new Kubernetes ConfigMaps or Secrets).
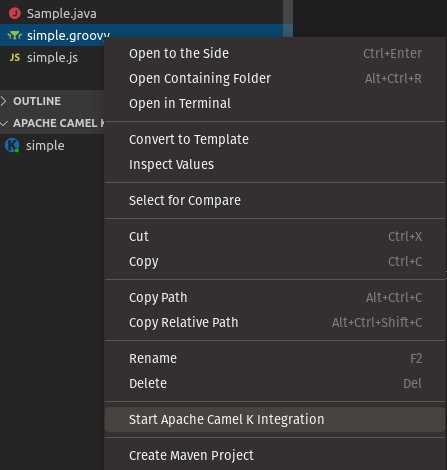
- In the VS Code Explorer, right-click on an integration file that is one of the following file types:
-
Java (*.java)
-
Camel plain XML DSL (not Spring XML or Blueprint) (*.xml)
-
JavaScript (*.js)
-
Groovy (*.groovy)
-
Kotlin (*.kts)
-
Yaml (*.yaml) (Experimental)
For more information about supported languages, see Languages in the Apache Camel-K documentation.
-
In the popup menu, select Start Apache Camel K Integration.
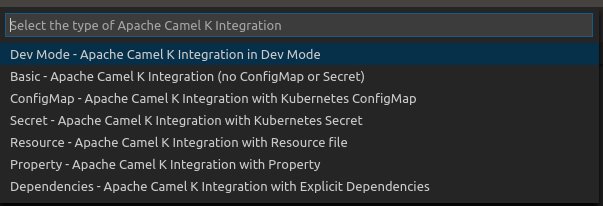
A drop-down appears in the command palette with several choices:
-
Dev Mode - Apache Camel K Integration in Dev Mode
In “Dev Mode,” all output is directed to the Apache Camel K output channel, including startup tasks. In addition, when you update the integration file, the integration is re-deployed automatically for easier development and debugging. For more information about Dev Mode, see Running in Dev Mode in the Apache Camel-K documentation.
-
Basic - Apache Camel K Integration (no ConfigMap or Secret)
The "Basic" option starts the file as a new integration to deploy the integration to the running Kubernetes system.
-
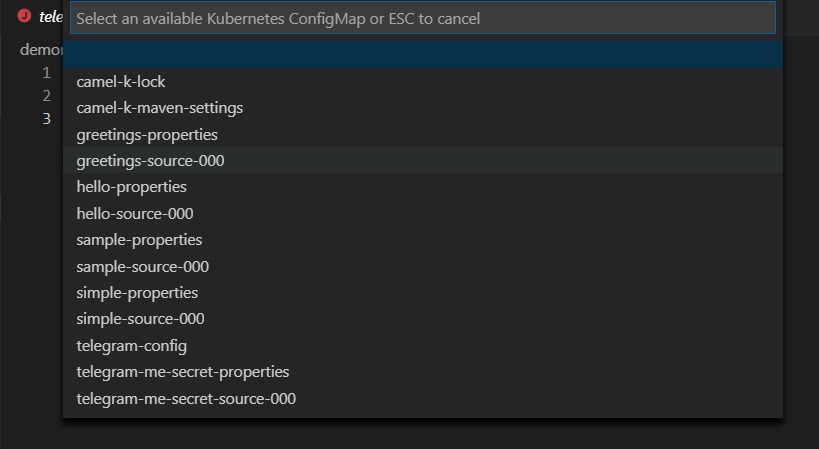
ConfigMap - Apache Camel K Integration with Kubernetes ConfigMap
Select a ConfigMap from a list of the published ConfigMaps in your current Kubernetes system. For example:
-
Secret - Apache Camel K Integration with Kubernetes Secret
Select a Secret from a list of the published Secrets in your current Kubernetes system. For more information about configuration with ConfigMaps or Secrets, see Configuration via ConfigMap or Secret in the Apache Camel K documentation.
-
Resource - Apache Camel K Integration with Resource file
Select one or more resource files from the file selection dialog.
-
Property - Apache Camel K Integration with Property
Specify property name/property value pairs, with the option to specify more than one. For more information about configuration with properties, see Configure Integrations in the Apache Camel-K documentation.
-
Dependencies - Apache Camel K Integration with Explicit Dependencies
Specify dependency details either by their camel-component artifact Id or by their Maven coordinates (group:artifact:version), with the option to specify more than one. For more information about configuration with Dependencies, see Dependencies and Component Resolution in the Apache Camel-K documentation.
When you start a new integration, the extension starts the deployment process with the kamel run [filename] command and any options after that.
Note: The first time that you publish a new integration, the extension might take a few moments to propagate through the system to a running state.
To update the state of your currently deployed integrations, hover over the Apache Camel K Integrations view and click the Refresh button.
You can use the Tooling for Apache Camel K extension to create ConfigMaps and Secrets and publish them to the running Kubernetes system.
###Before you begin
You must have a *.properties file that you want to use as the basis for the ConfigMap or Secret. Properties files consist of name/value pairs. Each property can then be referenced in a route by the property name to use the value by reference.
For example, you might have an application.properties file that has two entries:
my.message=Hello World
logging.level.org.apache.camel=DEBUG
In your route, you can then refer to my.message by providing as {{my.message}}.
In a Groovy route, that might look like from('timer:props?period=1s').log('{{my.message}}').
-
In the VS Code Explorer view, right-click on the *.properties file.
-
Select one of the following options:
- Create Kubernetes Config Map from File
- Create Kubernetes Secret from File
-
Type the name of your new ConfigMap or Secret. The name must start with a letter and contain no spaces. You can use numbers or hyphens. For example, my-config-map is a valid name but my config map is not.
- Press Enter. The extension creates a new ConfigMap or Secret that you can reference in your Apache Camel K route.
For more information about configuration with ConfigMaps or Secrets, see Configuration via ConfigMap or Secret in the Apache Camel-K documentation for more details.
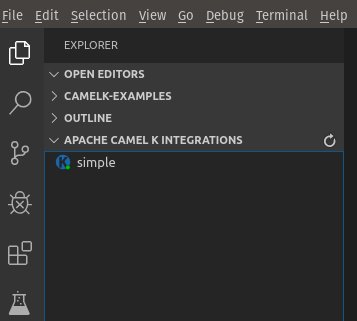
After you publish a new integration, it appears in the Apache Camel K Integrations view in the Side Bar of the Explorer activity:
When you add or remove file-based integrations in the Explorer view, it automatically refreshes the list.
Note: Refreshing the view sometimes is delayed as pods start. You might need to wait a few seconds. Optionally, to manually refresh the list, click the Refresh button.
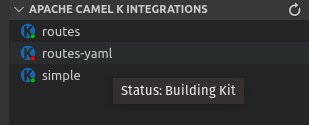
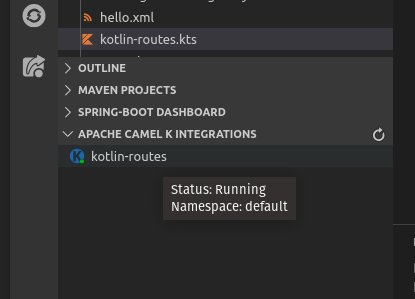
The status of deployment for Integrations is indicated by the color of the dot in the K icon for the integration. If green, the integration is in a "Running" state. If red, it is in another state, such as "Building Kit" or "Error". Hover over the integration to view a tooltip that shows the status:
The Tooling for Apache Camel K extension shows a status bar message for the following events:
- Starting a new integration
- Removing an integration
- Refreshing the integrations view
- Starting to follow an integration log
- Starting a local Kubernetes proxy instance
Optionally, to disable status bar messages:
- From the VS Code IDE, select File->Preferences->Settings.
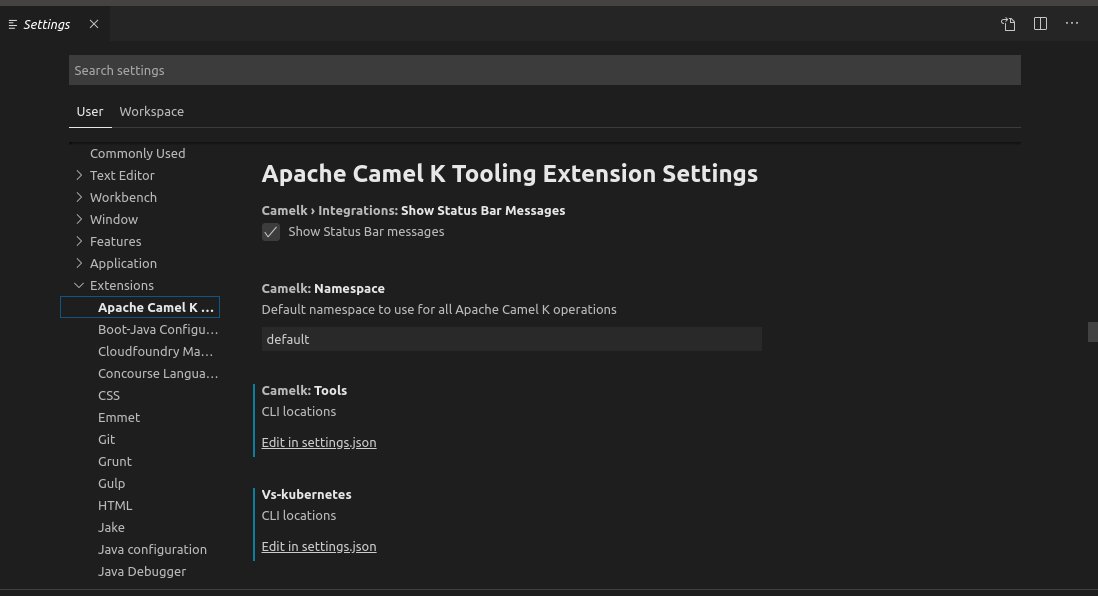
- Select Extensions and then select Apache Camel K Tooling Extension Settings.
- Uncheck the Show Status Bar Messages option.
If you are running an integration in Dev mode, you can view the logged output for that integration in the Apache Camel K Output channel.
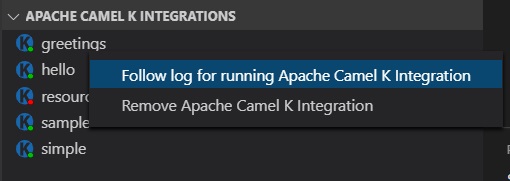
If you want to explicitly view the running log for a published integration in a new Output channel, right-click on a running integration and then select the Follow log for running Apache Camel K Integration option.
A new Output channel opens. It is named for the running Kubernetes pod where the integration is running. This log updates as new data is added:
When you stop an integration, you also remove its associated output channel.
- From the Apache Camel K Integrations view, right-click the integration that you want to stop.
- Select Remove Apache Camel K Integration.
To access Tooling for Apache Camel K extension settings:
- From the VS Code IDE, select File->Preferences->Settings.
- Select Extensions and then select Apache Camel K Tooling Extension Settings.
Settings include:
- Show Status Bar Messages - Indicates whether to show messages in the status bar to indicate when the system is updating, such as when the Camel K Integrations view is being refreshed or a new Integration is being deployed.
- Namespace - The namespace to be used for all Apache Camel K and Kubernetes operations. This defaults to
defaultbut can be set to whatever your namespace has been configured to in your runtime. When it is updated, the Apache Camel K Integrations view is refreshed automatically. (See Changing the Namespace below for a bit more detail.)
After your Apache Camel K/Minikube environment is running and you have installed the Tooling for Apache Camel K (vscode-camelk) extension, you can quickly start your first integration.
- Create a directory on your development system called integrations. For example, /home/(User_Name)/Documents/integrations on Linux or C:\Users(User_Name)\Documents\integrations on Windows.
- Download the simple.groovy file (https://github.com/apache/camel-k/blob/master/examples/simple.groovy) into your new integrations directory.
- Start a new workspace in your VS Code Integrated Development Environment (IDE).
- Add the folder from step 1 to your new workspace with File->Add Folder to Workspace...
- Right-click on simple.groovy in your directory and select Start Apache Camel K Integration.
- Select Dev Mode - Apache Camel K Integration in Dev Mode.
- Watch as messages appear in the Apache Camel K Output channel as your integration begins to run.
- Open simple.groovy and update the message to say ‘This is my first Camel K Integration!’. Save the file with File->Save or Ctrl+S.
- Watch as your integration is updated and your new message begins to appear in the output channel.
Updating the Namespace setting (see Apache Camel K Extension Settings) changes the default namespace that the Apache Camel K and Kubernetes CLIs use when referencing the running system. By default, the namespace is set to the system default when the field is blank, but depending on your system you may change it to some other namespace.
When you hover over a published integration and the namespace setting is set, you can now see what namespace is being used to populate the Apache Camel K Integrations view.
And if there are no published integrations available, you may see a message in the Apache Camel K output channel such as "Refreshing Apache Camel K Integrations view succeeded, no published integrations available for namespace mynamespace."
If any change is made to the namespace setting, the view will refresh accordingly.
Here's the current list of issues we're working to resolve. If you find a new issue, please create a new issue report in GitHub!


