Many thanks to Rclone and folderclone for making this possible.
- Create service accounts using script.
- Add massive service accounts into Rclone config file.
- Add massive service accounts into groups for your organization.
- Automatically switch accounts when Rclone copy/move/sync.
- Windows system is supported.
Before everything, install python because we use python as our programing language.
Install screen, git and latest Rclone.
If you are in Debian or Ubuntu, directly use the following command.
sudo apt-get install screen git && curl https://rclone.org/install.sh | sudo bash
After all dependency above are successfully installed, run this command
sudo git clone https://github.com/xyou365/AutoRclone && cd AutoRclone && sudo pip3 install -r requirements.txt
Directly download this project, download and copy latest Rclone into PATH. Then, run the following command in a commandline initialized inside your AutoRClone (this project) folder.
pip3 install -r requirements.txt
What is service account? How to use service account in Rclone?
Let us create only the amount of service accounts that we need.
Warning: Abuse of this feature is not the aim of autorclone and we do NOT recommend that you make a lot of projects. Creating just one project and 100 service accounts is plenty. Abuse of this service might get your projects banned by Google.
Create a project and enable the following APIs. You can do this here.
- Google Drive API,
- Cloud Resource Manager API,
- Identity and Access Management (IAM) API.
Create one service account as shown in the "Console" tab here. Name it anything, add description if you feel so; it doesn't matter. Now, create keys for it as shown here. Save the JSON file as "credentials.json" in this project folder.
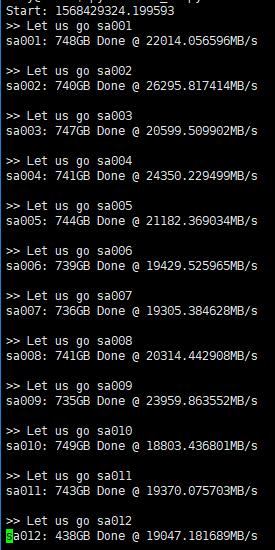
Note. Each service account can copy about 750GiB a day. 99 service accounts hence allows 75TiB of data transfer a day.
Since each project service account count capped to 100, we can create 99 more service accounts. You may leave the service accounted created above by itself. Create 99 service accounts as follows.
python gen_sa.py --create-sas -pid <project ID> -sp <prefix for SA names, you may ignore or use "mfc-" by default> -sc 99
- If you want to use the manually created service file also, run the following.
python gen_sa.py --generate-keys -pid <project ID>
- Else, follow through with the following to create and save keys to the newly created service accounts.
python gen_sa.py --generate-keys -pid <project ID> -sp <same prefix as above>
If you don't know your project ID, click on the dropdown that is to thje right of "Google Cloud Platform" here. You can see the list of projects and their corresponding IDs. You need the ID of the project you created above. You may also use the following to list all the projects in your Google Cloud.
python gen_sa.py --list-projects
Run python gen_sa.py -h for help with flags.
This step is recommended for hassle free, long term use, but is optional.
We use Google Groups to manager our service accounts, keeping in mind the pertinent official limits.
-
Turn on the Directory API here. Save the generated JSON file to the
credentialsfolder. -
Create group for your organization in the admin console. You will have an address to the newly created Google Group, say,
email@example.com. -
Run
python add_to_google_group.py -g email@example.com
Run python add_to_google_group.py -h for help with flags.
Create a Google Group and then add the service accounts as members from /accounts/sas-list.txt. You may add 10 at a time to avoid captha. The total limit is 200 a day and optimistically, you would have a good leeway.
If you do not use Team Drive, skip ahead.
Warning: It is NOT recommended to use service accounts to clone to folders that are not in teamdrives; service accounts work best with teamdrives.
If you have already created Google Groups in Step 2, add the group email address email@example.com or groupID@googlegroups.com to your source team drive (src001) and destination team drive (dst001).
Otherwise, add service accounts directly into Team Drive. You may use the following code or add it manually in the web UI.
- Add service accounts into your source Team Drive:
python add_to_team_drive.py -d SharedTeamDriveSrcID- Add service accounts into your destination Team Drive:
python add_to_team_drive.py -d SharedTeamDriveDstID
Let us copy hundreds of TiB using service accounts. Note the sarcasm; Over abuse of this, regardless of what cloning script you use, may get noticed by google. We recommend you do not be a glutton and clone what is important, instead of downloading the entire wikipedia.
- Publicly shared folder to team drive (with write privilege).
- Team drive to team drive.
- publicly shared folder to publicly shared folder (with write privilege).
- Team drive to publicly shared folder.
python rclone_sa_magic.py -s SourceID -d DestinationID -dp DestinationPathName -b 1 -e 600
-
For meaning of above flags, please run
python rclone_sa_magic.py -h. -
Add
--disable_list_rif Rclone cannot read all contents of public shared folder. -
Please make sure the Rclone can read your source and destination directory. Check it using
rclone size:
rclone --config rclone.conf size --disable ListR dst001:
- Local to team drive.
- Local to private folder.
- Private folder to any.
python rclone_sa_magic.py -sp YourLocalPath -d DestinationID -dp DestinationPathName -b 1 -e 600
- (Linux only) Run command
tail -f log_rclone.txtto see what happens in details.
