This example application is a motion detector. It uses the ESP8266 NodeMCU and a PIR sensor. This example code is apart of a tutorial. The tutorial demonstrates how to send the data to the Losant IoT Platform, where we can create a dashboard to monitor activity, and send alerts based on customizable rules.
- ESP8266
- ESP32
Before beginning, you must have the mos tool installed. For more info, see the mos installation instructions.
- First, clone the losant app
$ git clone git@github.com:Losant/losant-mongoose-motion-sensor.git
- Build the firmware: (esp8266 or esp32)
$ mos build --arch esp8266
- Flash the device: (esp8266 or esp32)
$ mos flash
- Configure WiFi:
mos wifi WIFI_SSID WIFI_PASSWORD
You must replace the following values:
- WIFI_SSID
- WIFI_PASSWORD
-
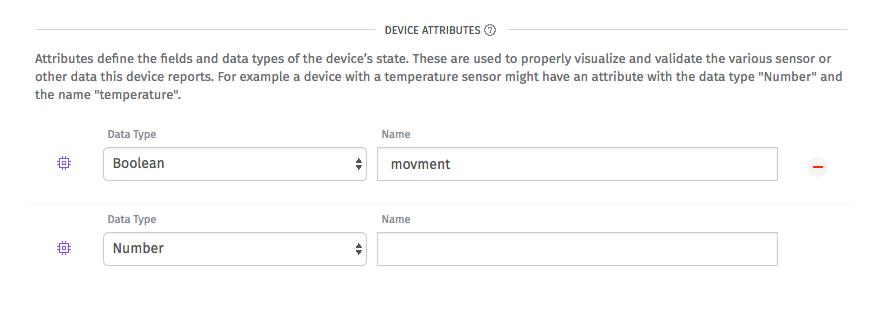
Login to Losant service. Create and app, device, and security credentials for your device: The device will have the following attributes:
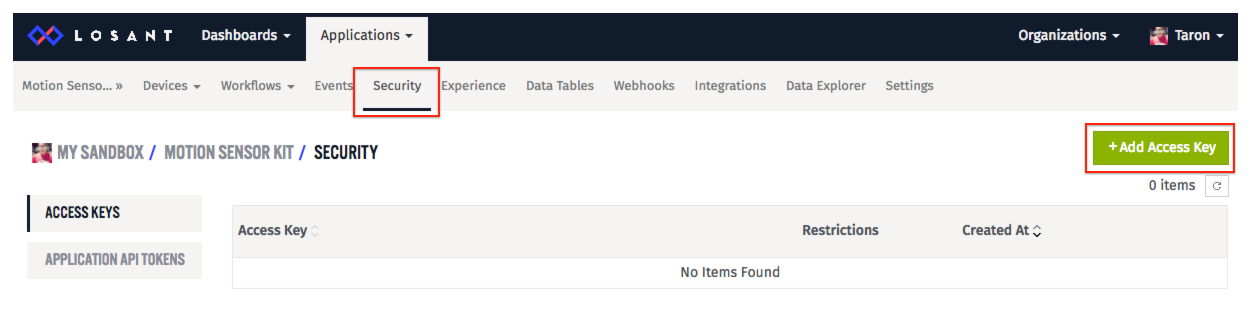
 Here is where you can obtain security crendentials:
-
Configure MQTT connection to Losant:


mos config-set mqtt.client_id=LOSANT_DEVICE_ID \
  mqtt.user=LOSANT_ACCESS_KEY \
  mqtt.pass=LOSANT_ACCESS_SECRET
You obtain the LOSANT_DEVICE_ID, LOSANT_ACCESS_KEY, and LOSANT_ACCESS_SECRET values from Losant.
- To stream logs to the terminal:
$ mos console
- To open up the mos web UI:
$ mos
- Switch back to Losant page, watch data graph:
