This is an example of a Containerized Flask Application the can be the core ingredient in many "recipes", i.e. deploy targets..
Feel free to test my ML project: docker pull ghcr.io/noahgift/python-mlops-cookbook:latest
Makefile: View Makefilerequirements.txt: View requirements.txtcli.py: View cli.pyutilscli.py: View utilscli.pyapp.py: View app.pymlib.py: View mlib.pyModel Handling Libraryhtwtmlb.csv: View CSV Useful for input scalingmodel.joblib: View model.joblibDockerfile: View DockerfileBaseball_Predictions_Export_Model.ipynb: Baseball_Predictions_Export_Model.ipynb
There are two cli tools. First, the main cli.py is the endpoint that serves out predictions.
To predict the height of an MLB player you use the following: ./cli.py --weight 180
The second cli tool is utilscli.py and this perform model retraining, and could serve as the entry point to do more things.
For example, this version doesn't change the default model_name, but you could add that as an option by forking this repo.
./utilscli.py retrain --tsize 0.4
Here is an example retraining the model.

Additionally the you can query the API via the CLI allowing you to change both the host and the value passed into the API. This is accomplished through the requests library.
./utilscli.py predict --weight 400
The Flask ML Microservice can be run many ways.
You can run the Flask Microservice as follows with the commmand: python app.py.
(.venv) ec2-user:~/environment/Python-MLOps-Cookbook (main) $ python app.py
 * Serving Flask app "app" (lazy loading)
 * Environment: production
   WARNING: This is a development server. Do not use it in a production deployment.
   Use a production WSGI server instead.
 * Debug mode: on
INFO:werkzeug: * Running on http://127.0.0.1:8080/ (Press CTRL+C to quit)
INFO:werkzeug: * Restarting with stat
WARNING:werkzeug: * Debugger is active!
INFO:werkzeug: * Debugger PIN: 251-481-511
To serve a prediction against the application, run the predict.sh.
(.venv) ec2-user:~/environment/Python-MLOps-Cookbook (main) $ ./predict.sh
Port: 8080
{
  "prediction": {
    "height_human_readable": "6 foot, 2 inches",
    "height_inches": 73.61
  }
}
Here is an example of how to build the container and run it locally, this is the contents of predict.sh
#!/usr/bin/env bash

# Build image
#change tag for new container registery, gcr.io/bob
docker build --tag=noahgift/mlops-cookbook .

# List docker images
docker image ls

# Run flask app
docker run -p 127.0.0.1:8080:8080 noahgift/mlops-cookbook
To setup the container build process do the following. This is also covered by Alfredo Deza in Practical MLOps book in greater detail.
  build-container:
    runs-on: ubuntu-latest
    steps:
    - uses: actions/checkout@v2
    - name: Loging to Github registry
      uses: docker/login-action@v1
      with:
        registry: ghcr.io
        username: ${{ github.repository_owner }}
        password: ${{ secrets.BUILDCONTAINERS }}
    - name: build flask app
      uses: docker/build-push-action@v2
      with:
        context: ./
        #tags: alfredodeza/flask-roberta:latest
        tags: ghcr.io/noahgift/python-mlops-cookbook:latest
        push: true
With the project using DevOps/MLOps best practices including linting, testing, and deployment, this project can be the base to deploy to many deployment targets.
[In progress....]
[In progress....]
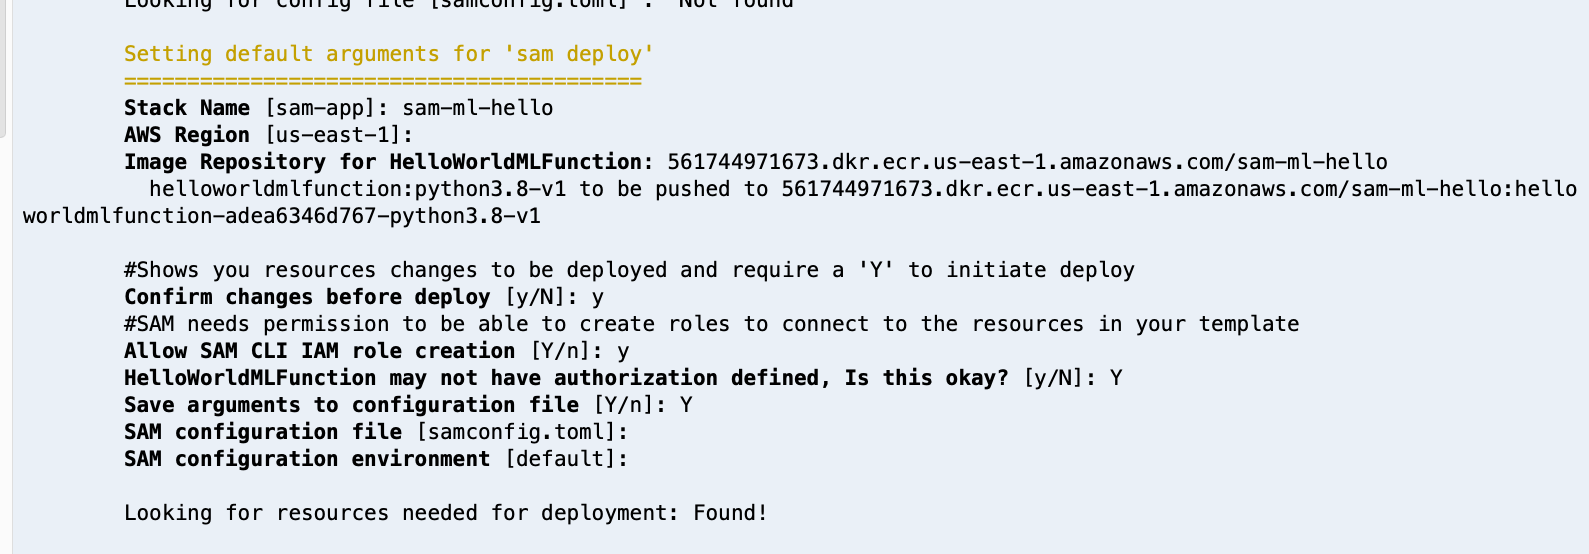
Install SAM as documented here, AWS Cloud9 has it installed already.
You can find the recipes here
Follow recipe in recipe section.
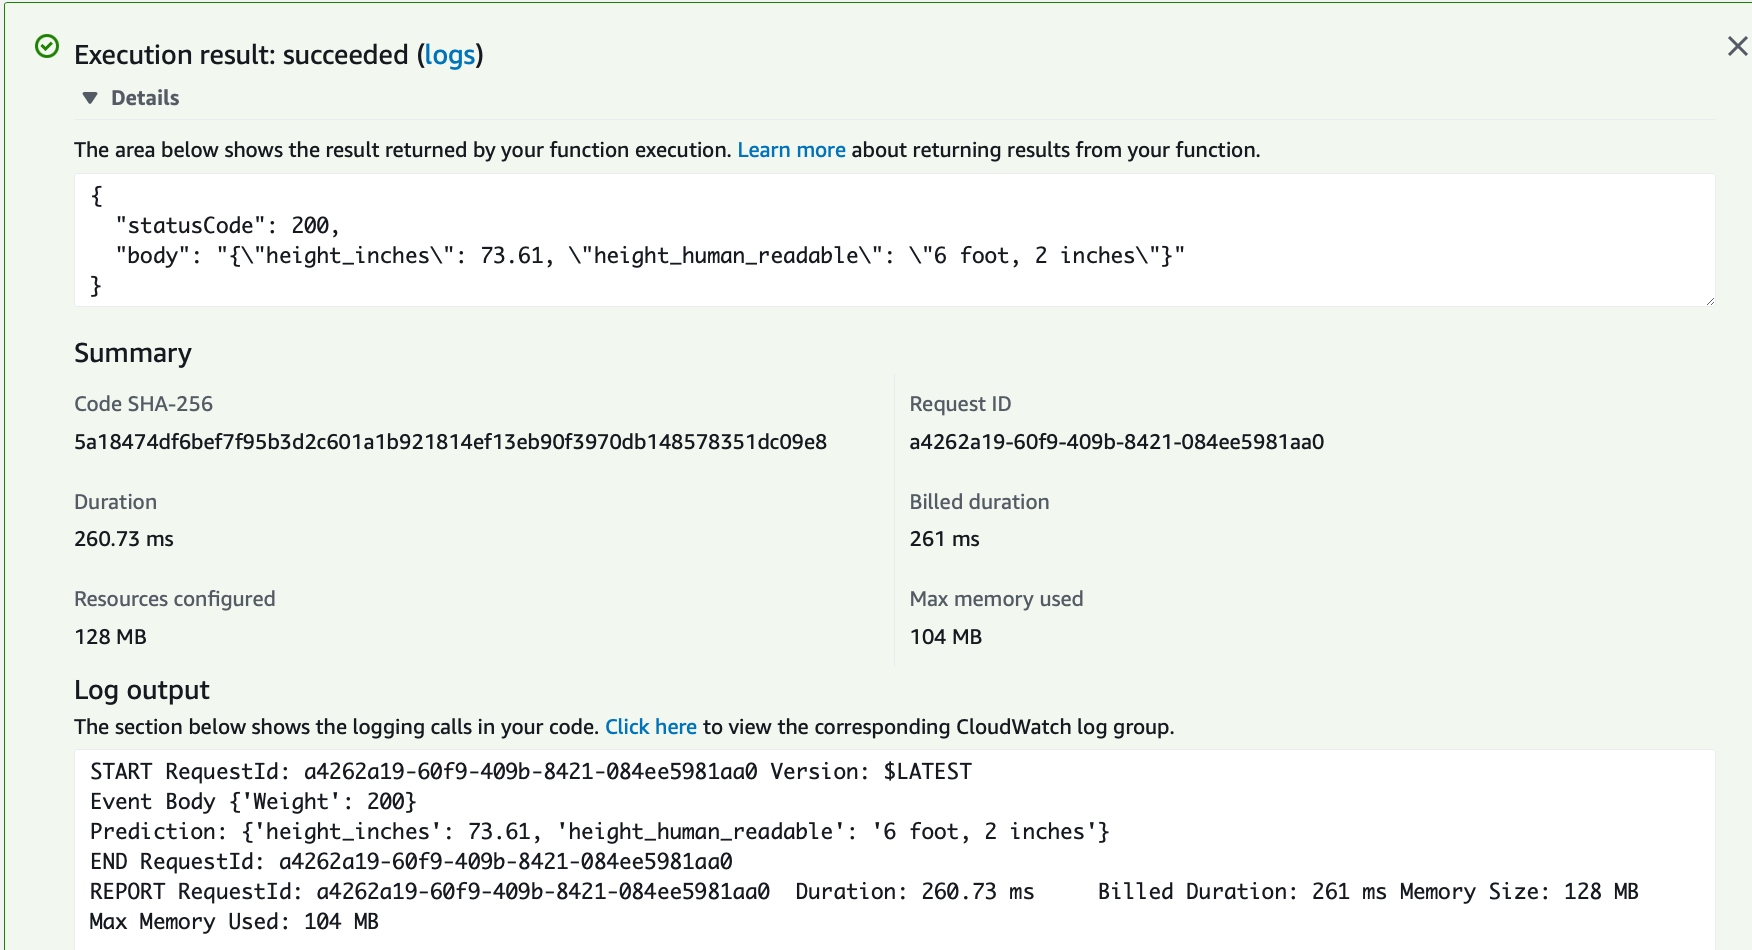
When deployed an easy way to verify image is via Console.
A great way to test the API Endpoint is with the Cloud9 Environment:
Another way is the the tool "Postman":
Watch a YouTube Walkthrough on AWS App Runner for this repo here: https://www.youtube.com/watch?v=zzNnxDTWtXA
Following setup here and then deploy project using cli https://docs.aws.amazon.com/AmazonECS/latest/developerguide/getting-started-aws-copilot-cli.html
It is trivial (if you select project):
gcloud config set project <yourprojectname>
A. Get GCP Account
B. Checkout project
C. cloud run deploy inside of project
D. Verify it works by using ./utilscli.py
[In progress....]
- Cached model (deploy)
- Load-testing
This repository is focused on MLOps. To see more about Data Storytelling, you can go to this Github repo on Data Story Telling


