Easy Amazon Kinesis load testing with Locust - a modern load testing framework.
- Overview
- Getting started
- Large scale load testing
- Project structure
- Remarks
- Setup
- Notice
- Security
- License
For high-traffic Kinesis based application, it's often a challenge to simulate the necessary load in a load test. Locust is a powerful Python based framework to execute load test. This project leverages a Boto3 wrapper for Locust.
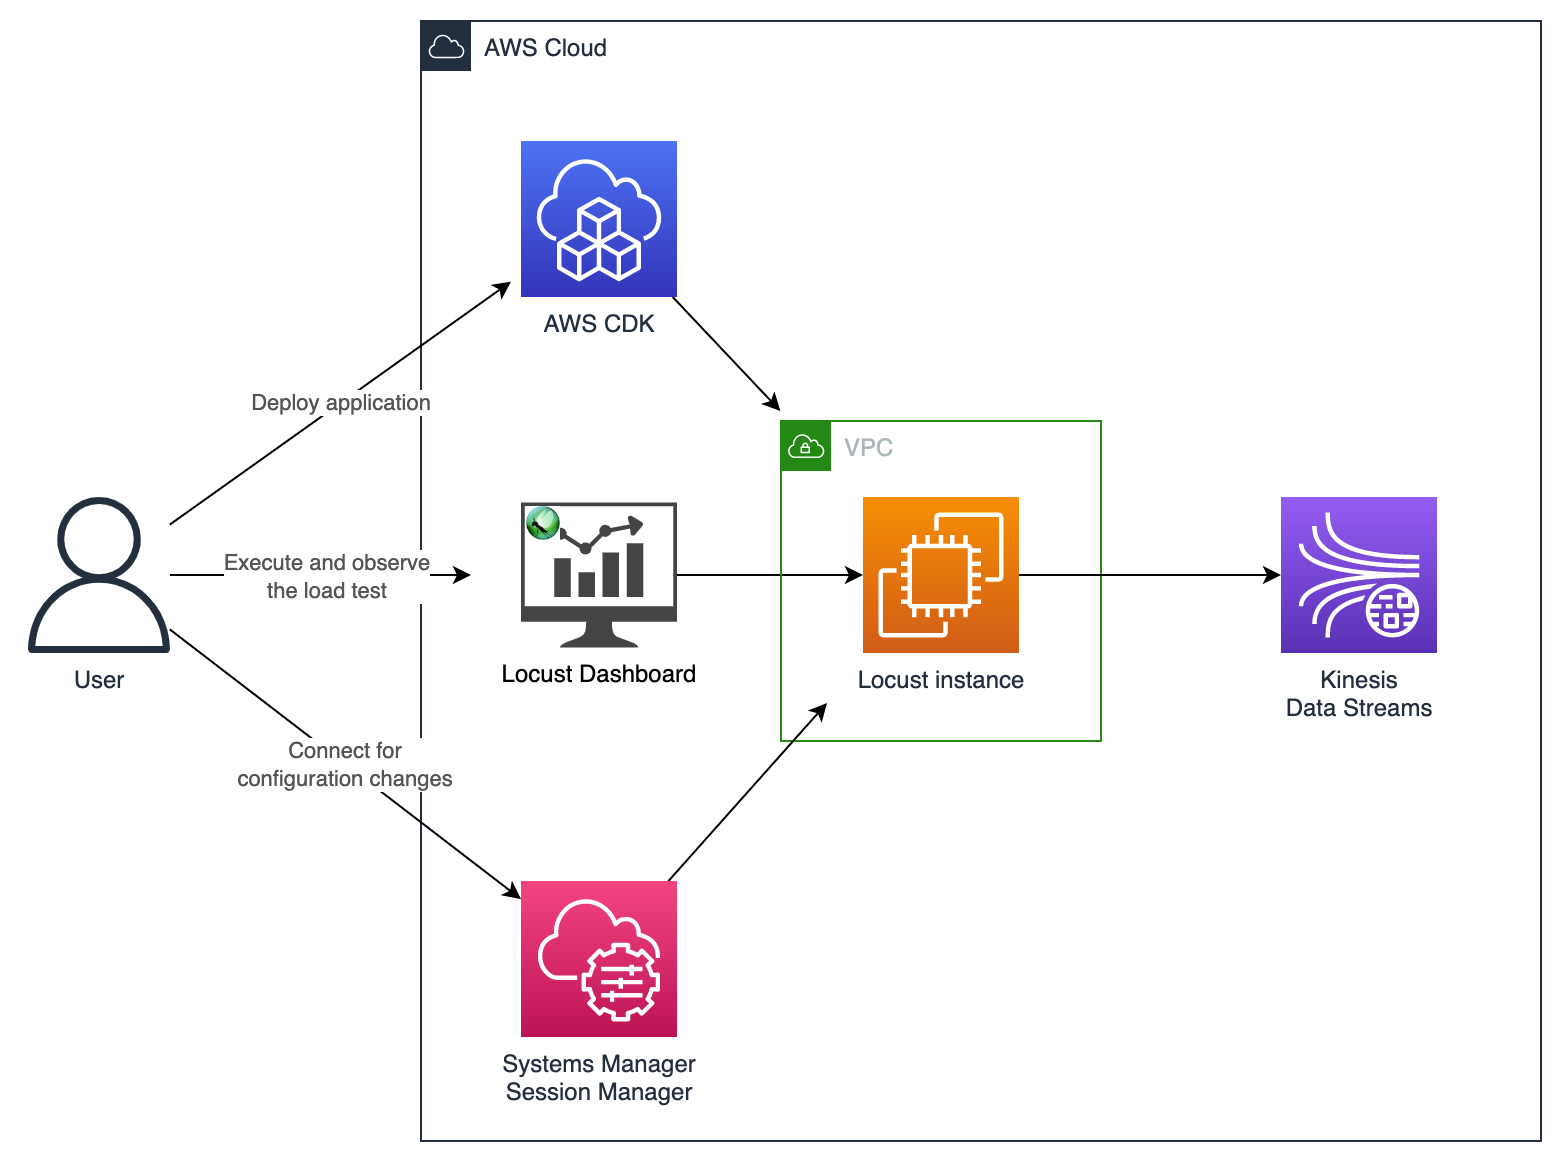
This project emits temperature sensor readings via Locust to Kinesis. The EC2 Locust instance is setup via CDK to load test Kinesis based applications. Users can connect via Systems Manager Session Manager (SSM) for configuration changes.
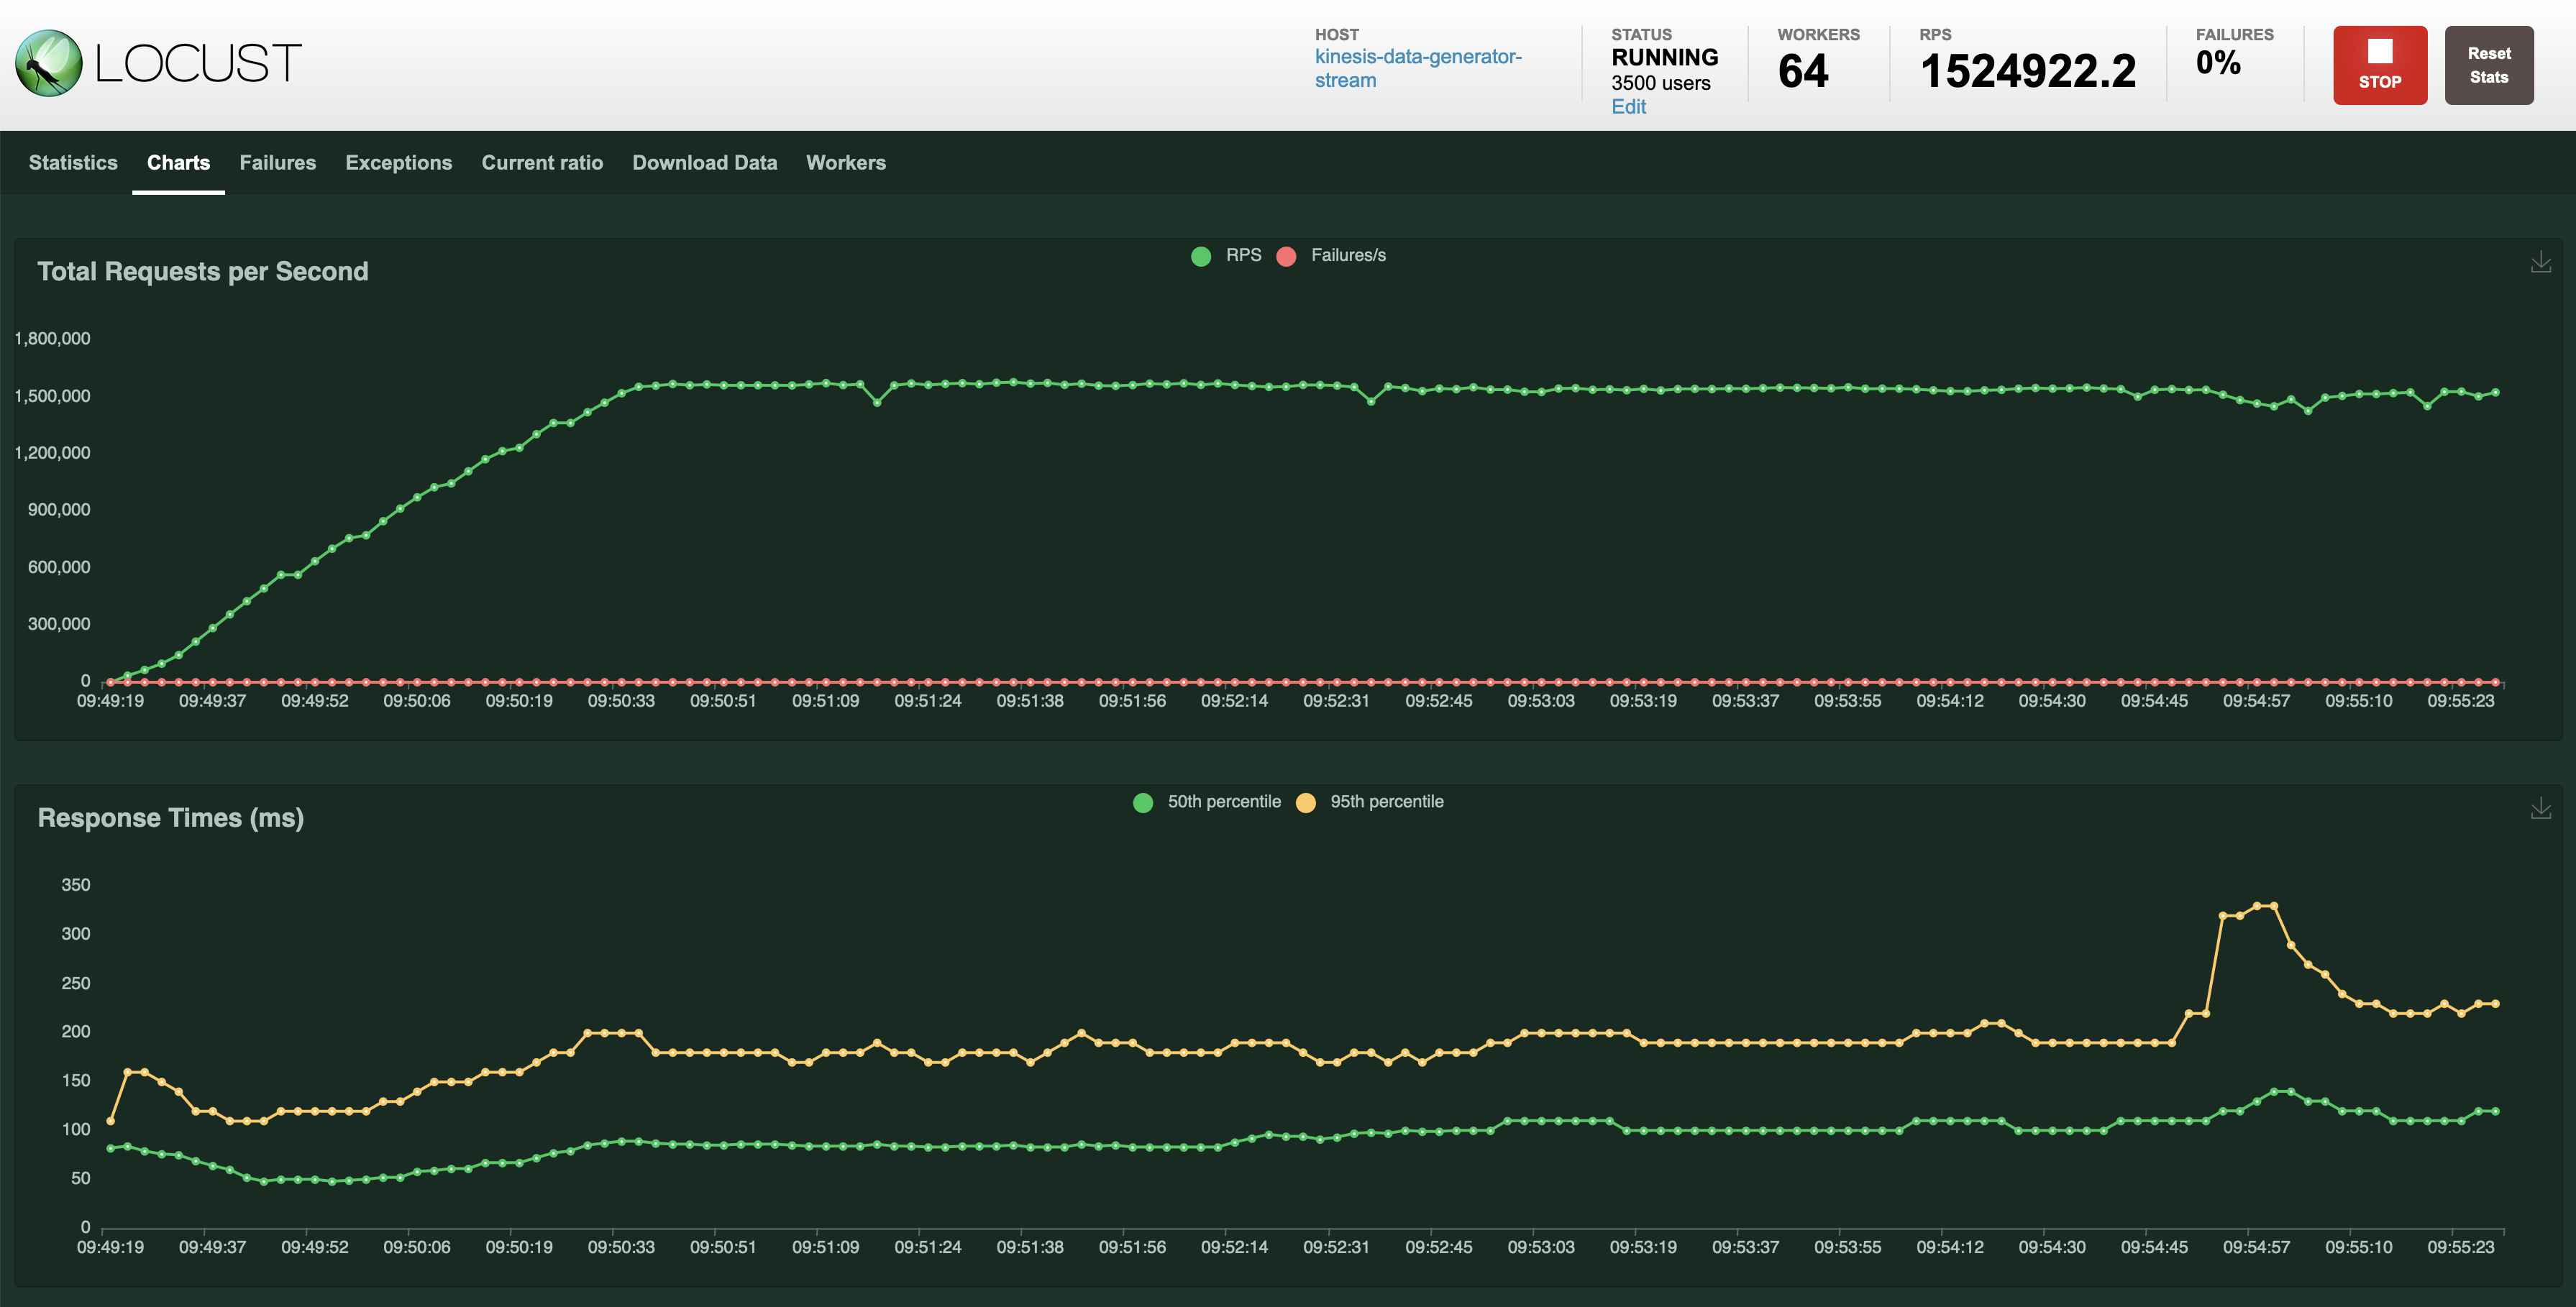
In our testing with the largest recommended instance - c7g.16xlarge - the setup was capable of emitting over 1 million events per second to Kinesis, with a batch size of 500. See also here for more information on how to achieve peak performance.
Alternatively your can use the Amazon Kinesis Data Generator, which provides you with a hosted UI to set up Kinesis load tests. As this approach is browser based, you are limited by the bandwidth of your current connection, the round trip latency and have to keep the browser tab open to continue sending events.
By default, this project generates random temperature sensor readings for every sensor with this format:
 {
    "sensorId": "bfbae19c-2f0f-41c2-952b-5d5bc6e001f1_1",
    "temperature": 147.24,
    "status": "OK",
    "timestamp": 1675686126310
 }
To adopt it to your needs, the project comes packaged with Faker, that you can use to adopt the payload to your needs. If you want to use a different payload or payload format, please change it here.
To test Locust out locally first, before deploying it to the cloud, Locust must be installed, for instructions, see here. In order to send events to Kinesis from your local machine, you have to have AWS credentials, see also the documentation on Configuration and credential file settings.
To execute the test locally, navigate to the load-test directory and execute:
locust -f locust-load-test.pyIn order to get the generated events logged out, run this command, it will filter only locust and root logs (e.g. no botocore logs):
locust -f locust-load-test.py --loglevel DEBUG 2>&1 | grep -E "(locust|root)"To get started you first have to do the setup, as described here.
You can access the dashboard by using the CDK Output KinesisLoadTestingWithLocustStack.locustdashboardurl to open the dashboard, e.g. http://1.2.3.4:8089.
The Locust dashboard is password protected, by default it is set to Username locust-user and Password locust-dashboard-pwd, you can change it here.
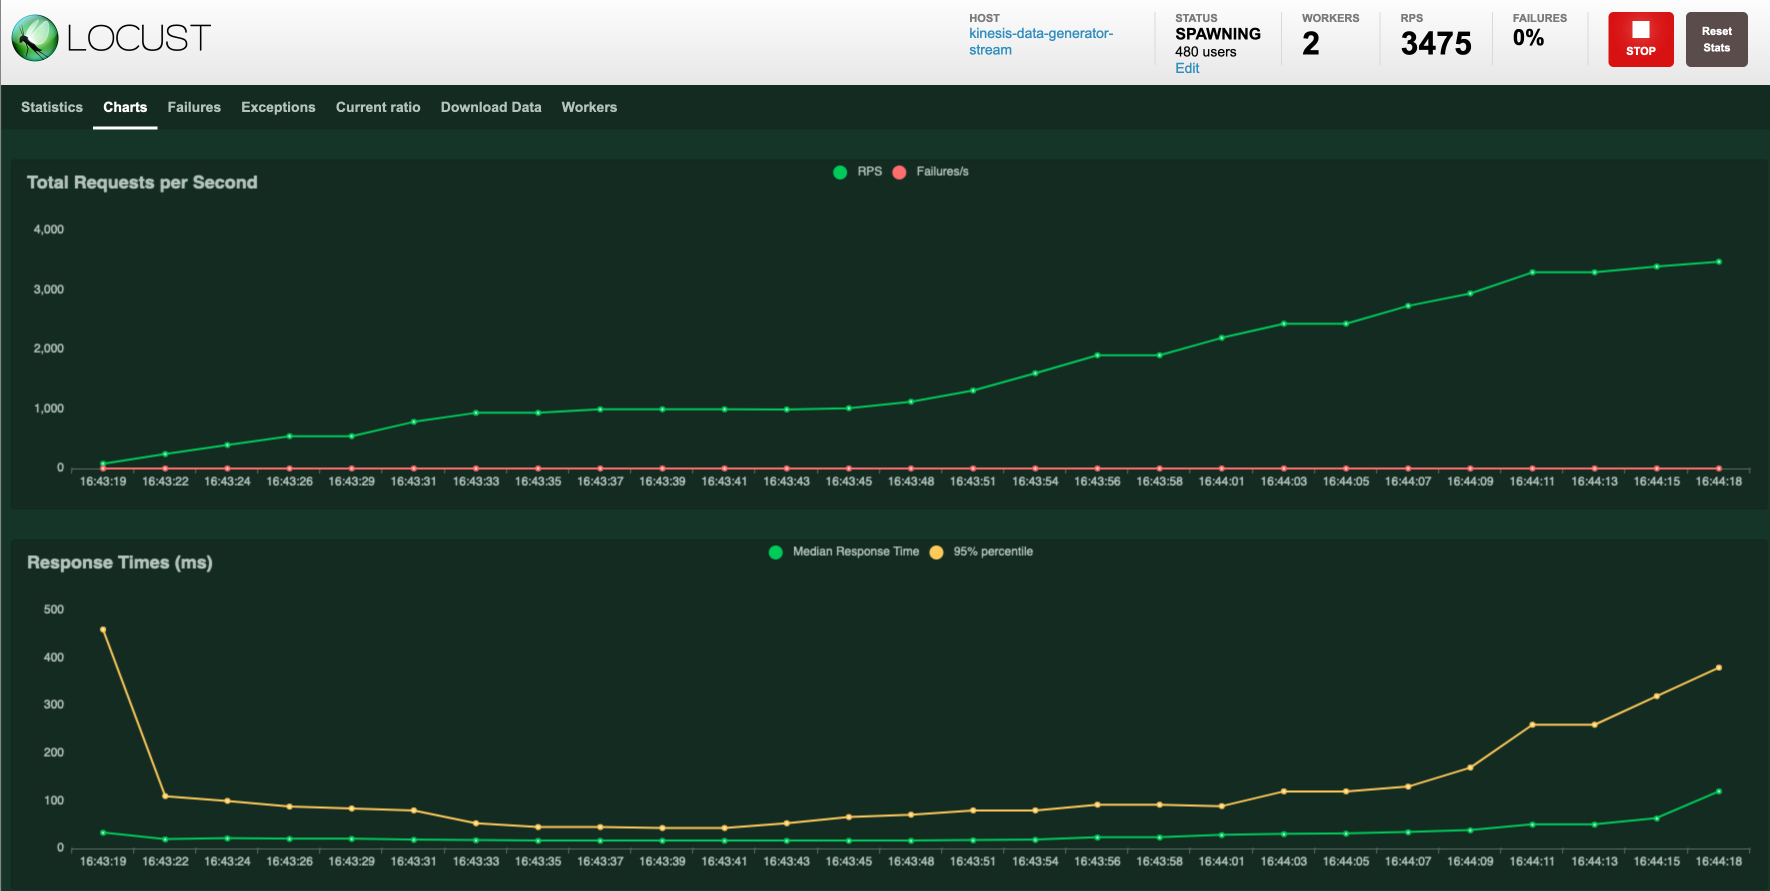
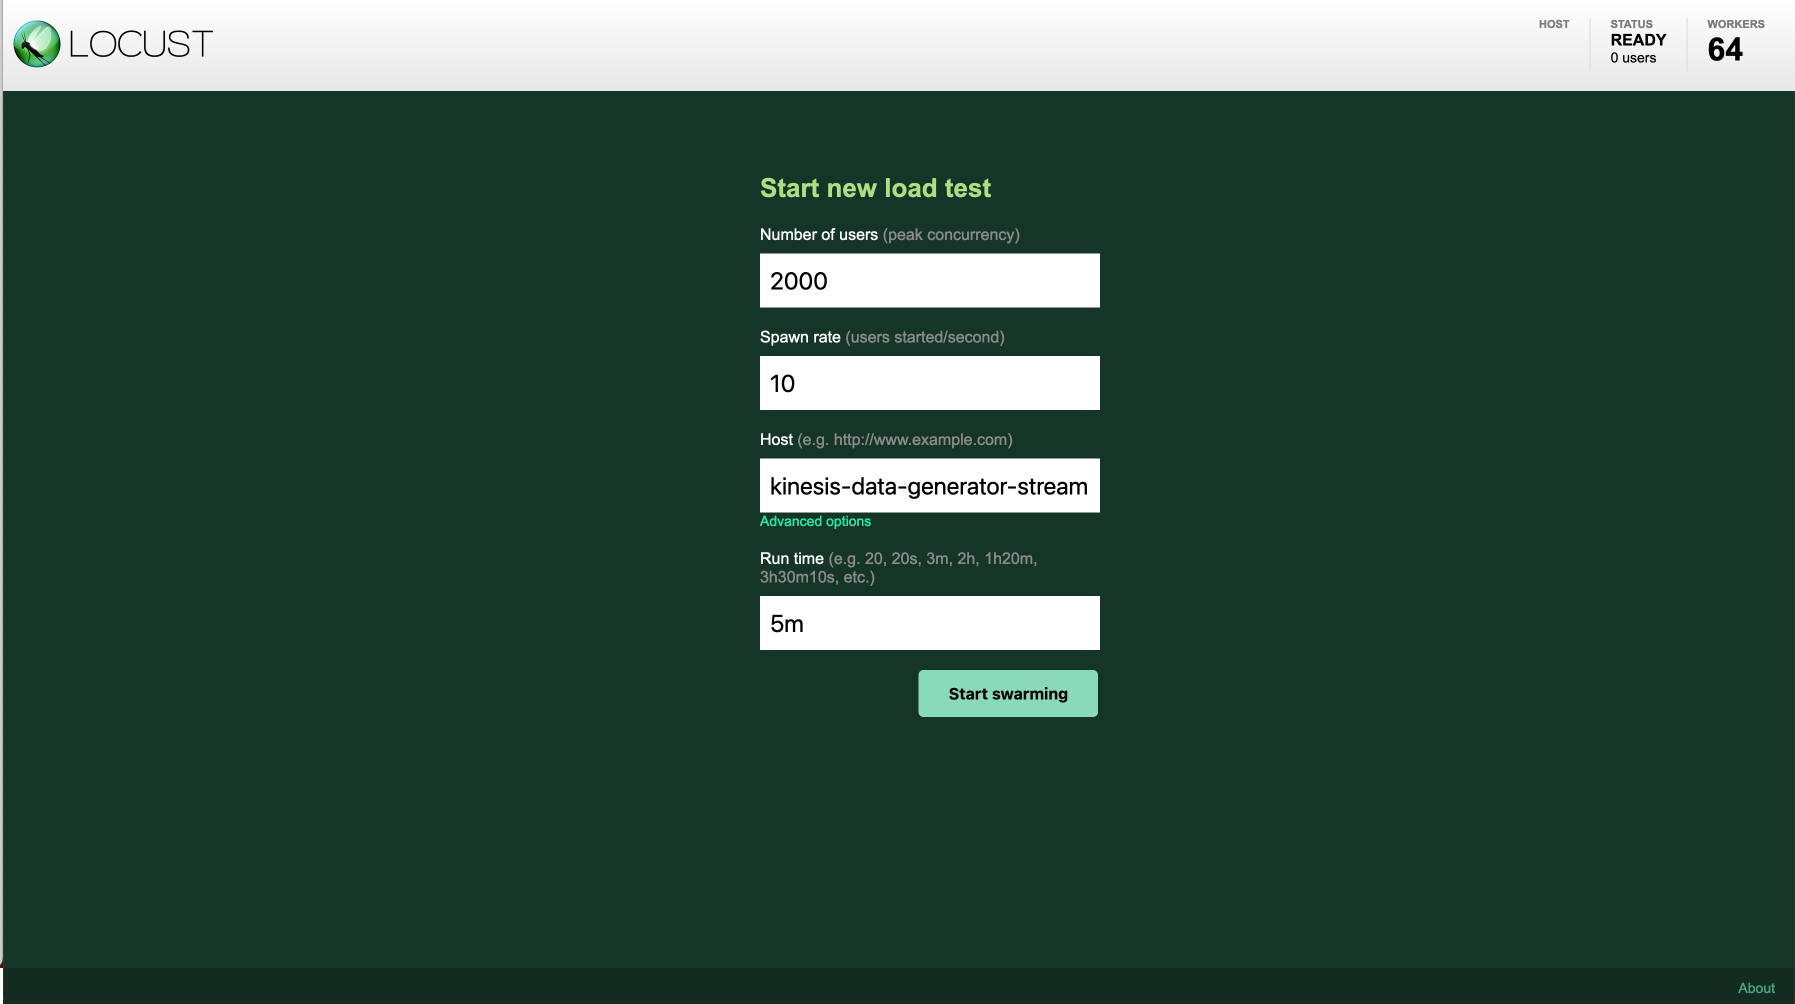
With the default configuration, you can achieve up to 15.000 emitted events per second. Enter the number of Locust users (times the batch size), the spawn rate (users added per second) and the target Kinesis stream name as host.
The default settings:
- Instance:
c7g.xlarge - Number of secondaries:
4 - Batch size:
10 - Host (Kinesis stream name):
kinesis-load-test-input-stream, you can change the default host here
If you want to achieve more load, checkout Large scale load testing documentation.
Locust is created on the EC2 instance as a systemd service and can therefore be controlled with systemctl. If you want to change the configuration of Locust on-the-fly without redeploying the stack, you can connect to the instance via Systems Manager Session Manager (SSM), navigate to the project directory on /usr/local/load-test, change the locust.env file and restart the service by running sudo systemctl restart locust.
In order to achieve peak performance with Locust and Kinesis, there are a couple of things to keep in mind.
Your performance is bound by the underlying EC2 instance, so check recommended instance for more information about scaling. In order to set the correct instance size, you can configure the instanze size here.
Locust benefits from a distributed setup. Therefore the setup spins up multiple secondaries, that do the actual work, and a primary, that does the coordination. In order to leverage the cores up to maximum, you should specify 1 secondary per core, you can configure the number here.
The amount of Kinesis events you can send per Locust user is limited, due to the resource overhead of switching Locust users and by this threads. To overcome this, you can configure a batch size, to define how much users are simulated, per Locust user. These are send as a Kinesis put_records call. You can configure the number here.
The load test was achieved with this settings:
- Region:
eu-central-1(Frankfurt) - Instance:
c7g.16xlarge - Number of secondaries:
64 - Batch size:
500
For Kinesis load testing with Locust, Locust is a compute and network intensive workload, that can also run on ARM for better cost-efficiency.
C7G is the latest compute optimized instance type, that runs on ARM with Graviton.
Below you can find an overview of possible EC2 instances, that you could select, based on the peak load requirements of your test. If you want you can change the instance type in CDK.
| API Name | vCPUs | Memory | Network Performance | On Demand cost | Spot Minimum cost |
|---|---|---|---|---|---|
| c7g.large | 2 vCPUs | 4.0 GiB | Up to 12.5 Gigabit | $0.0725 hourly | $0.0466 hourly |
| c7g.xlarge | 4 vCPUs | 8.0 GiB | Up to 12.5 Gigabit | $0.1450 hourly | $0.0946 hourly |
| c7g.2xlarge | 8 vCPUs | 16.0 GiB | Up to 15 Gigabit | $0.2900 hourly | $0.1841 hourly |
| c7g.4xlarge | 16 vCPUs | 32.0 GiB | Up to 15 Gigabit | $0.5800 hourly | $0.4188 hourly |
| c7g.8xlarge | 32 vCPUs | 64.0 GiB | 15 Gigabit | $1.1600 hourly | $0.7469 hourly |
| c7g.12xlarge | 48 vCPUs | 96.0 GiB | 22.5 Gigabit | $1.7400 hourly | $1.0743 hourly |
| c7g.16xlarge | 64 vCPUs | 128.0 GiB | 30 Gigabit | $2.3200 hourly | $1.4842 hourly |
The pricing information is according to us-east-1 (North Virginia). To find the most accurate pricing information, see here.
Please keep in mind, that not only the EC2 instance costs, but especially the data transfer costs contribute to your costs.
docs/                                 -- Contains project documentation
infrastructure/                       -- Contains the CDK infrastructure definition
load-test/                            -- Contains all the load testing scripts
├── locust-load-test.py               -- Locust load testing definition
├── locust.env                        -- Locust environment variables
├── requirements.txt                  -- Defines all needed Python dependencies
├── start-locust.sh                   -- Script to start Locust to run in a distruted mode
└── stop-locust.sh                    -- Script to stop all Locust workers and the master
For simplicity of the setup and to reduce waiting times in the initial setup, the default VPC is used. If you want to create your custom VPC or reuse an already defined VPC, you can change it here.
The setup also requires, that the EC2 instance is accessible on port 8089 inside this VPC, so make sure an Internet Gateway is set up, and nothing restricts the port access (e.g. NACLs, ...).
This project relies on AWS CDK and TypeScript, for installation instructions look here. For further information you can also checkout this Workshop and this Getting Started.
cdk bootstrap aws://ACCOUNT-NUMBER/REGION # e.g. cdk bootstrap aws://123456789012/us-east-1
For more details, see AWS Cloud Development Kit - Bootstrapping.
npm install
Run the following to deploy the stacks of the cdk template:
cdk deploy
In order to not incur any unnecessary costs, you can simply delete the stack.
cdk destroy
This is a sample solution intended as a starting point and should not be used in a productive setting without thorough analysis and considerations on the user's side.
See CONTRIBUTING for more information.
This library is licensed under the MIT-0 License. See the LICENSE file.


