Integrate Azure OpenAI Services with PVA with maintaing Context as a Global Varaible in PVA.
-
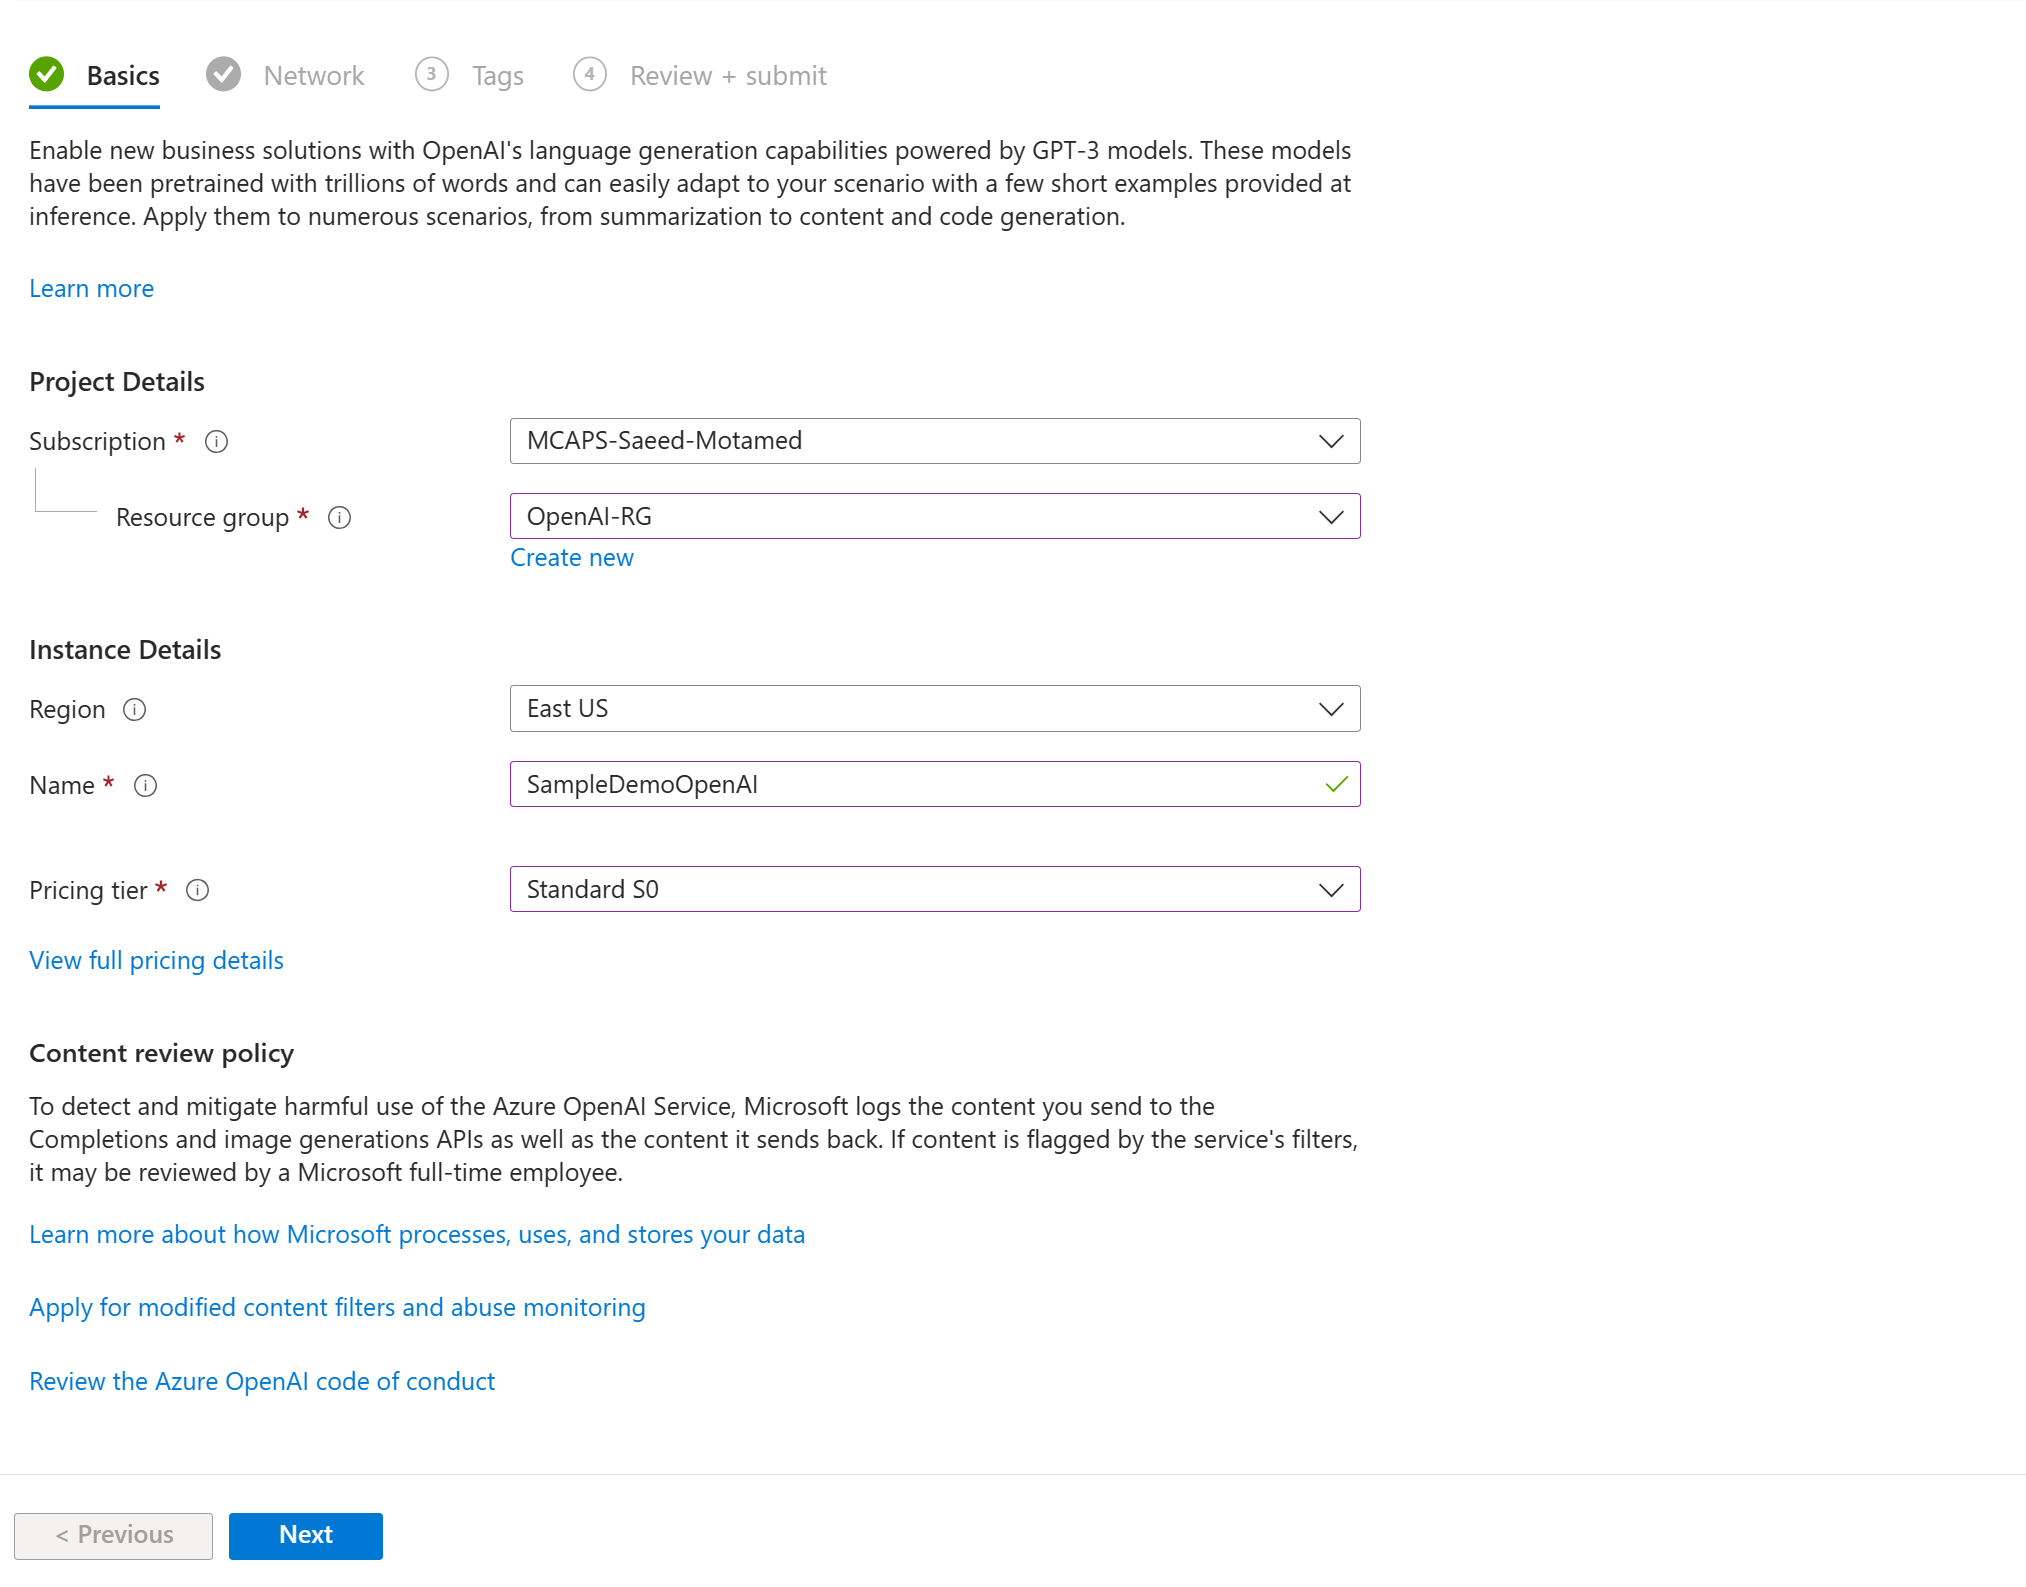
Head to https://portal.azure.com
-
Once you login, at the top search bar search for "Azure OpenAI"

-
Once the provisioning is done click on "Go to Azure OpenAI Studio"

-
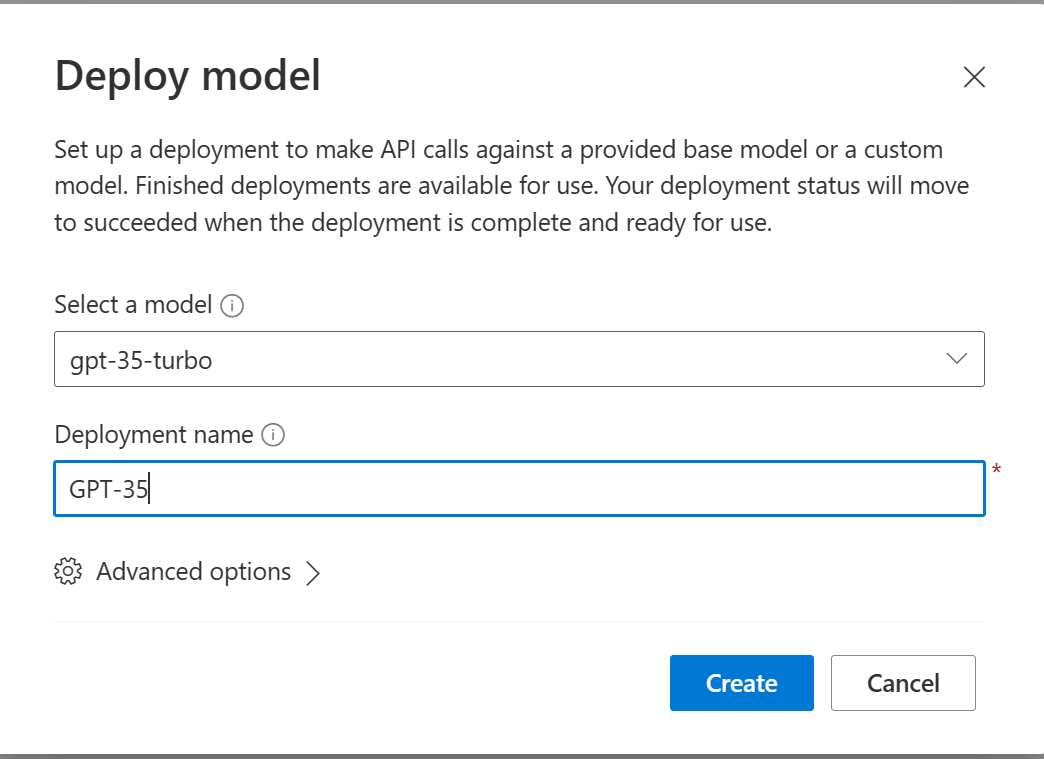
On the left pane click on Deployments and + Create a new deployment , choose the gpt-35-turbo model and create.
-
Once the deployment is done , click on it and click on "Open in Playground"

-
Under Chat session click on "View Code" and take note of Endpoint and Key

-
Download "OpenAIPVA.zip" from the repo
-
Head to https://make.powerapps.com/
-
Once you login , On the left pane click on Solution , then on the top "Import Solution"
-
Browse and choose the .zip file you just downloaded , Click Next and then Import. ( might take some time )
-
Once the Import is successful you will see a notification on top of the page
-
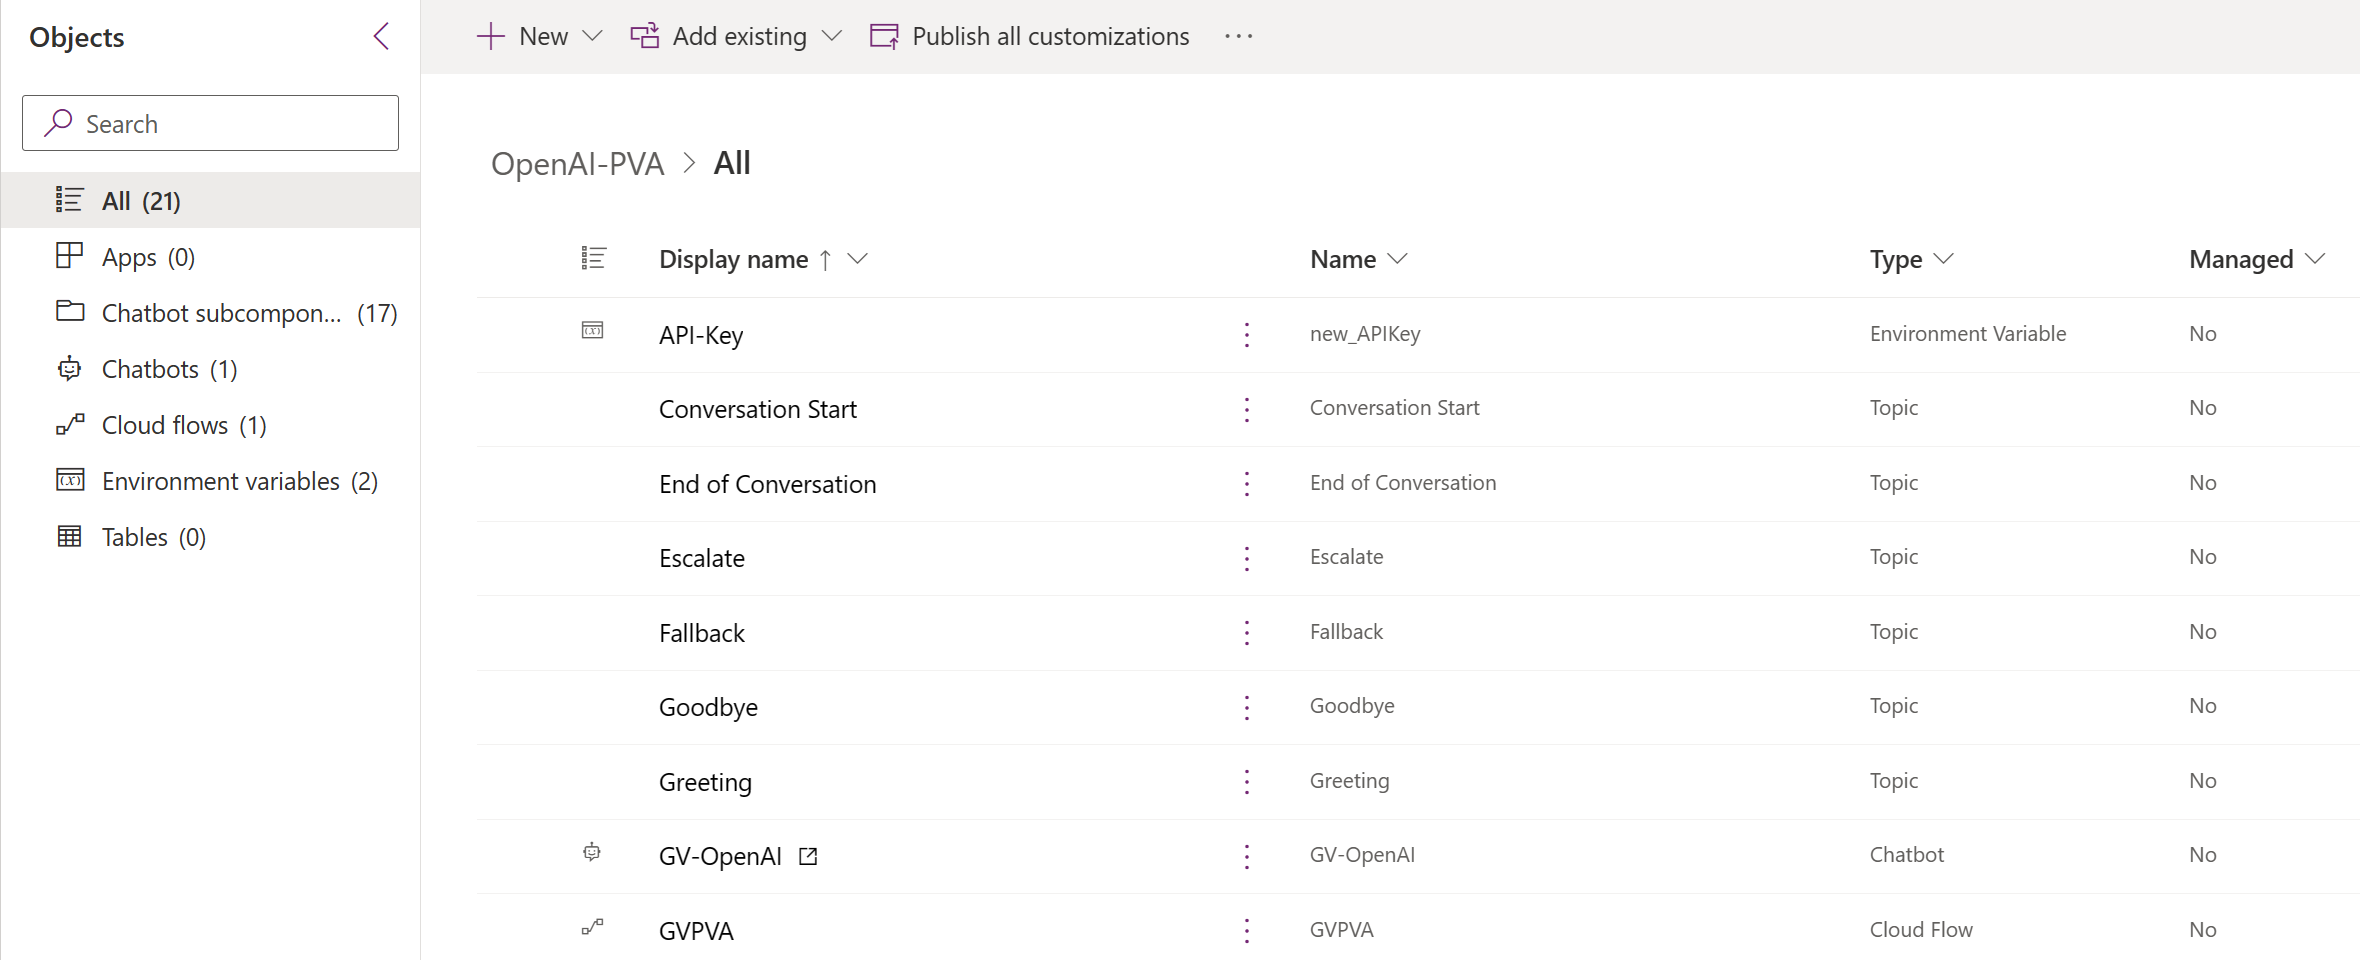
Click on the imported solution, you will see 1 chatbot , 1 cloud flow and 2 Enviroment variables imported.
-
Click on API-Key and set the Default value to the Key we Aquired from the Azure OpenAI Service in the previous step

-
Do the same with OpenAPI-GPT35_URL and set the default value to the Endpoint URL.
-
On the left pane click on Chatbots and open GV-OpenAI its going to redirect you to the PVA page and thats it !
-
On the left pane click on Chatbots and + New chatbot
-
Give the bot a name and click create
-
Once created Click on it and on the left pane click on Topics

-
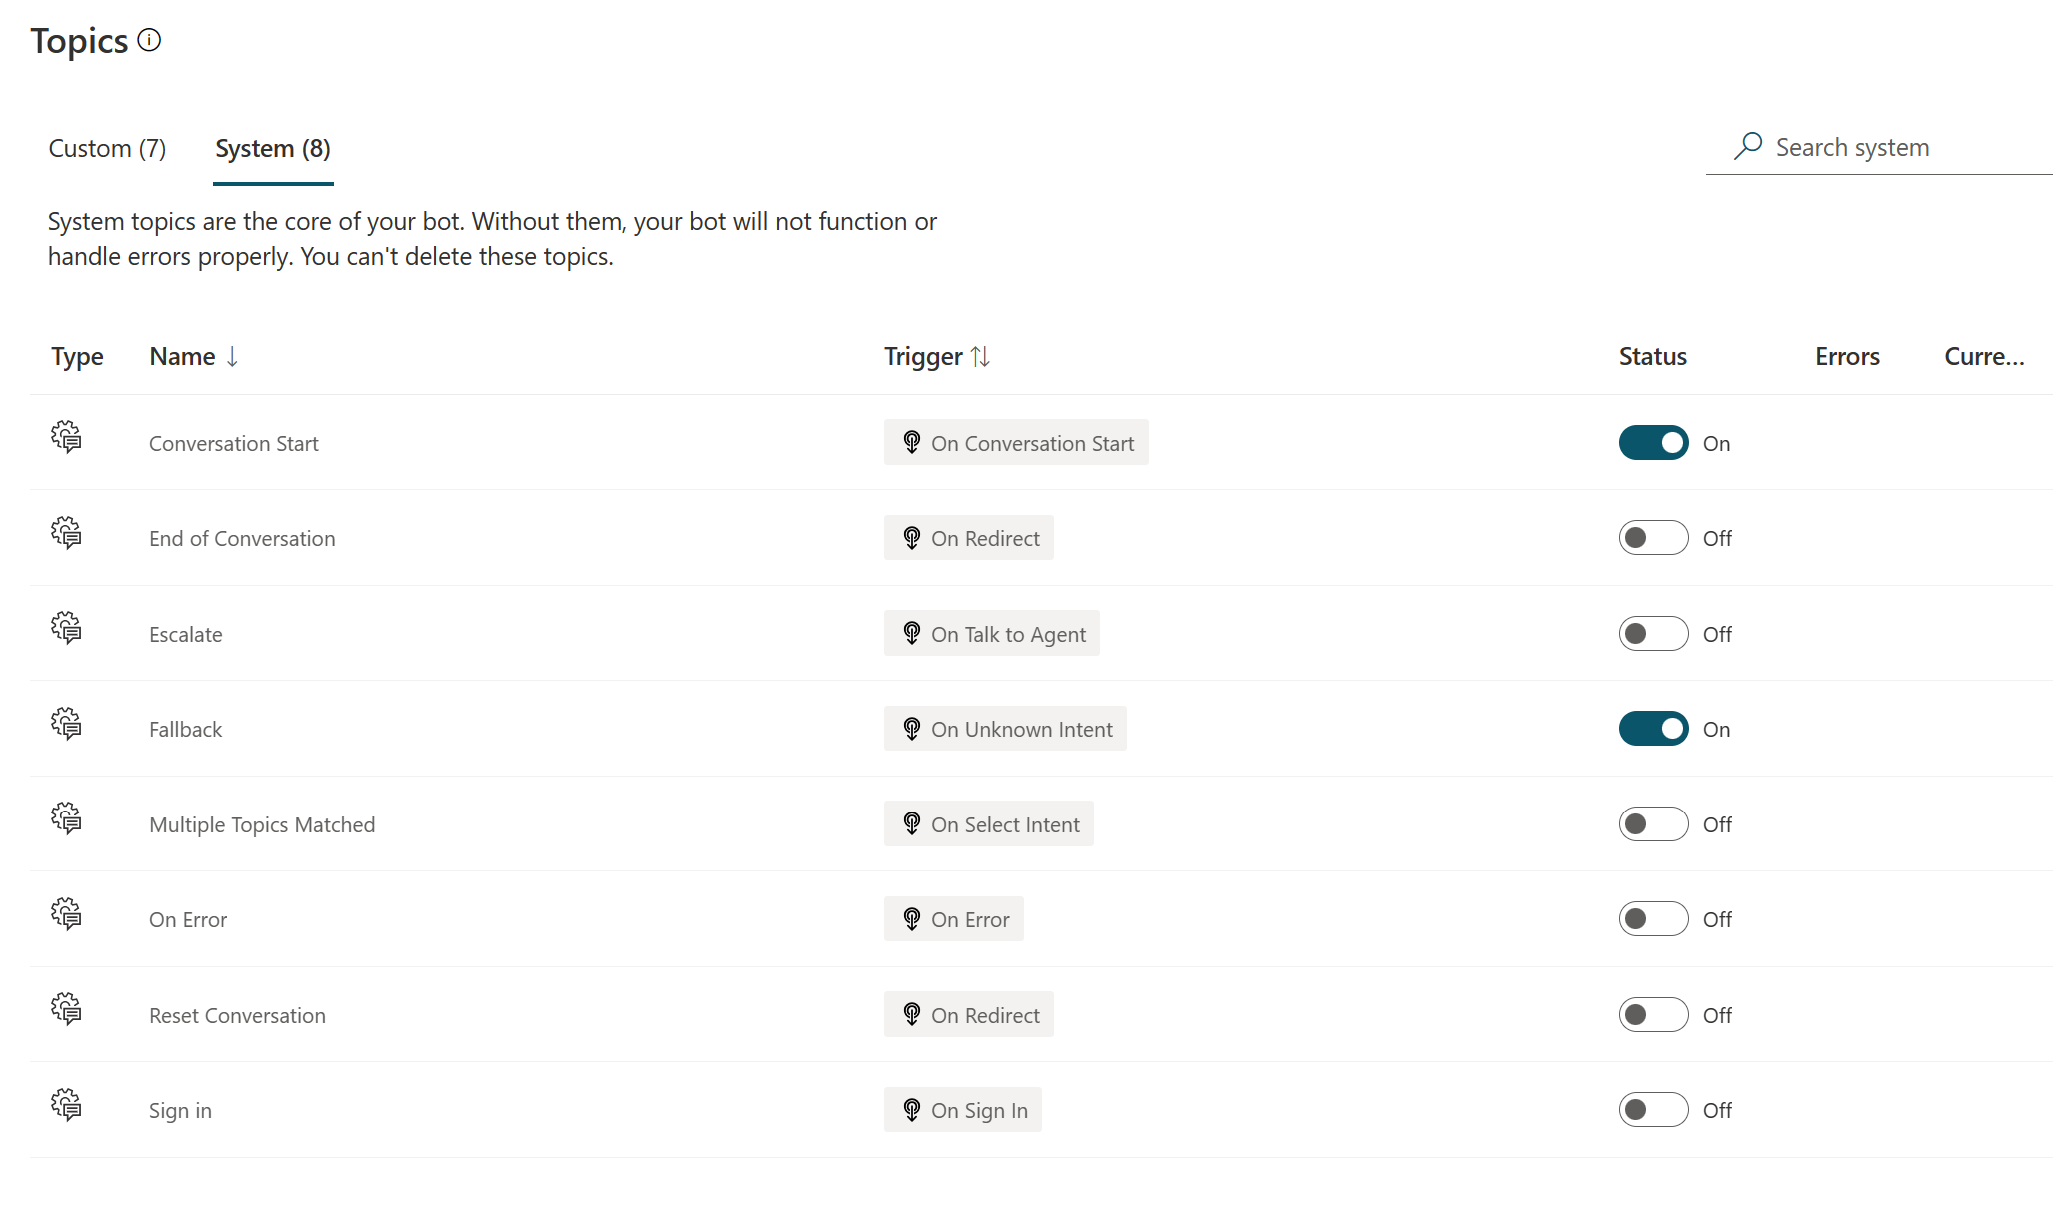
In this PVA example we are going to use only 2 topics , "Conversation Start" and "Fallback"
-
I turned off all topics under Custom and System tab execpt the above 2
-
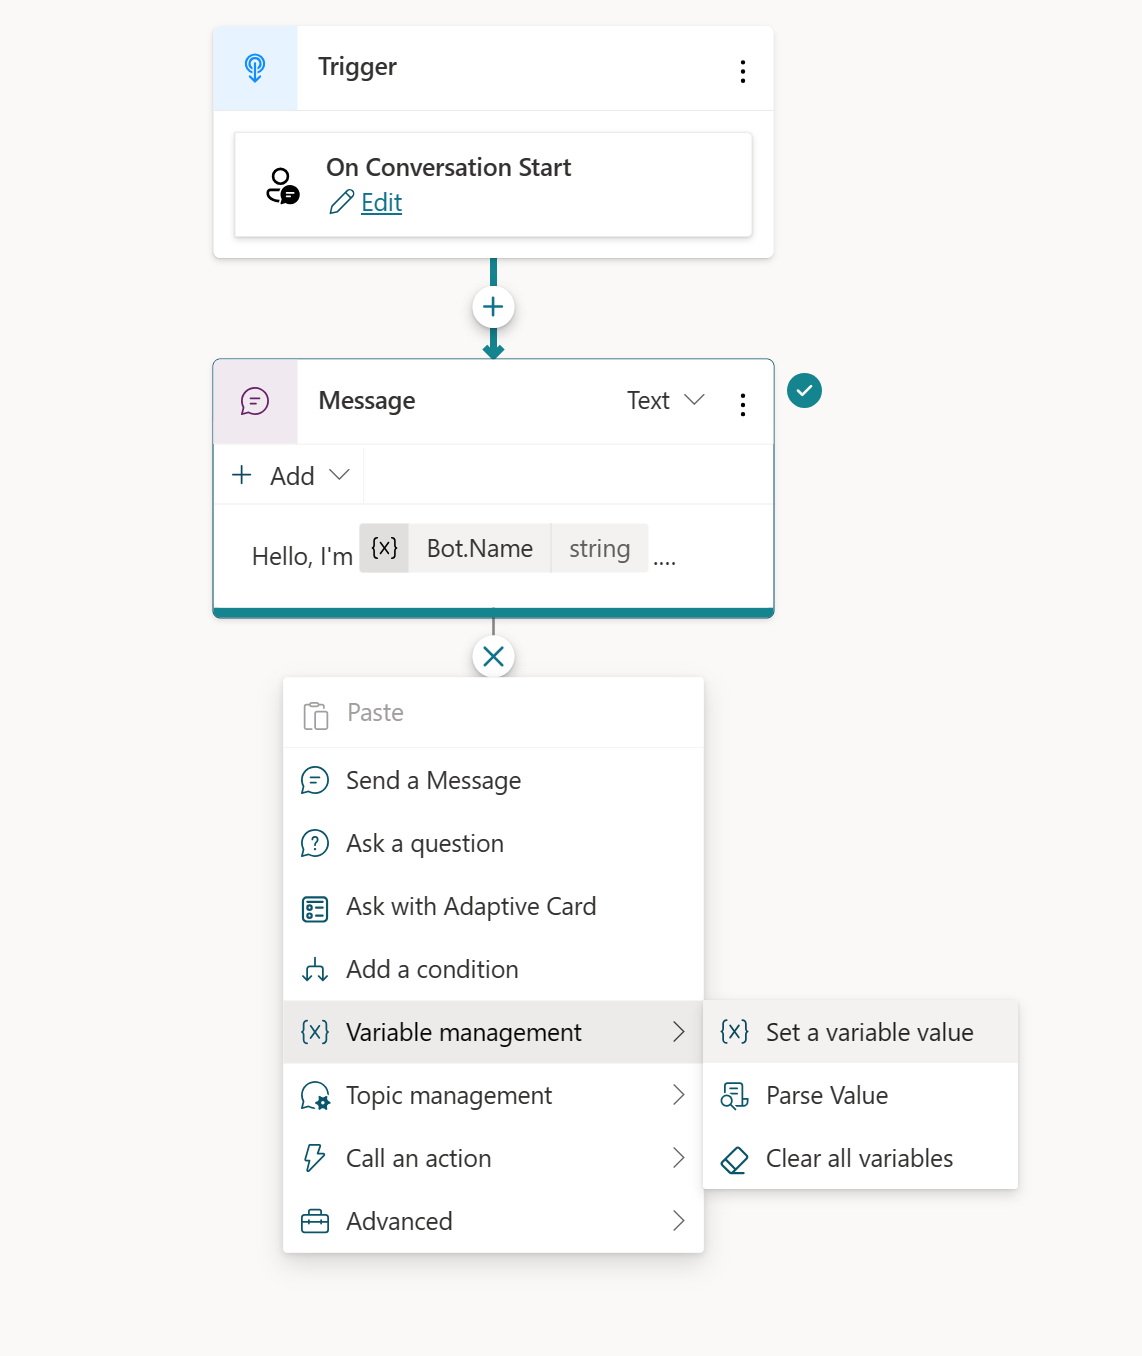
Click on the Conversation Start under System tab
-
Under the Message node click + , and select "Variable managment" then "Set a variable value"
-
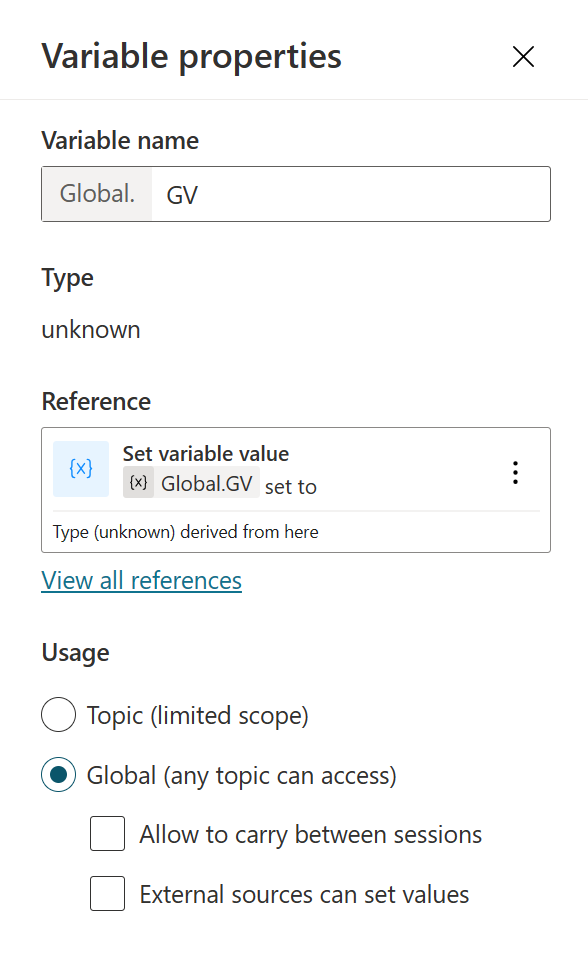
Under Set variable click on the right arrow > , and create a new variable
-
Then at top right of the page click on {x}
-
Select your variable and change the variable name to GV and set the Usage to Global and close the pane
-
set the To value to
[{role: "system",content:"start"}] -
on top right click the save icon to save
-
Go back to Topics , under System click Fallback
-
Delete any nodes under the trigger node then click on +
-
under Call an action select Create a flow , this will take you to the power automate page

-
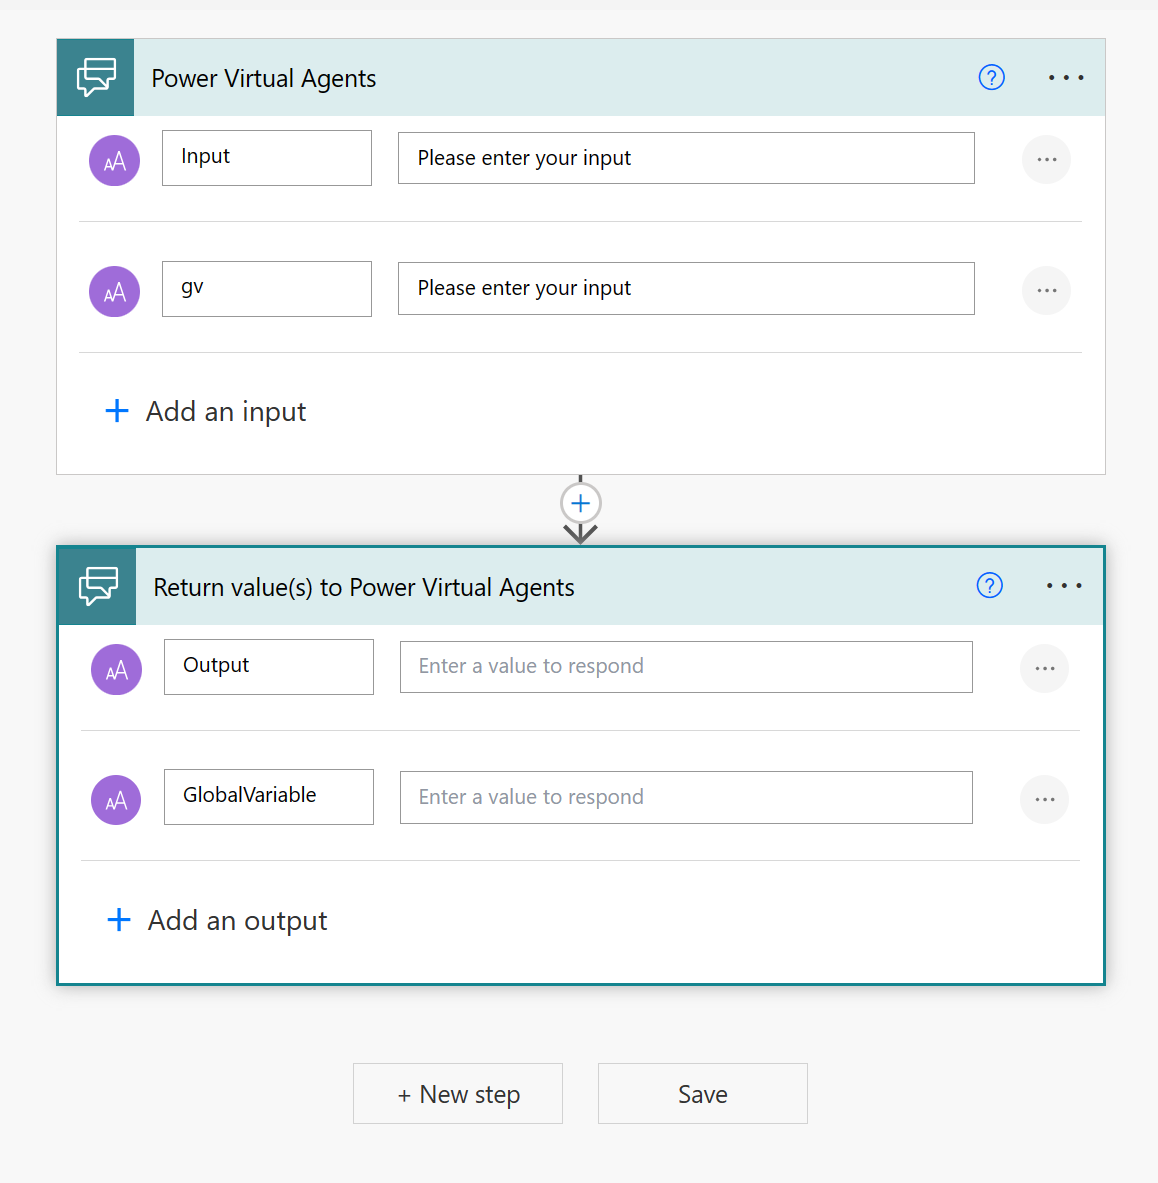
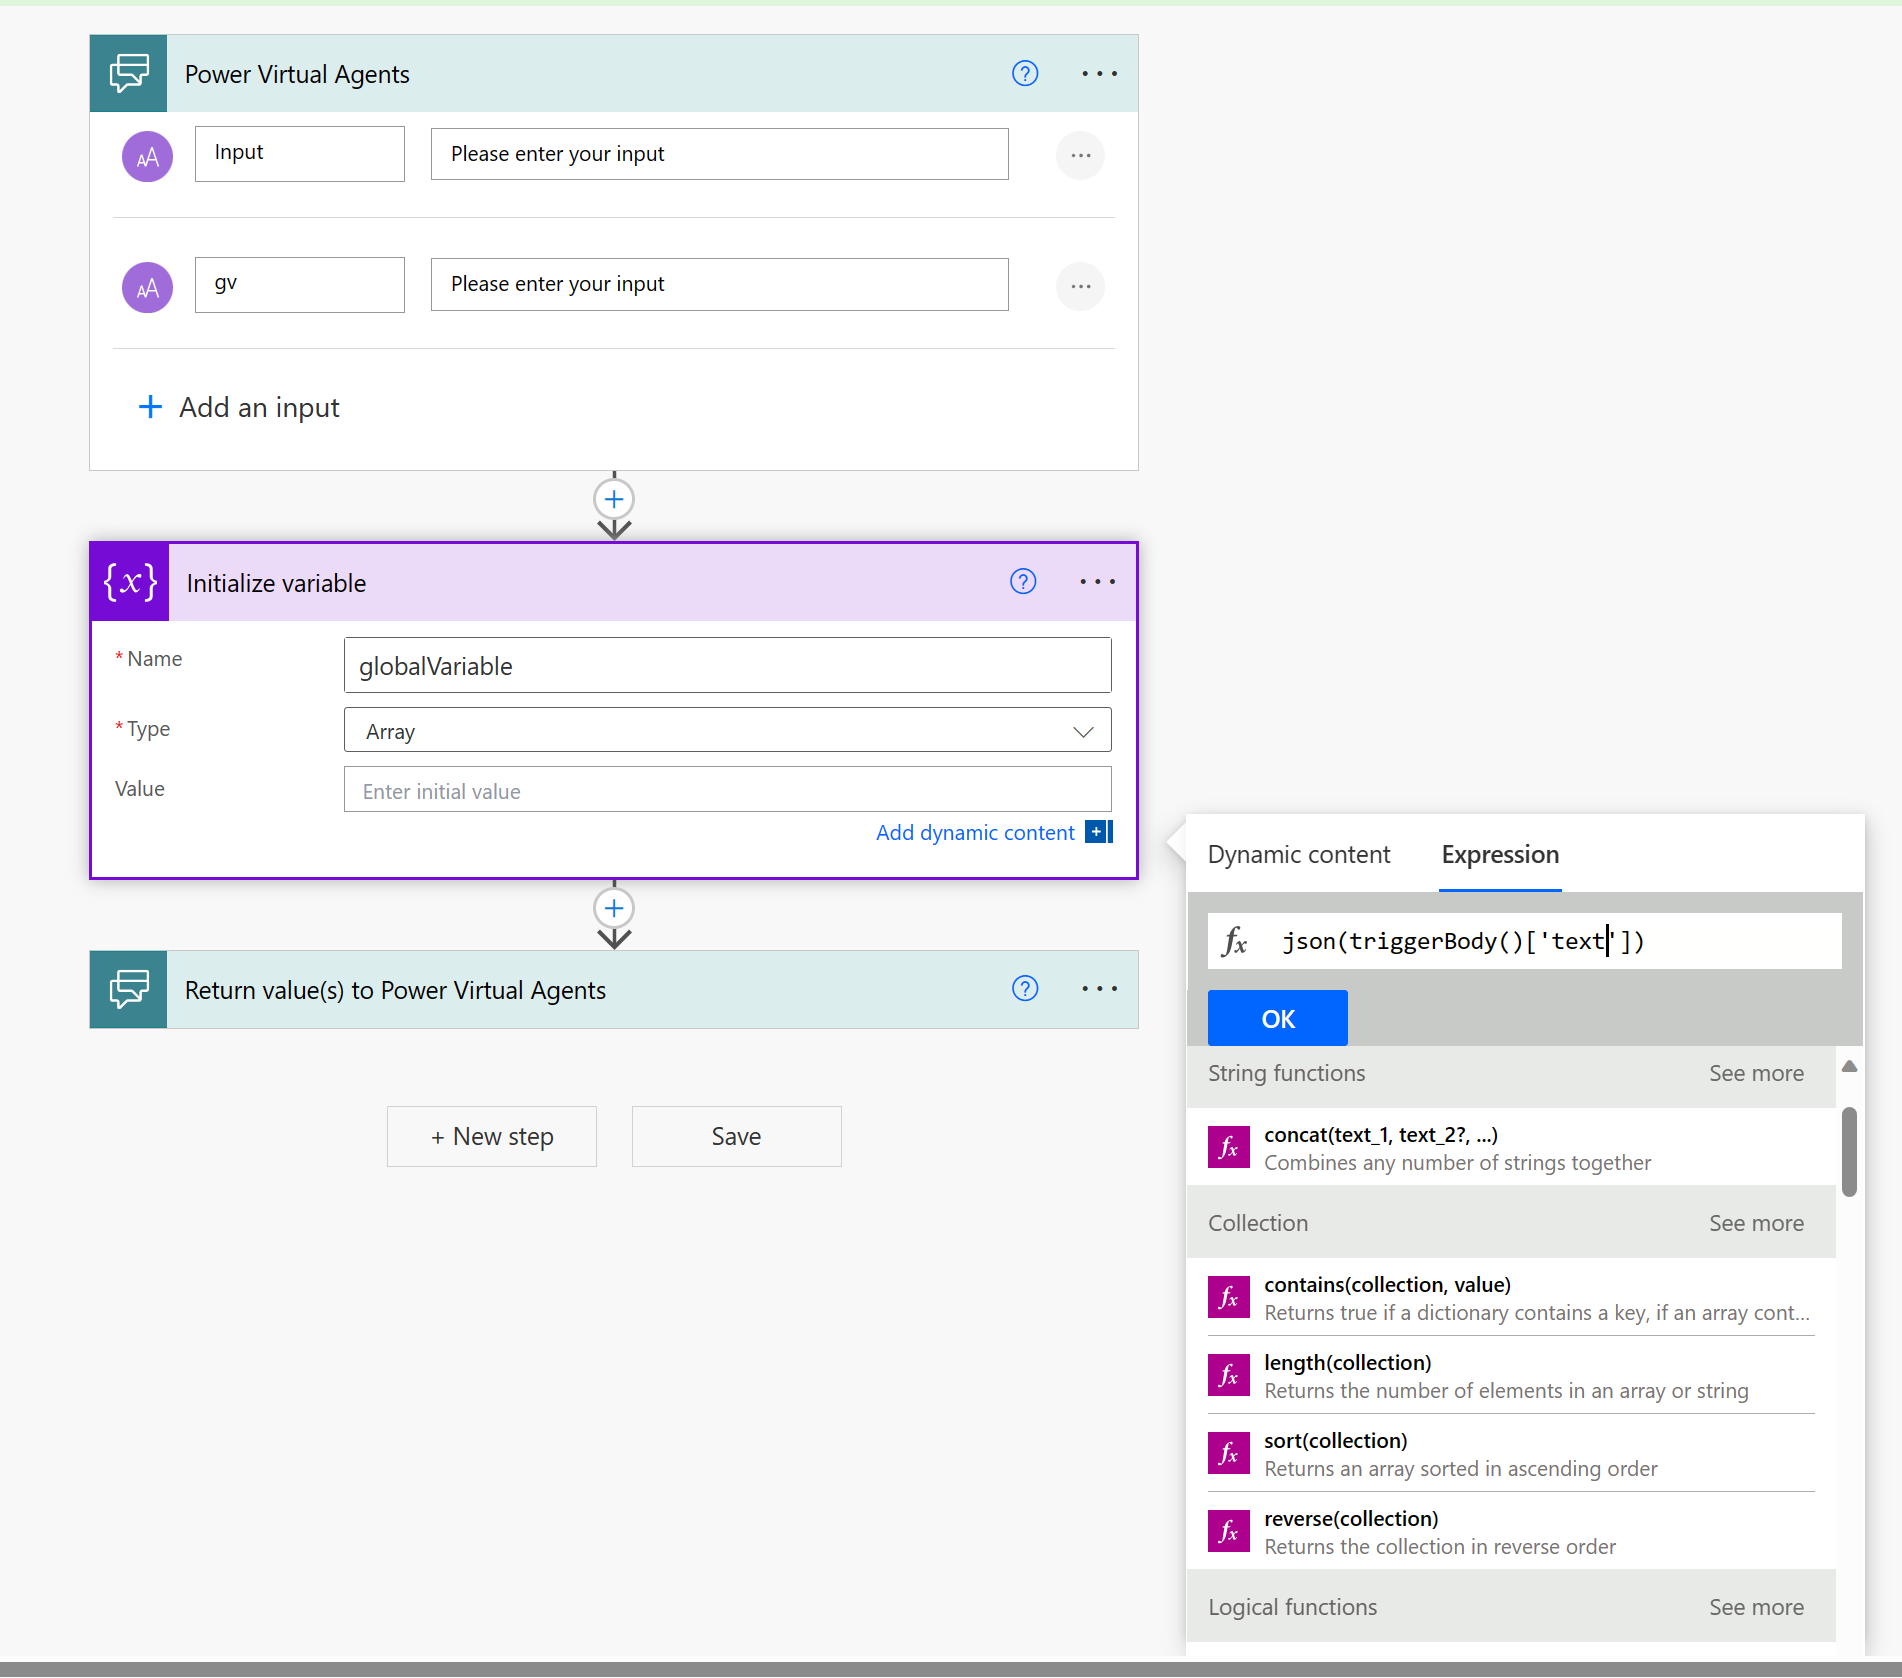
Under Power Virtual Agents click on + Add an Input and choose text , add another one and choose text and change the name to GV.
-
Under Return value(s) to Power Virtual Agents add 2 outputs of type text and change the name of one of those outputs to GlobalVariable
-
After the Input node click on the + and add an action and search for Variable , click on it and then click on "Initialize variable"
-
Set the name to "globalVariable" and the type to Array.
-
Click On the Value field select Expression on the pop up and paste this code
json(triggerBody()['text'])
-
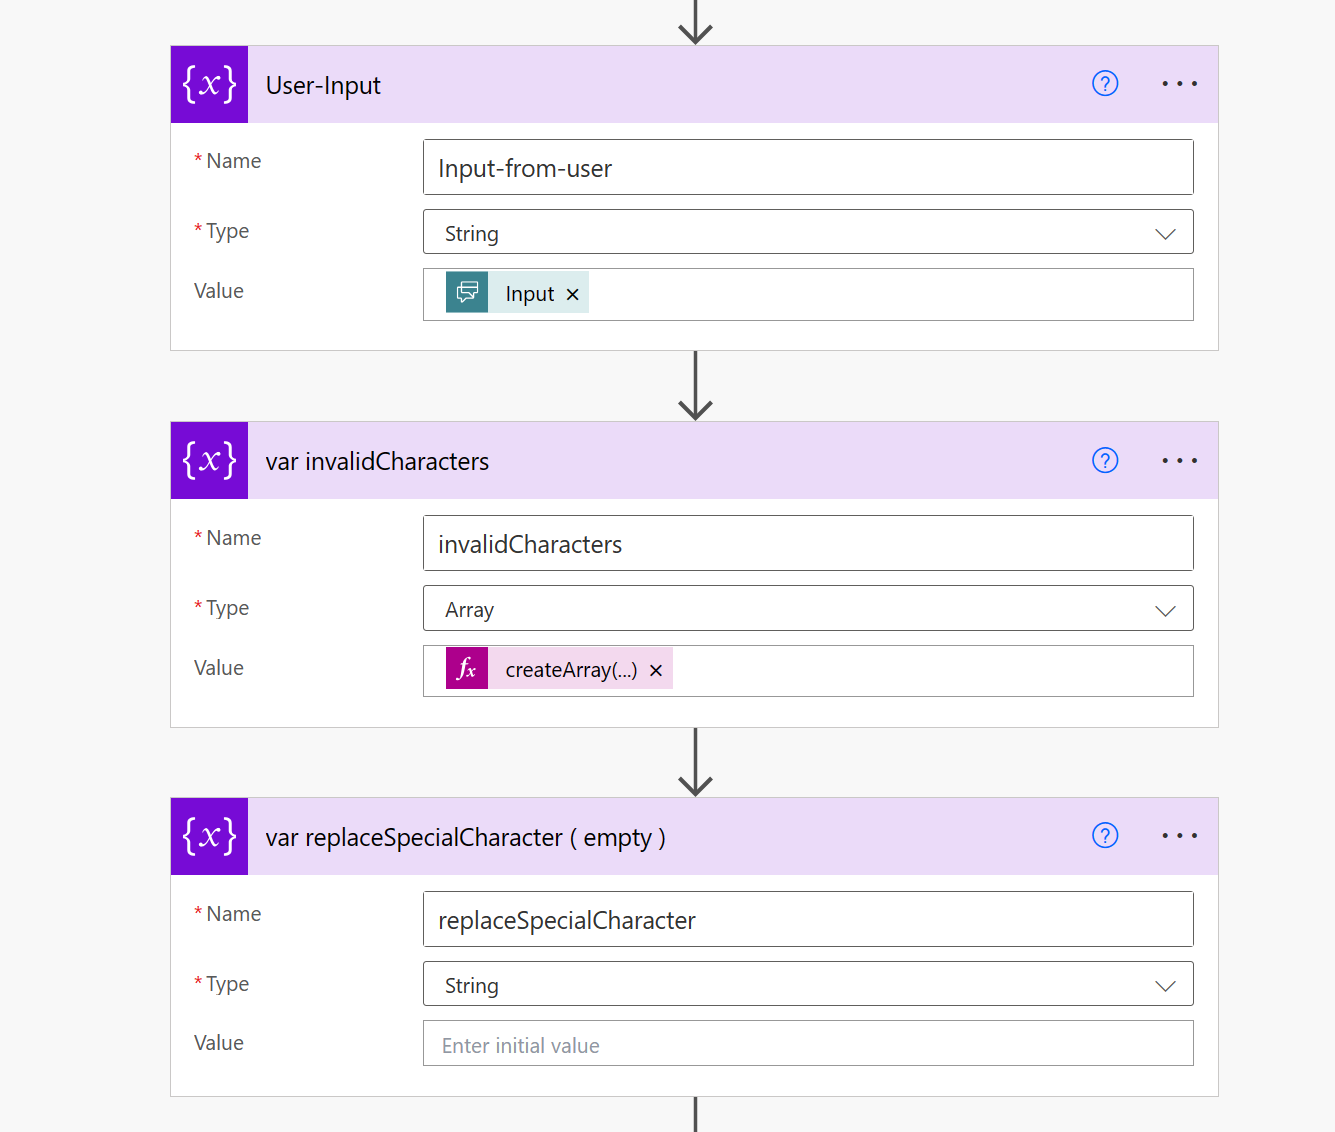
Under Variable Create a "Initialize variable" of type string to store our input from the PVA and name it Input-from-user and set the value to the PVA Input under Dynamic Content.
-
Under Variable Create a "Initialize variable" of type array called invalidCharacters and in value under Expression use this code
createArray(':','{','}','"') -
Under Variable Create a "Initialize variable" of type String call it replaceSpecialCharacter leave the value empty , we need this variable to strore our clean Input.
-
Click on Add an action and search for Conditions and under it select Apply to each
-
On the "Select an output from previous steps" field set the value from the Dynamic Content to invalidCharacter Variable
-
Inside the Apply to Each action create a Set Variable action under Variables and select the replaceSpecialCharacter variable and set the value under expressions to
replace(variables('Input-from-user'),item(),' ') -
Create another Set Variable and select Input-from-user and set the value to replaceSpecialCharacter variable from Dynamic content

-
Now we need to format the User input as JSON and append it to Context/HIstory Array so we can pass the whole context to the OpenAI API.
-
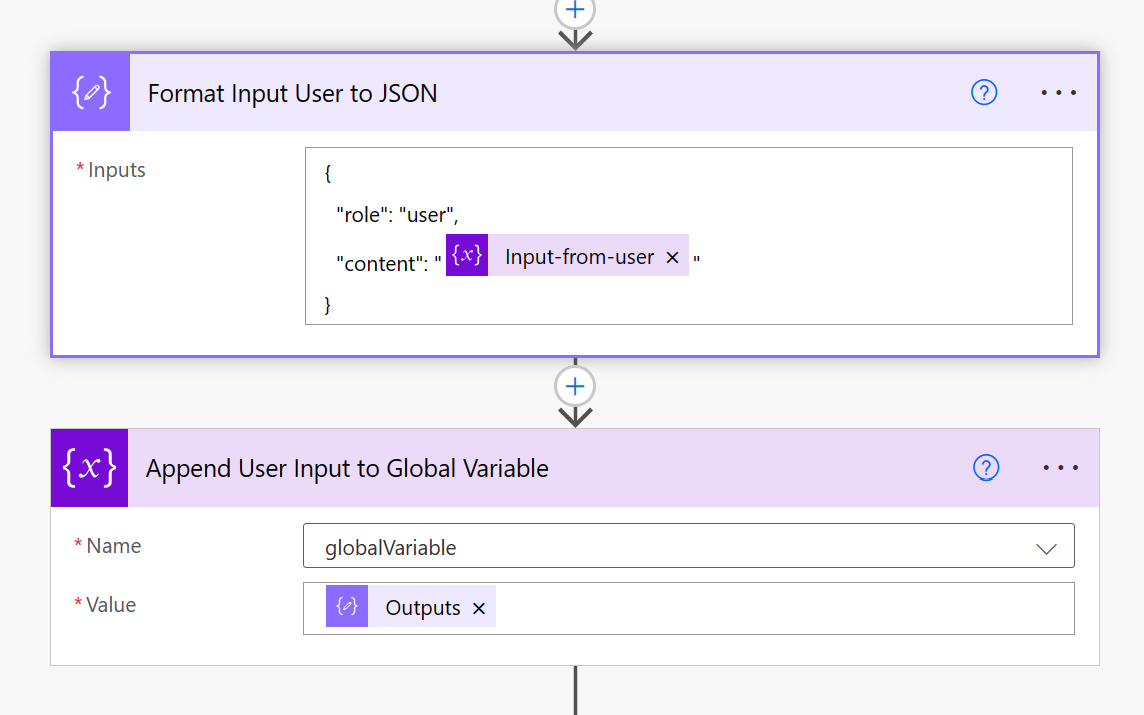
Create and Action and search for Compose
-
Add this to the Inputs
{"role": "user","content": "@{variables('Input-from-user')}"} -
Create Appened to Array variable under Variable action and select the globalVariable array and set the value to the compose output under Dynmaic Content.
-
Now we have all the context we need to call the OpenAI API .
-
Create and action and search for HTTP
-
Set the mothod to POST
-
Set the URL to OpenAI Endpoint we took note of
-
We need to add 2 header
-
key: Content-Type value: application/json
-
key: api-key value: The Key from OpenAI we took note of
-
Under body field add this line :
{
  "messages": @{variables('globalVariable')},
  "temperature": 0.7,
  "top_p": 0.95,
  "frequency_penalty": 0,
  "presence_penalty": 0,
  "max_tokens": 800,
  "stop": null
}
-
After the POST call we will have the OpenAI Result which we need to append to the array to keep track of the context.
-
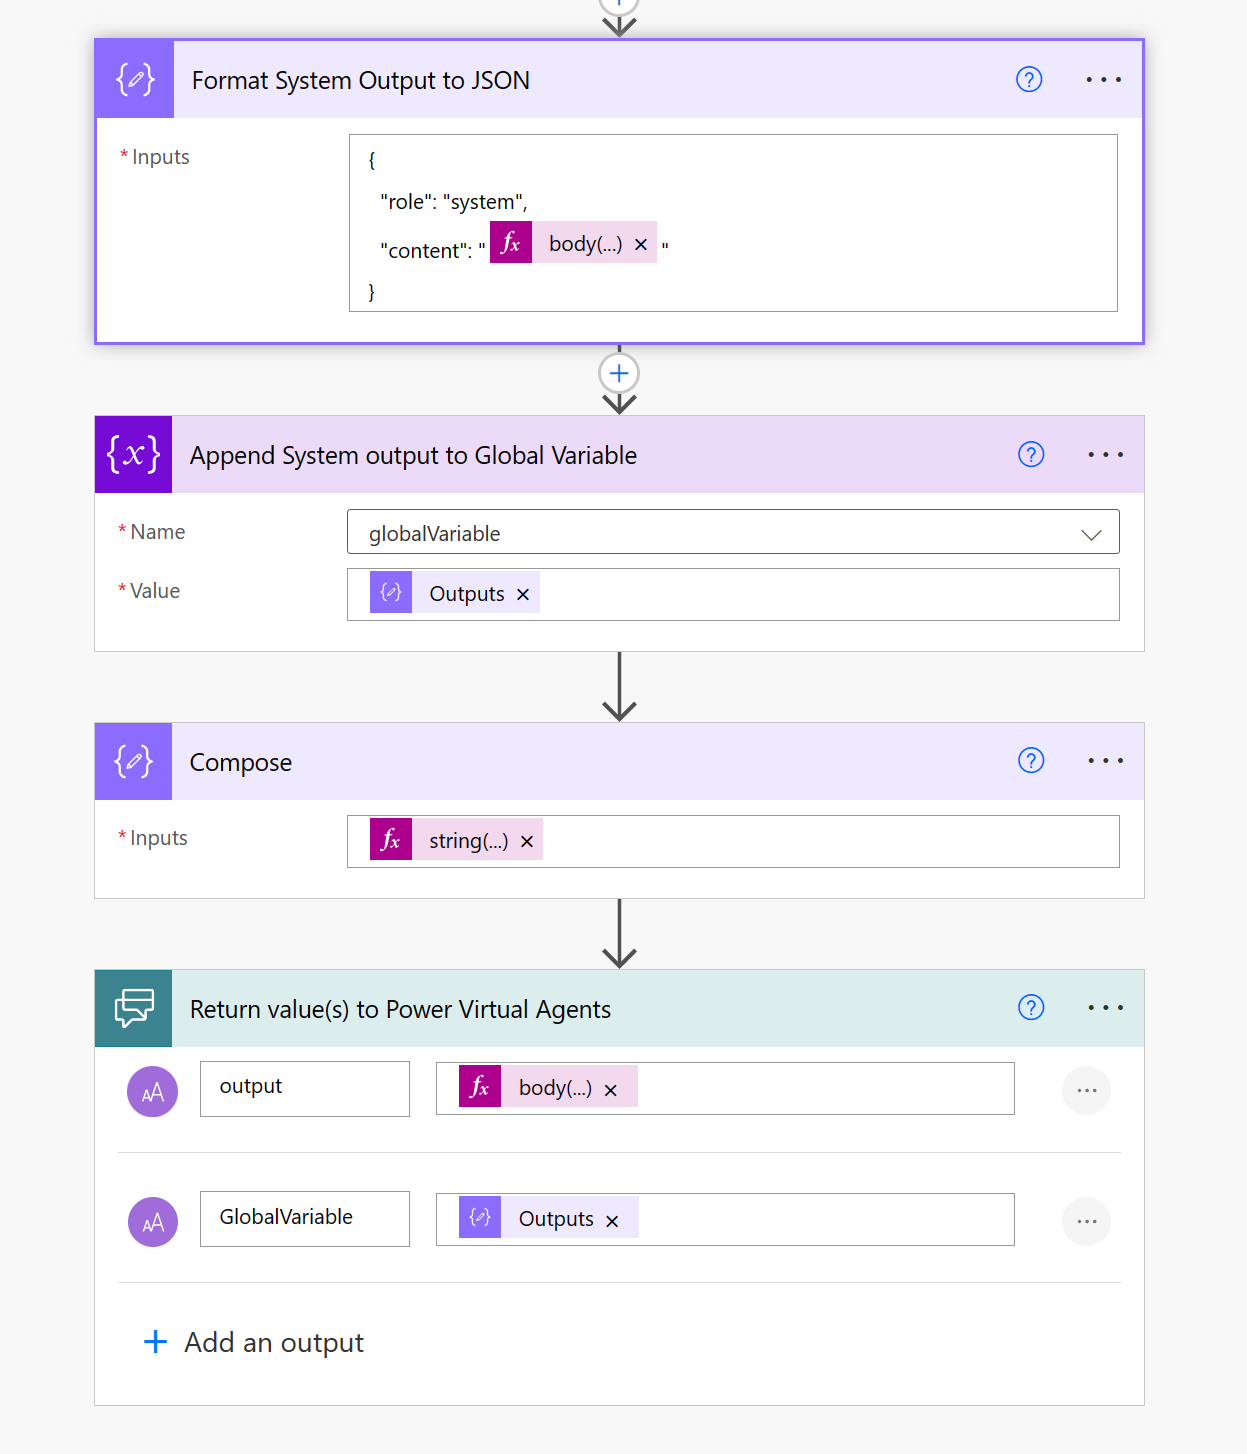
we need to format the result in JSON format to append it.
-
Create action and search for Compose under Data Operation action and set the input to as below:
{
  "role": "system",
  "content": "@{body('HTTP')?['choices'][0]?['message']?['content']}"
}
-
Under Variabe create Append to Array variable and select the globalVariable and set the Value to Compose Output from the previous step
-
To store the History we need to pass the globalVariable to PVA and store it as a Global Variable .
-
Since PVA output accepts only string formt we need to convert the array into a string.
-
Create Compose action and set the Input to
string(variables('globalVariable'))under expressions. -
Under Return value(s) to PVA node
-
Set the output to value to :
body('HTTP')?['choices'][0]?['message']?['content'] -
We are done with the Power Automate part now we need to jump back to PVA.
-
Switch back to PVA and click done if there is a popup .
-
Create a new under call an action , this you will see the created power automate flow.

-
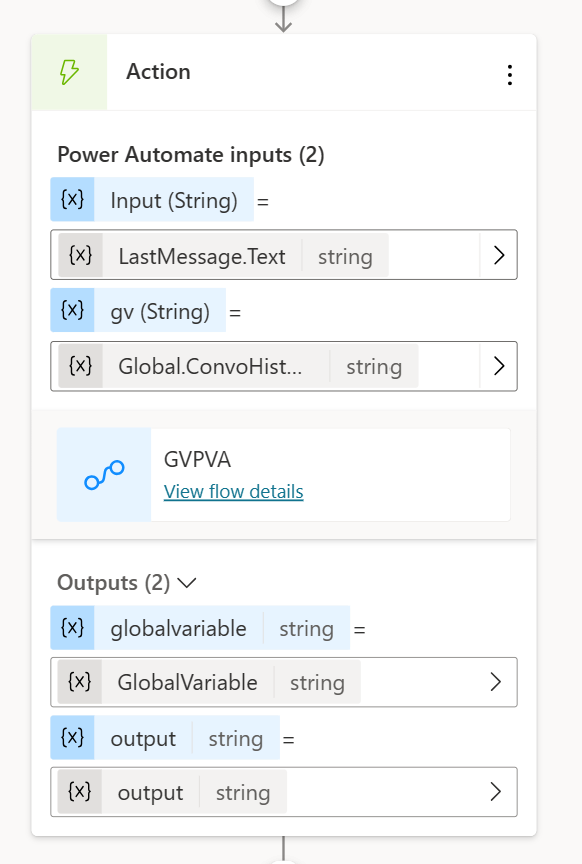
Select the flow and a new node will be created with two inputs and two output.
-
In the first input click on the right arrow >, Under System Select LastMessage.Text
-
In the gv input click on th eright arrow >, Under Custom Select your Global Variable
-
Now create another node , Select Send a message then click the {x} and choose the output variable we got from the flow to show the result to the user.
-
Last Step is to store the Hisory Data in the Global Variable.
-
Create a node and select Set variable value choose the Global Variable we created at begining and set the value to the second output of the flow which in our case it is called GlobalVariable

