A comprehensive README file that covers the steps to clone the project, deploy it on an Ubuntu server with Apache, and secure specific routes with .htaccess password protection:
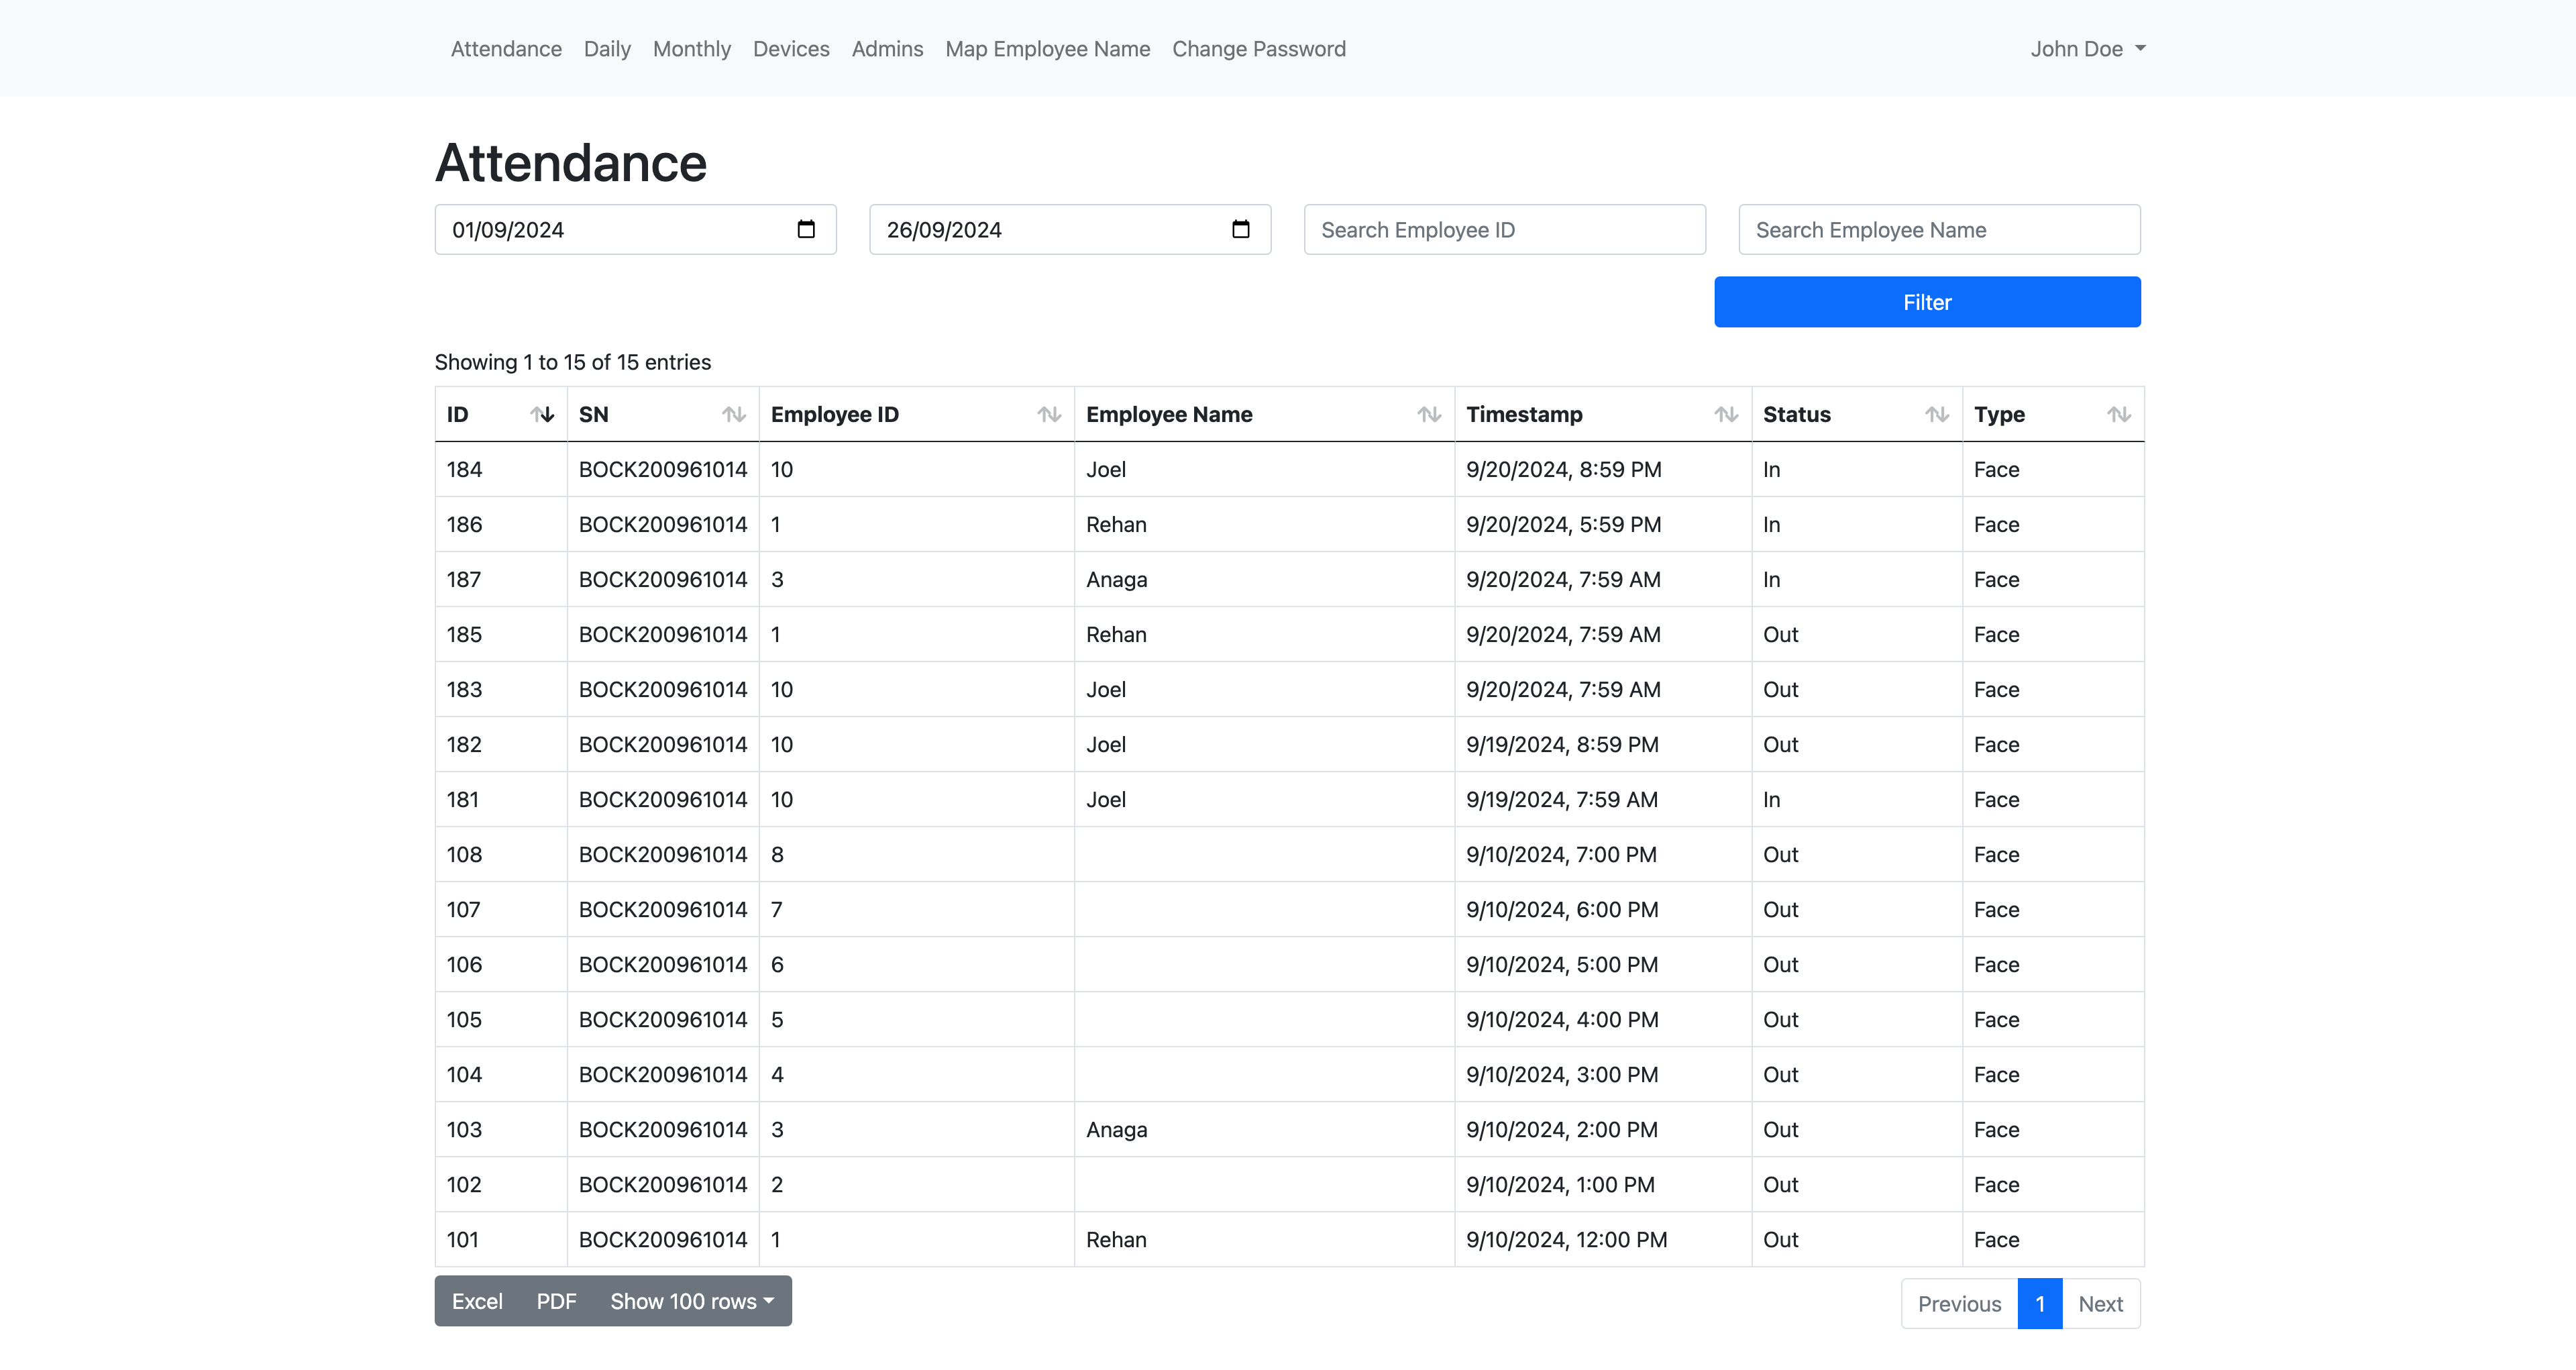
Access is a comprehensive Attendance Device Management System designed to handle biometric and access control data from various devices. This system is built using Laravel, a PHP framework, and provides functionalities to store and manage user and fingerprint data.
- Introduction
- Prerequisites
- Setting up the Server
- Cloning the Repository
- Installing Dependencies
- Configuring the Environment
- Migrating the Database
- Serving the Application
- Deploying to Production
- Troubleshooting
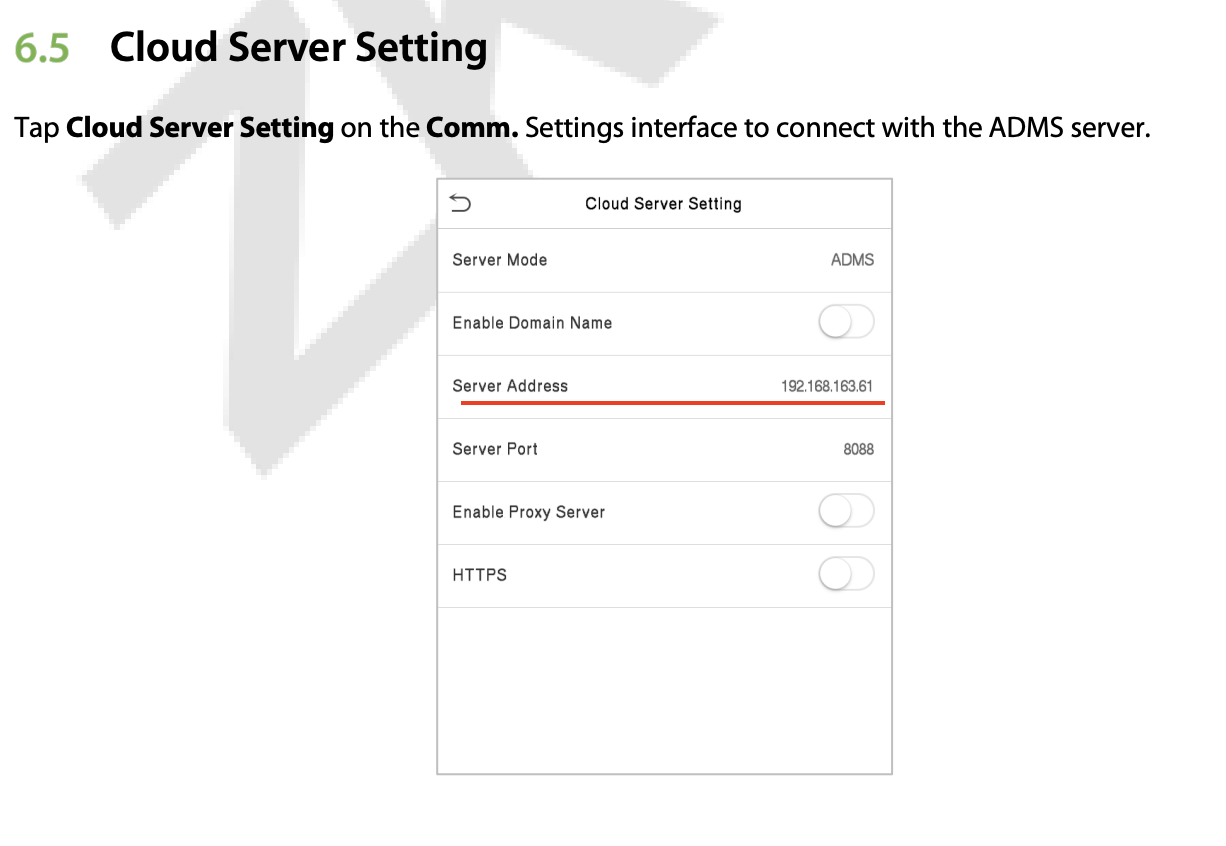
Device Manual: https://catalogoarquitectura.s3.amazonaws.com/media/post_file/Manual-Usuario-Speedface-V5L_TD__91514166-f167-4838-a544-6d948fc6d224.pdf The Access system is designed to work with Zkteco SpeedFace-V5L-RFID devices, which send log data to the application through specific routes. These routes are:
/iclock/cdata/iclock/test/iclock/getrequest
You will need to provide server address to the Zkteco SpeedFace-V5L-RFID device.

But the issue is anyone on the same network can access these routes. To ensure the security and integrity of the data, it is essential to protect these routes from unauthorized access. This is achieved by implementing .htaccess password protection.
Before you begin, ensure you have the following installed on your system:
- Git
- Apache
- PHP
- Node.js
- MySQL
-
Update your package manager:
sudo apt update -
Install PHP and required extensions:
sudo apt install php php-cli php-fpm php-json php-common php-mysql php-zip php-gd php-mbstring php-curl php-xml php-pear php-bcmath -
Verify PHP installation:
php -v
-
Download Composer:
curl -sS https://getcomposer.org/installer | php -
Move Composer to a global location:
sudo mv composer.phar /usr/local/bin/composer -
Verify Composer installation:
composer --version
Install node via NVM (Node Version Manager) Install NVM:
curl -o- https://raw.githubusercontent.com/nvm-sh/nvm/v0.39.3/install.sh | bashLoad NVM and install the latest LTS version of Node.js:
export NVM_DIR="$([ -z "${XDG_CONFIG_HOME-}" ] && printf %s "${HOME}/.nvm" || printf %s "${XDG_CONFIG_HOME}/nvm")"
[ -s "$NVM_DIR/nvm.sh" ] && \. "$NVM_DIR/nvm.sh"
source ~/.bashrc
nvm install --lts
nvm use --lts
nvm alias default 'lts/*'-
Install MySQL:
sudo apt install mysql-server -
Secure the MySQL installation:
sudo mysql_secure_installationFollow the prompts to set a root password and configure other security settings.
-
Verify MySQL installation:
mysql -u root -p
-
Open your terminal and navigate to the directory where you want to clone the project.
-
Clone the repository:
git clone repo_url
cd project_name
-
Install the required PHP dependencies using Composer:
composer install
-
Install the required JavaScript dependencies using npm:
npm install
-
Copy the
.env.examplefile to.env:cp .env.example .env
-
Open the
.envfile and update the following environment variables:DB_CONNECTION=mysql DB_HOST=127.0.0.1 DB_PORT=3306 DB_DATABASE=adms DB_USERNAME=root DB_PASSWORD=your_mysql_password -
Generate key
php artisan key:generate
-
Run the database migrations:
php artisan migrate
-
Start the development server:
php artisan serve
The application should now be accessible at
http://localhost:8000.
-
Update the package manager:
sudo apt update -
Install Apache:
sudo apt install apache2 -
Start Apache and enable it to run on boot:
sudo systemctl start apache2
sudo systemctl enable apache2
-
Create a new Apache configuration file:
sudo nano /etc/apache2/sites-available/your-project-name.conf -
Add the following configuration (replace
your-domain.comwith your actual domain):<VirtualHost *:8080> ServerName your-domain.com ServerAdmin webmaster@your-domain.com DocumentRoot /var/www/your-project-name/public <Directory /var/www/your-project-name/public> Options Indexes FollowSymLinks MultiViews AllowOverride All Require all granted </Directory> ErrorLog ${APACHE_LOG_DIR}/error.log CustomLog ${APACHE_LOG_DIR}/access.log combined </VirtualHost>
-
Enable the new site and disable the default site:
sudo a2ensite your-project-name.conf sudo a2dissite 000-default.conf -
Enable the rewrite module:
sudo a2enmod rewrite -
Restart Apache:
sudo systemctl restart apache2
-
Create a password file:
sudo mkdir /etc/apache2/htpasswd
sudo htpasswd -c /etc/apache2/htpasswd/.htpasswd user1
You'll be prompted to enter and confirm a password for
user1. -
Add more users (if needed):
sudo htpasswd /etc/apache2/htpasswd/.htpasswd admin -
Modify your Apache configuration file:
sudo nano /etc/apache2/sites-available/your-project-name.confAdd the following lines inside the
<Directory>block for the routes you want to protect:<Location "/iclock/cdata"> AuthType Basic AuthName "Restricted Content" AuthUserFile /etc/apache2/htpasswd/.htpasswd Require valid-user </Location> <Location "/iclock/test"> AuthType Basic AuthName "Restricted Content" AuthUserFile /etc/apache2/htpasswd/.htpasswd Require valid-user </Location> <Location "/iclock/getrequest"> AuthType Basic AuthName "Restricted Content" AuthUserFile /etc/apache2/htpasswd/.htpasswd Require valid-user </Location>
This will protect the specified routes (
/iclock/cdata,/iclock/test, and/iclock/getrequest) with the.htaccesspassword, allowing only authorized users to access them..htaccessat project/public directory should look like:<IfModule mod_rewrite.c> <IfModule mod_negotiation.c> Options -MultiViews -Indexes </IfModule> RewriteEngine On # Handle Authorization Header RewriteCond %{HTTP:Authorization} . RewriteRule .* - [E=HTTP_AUTHORIZATION:%{HTTP:Authorization}] # Redirect Trailing Slashes If Not A Folder... RewriteCond %{REQUEST_FILENAME} !-d RewriteCond %{REQUEST_URI} (.+)/$ RewriteRule ^ %1 [L,R=301] # Send Requests To Front Controller... RewriteCond %{REQUEST_FILENAME} !-d RewriteCond %{REQUEST_FILENAME} !-f RewriteRule ^ index.php [L] </IfModule>
-
Restart Apache:
sudo systemctl restart apache2
To add an extra layer of security, the application will be accessible through port 8080 instead of the default port 80.
The endpoint for the Zkteco devices will be in the following format:
username:password@your-domain.com:8080
This ensures that all traffic to the application is routed through Cloudflare, providing additional security and performance benefits.
If you encounter any issues during the deployment process, try the following steps:
-
Check the Apache error logs:
sudo tail -f /var/log/apache2/error.log -
Ensure the
auth_basicmodule is enabled:sudo a2enmod auth_basic sudo systemctl restart apache2 -
Verify that
AllowOverride Allis set in your Apache configuration. -
Test your
.htaccessfile by intentionally adding a syntax error to see if it causes a 500 Internal Server Error.
For more information on Laravel deployment and best practices, refer to the official Laravel documentation.
This project was cloned initially from: https://github.com/saifulcoder/adms-server-ZKTeco
