Small OpenGL based 2D/3D Engine / Wrapper in C++
Supported on GNU/Linux and MacOS
 Simple generated perlin-noise heightmap rendered with normal vectors as colors (Example Program 2)
LINES OF CODE (without unreasonable compression):

	Main File: 188
	Main Classes: 302
	Utility Classes: 775
	Helpers Namespaces: 678
	Core Total: 1265
	Total: 1943

History:
	12. Apr 2020: 885
	29. Apr 2020: 1116
	17. May 2020: 1667
	23. May 2020: 1065
	01. Aug 2020: 1145
	21. Feb 2021: 1378
	27. Jul 2021: 1943
Based on many previous OpenGL projects, I have a good idea of what features I need in an engine to build visually appealing visualizations of generated data. Many of the projects had the same overarching structure, and used the same OpenGL wrapping structures. This engine unifies those basic concepts.
The goal of this "engine" is to act as an intuitive wrapper for boilerplate OpenGL, allowing for quick and easy development of 2D / 3D visualizations of generated data. I also want to keep it as small as possible, giving only necessary abstractions of boilerplate OpenGL code, and doing the rest with user-defined behaviors passed to the engine.
This is also a learning project, for practicing engine / systems design. This is not intended as an optimized game development library, but can be used to generate beatiful visualizations of generated data.
If anybody likes the structure, they are free to adopt it or recommended additions / changes.
As I continue to build projects using this engine, I plan on slowly expanding its feature set, as long as new features fit elegantly into the overall structure and offer a large amount of functionality for little additional effort.
Animated Julia-Set (Example 4). See my blog here.
The main engine interface is wrapped in a namespace Tiny. This namespace has three (global) static members, which are its main component classes:
- View Class (Tiny::view):       Window handling, rendering, GUI interface
- Event Class (Tiny::event):     Event handling for keyboard and mouse, window resizing
- Audio Class (Tiny::audio):     Audio interface for playing / looping sounds
A number of utility classes wrap typical OpenGL features into easily useable structures. These have simple constructors and destructors that wrap the necessary OpenGL so you don't have to worry about it:
- Texture:      OpenGL texture wrapper with constructors for different data types (e.g. algorithm, raw image, ...)
- Shader:       Load, compile, link and use shader programs (vertex, fragment, geometry) easily, pass SSBO.
- Compute:      Derived from Shader, allows for compute shader dispatching
- Model:        OpengL VAO/VBO wrapper. Construct from user-defined algorithm. Handles loading, updating, rendering.
- Target:       OpenGL FBO wrapper. Bind a texture for render targeting. Handles 2D (billboards) and 3D (cubemaps).
- Instance:     OpenGL instanced rendering wrapper (any Model object, any data). Simply add model buffers and render model instanced.
More information can be found on the wiki: Utility Classes
The behavior is combined through a standard game pipeline. The programs behavior is additionally changed through user-defined functions which are called in the relevant parts of the pipeline:
- Tiny::event.handler: 	Lets you define behavior based on user-inputs. Tiny::event stores input data
- Tiny::view.interface: Lets you define an ImGUI interface that can act on your data structures
- Tiny::view.pipeline: 	Combines utility classes to render your data structures to targets / windows
- Tiny::loop: 		Executed every cycle. Arbitrary code acting on your data structures every loop
A number of helper namespaces then supply additional algorithms and functions that are useful.
All of the programs shown below are highly interactive and allow for live manipulation of the scene. All of them run in real time and allow for camera movement. Read the very brief example programs to see how TinyEngine is used to construct nice visualizations using very little code.
 A procedural 3D tree (example program 6), that has a leaf particle system and orthogonal projection shadow mapping.
 A simple scene (example program 9) that uses .obj / .mtl files generated in Blender, and then uses cubemaps for point-light shading.
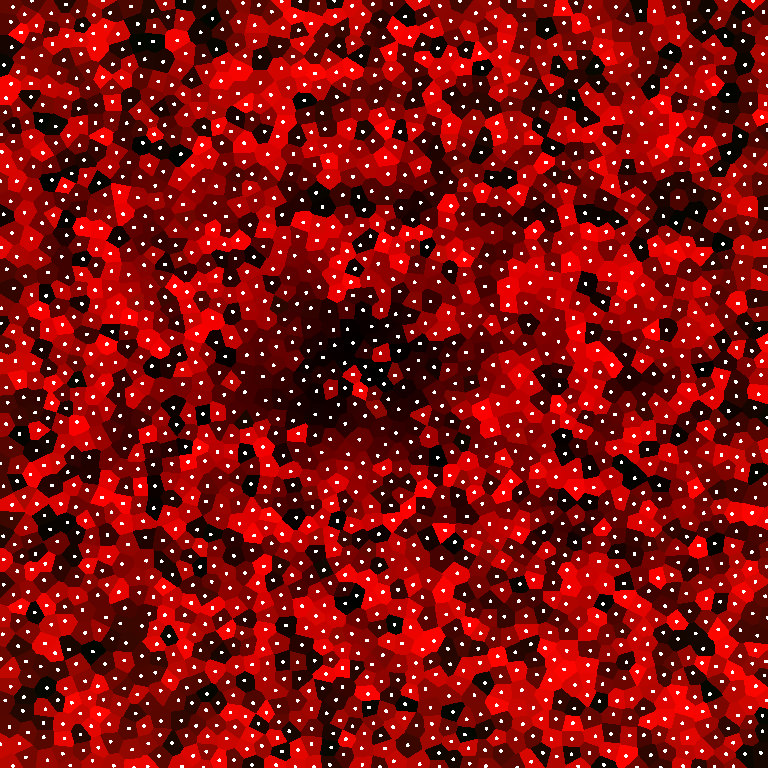
An example image of a shader-based voronoi texture generator I implemented as a small experiment (example program 11). Lets you do real-time voronoi filters because its very fast. Here seen for N = 2048. See my blog here here.
A rendering of a dynamic alpha-blended voxel scene which uses a technique called vertex pooling to reduce driver overhead while drawing. See my blog here
As the code-base is extremely brief, I recommend reading through the code and the example programs to understand how it works. The Wiki contains more information on the individual functions of the classes and how they are used.
Building a program with TinyEngine is extremely simple!
Example Program 0:
#include <TinyEngine/TinyEngine>

int main( int argc, char* args[] ) {

	Tiny::window("Example Window", 600, 400);   //Open Window

	Tiny::event.handler = [&](){ /*...*/ };   //Define Event Handler

	Tiny::view.interface = [&](){ /*...*/ };  //Define ImGUI Interface

	/*...Define Utility Classes...*/

	Tiny::view.pipeline = [&](){ /*...*/ };   //Define Rendering Pipeline

	Tiny::loop([&](){ //Start Main Game Loop
        		//... additional code here
	});

	Tiny::quit(); //Close the window, cleanup

	return 0;
}
Check the TinyEngine Wiki for more information on how to construct a basic program. Read the example programs to see how the utility classes are combined to create interactive 2D and 3D programs using OpenGL in very little code.
As of 2021, TinyEngine is built as a statically linked library for easier inclusion in your project. This has a number of benefits:
- TinyEngine does not need to be copied into your project directory
- Easier continuous maintenance and updating
- Faster compilation times
The installation process occurs in the makefile (valid for all operating systems):
	sudo make setup     #Copy Core Header Files to Install Location
	sudo make helpers   #Copy Helper Headers
	sudo make install   #Compile TinyEngine and Copy to Install Location
	sudo make all       #All of the above! Run this for easy install.
The default install locations are /usr/local/lib for the compiled library and /usr/local/include for the header files.
Check the (brief!) makefile for options (e.g. install location, compiler flags).
Note that the installation has only been tested on GNU/Linux and install locations might need tuning for your system.
Building a project by default only requires inclusion of the TinyEngine header
#include <TinyEngine/TinyEngine>
and optionally any helper namespace headers, e.g.
	//...
	#include <TinyEngine/object>
	#include <TinyEngine/image>
	//...
TinyEngine standalone is linked using:
-lTinyEngine
but also requires linking of all additional dependencies! See the example programs to see exactly how to link the program (makefile). Note that all makesfiles are identical! Different operating systems have slightly different linkage.
Compiled using g++ on Ubuntu 18/20 LTS, Fedora 33 and MacOS Big Sur.
In case your computer / graphics card does not support the latest versions of OpenGL, you can compile your program by defining the additional macro TINYENGINE_COMPATIBILITY, i.e.:
gcc main.cpp -D TINYENGINE_COMPATIBILITY -o main
This will reduce the version to a compatibility version, reducing some features (i.e. lower GLSL versions), but allowing for 95% of all features to operate normally.
Note that some examples rely on features introduced in OpenGL4+, meaning that the required version of GLSL will not be available. All example programs are reduced to the minimum necessary version.
Currently TinyEngine has only been tested on linux (Ubuntu 18 LTS, Fedora 33) and MacOS. It would be possible to port to windows, but I lack a dedicated windows development environment to reliably port it. I might do this in the future.
- OpenGL3: apt-get install libglu1-mesa-dev
- SDL2:    apt-get install libsdl2-dev libsdl2-ttf-dev libsdl2-mixer-dev libsdl2-image-dev
- GLEW:    apt-get install libglew-dev
- Boost:   apt-get install libboost-system-dev libboost-filesystem-dev
- GLM:     apt-get install libglm-dev

- DearImGUI (already included!)
- g++ (compiler)
In a single command:
sudo apt-get install libglu1-mesa-dev libsdl2-dev libsdl2-ttf-dev libsdl2-mixer-dev libsdl2-image-dev libglew-dev libboost-system-dev libboost-filesystem-dev libglm-dev
For systems with dnf as package manager, the dependencies can be installed using:
sudo dnf install make gcc-c++ glew-devel SDL2-devel SDL2_image-devel SDL2_ttf-devel SDL2_mixer-devel boost-devel glm-devel
To install on MacOS, you need to install xcode commandline tools:
sudo xcode-select --install
Then, to install the dependencies, I recommend installing homebrew from here and installing the packages:
brew update
brew upgrade
brew install glew sdl2 sdl2_image sdl2_mixer sld2_ttf glm boost
Note that MacOS only supports a specific OpenGL version, giving access to GLSL versions 330 to 410 (including core profiles). This affects which examples can be run, depending on what GLSL versions they need. Be aware of this when writing your own programs. (Credit: User CodingWatching)
I am currently working on an elegant windows port. Stay tuned.
MIT License


