Having had to repeat the process of firing up a new python dev station on a new Macbook Pro, thought I'd put the instructions out there for others to follow.
NOTE: Implemented on fresh MacBook Pro (Apple M3 Pro) on Sonoma 14.2.
My approach to setting up a Macbook Pro for data science using Python involves
installing Python-dot-org Pythons, and using pip to install any packages I
may need. While this makes Python 3.11 available globally, it won't
touch the core Python installation that is used by the MacOS.
Over the years, I have tried to use installation methods involving macports,
conda, and brew. I found it all a bit cumbersome, and each time I would
attempt to follow past instructions I had saved for myself, I wasn't successful.
Also given I use IntelliJ to test GitHub projects across multiple Python 3.x
versions, this approach just works better as I can have 3.7, 3.8, ..., 3.12
Python-dot-org Pythons installed.
As well, there have been very few situations in the last decade where I really felt the need to set up two separate python environments, e.g., TensorFlow 1.x vs TensorFlow 2.x. So I will only set up virtual environments as needed (See Creating Virtual Environments)
Download the latest desired version of Python 3.xx and run the package installer: Python 3.11.7
You should now have python3 alias pointing at the installed 3.xx python
binaries:
$ which python3
/Library/Frameworks/Python.framework/Versions/3.11/bin/python3

$ python3
Python 3.11.7 (v3.11.7:fa7a6f2303, Dec  4 2023, 15:22:56) [Clang 13.0.0 (clang-1300.0.29.30)] on darwin
Type "help", "copyright", "credits" or "license" for more information.
>>>
You may need to install a set of current SSL root certificates after the python installation process (did I miss this in the package installer process?). I came across this error when running the rpy2 demo on Colab below.
$ /Applications/Python\ 3.11/Install\ Certificates.command ; exit;Almost always is the case that you will need to upgrade pip after installing python, so do this by default now.
$ pip3 install -U pip

$ pip3 list | grep "pip"
Package                       Version
----------------------------- ----------
pip                           23.3.1
Ensure at this point that you find the following:
$ which pip3
$ which python3

/Library/Frameworks/Python.framework/Versions/3.11/bin/pip3
/Library/Frameworks/Python.framework/Versions/3.11/bin/python3
NOTE: We will be using
pip3anywhere we mention usingpip.
When it comes time to upgrade Python-dot-org Pythons, consider using pymac which allows you to upgrade to the micro versions, i.e. 3.11.7 to 3.11.8. I'll update this document when 3.11.8 is actually released, if at all.
Installing Jupyter is a pretty simple process, just use pip to install,
and launch directly:
$ pip3 install -U jupyter

$ jupyter notebook
We can customize the notebook config to use a specific directory, and even set which port we intend to launch Jupyter on. Use the following command to launch Jupyter now:
$ jupyter notebook \
  --NotebookApp.allow_origin='' \
  --port=8889 \
  --notebook-dir='/Users/marksusol/DataScience/' \
  --allow-root \
  --NotebookApp.token='' \
  --NotebookApp.disable_check_xsrf=True \
  --NotebookApp.port_retries=0 > /tmp/jupyter.log 2>&1
port: I purposely chose to use a non-default
port=8889as often another process will try to useport=8888, so I avoid the port collision this way.allow_origin: Don't use
'*'to allow any origin to access your server.
In the event, you close the Terminal window from which you launched Jupyter and need to shut it down, you will need to find the process ID for the job and kill it directly.
$ lsof -t -i:8889 | xargs kill -9Create a new notebook in Jupyter, and in a code block ensure that Jupyter is in fact running off our Python-dot-org Python as we see in shell.
You will now be able to directly use pip in Jupyter to update packages as
needed. See the example code block to install missing tensorflow package
directly from a notebook.
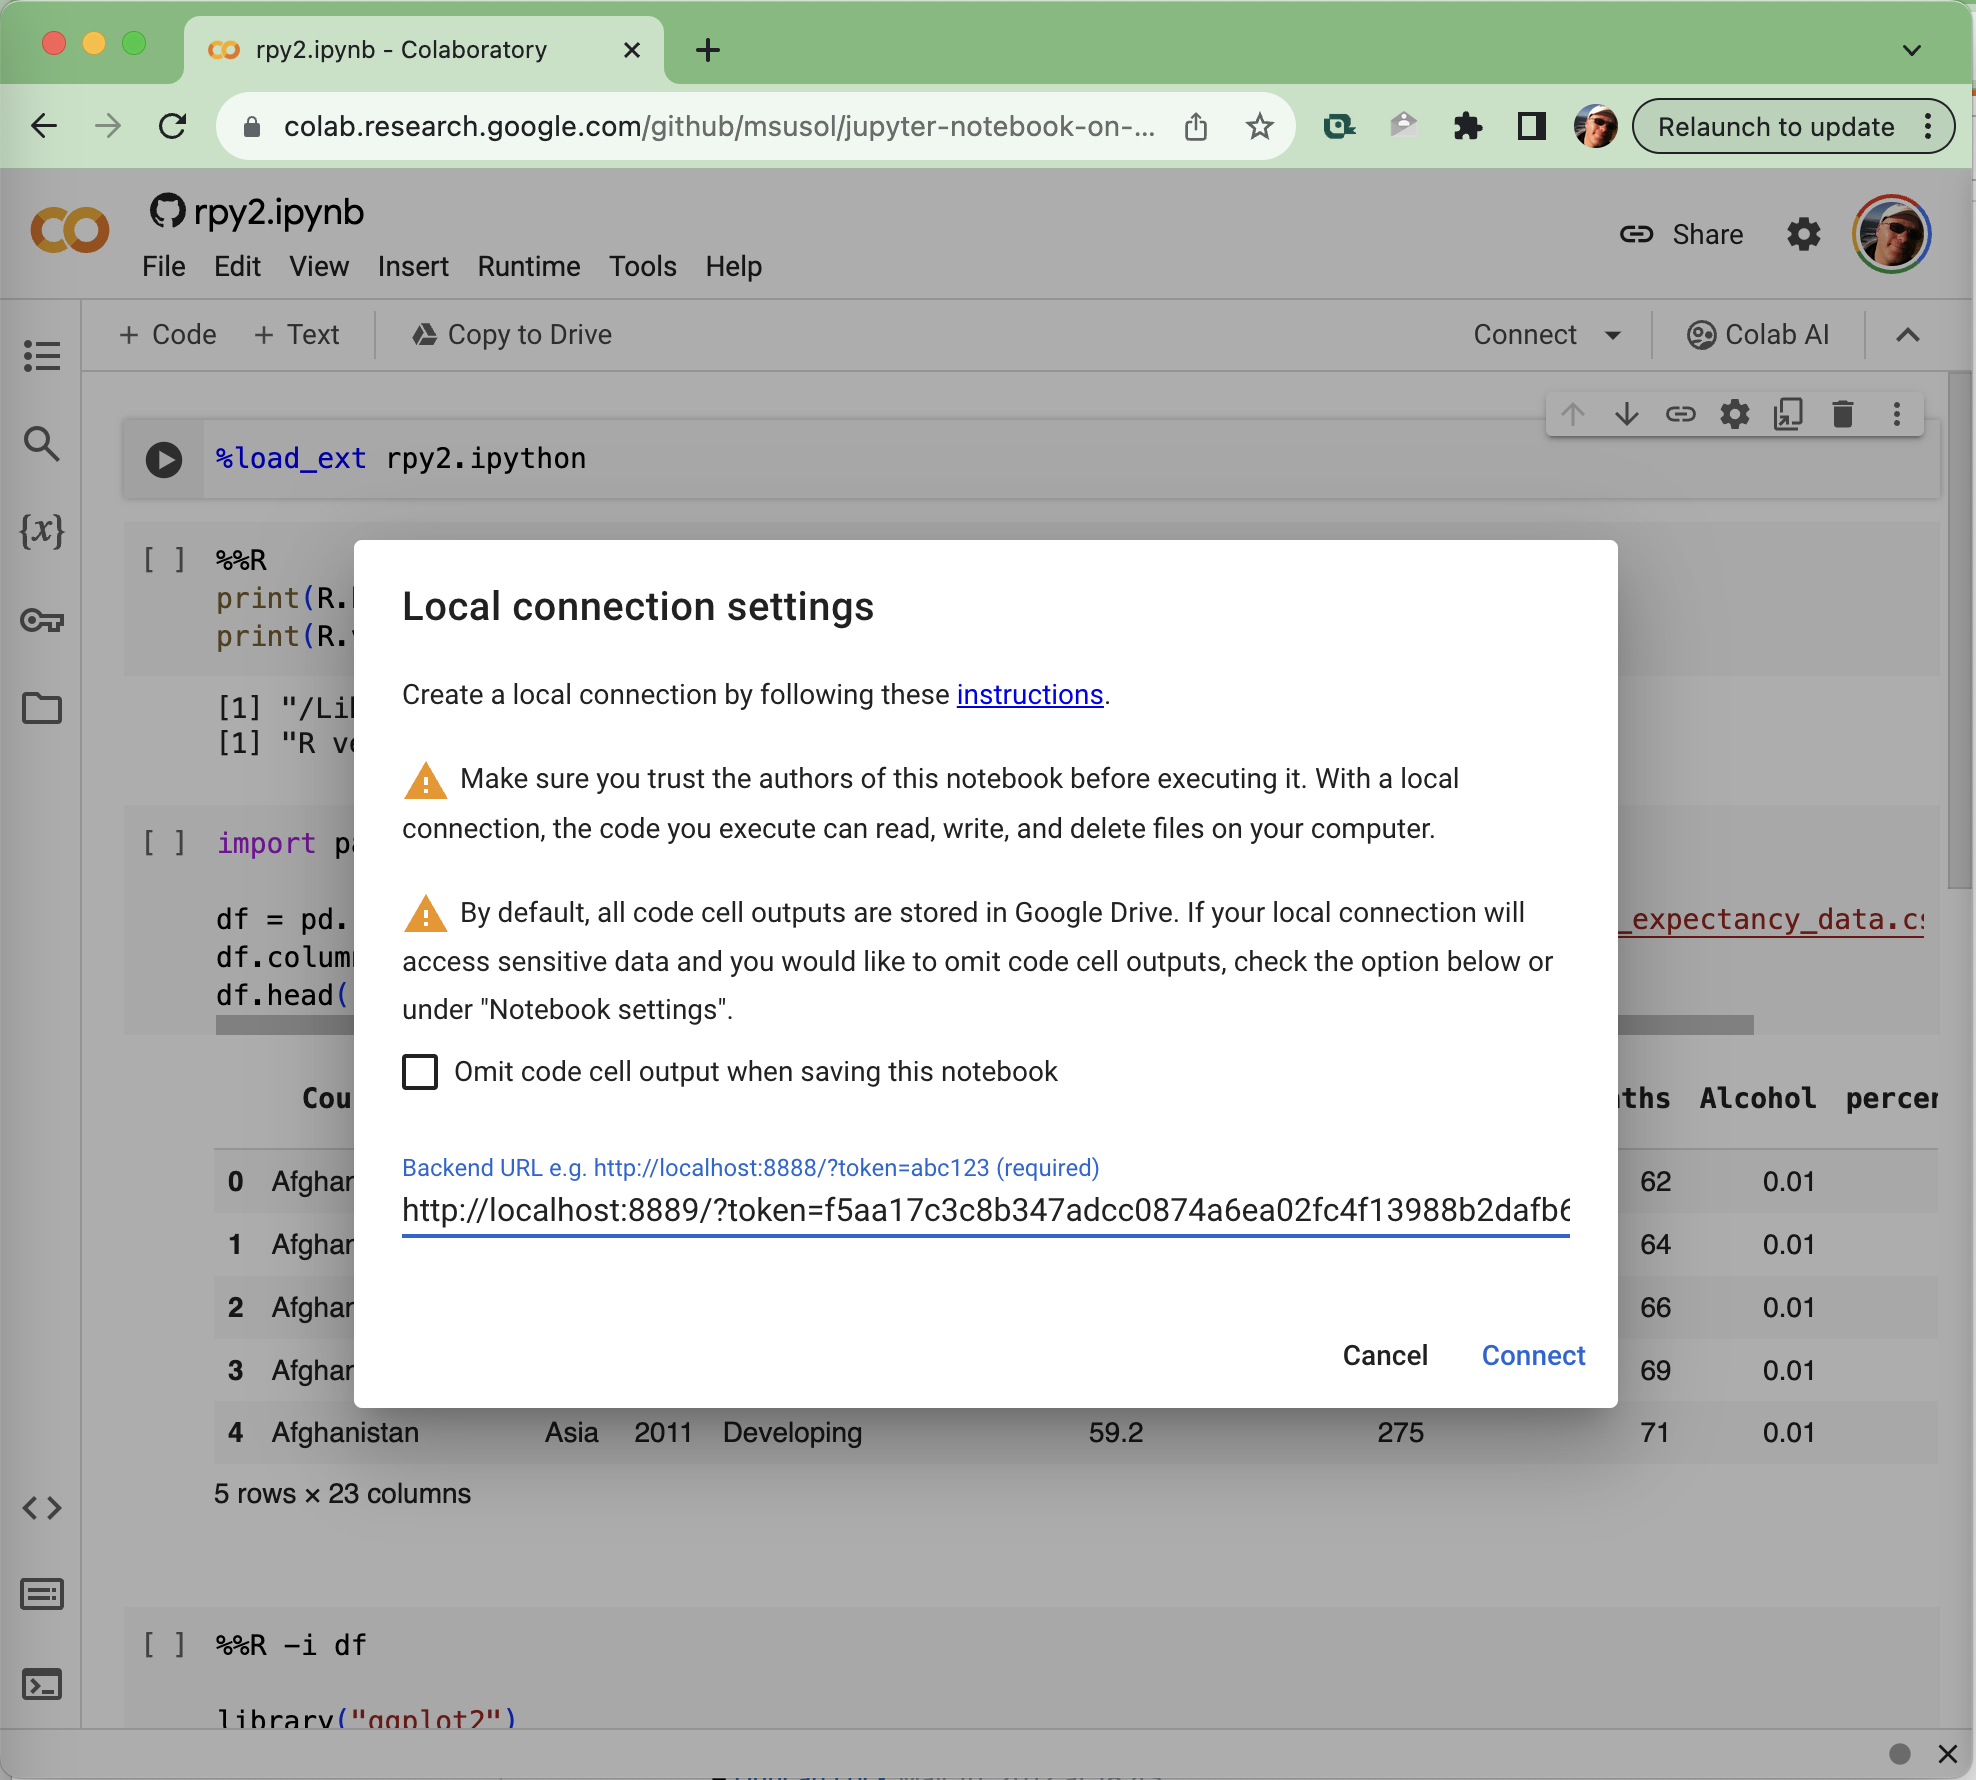
!pip3 install -U tensorflowGoogle's Colab will let you connect to a local runtime. This allows you to execute code on your local hardware using the Colab UI at colab.research.google.com.
The only change to the command above it to modify --NotebookApp.allow_origin
to permit Colab to access your local kernels.
$ jupyter notebook \
  --NotebookApp.allow_origin='https://colab.research.google.com' \
  --port=8889 \
  --notebook-dir='/Users/marksusol/DataScience/' \
  --allow-root \
  --NotebookApp.token='' \
  --NotebookApp.disable_check_xsrf=True \
  --NotebookApp.port_retries=0 > /tmp/jupyter.log 2>&1
Now open colab.research.google.com and connect to our local runtime.
WARNING: Make sure you trust the authors of any notebook before executing it. With a local connection, the code you execute can read, write, and delete files on your computer.
In order to make our lives easier when launching Jupyter, let's create a shell
script to run the jupyter notebook command with all the desired flags above.
Create jupyter_notebook.sh as follows:
#!/bin/zsh

jupyter notebook \
  --NotebookApp.allow_origin='https://colab.research.google.com' \
  --port=8889 \
  --notebook-dir='/Users/marksusol/DataScience/' \
  --allow-root \
  --NotebookApp.token='' \
  --NotebookApp.disable_check_xsrf=True \
  --NotebookApp.port_retries=0 > /tmp/jupyter.log 2>&1;
Now, in your terminal of choice, run the shell command as follows:
$ sh jupyter_notebook.shSUGGEST: Create an alias to call your script from anywhere.
~ % echo "alias jupyter_notebook.sh='sh \
/Users/marksusol/DataScience/GitHub/msusol/jupyter-notebook-on-macos/jupyter_notebook.sh'" >> ~/.zshrc
~ % source ~/.zshrc
~ % jupyter_notebook.sh
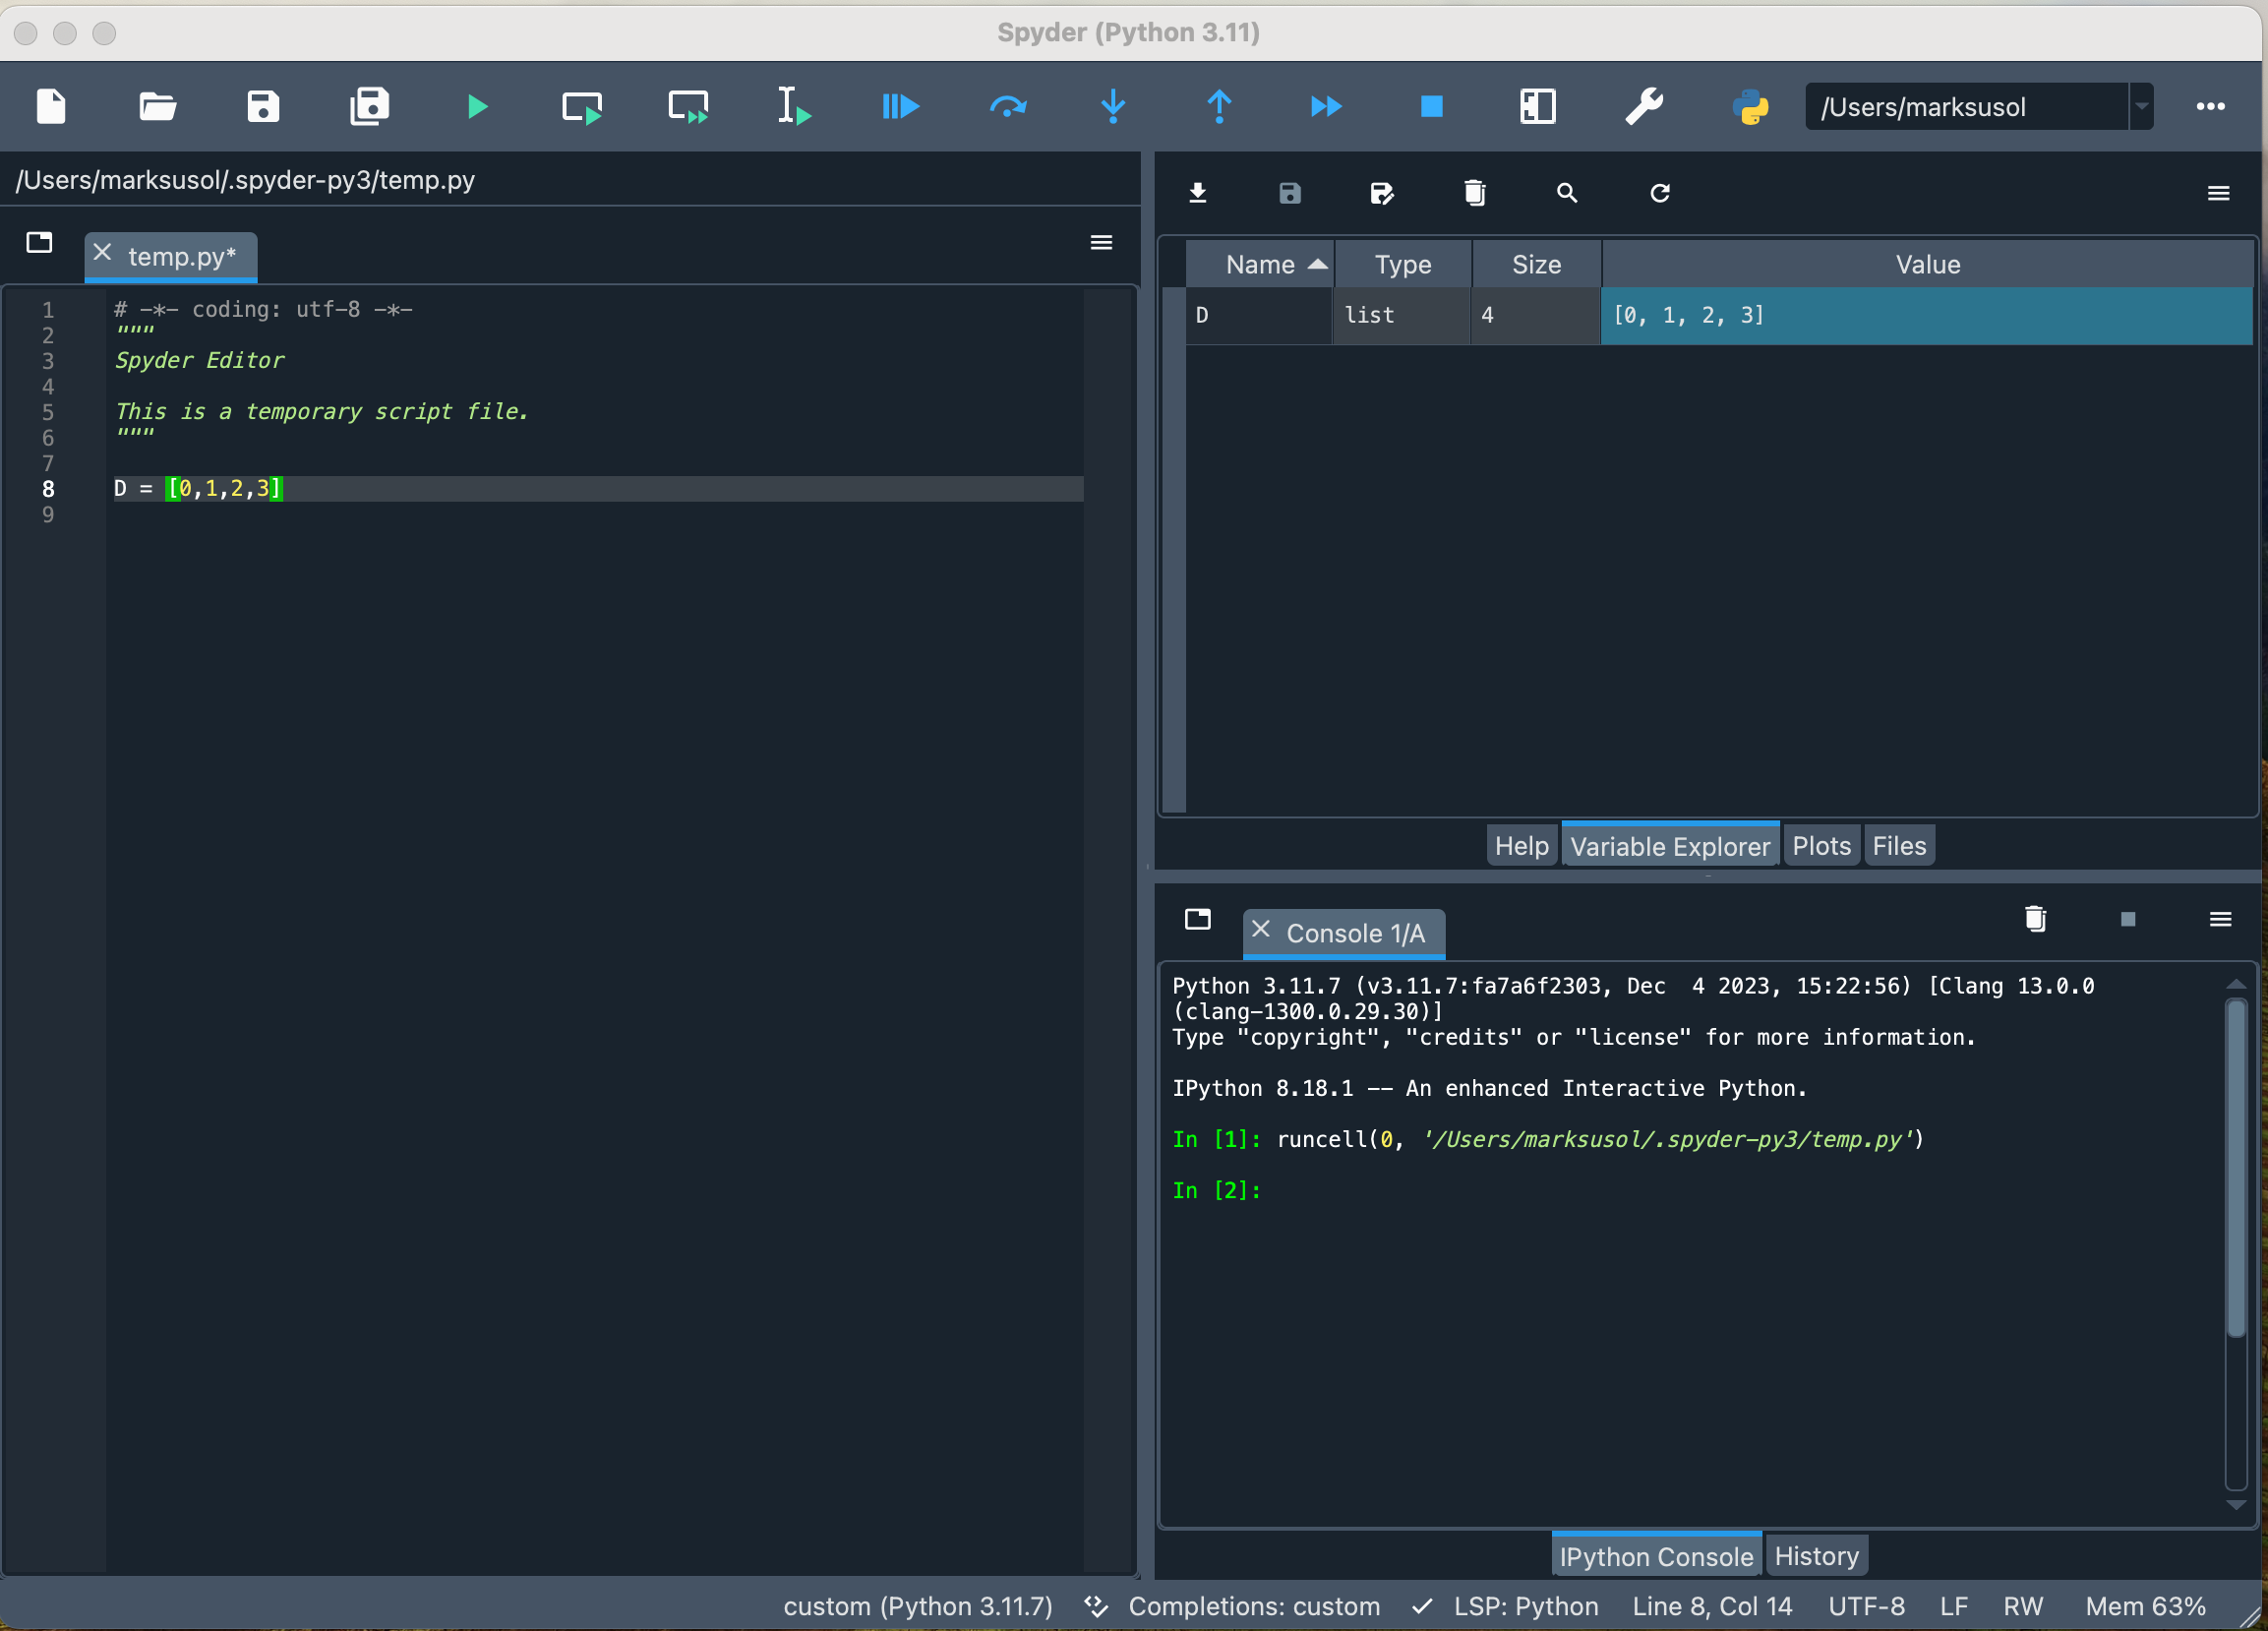
The Scientific Python Development Environment | Spyder-IDE.org
Install the IDE and open from terminal:
$ pip3 install -U spyder
$ pip3 install -U spyder-notebook

$ spyder
The Spyder app will run but be title 'Python' instead.
NOTE: If you were to install Spyder from the
Spyder.dmgfile on the site, it will install python 3.7. If you were to try and point to our newly installed python 3.11 interpreter, it will give you errors like:
incompatible architecture (have 'arm64', need 'x86_64')
Download and run the appropriate package installer for R from
CRAN.
For Apple Silicon (M1/M2/M3) Macs: R-4.3.2-arm64.pkg
Run the code below from the command line to install the IRkernel for
Jupyter. It starts up R, installs the adapter between Jupyter and R (a kernel), and then exits.
$ R -e "install.packages('IRkernel', repos = 'http://cran.us.r-project.org');IRkernel::installspec()"Now when you open Jupyter you can create new R notebooks, and even switch between kernels!
$ jupyter kernelspec list
...
Available kernels:
  ir         /Users/marksusol/Library/Jupyter/kernels/ir
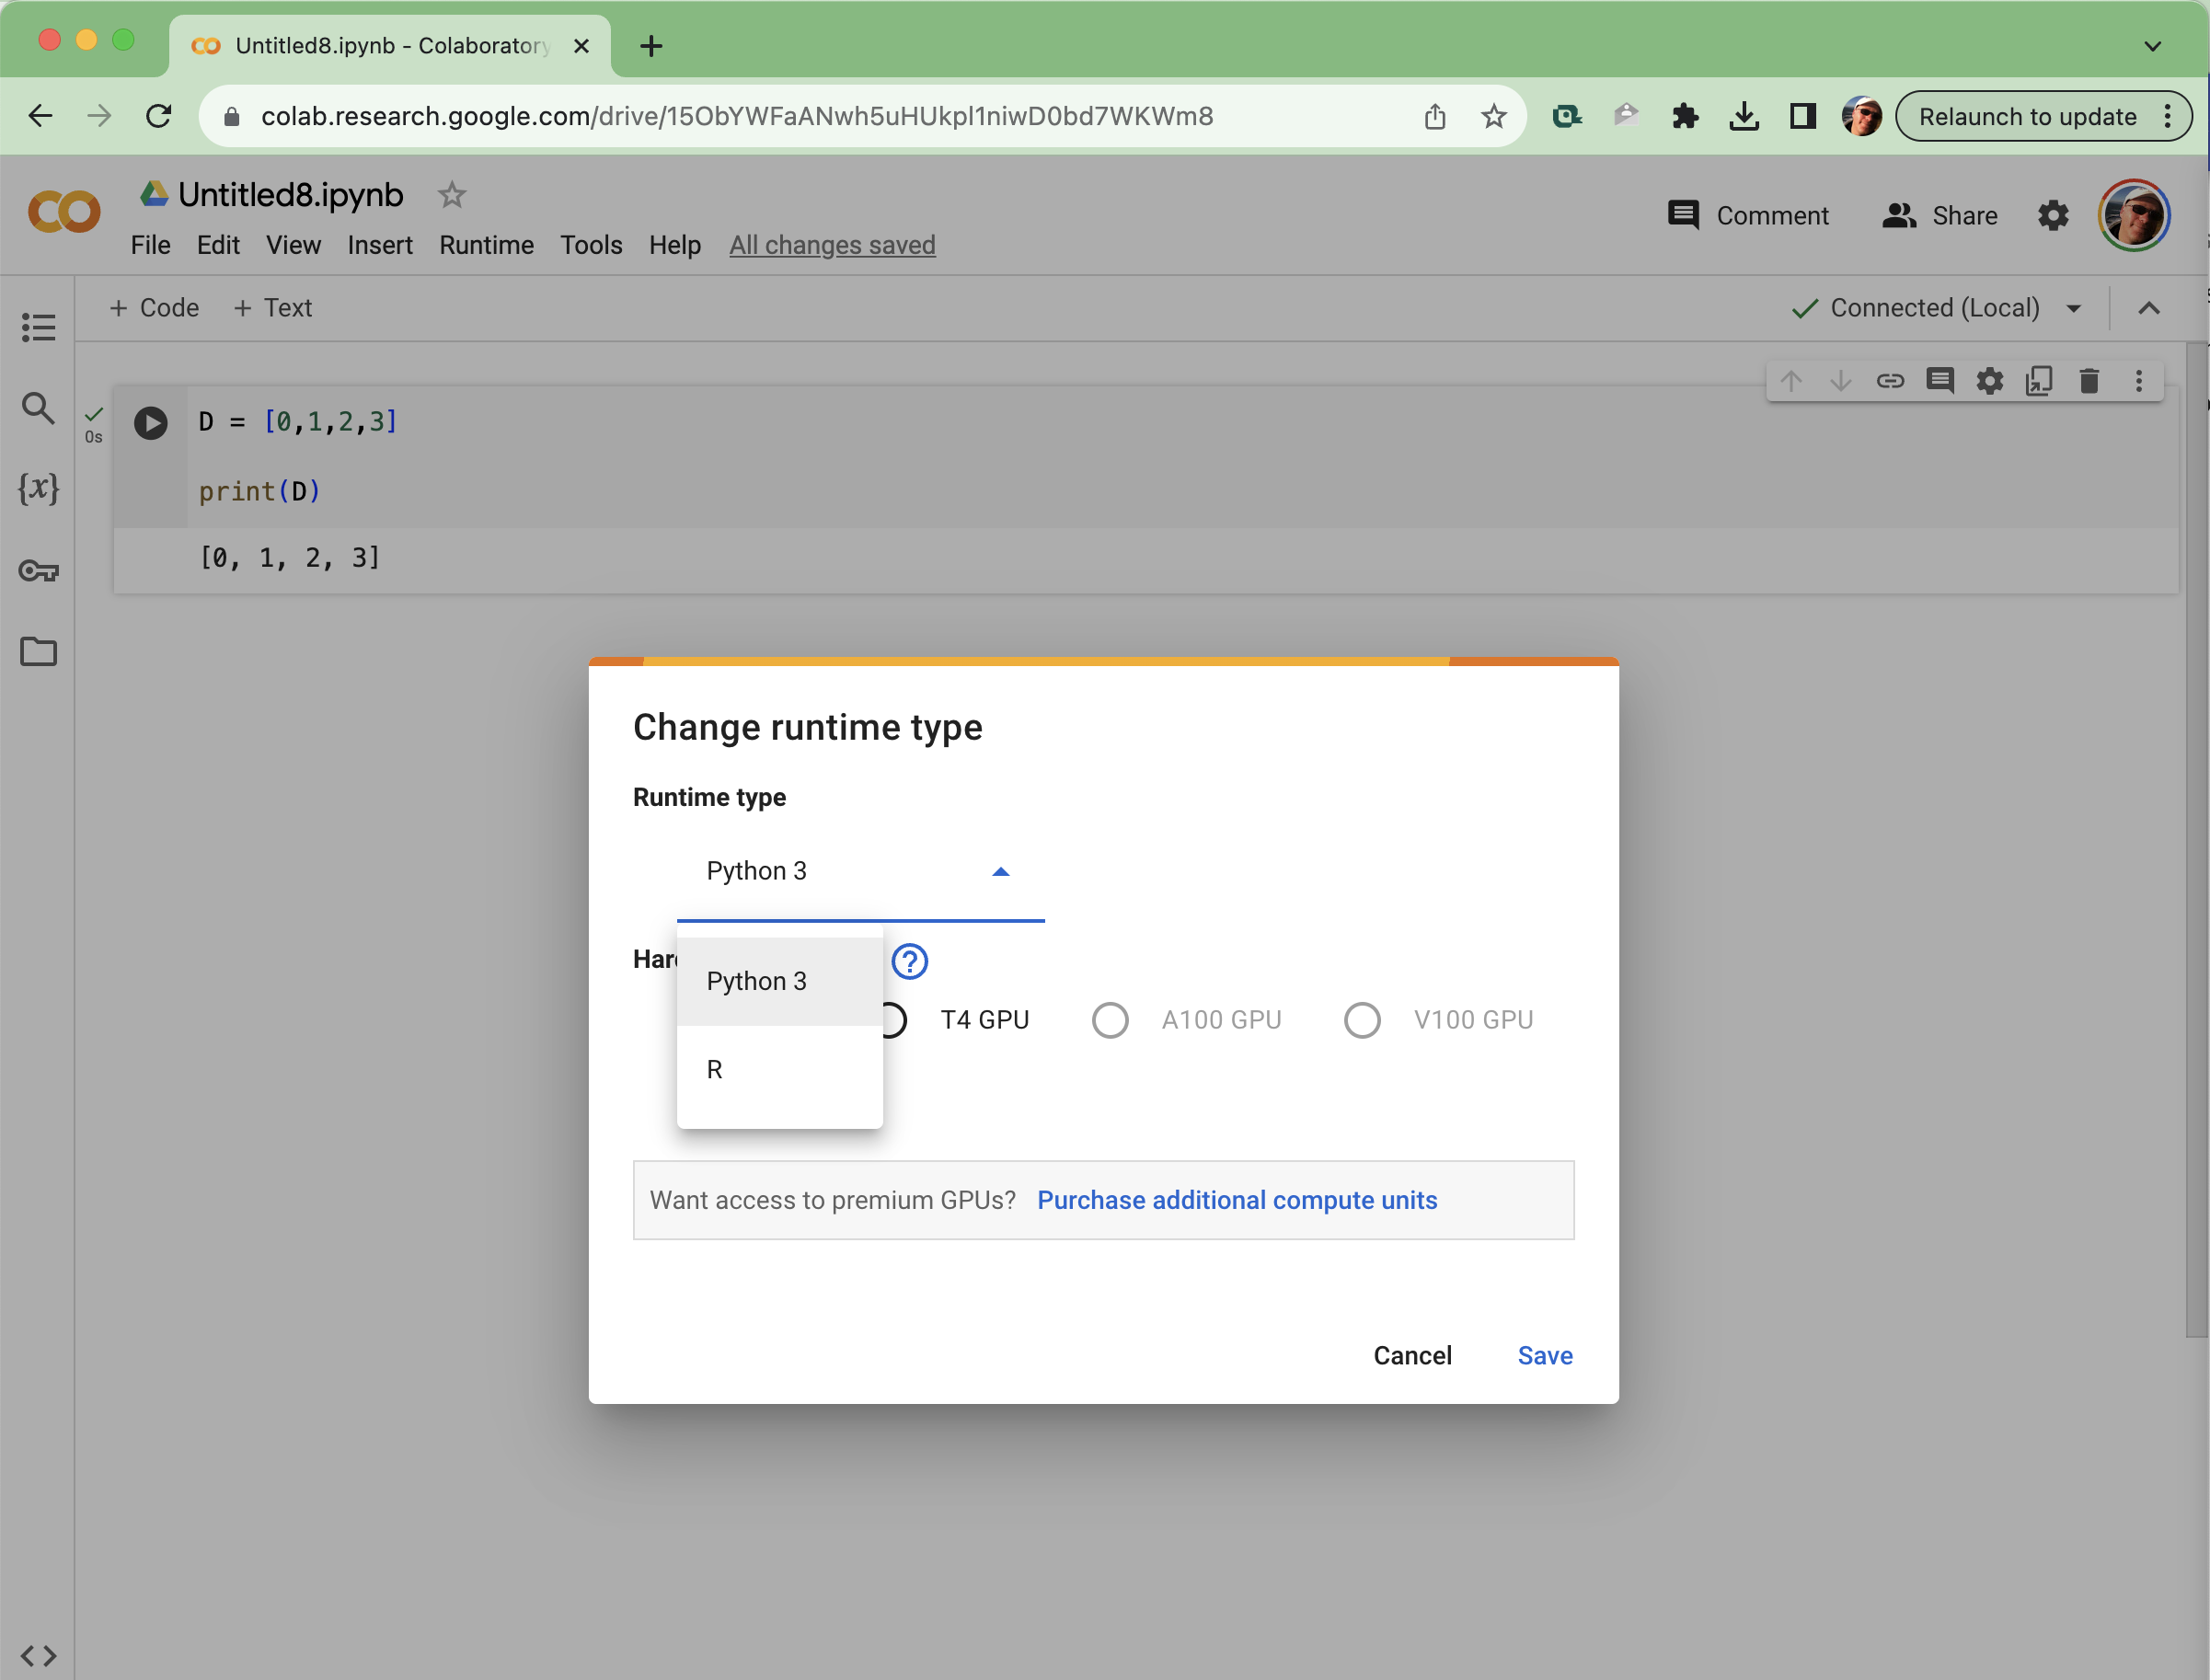
python3 /Library/Frameworks/Python.framework/Versions/3.11/share/jupyter/kernels/python3Google's Colab will also now pick up on the different local kernels
available when you connect to your local runtime. So you can build python
and/or R colab notebooks for datascience projects in your drive account.
Download and run the appropriate desktop package installer for RStudio.
For MacOS 12 and higher: RStudio-2023.09.1-494.dmg
While python is becoming one of the primary languages of data scientist,
R is still the statistical preference we often need to run with. But often
we are faced with having had developed a lot of code in python that we would
prefer to run, i.e., data mining. So how can we pass the resulting ETL to an
R package?
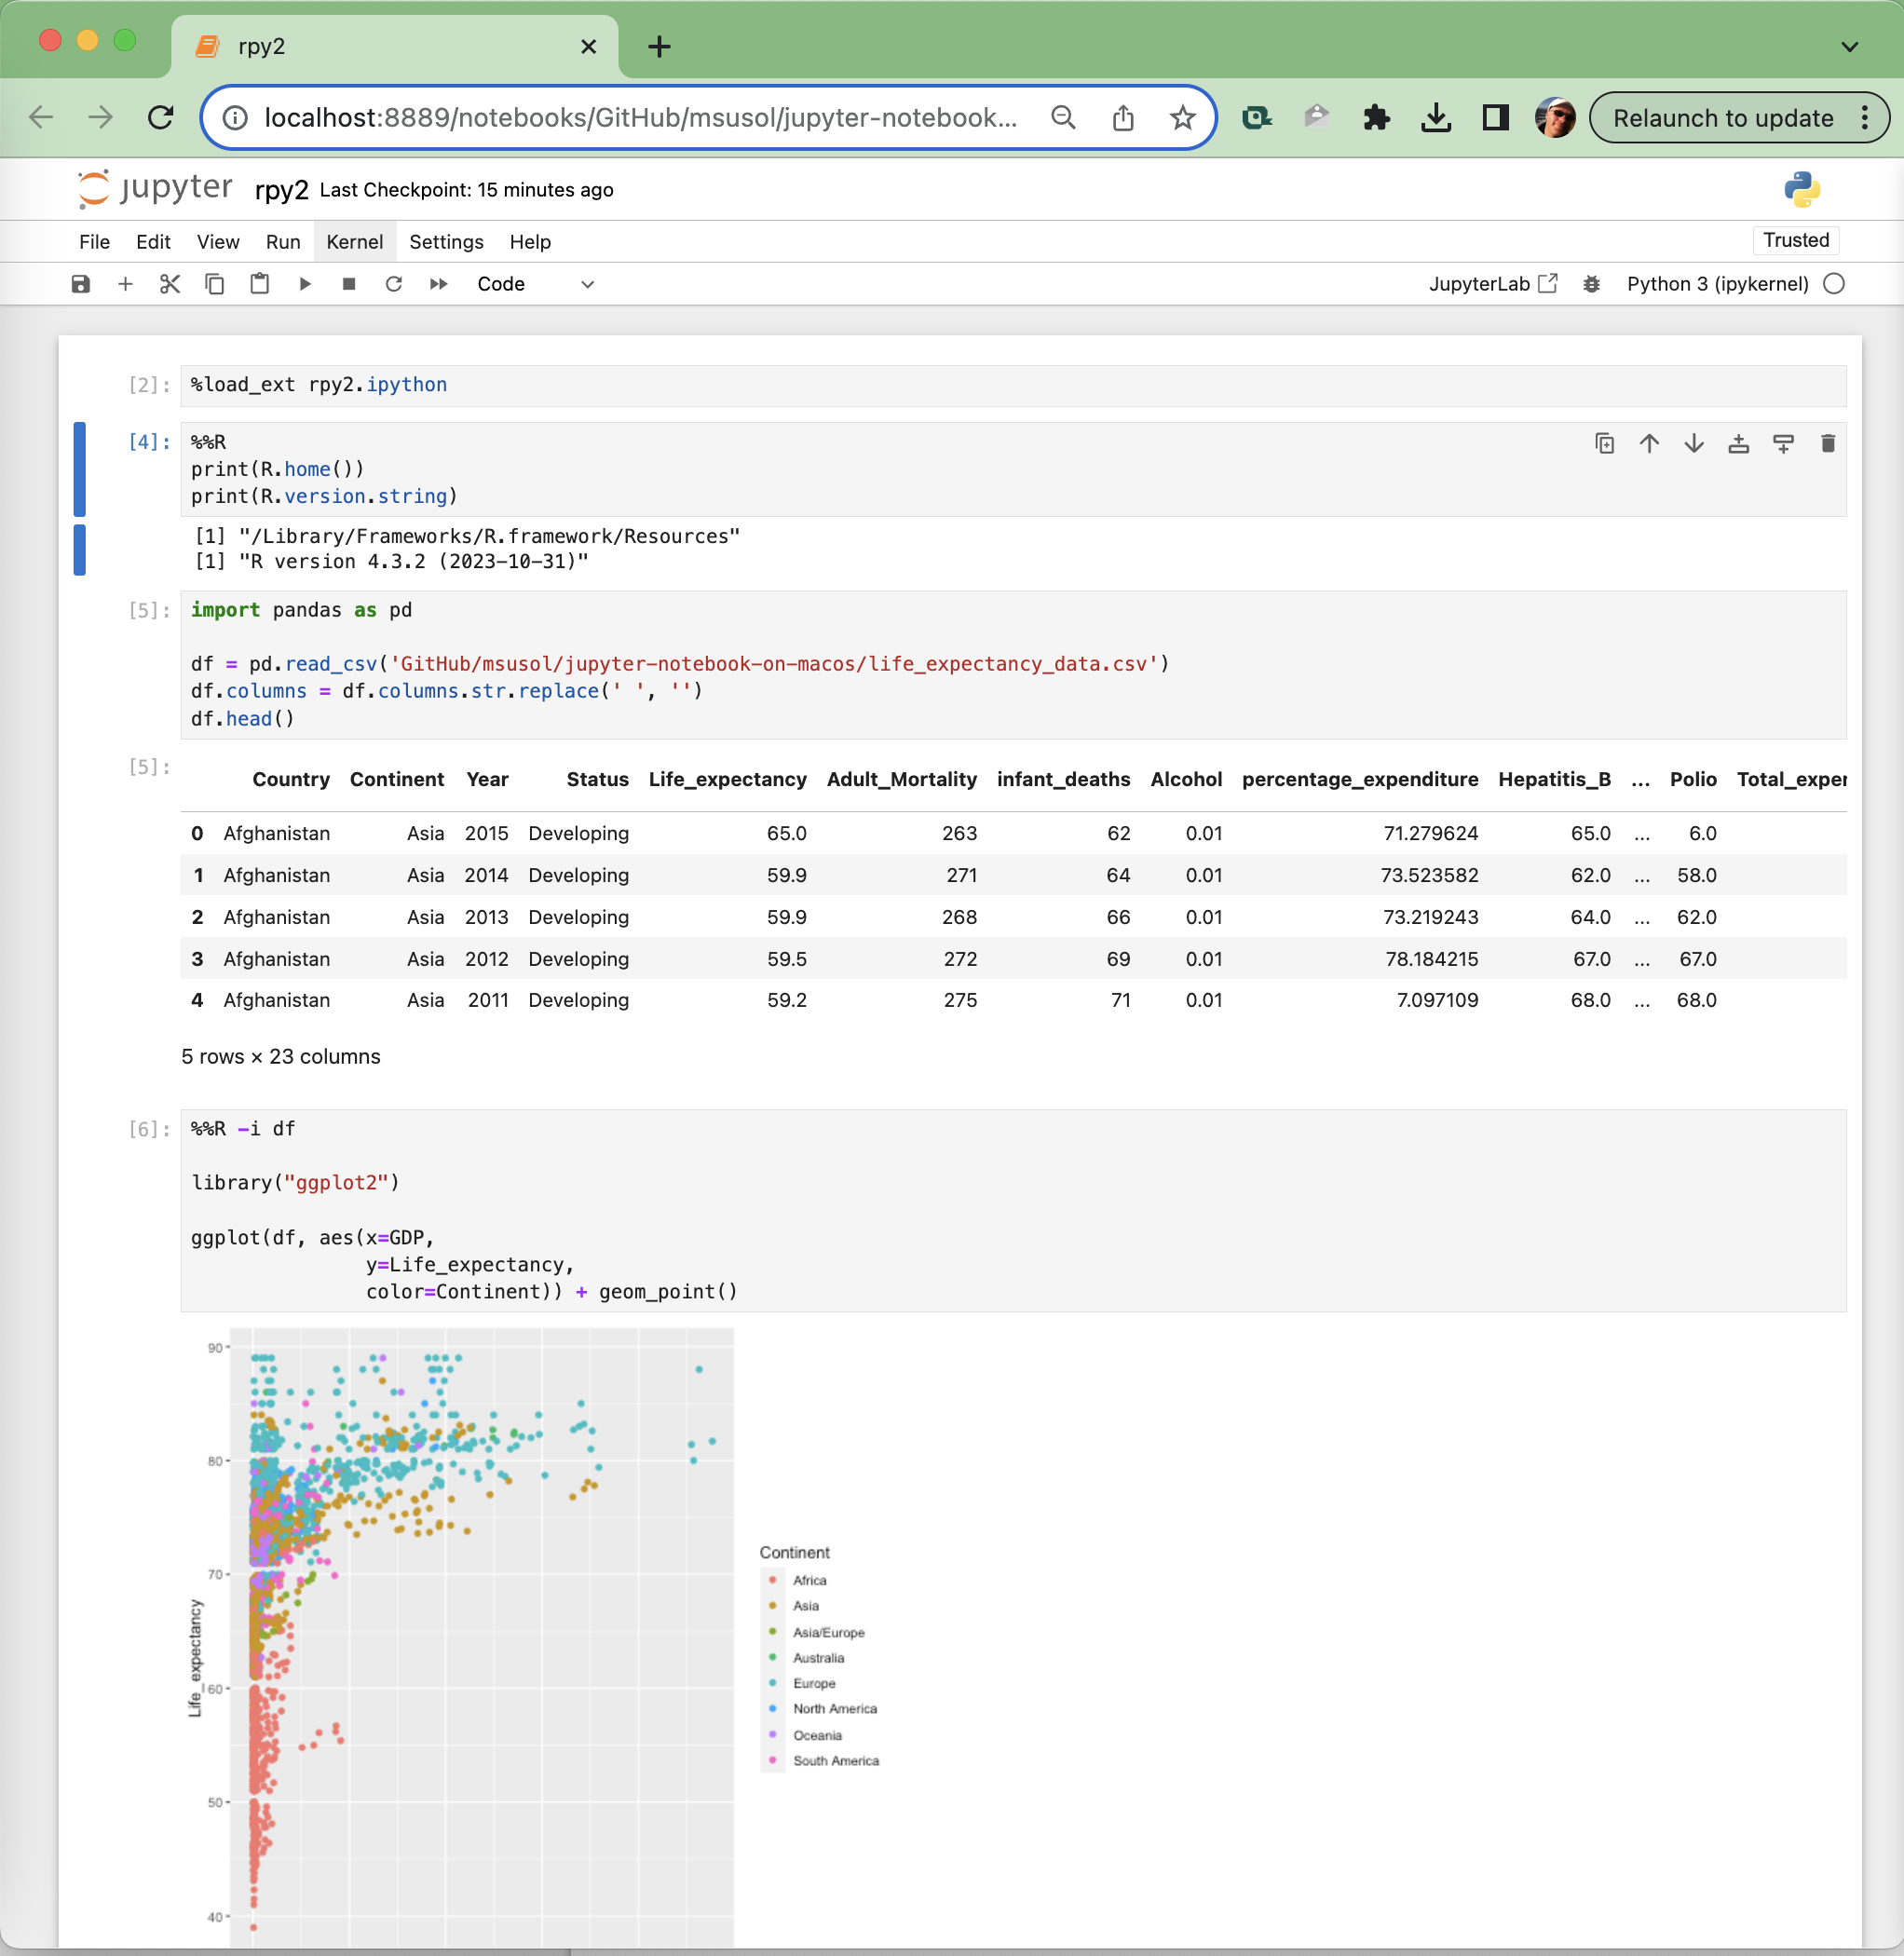
Install the rpy2 package, which allows Python to talk to R. You can use
pip to install it:
$ pip3 install -U rpy2Each time you start a new notebook you'll need to load rpy2 as an extension:
%load_ext rpy2.ipython
And then you can run R code alongside python and share pandas dataframes, as
long as you put %%R magic in the top of the cell.
%%R
R.version.string

[1] "R version 4.3.2 (2023-10-31)"
DEMO: Now, let's look at a simple example of using python to load a
csv file into a dataframe (df), and then pass it over to R to then use
directly in ggplot.
NOTE: You may need to set the environmental variable
R_HOMEin a python code block once before running therpy2colab.import os os.environ['R_HOME'] = '/Library/Frameworks/R.framework/Resources'
Try our
rpy2 notebook
on Colab for yourself. BTW, Colab already has rpy2 installed in its basic
'hosted' runtime.
- Top programming languages for data scientists in 2023
- Double BAM! StatQuest with Josh Starmer
- Python: Creating Virtual Environments
- Pymac: Command line tool to install and manage Python.org Mac installations
- Everything I Know: R with Python and Jupyter Notebook
- Source of life_expectancy_data.csv
~ % pip3 install -U ipykernel
~ % python3 -m ipykernel install --user --name=python311 --display-name="Python 3.11 (System)"

Installed kernelspec python311 in /Users/marksusol/Library/Jupyter/kernels/python311

~ % jupyter kernelspec list

Available kernels:
  ir           /Users/marksusol/Library/Jupyter/kernels/ir
  python311    /Users/marksusol/Library/Jupyter/kernels/python311
  python3      /Library/Frameworks/Python.framework/Versions/3.11/share/jupyter/kernels/python3
{
"argv": [
"/Library/Frameworks/Python.framework/Versions/3.11/bin/python3",
"-m",
"ipykernel_launcher",
"-f",
"{connection_file}"
],
"display_name": "python311",
"language": "python",
"metadata": {
"debugger": true
}
}
% ipython --version
8.18.1
from distutils.sysconfig import get_python_lib
print(get_python_lib())
'/Library/Frameworks/Python.framework/Versions/3.11/lib/python3.11/site-packages'vi /Library/Frameworks/Python.framework/Versions/3.11/lib/python3.11/site-packages/notebook/static/custom/custom.js
vi ~/.jupyter/custom/custom.js
define(['base/js/namespace','base/js/events'], function(IPython, events) {
  events.on('app_initialized.NotebookApp', function(){
    // This sets the indentation within code cells
    IPython.Cell.options_default.cm_config.indentUnit = 2
  });
});


