A guide for installing macOS Big Sur on Lenovo IdeaPad 320-14IKB using Clover and OpenCore UEFI hotpatch.
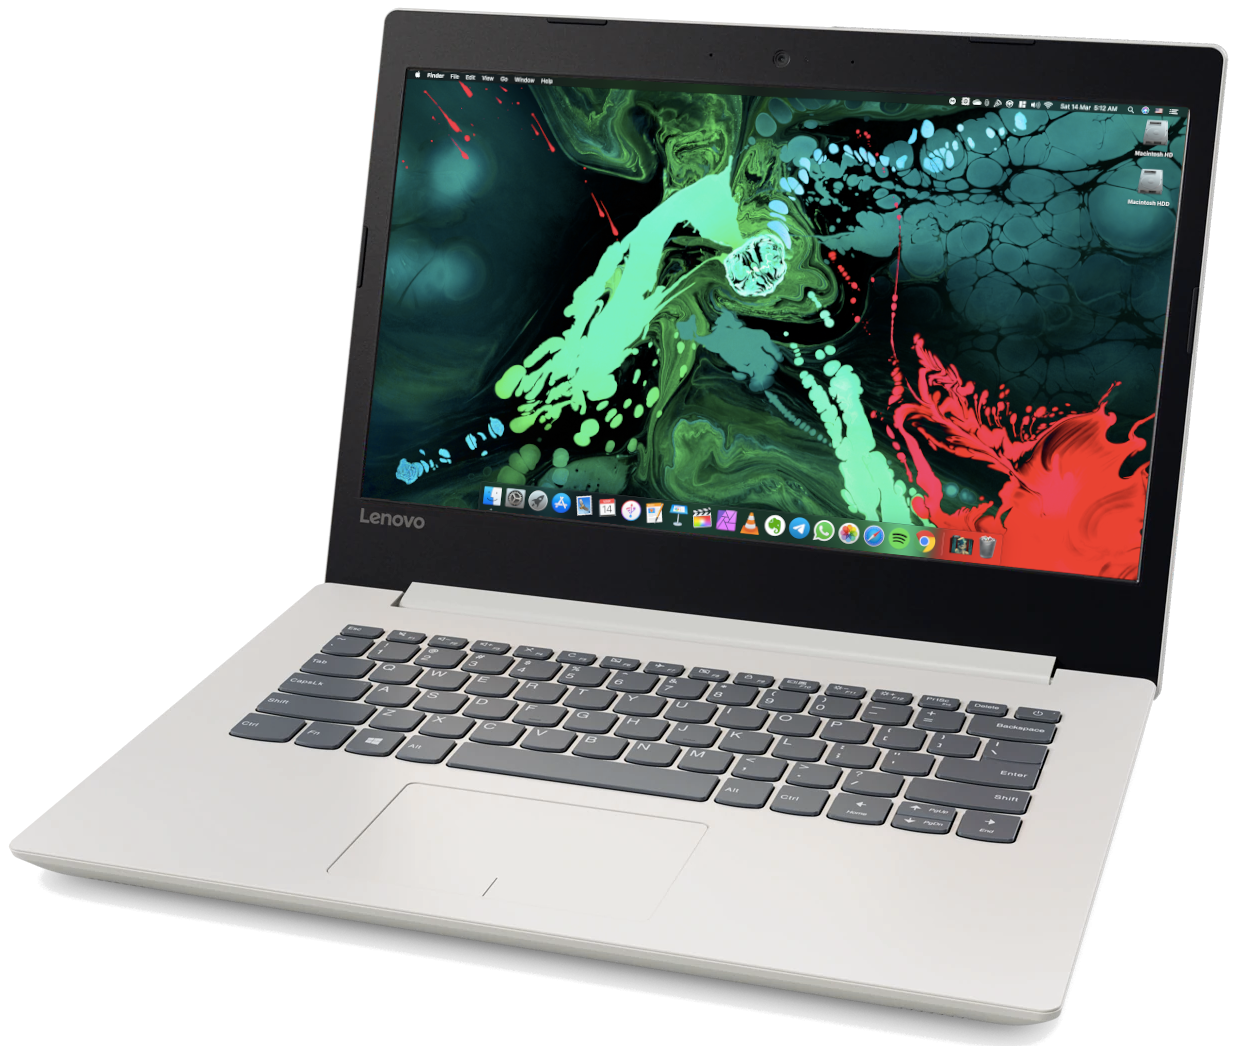
I'm not an expert in hackintoshing, this is my first Hackintosh, I managed to get everything working in my laptop, your laptop may be different than mine, higher specifications, dedicated GPU, etc, it's not guaranteed to work a %100, if it's so then this guide may not work for you, be careful and good luck!
- CPU: Intel i5 7200U Dual-Core CPU (Kaby Lake-U)
- GPU: Intel HD 620 Graphics
- Storage: 500GB WD Blue Solid State Drive & 2TB Seagate Mobile Hard Drive (Upgraded)
- RAM: 12 GB DDR4 2133MHz (Upgraded)
- Screen: 13.9-inch Full HD (1920 x 1080)
- Trackpad: ELAN (I2C)
- Wi-Fi: Broadcom DW1560 (BCM94352Z) Dual Band M.2 Ngff WiFi Card (Upgraded)
- Ports: 1 x USB-C, 2 x USB 3.0,USB 2.0 SD Card Reader, HDMI Display Port, Ethernet Port
This laptop is a budget laptop, by these specs, you can't do some heavy work, battery life is around 2-3 hours, It's good but not the best, if you want more you can choose higher specs, but consider that this guide may be different for your hardware.
- Intel HD 620 Graphics full QE/CI
- CPU power management
- Battery (Cycles doesn't show properly)
- All USB ports
- HDMI port (including HDMI Audio)
- Realtek Ethernet port
- Realtek ALC230 Audio (including headphones jack)
- Wi-Fi & Bluetooth (including Apple services)
- Internal webcam with Facetime
- ELAN Trackpad with GPIO mode (including gestures)
- Sleep (hibernation, lid sleep, and lid wake)
- Native macOS Hibernation
- Screen Brightness with Hotkeys
- Fn keys and Hotkeys lock
- macOS 10.13 High Sierra, 10.14 Mojave, 10.15 Catalina, and Big Sur 11
- Apple Pay, requires TouchID, more information here
- DRM support (iTunes Movies, Apple TV+, Amazon Prime and Netflix, and others) could be fixed in the future, more information here and here.
- No sound if power unplugged or mic is being used after sleep, see Ab2774#2.
- Microphone doesn't work in Chrome or Firefox, see Ab2774#3.
- Lowest brightness, in real Macs, the lowest brightness turns the screen completely black, however,
AppleBacklightSmootherKext doesn`t support this feature yet. - Screen light-up after wake, in
Big Sura second keyboard click is required to light up the screen, this can be fixed but it will break sleep causing instant wake.
- 16GB USB drive
- macOS Big Sur image downloaded from the Appstore
Mouse, because trackpad won't work in the installationFixed with VoodooI2C v2.4
Before doing anything, make sure to update your BIOS to the latest version from here, preparing your laptop to macOS, reboot your laptop, when the Lenovo logo appears press F2, when the BIOS menu appears go to:
- "Configuration" SATA Controller Mode to AHCI, HotKey Mode to Enabled.
- "Security" Intel Platform Trust Technology to Disabled, Intel SGX to Disabled, Secure Boot to Disabled.
- "Boot" Boot Mode to UEFI,Fast Boot to Disabled, USB Boot to Enabled.
- "Exit" OS Optimized Defaults to Disabled.
After downloading macOS Big Sur from the AppStore (do not use a distro image like Hackintosh Zone otherwise it's gonna break your system and you won't get any support using it), format your USB drive as "Mac OS Extended (Journaled)", then open Terminal and type: sudo /Applications/Install\ macOS\ Big\ Sur\.app/Contents/Resources/createinstallmedia --volume /Volumes/MyVolume, and remember, MyVolume is for the name of your USB drive, you can change it if you would, mount the EFI partition in your USB, Copy-and-paste the folder EFI from this release's repository, unzip SMBIOS Generator, open Terminal and drag-and-drop macserial to the terminal window, then type --generate-all and press enter, then copy MacBookPro14,1 SMBIOS (which is the closest one to this laptop's hardware) and change it, copy to both Clover's config.plist and OpenCore's config.plist, update your kexts and Clover Bootloader or OpenCore (if a new update is available), reboot your laptop and press F12 to enter BIOS Menu, choose your USB installer and boot from it, you should see the Clover Boot Menu, boot from the USB that shown, it may take some time to boot, after is done, you should see macOS Utilities, choose Disk Utility and erase the drive you want to install macOS on it, click on Erase and type the name that you want, like: "Macintosh HD", choose the format as APFS and Scheme as GUID Partition Map and click Erase, after it's done, close the window and go back to macOS Utilities and choose Install macOS, click Agree to accept the license agreement, the installation should starts now, your laptop should restarts several times, after it's done, login to your AppleID (for more specific guide please go here), after setting up your laptop, unzip the folder, (please delete CodecComannder and ALCPlugFix as they're no longer required with AppleALC 1.5.4), if you have problems with sleep please go here
restart, and you're ready to go!
- After you finish the installation you'll notice that your iMessage and other Apple services aren't working properly, to fix that issue you have to add
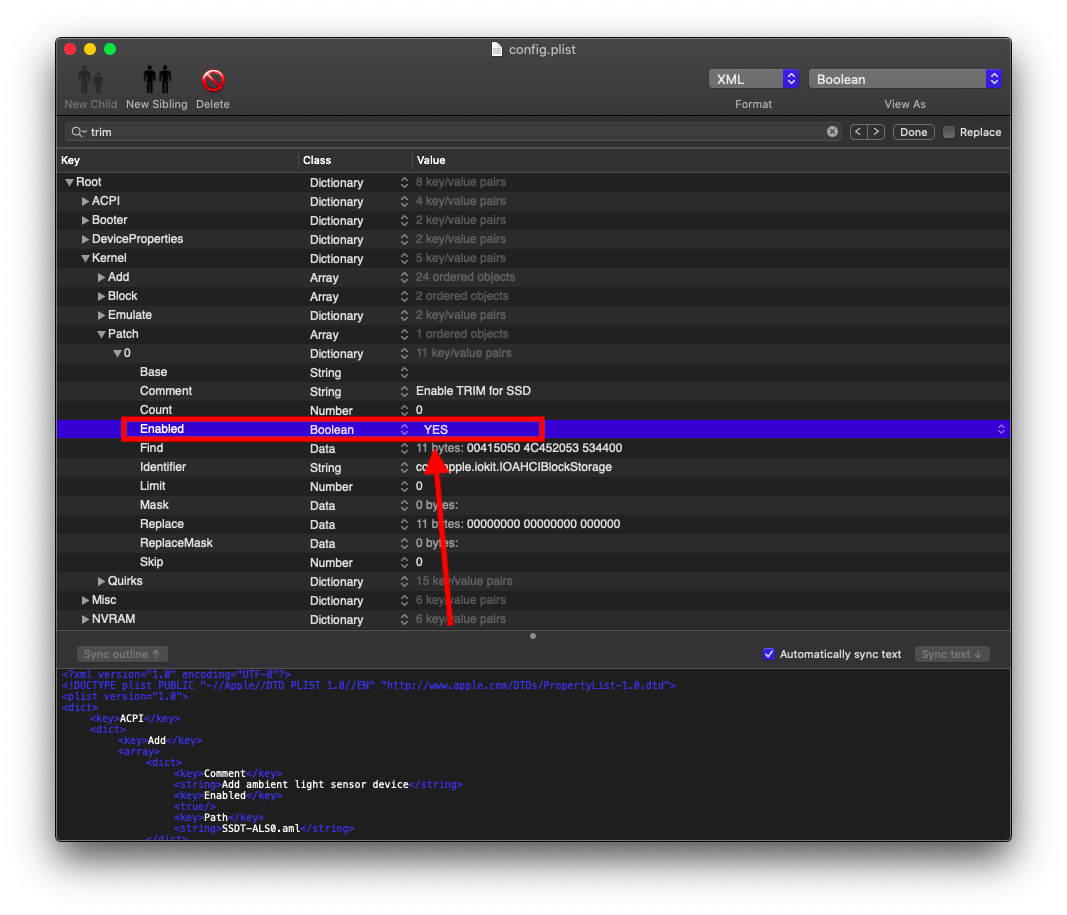
ROM,MLBand a proper SMBIOS (which is MacBookPro14,1 for this device) in yourconfig.plist, for more information follow this guide from here. - If you have an SSD installed, you can enable TRIM support on it, just enable this option in your
config.plistand enjoy! (consider that it may slow booting a bit for APFS formatted SSDs, more information about TRIM here Clover: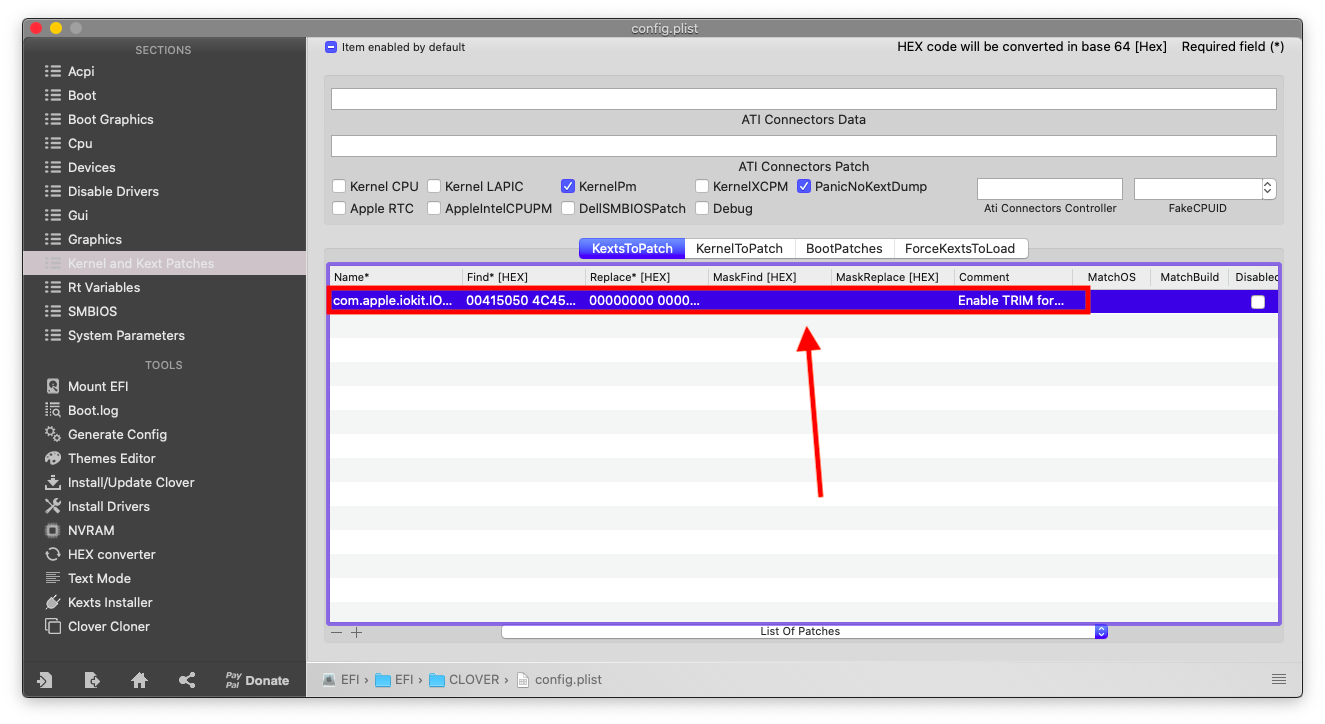 OpenCore:
- If you're a Synaptics trackpad user, your trackpad is supported! Just enable these options that can be found in
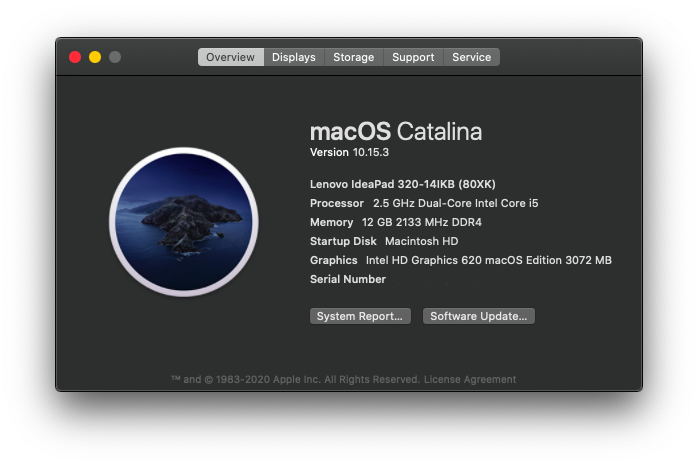
Extrasfolder in this repository realeses to yourconfig.plistand copyVoodooI2CSynaptics.kexttoKextsorkexts/Otherfolder. - If you don't like the name of your laptop that shown in "About This Mac", you can change it! Press Shift+Cmd+G ⇧⌘G and copy-and-paste this path:
/Users/Username/Library/Preferences/com.apple.SystemProfiler.plist, and remember, the wordUsernameIs for your username, now download your favorite plist editor (mine is "PilstEdit Pro"), then you can change toLenovo IdeaPad 320-14IKB (80XK)or any name you want.
- Fn keys don't work usually on most hackintoshes, luckily,
YogaSMCcan fix this! Not just enabling Fn keys and their abilities, it enables Lenovo features likeConversation Modeto stop charging the battery at %60 to increase it's age, ture Cycle Count reading because macOS ones can be wrong,Fn Modeetc, to get those features,YogaSMCis included inside the EFIs, all you have to do is installYogaSMCNCapp andYogaSMCPanewhich are included in the release. - The keyboard experience on this laptop is a bit different than a real mac, in order to make the closest to a real mac we need to make a couple of changes, luckily, in the latest
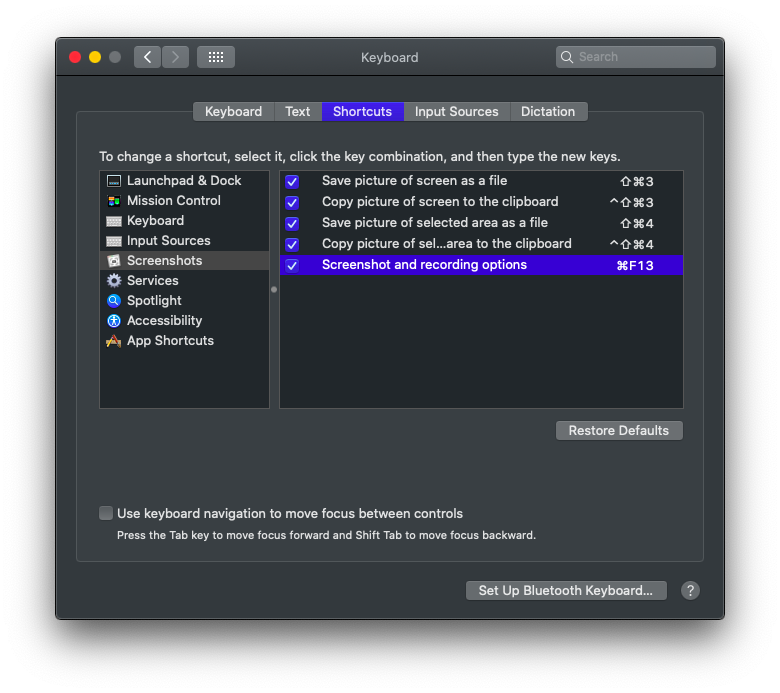
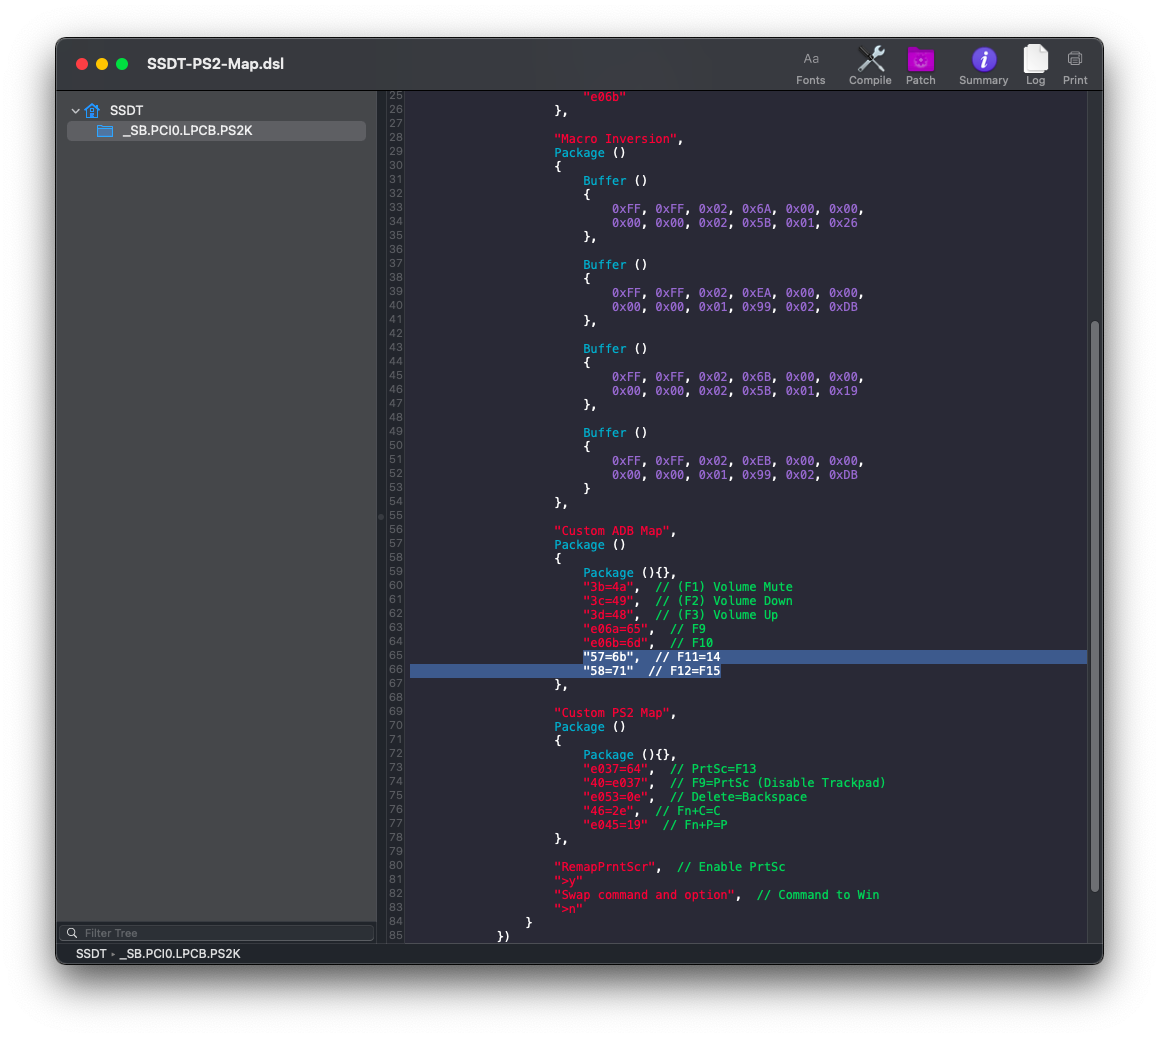
VoodooPS2release, it automatically swaps Cmd to Win, if you want to reverse it, useSSDT-Swap-Alt-Cmd(or swap them inSystem Preferencesas shown in the photo), to prevent PrtSc from disabling trackpad we need to remap it as F13 (can be remaped to take screenshots and record videos as shown in the photo) and remap F6 as PrtSc to disable trackpad, to make Delete key working like a real Mac we need to remap it as Backspace,BrightnessKeysKext automatically remaps brightness keys without any ACPI requirements, if your brightness keys are F11 and F12, please remove these two lines using MaciASL which can be found here as they are not required and will affect brightness keys inFn Mode, then compile it and replace it, if your brightness keys are F14 and F15, you're good to go! If you want to use all keyboard patches, there's an SSDT that combines them all which isSSDT-PS2-Map, please avoid using all of them to prevent having aKernel Panic.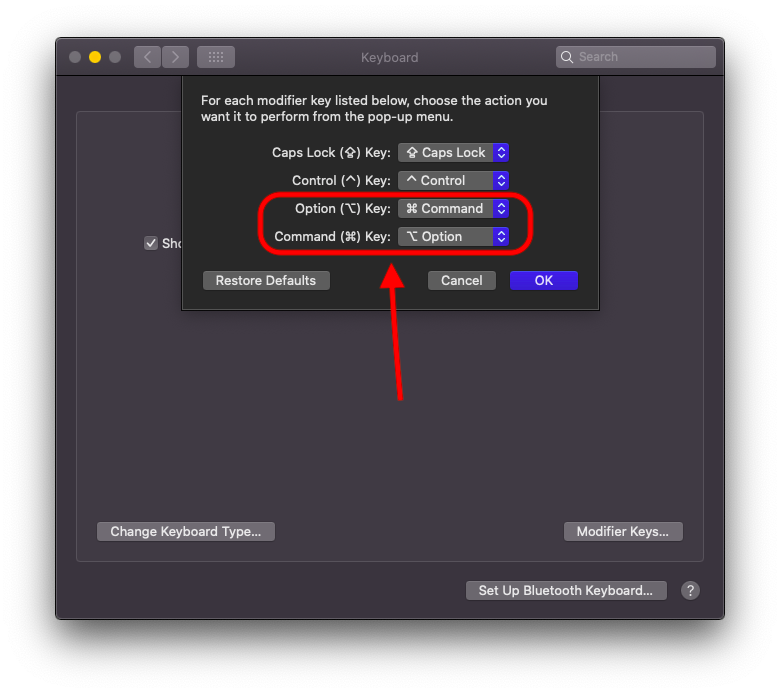
- Who needs CDs these days? You can buy this caddy and replace it with the CD Drive from here to get dual drives.
- 4GB of ram isn't enough these days, Unfortunately, 4GB is built-in the motherboard, so the maximum is 12GB, you can upgrade your RAM to 12GB total from here.
- The Wi-Fi card that shipped with this laptop is probably an Intel Wi-Fi card which can be fixed with
itlwmKext which can be found here, please check all supported cards before buying from here, there's another option which is buying a Broadcom Card like DW1560 and DW1830, please check all supported cards before buying from here, or you can buy an Apple Wi-Fi Card like BCM94360CS2, The Wi-Fi Card, The Adapter, The Antennas. - You can change the frequency of your CPU in
config.plistas shown in the photo, without changing it, macOS will recognize it as 2.71 GHz for some-reason.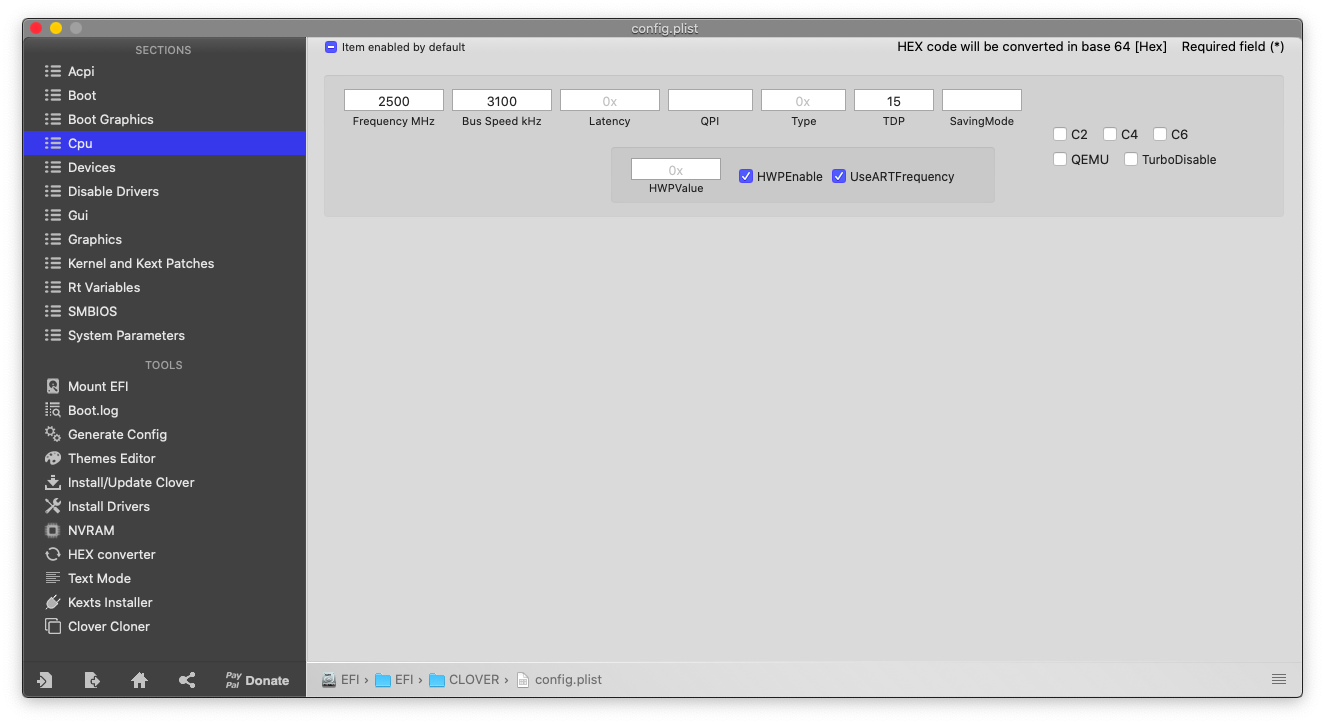
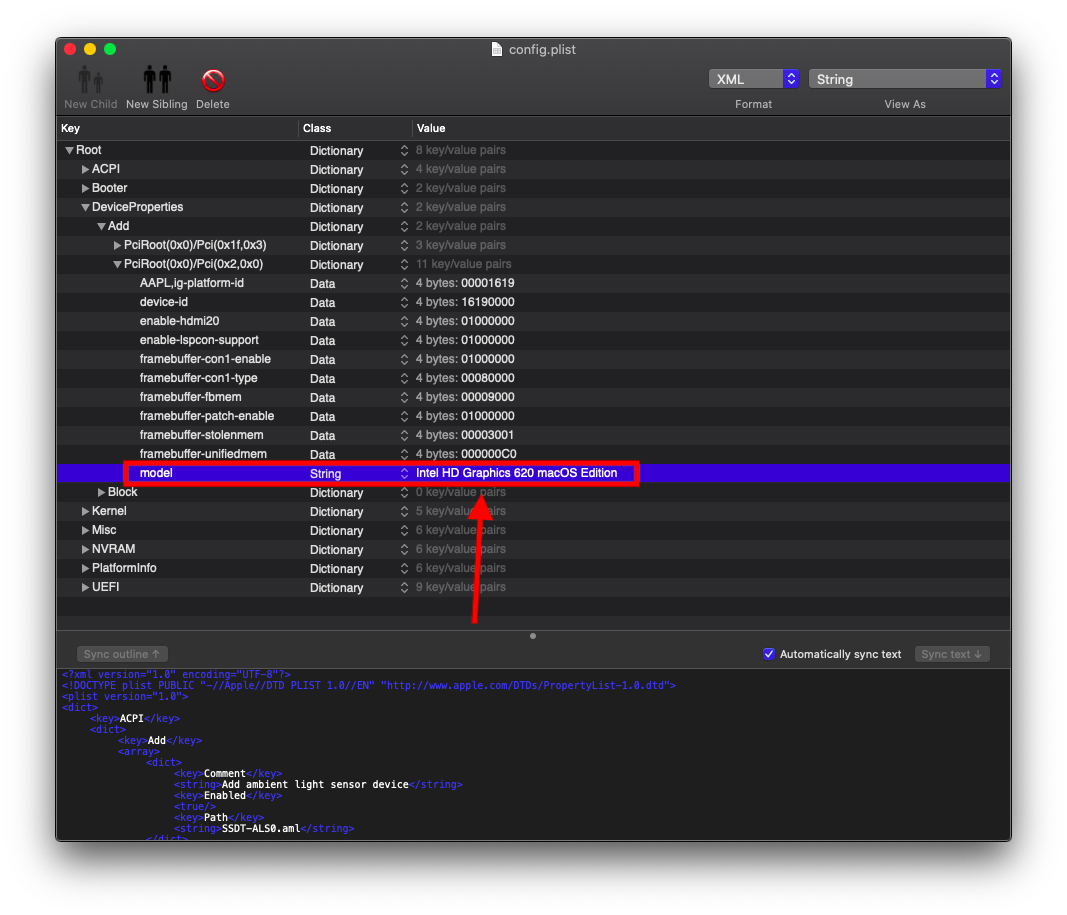
- You can change the name of your graphics like this, I chose the name
Intel HD Graphics 620 macOS Editionyou can choose whatever you want as shown in the photo. Clover: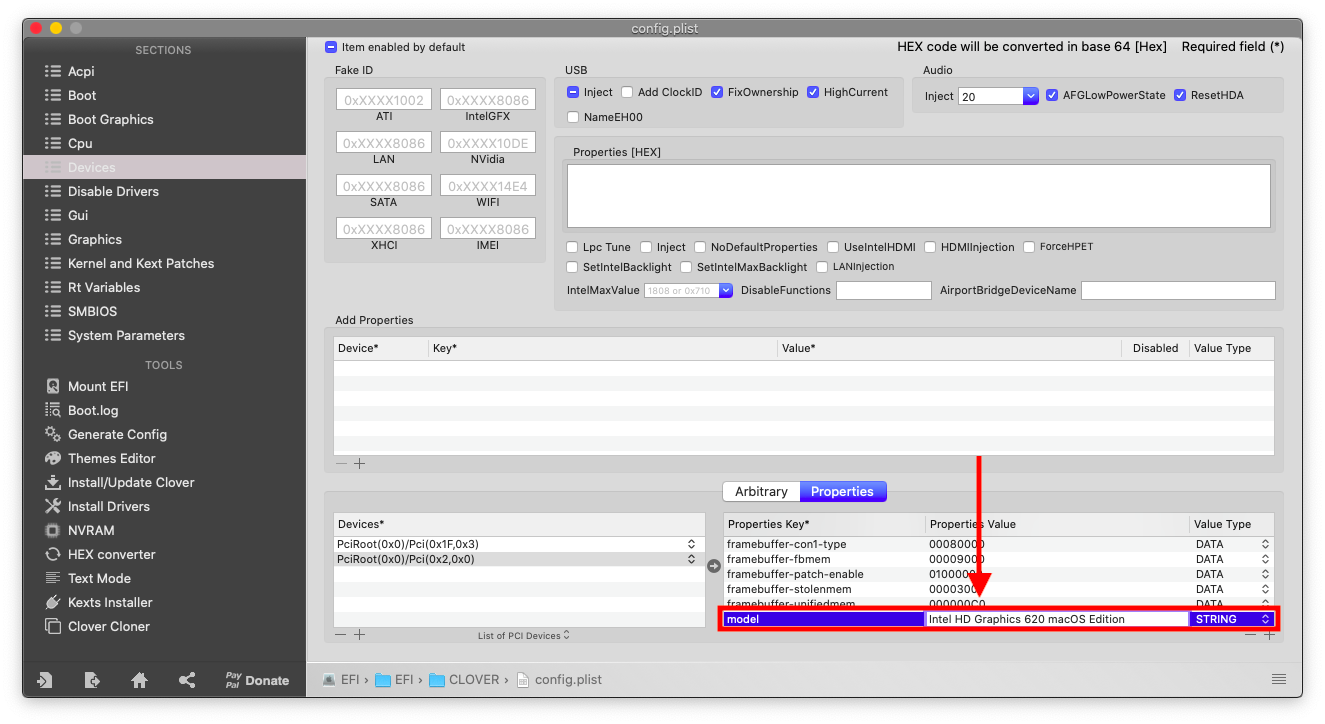 OpenCore:
- If your RAM information isn't shown properly in
System Reportyou can fix that by adding it to yourClover'sconfig.plist.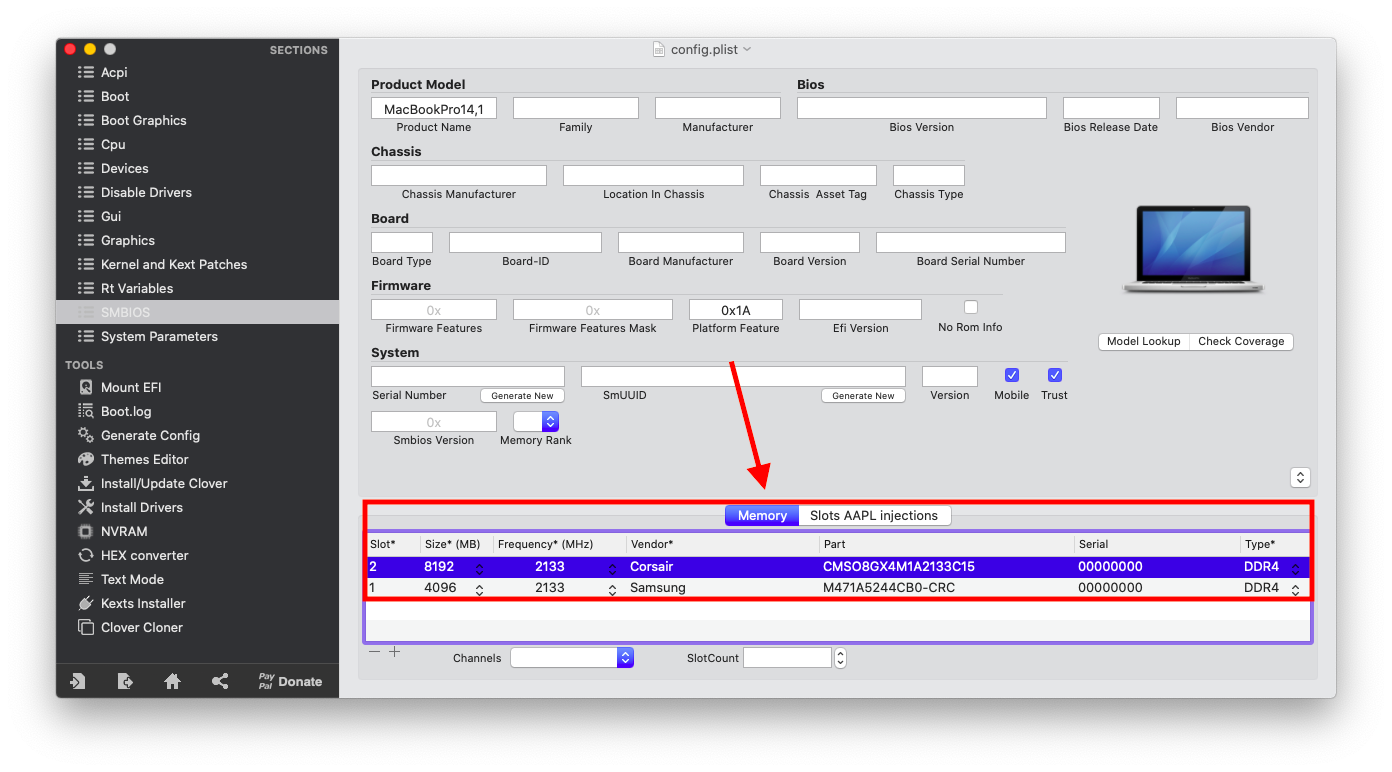
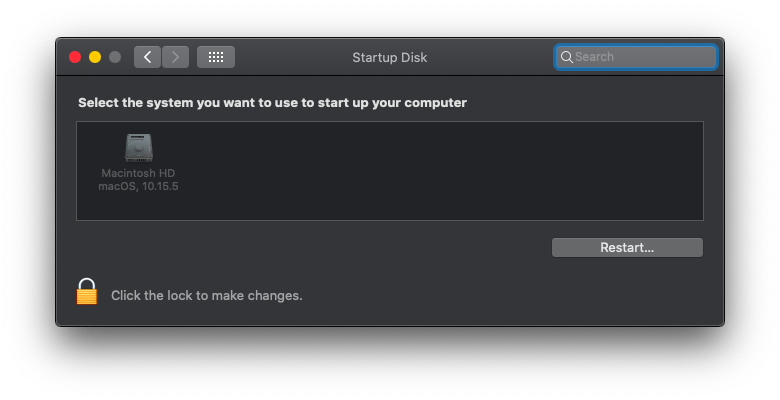
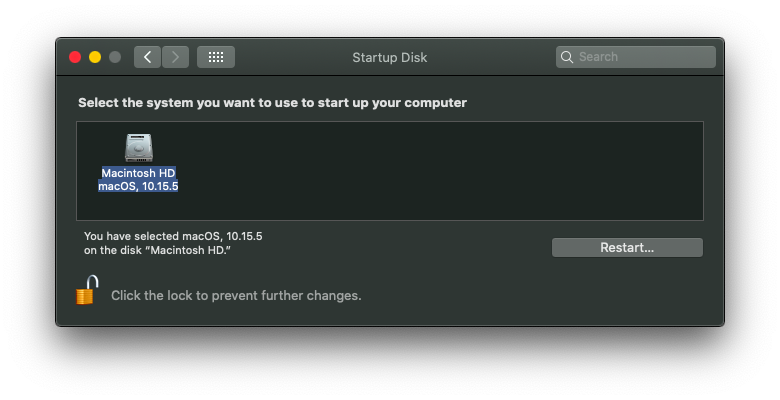
- You can make your laptop boots automatically to macOS if you don't have another OS installed as shown in the photos, type your drive's name, check
Fast, now your laptop should boot automatically to macOS without theClover Boot Menu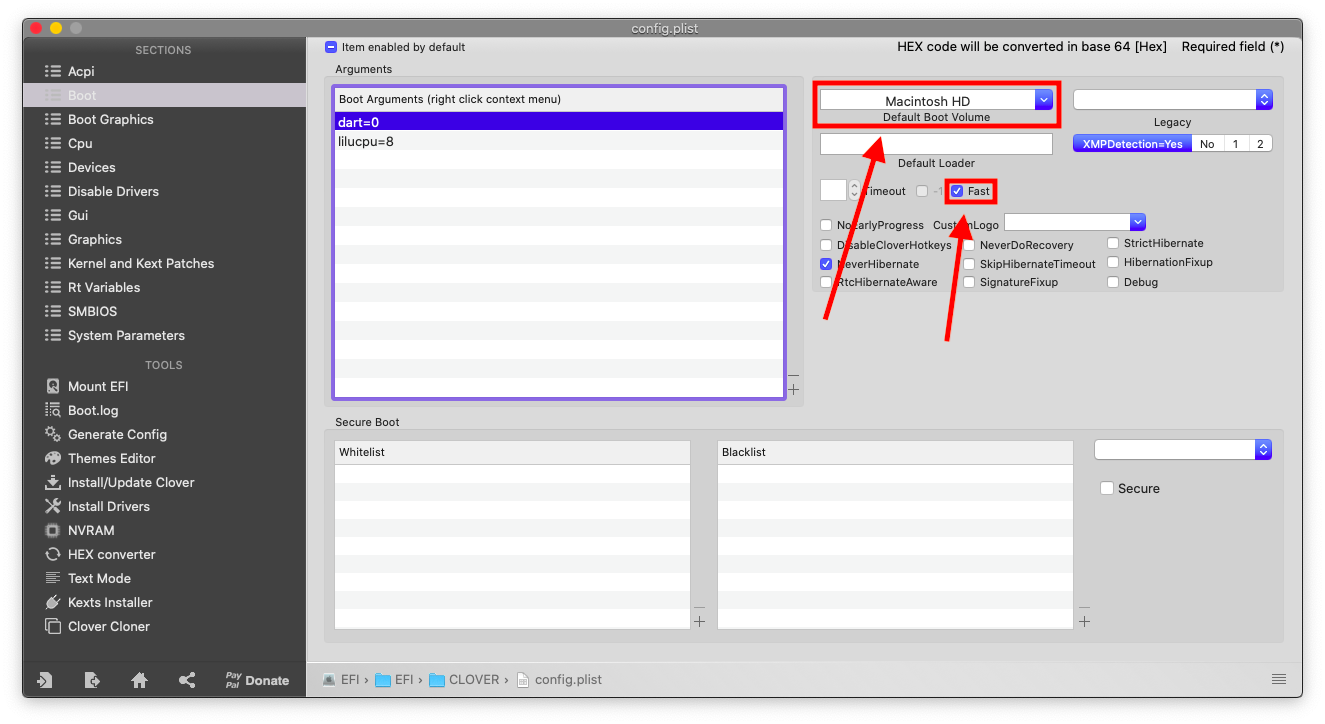
- In OpenCore it's a bit different, disable
ShowPickerand openSystem Preferences,Startup Disk, type your password, choose the disk that you boots from, and restart, if you want it to boot normally, press Esc in the startup menu, to show other disks and tools press Space, make sure to do this when you're done installing macOS and troubleshooting, in case you needed to boot toPrebootor resetNVRAMetc.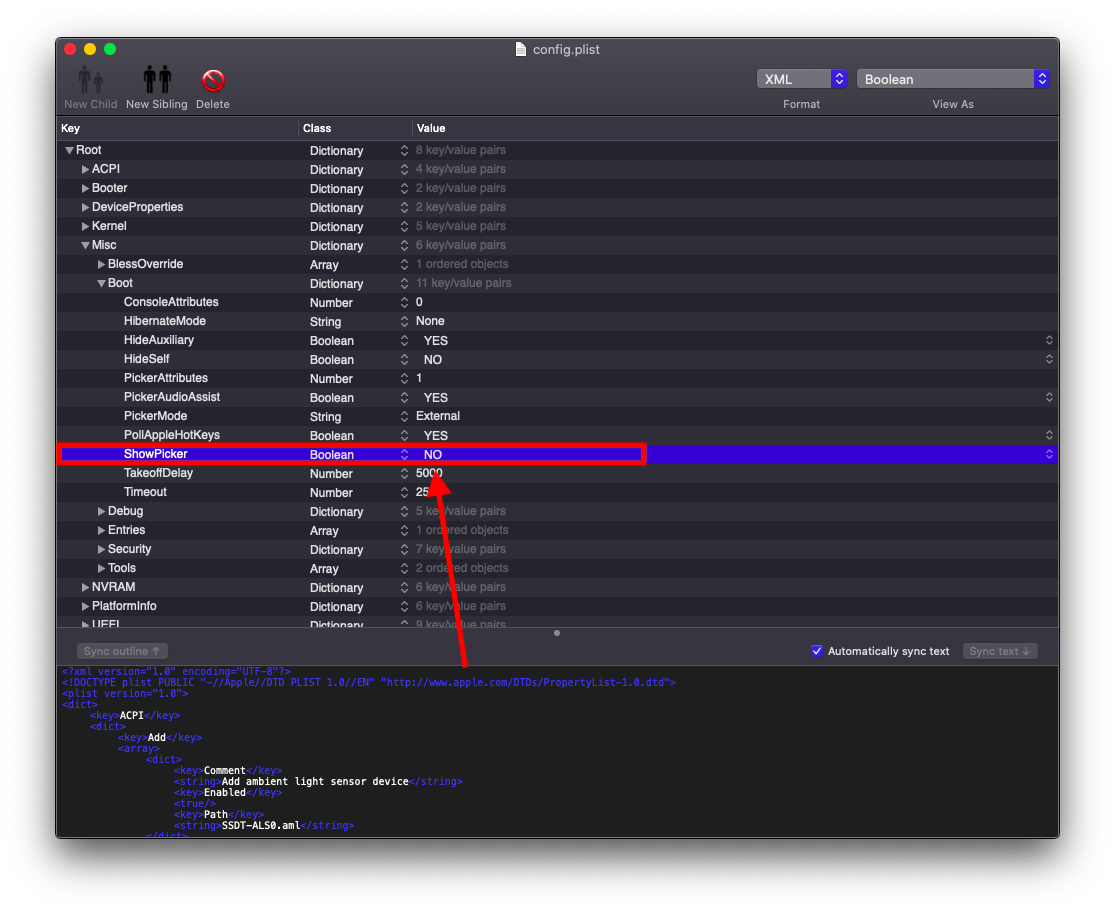
- You can get the famous Mac-Chime when booting! By enabling these two options in your
config.plistand copyAudioDxe.efifromExtrasfolder in this repository realeses toDriversfolder, but consider that it may slow your booting a bit.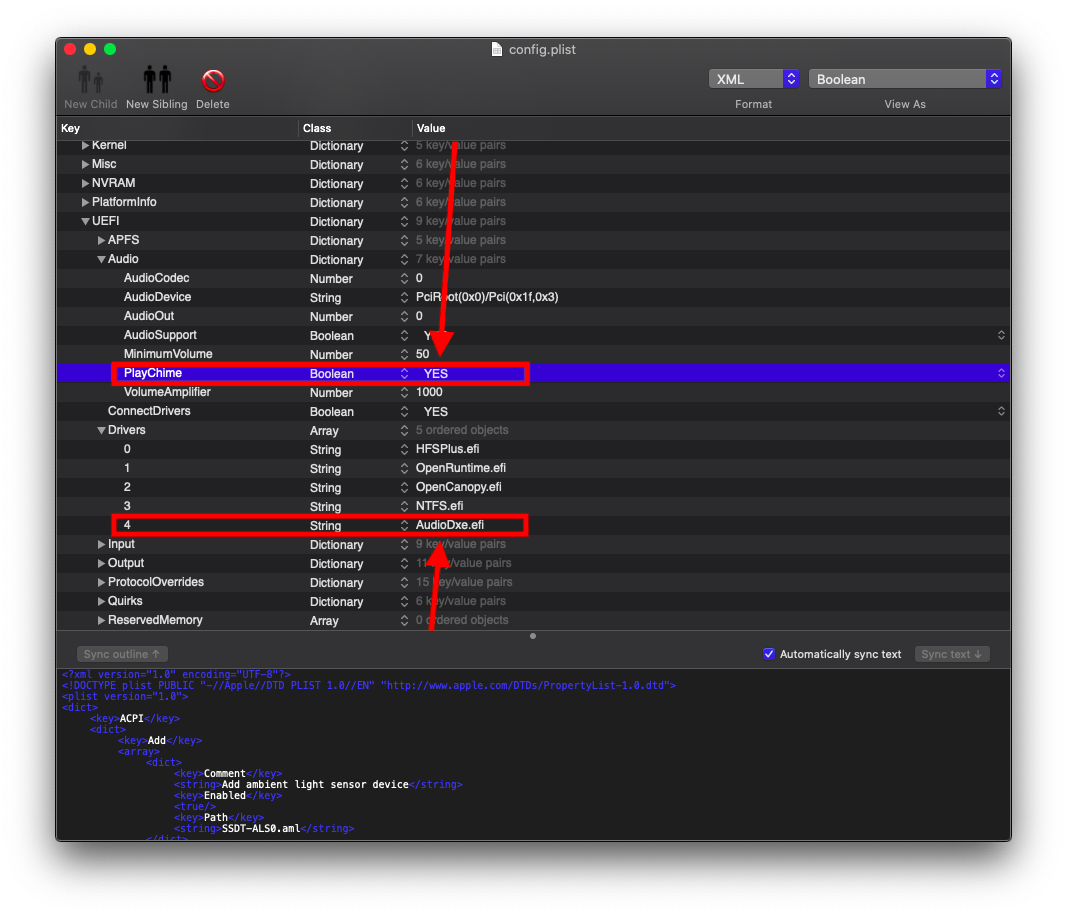
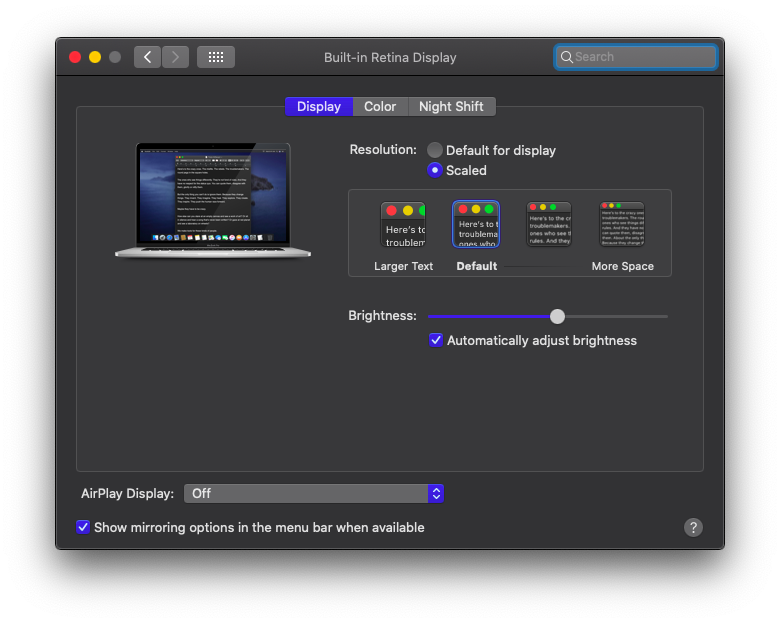
- If you want to get these options to choose the resolution like this you can! by running this command which can be found here, type your password and choose the numbers 1,3,1 then restart.
- If you don't like the default Clover you can change it! Search the web and choose your favorite theme, copy-and-paste it to
themesinEFIfolder, then go to yourconfig.plist,GUIsection,Themeand type the name of your theme, you can useClover OSS Theme, which looks like a real Mac boot-up screen.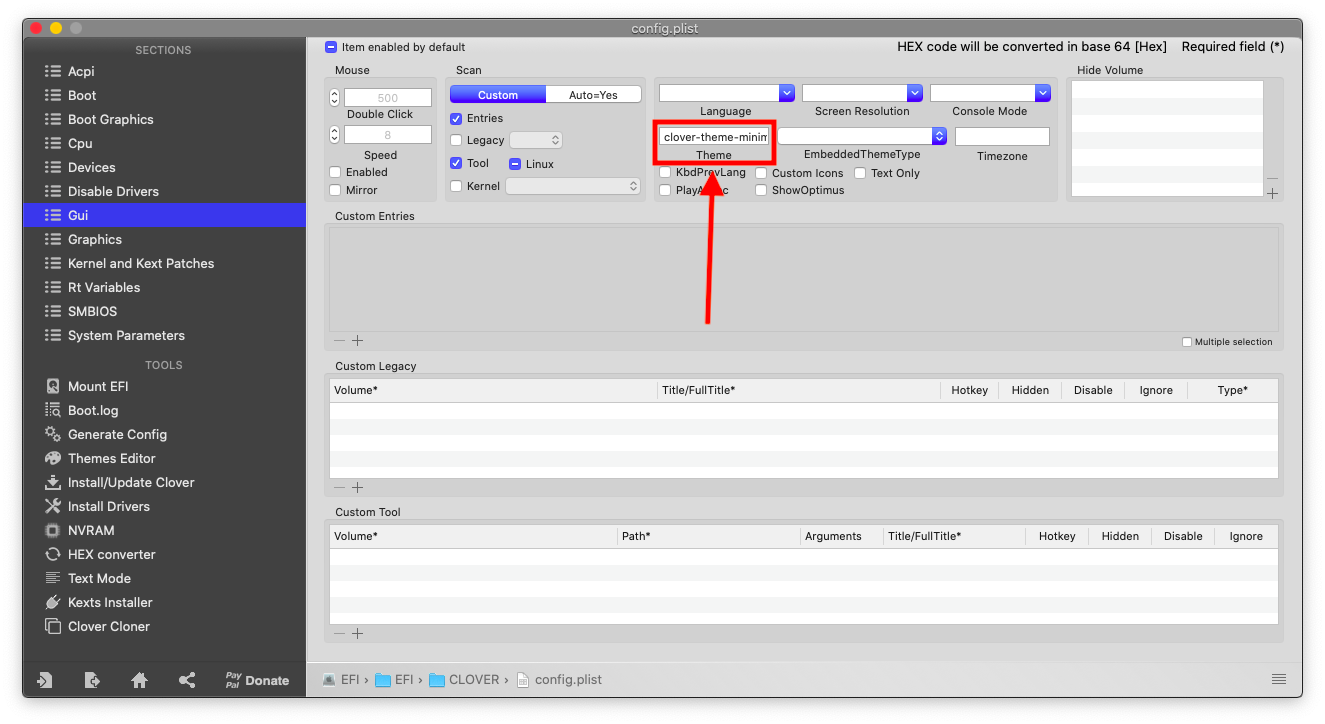
- Apple for macOS.
- Acidanthera for most of the kexts.
- RehabMan for some ACPI patches.
- Steve Zheng for some patches.
- zhen-zen for YogaSMC.
- Hiep Bao Le for AppleBacklightSmoother
- Sniki for some patches.
- daliansky for some ACPI patches.
- Moh_Ameen for some ACPI patches.
- blackosx for OpenCanopyIcons theme.
- al3xtjames for clover-theme-oss theme.
- ImmersiveX for clover-theme-minimal-dark theme.
- And anyone else that helped to develop and improve hackintoshing.

