This repository contains a practical exercise to set up and use a Continuous Integration (CI) Server. The objective is to provide students with a first contact with this important tool when developing software nowadays.
For more details on CI, we recommend reading Chapter 10 of our Software Engineering textbook.
Even though there are many CI servers in the market, in this exercise, we will use the CI service provided by GitHub, which is called GitHub Actions. This service can be accessed in the top menu of any GitHub repo.
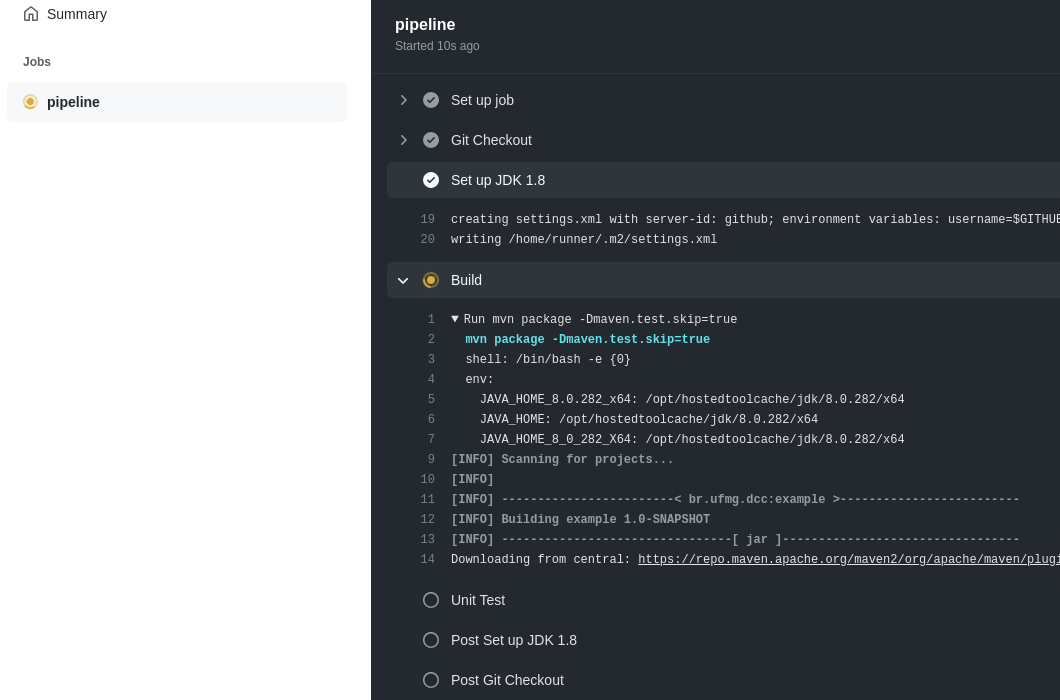
GitHub Actions allows us to execute external applications when GitHub detects some events in a repository. Our goal is to set up a CI server to compile and build a simple Java program and then run the tests. This pipeline will be executed every time a Pull Request (PR) is open.
We'll use a simple Java program to llustrate the usage of a CI server. The code is also available in this repository in the "src" folder, and it is called SimpleCalculator.java.
public class SimpleCalculator {

  public int addition(int x, int y) {
    return x + y;
  }

  public int subtraction(int x, int y) {
    return x - y;
  }
}
When we submit a PR to this repository, the CI server will automatically compile and build this program and run the following unit test, called SimpleCalculatorTest.java.
public class SimpleCalculatorTest {
  private SimpleCalculator calc;

  @BeforeEach
  public void init(){
    calc = new SimpleCalculator();
  }

  @Test
  public void testAddition1() {
    int expected = 5;
    int result = calc.addition(2,3);
    assertEquals(expected, result);
  }
}Fork this repository, by clicking on the Fork button on the top right corner of this page. In this way, you will test the CI server into your own copy of the repository.
Clone the forked repository into your local machine, using the following command (where <USER> should be replaced by your GitHub user).
git clone https://github.com/<USER>/demo-ci.gitNext, go to the folder .github/workflows/and create a configuration file called actions.yaml, with the following lines:
name: Github CI
on:
  # Set up a CI Server to execute the jobs pipeline below when
  # a push or pull request is made at the main branch
  push:
    branches:
      - main
  pull_request:
    branches:
      - main

jobs:
  pipeline:
    runs-on: ubuntu-latest # Commands must be executed on a Linux Ubuntu OS

    steps:
      - name: Git Checkout
        uses: actions/checkout@v2 # Checkout the received code

      - name: Set up JDK 1.8
        uses: actions/setup-java@v1 # Set up Java 1.8
        with:
          java-version: 1.8

      - name: Build
        run: mvn package -Dmaven.test.skip=true # Build (compiles) the source code

      - name: Unit Test
        run: mvn test # Executes the testing framework
Every time a push or pull_request event occurs on the main branch, this configuration file defines that GitHub Actions should:
- checkout the source code;
- build the source;
- execute the tests.
Commit and push the configuration file:
git add --all
git commit -m "Setting up GitHub Actions"
git push origin mainWhen the previous push reaches the GitHub repository, GitHub Actions will automatically execute the jobs defined in actions.yaml.
You can checkout the status of these jobs by clicking on the Actions tab in your repository.
Now let's see our CI server performing a more real live action. We will add a simple bug in our example and submit a PR. Then, the CI server will alert that a test has failed and will not integrate the change.
Change the function addition in SimpleCalculator.java to work incorrectly (i.e., introduce a bug on it). For example, you can change line 6 to return x + y + 1, as detailed below.
--- a/src/main/java/br/ufmg/dcc/SimpleCalculator.java
+++ b/src/main/java/br/ufmg/dcc/SimpleCalculator.java
@@ -3,7 +3,7 @@ package br.ufmg.dcc;
 public class SimpleCalculator {

   public int addition(int x, int y) {
-    return x + y;
+    return x + y + 1;
   }

public int subtraction(int x, int y) {Create a new branch, commit, and push:
git checkout -b buggy
git add --all
git commit -m "Deliberately introducing a bug in addition"
git push origin buggyCreate a PR with your changes. Click on the Pull Request tab on your GitHub repository and follow the options to create a PR from your buggy branch to your main branch. If you prefer, you can just type the following URL in your browser (where <USER> should be replaced by your GitHub user).
https://github.com/<USER>/demo-ci/compare/main...buggyYou will be presented with the differences of both branches, and you should also write a description for your PR.
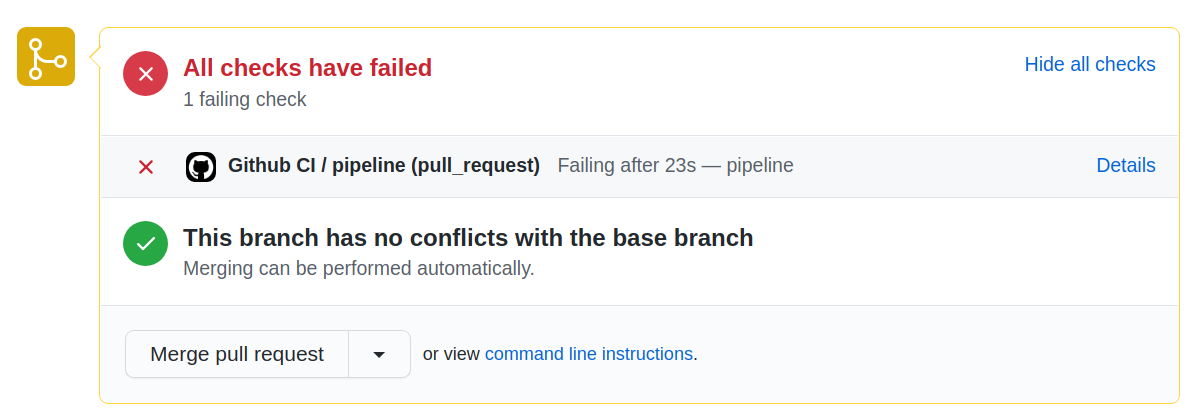
After creating the PR, the job pipeline defined in GitHub Actions is triggered. Do not merge, wait at least 1 minute and you will see the results. GitHub itself will build the system and run the tests (just like it did in Task #1). However, this time the tests will fail, as shown in this figure.
SUMMARIZING: The CI server automatically notified both the PR author and the integrator about a problem in the submitted code.
This exercise was created by Rodrigo Brito, an MSc student in DCC/UFMG, under the advisement of Prof. Marco Túlio Valente. It was translated and adapted to English by Prof. Henrique Rocha, at Loyola University Maryland.


