Qt app that can be compiled on Linux, Windows or Mac for providing CAT support for Cloudlog (http://www.cloudlog.co.uk/). The app uses a connection to FlRig (http://www.w1hkj.com)
The app is still in development and therefore it can not be considered as fully stable.
apt install qt5-default
git clone --recursive https://github.com/myzinsky/CloudLogCatQt.git
cd CloudLogCatQt
mkdir build
cd build
qmake ../CloudLogCatQt.pro
make -j4- Install Homebrew
- Open a Terminal
- Run
brew install qt@5 - Clone this repository and cd into it
mkdir buildcd build/usr/local/opt/qt@5/bin/qmake ../CloudLogCatQt.promake -j4
After successfully installing Homebrew, take a look at the output in the terminal. You'll find a "Caveats" block having some information on the installation paths of Qt5. Maybe you have to adapt Step 7 to your needs.
Terminal output example:
Caveats
We agreed to the Qt open source license for you.
If this is unacceptable you should uninstall.

qt@5 is keg-only, which means it was not symlinked into /usr/local,
because this is an alternate version of another formula.

If you need to have qt@5 first in your PATH, run:
  echo 'export PATH="/usr/local/opt/qt@5/bin:$PATH"' >> /Users/michael/.bash_profile

For compilers to find qt@5 you may need to set:
  export LDFLAGS="-L/usr/local/opt/qt@5/lib"
  export CPPFLAGS="-I/usr/local/opt/qt@5/include"
For building CloudLogCatQt on Windows 10 follow the steps below.
- Install Chocolatey (The Package Manager For Windows)
- Open an elevated PowerShell and run
choco install -y qt5-default cmake qtcreator - Clone this repository
- Start QT Creator
- Open project file CloudLogCatQt.pro
- Change the projects build settings for Release and add a Custom Process Step
- Command:
%{Qt:QT_INSTALL_BINS}\windeployqt.exe - Arguments:
%{buildDir}\release - Working directory:
%{buildDir}\release
- Command:
- Click on Build Project [
CTRL+B] - The release and all it's dependencies should now be located in the Build directory as defined in the Projects Build Settings (e.g. in build-CloudLogCatQt-Desktop-Release/release next to your project)
Read more on the deployment process: Qt for Windows - Deployment
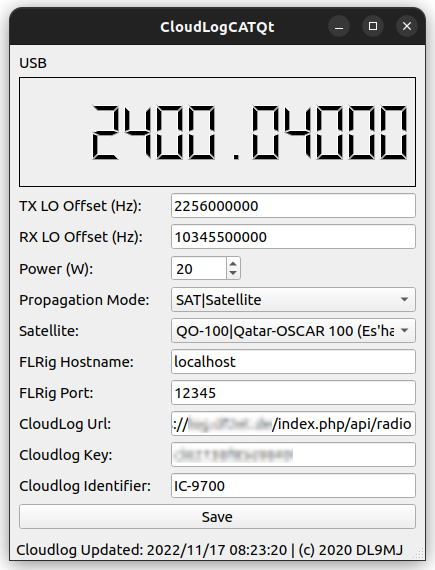
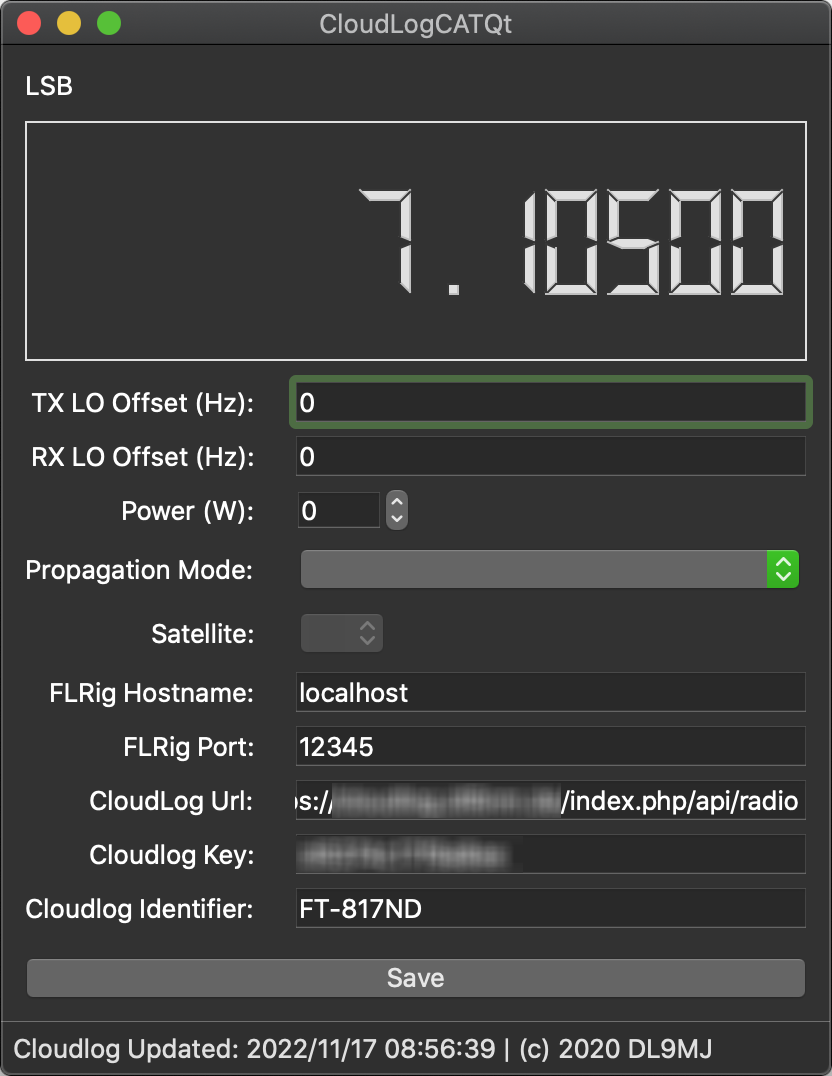
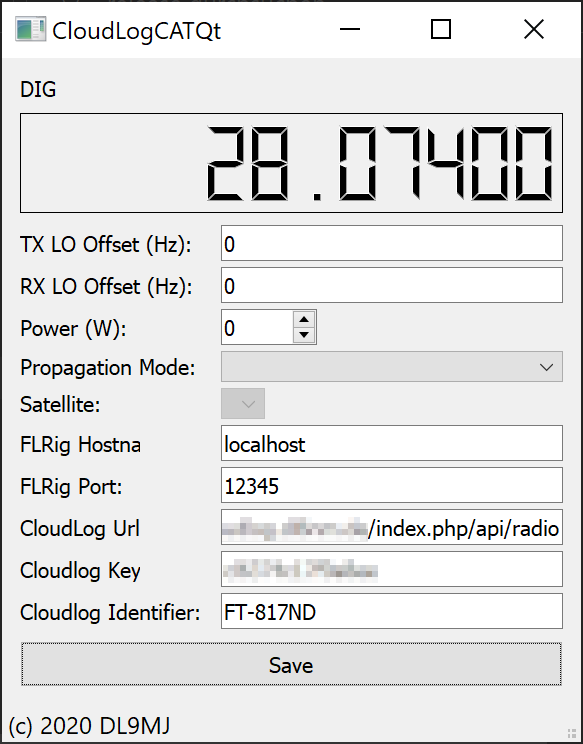
The settings are almost self explaining. According to https://github.com/magicbug/Cloudlog/wiki/API create an API key and fill this together with your CloudLog URL e.g. https://<CloudLogServer>/index.php/api/radio into the settings pane. Furthermore, add the conneciton to FlRig. The default settings are localhost and the port 12345
Besides that you can optionally configure local oscillators for RX and TX (e.g. if you are using a transverter). The output power can be set (is not read from CAT). If you make use of specific propagation modes this can also be selected from a pre-defined list. For SAT QSOs you can also select the satellite name from the drop-down menu. This list is read from an external file called sat.dat which you my need to copy to the folder the executable is in.
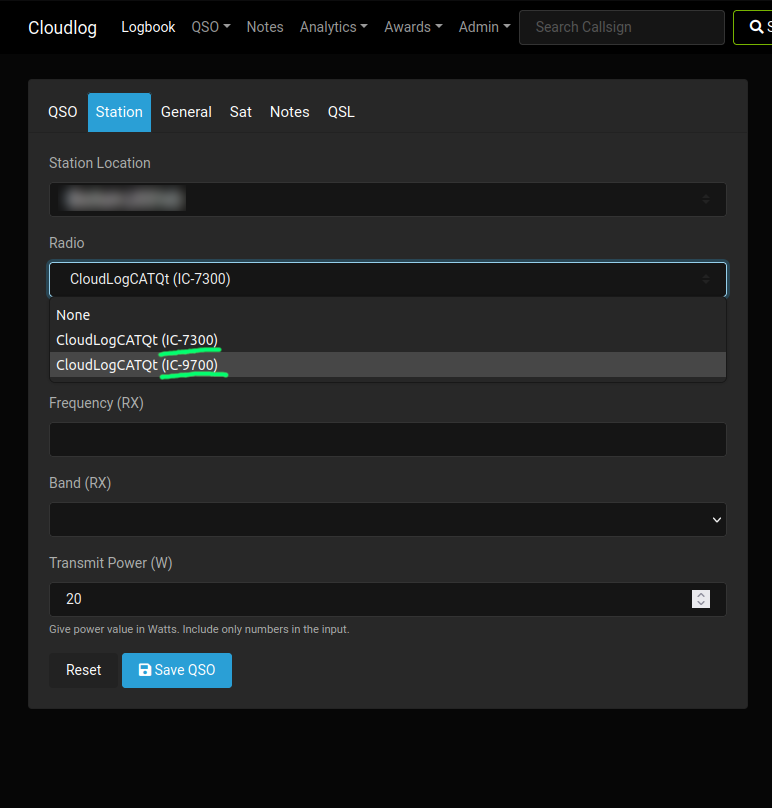
With version 2 of Cloudlog there is also an option to configure an identifier. This enables for distinguishing more than one runnig instance of CloudLogCatQt without overwriting each other on the Cloudlog side. The identifier is shown in the hardware interfaces section as well as the drop-down menu during station selection when logging a QSO.
Linux
macOS
Windows


