Xavier MRZ SDK Integration Manual
For Xavier iOS SDK 1.5, August 2017
By Blackshark Tech, Fairfax Station, VA
Description
The Xavier MRZ SDK contains both Objective-C and Swift demo applications that demonstrate the API calls you can use to interact with the Xavier Library. The Xavier SDK is an iOS framework that enables the developers to integrate the ability to perform OCR i.e. scan on International Civil Aviation Organization (ICAO) compliant two-line passport and three-line ID travel documents, and barcodes. Some sample documents that Xavier SDK can process are:
- Passport
- Refugee Travel Document
- Visa, Resident Alien, Commuter
- Re-Entry Permit
- 2D and 3d barcodes
- QR codes
The Xavier MRZ SDK is capable of performing OCR on travel documents via the native camera to extract all the Machine Readable Zone (MRZ) fields from the travel documents. Xavier MRZ SDK performs auto capture when the quality threshold is reached or a timeout occurred. The resulting data is returned as key-value pair elements.
As of release 1.4, the Xavier engine is also capable of scanning different types of barcodes (one dimensional, two dimensional, QR code etc...). This new feature works seemlessly alongside of the MRZ scanning functionality.
Starting release 1.5, the Xavier engine will now return result in both XML and JSON format
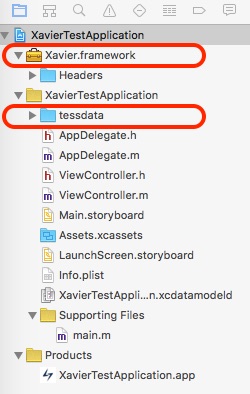
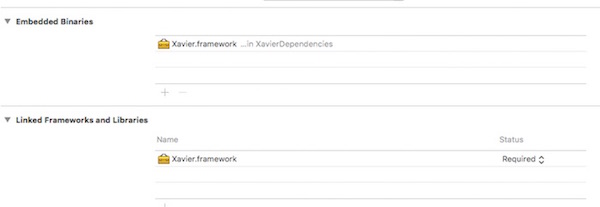
To integrate the Xavier MRZ SDK into your project, you need to include the Xavier.framework and tessdata training folder in your Xcode project (Figure 4).
The provided demo project was created using Xcode 7.2.1 IDE. Please download the XavierTestApplication and follow the instructions below on setting up and running the Xavier MRZ SDK demo application in Xcode IDE. The project is configured to compile at iOS 9.
The Xavier Evaluation SDK has been tested on the iPhone 5 through 7 Plus and iPad Air and iPad Air 2.
The Xavier Evaluation SDK will require a key and the email address registered to that key to operate. You may send an email to request for an evaluation key to sales@blackSharkTech.com.
There is no obligation to purchase the Xavier MRZ SDK. We invite you to explore and try it out for free.
The Xavier Evaluation SDK displays a random pop-up screen to indicate that this is an evaluation version. Please contact Blackshark Tech email address sales@blacksharktech.com for a production license version of Xavier
Getting the latest Xavier Evaluation SDK from GitHub
-
Download the XavierTestApplication project. This is a self contained Xavier Evaluation project which includes the Xavier.framework for you to run the demo application on the iPhone.
-
Open the XavierTestApplication project using the Xcode IDE and compile the project.
-
Add the file iso3.plist from the framework folder to your project.
-
The framework included in the project is a universal framework for both simulators and devices. If you'd like the version of the framework without the binaries for simulators, please use the one in the folder "Frameworks/Devices/".
-
To integrate the Xavier.framework into your application, please make sure you have the similar setting as the Xavier Evaluation SDK. Here are all the Xavier Evaluation SDK settings:
General Setting (Figure 1)
Architectures Setting (Figure 2)

Build Options Setting (Figure 3)

Xavier Framework & tessdata folder highlighted in red (Figure 4)
Running Xavier Evaluation SDK application on the iPhone phone
-
Connect the iPhone phone to your laptop via the USB connection.
-
Before running the Xavier Evaluation SDK demo application from the Xcode IDE, make sure the iPhone you are tesing on is properly provisioned.
-
Run Xavier Evaluation application from Xcode IDE.
-
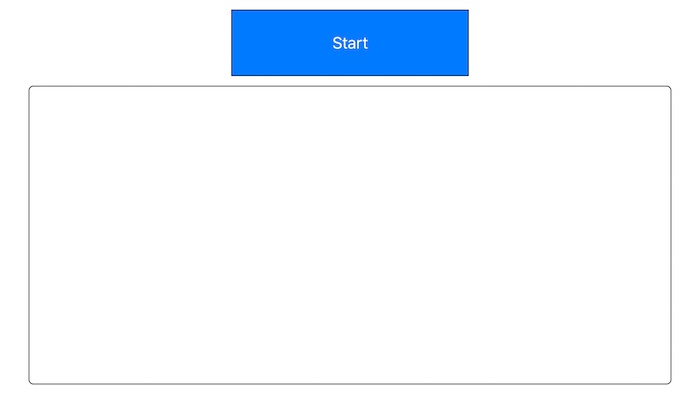
Once Xavier Evaluation application is running on the iPhone. You should see the following screen:
-
Click "Start" button to initiate the MRZ capturing process. The capturing screen should display as below:
-
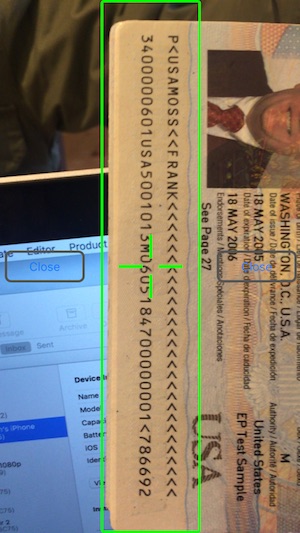
Xavier is now capable of running in portrait orientation (Figure 11). Refer to the integration section for more details on how to utilzie this mode.
Xavier Evaluation SDK Application (Figure 5)
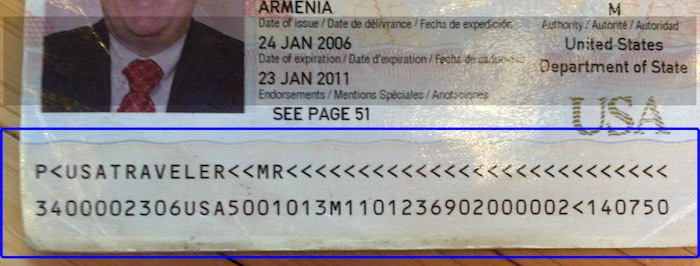
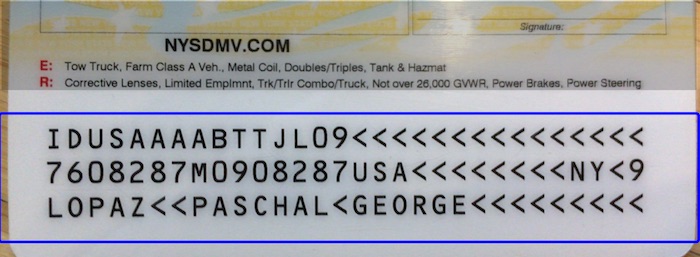
Two-line MRZ Preview (Figure 6)
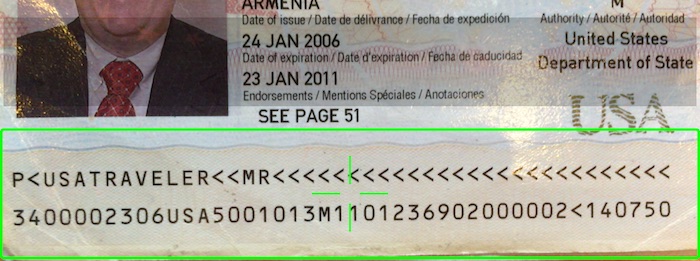
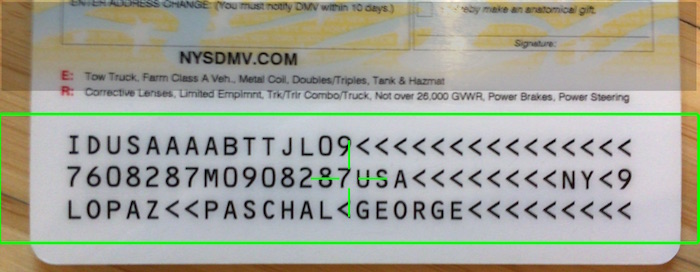
Two-line MRZ in-focus (Figure 7)
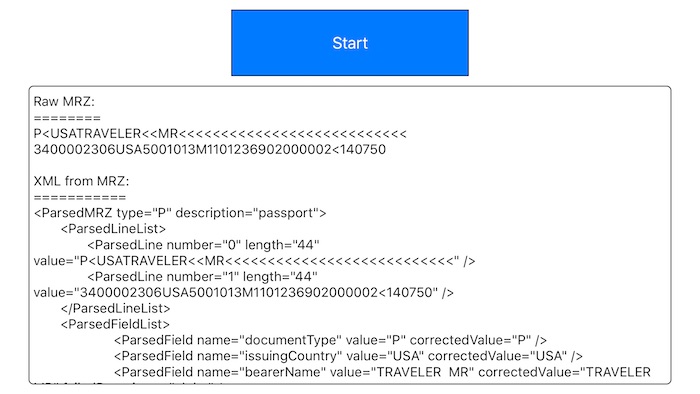
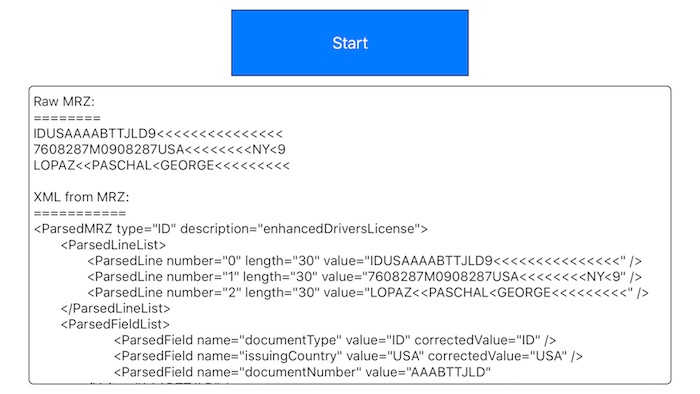
Two-line MRZ Final Result (Figure 8)
Three-line MRZ Preview (Figure 9)
Three-line MRZ in-focus (Figure 10)
Three-line MRZ Final Result (Figure 10)
Xavier in portrait orientation (Figure 11)
- To capture MRZ data accurately, hold the document as close as possible to the camera and make sure the MRZ lines (either two-line or three-line document) fall within the rectangular box on the phonescreen.
- The capturing screen displays a rectangular box in blue color (Figure 6 or Figure 9) when it is not detecting any MRZ lines. The rectangular box turns to green (Figure 7 or Figure 10) with a plus mark when it detects the MRZ lines.
- The capturing screen automatically goes away under one of these three conditions:
- When the MRZ lines are successfully captured.
- When timeout has occurred and it returns the MRZ lines to the client application. Timeout is currently set to 5 seconds.
- When an error occurred and failed to capture MRZ lines. It returns an error message in the onError callback.
#### Xavier Library Integration Code ##### 1. Property List: Starting version 1.1, xavier.plist has been introduced as part of the Xavier SDK package. It must be added to any projects utilizing the Xavier framework.
The plist contains the following fields:
i. Email Address: The email sent to BlackShark Tech to generated the License Key
ii. License Key: The license key obtained from Blackshark Tech to enable Xavier
iii. Portrait Mode: Specify whether Xavier should be used in portrait mode
iv. previewing UIColor: Specify the color of the preview box for the Xavier widget. The value has to be of type UIColor
v. mrz detected UIColor: Specify the color of the preview box when the target MRZ is detected. The value has to be of type UIColor
vi. close button text: Specify the display text of the close button on the Xavier widget
vii. company logo image: Specify the image to be used for the company logo. This is displayed on the top left corner (landscape mode) and top right corner (portrait mode) of the Xavier widget
viii. company logo width: Specify the width of the logo from (vii)
ix. company logo height: Specify the height of the logo from (vii)
x. Maximum MRZ candidates: Specify the maximum number of MRZ candidates that the engine need to create the composite
xi. OCR Timeout: Specify the maximum duration that the enginge will run
The plist is used to simplify the Xavier View Controller initialization process #####2. Starting up Xavier capturing screen (Please see ViewController.m for integration code usage) #####There are 2 ways to initialize the Xavier View Controller: a. Explicitly specify whether the view controller will be initialized in portrait or landscape mode: Objective-C:
    // NOTE: To request License Key, contact Blackshark Tech (www.blacksharktech.com)
    //Portrait mode
    _xavierViewController = [[SCIXavierViewController alloc] init:true];
    /* OR */
    //Landscape mode
    _xavierViewController = [[SCIXavierViewController alloc] init:false];
    _xavierViewController._clientProtocol = self;
    [self presentViewController:_xavierViewController animated:NO completion:^{
        NSLog(@"Xavier View Controller is started");
    }];
    // NOTE: To request License Key, contact Blackshark Tech (www.blacksharktech.com)
    //Portrait mode
    xavierVC = SCIXavierViewController(true)
    /* OR */
    //Landscape mode
    xavierVC = SCIXavierViewController(false)
    xavierVC?._clientProtocol = self
    self.presentViewController(xavierVC!, animated: false, completion: {() -> Void in print("Xavier is started")})
b. Leave out the orientation info and let the constructor pull that from xavier.plist: Objective-C:
    // NOTE: To request License Key, contact Blackshark Tech (www.blacksharktech.com)
    _xavierViewController = [[SCIXavierViewController alloc] init];
    _xavierViewController._clientProtocol = self;
    [self presentViewController:_xavierViewController animated:NO completion:^{
        NSLog(@"Xavier View Controller is started");
    }];
<b>Swift:</b>
    // NOTE: To request License Key, contact Blackshark Tech (www.blacksharktech.com)
    xavierVC = SCIXavierViewController()
    xavierVC?._clientProtocol = self
    self.presentViewController(xavierVC!, animated: false, completion: {() -> Void in print("Xavier is started")})
Note: If the approach in (a) is used to initialize the Xavier view controller then it will always overrride the value specified in the plist
3. The Xavier client callbacks
Objective-C:
/**
 * onRawMrz - SCIXavierClientProtocol implementation
 */
-(void) onRawMrz: (NSString*) rawMrz
{
    // Raw MRZ lines
}

/**
 * onMrzCaptureCompleted - SCIXavierClientProtocol implementation
 */
-(void) onMrzCaptureCompleted
{
    // MRZ capture complete event
}

/**
 * onError - SCIXavierClientProtocol implementation
 */
-(void) onError: (NSString*) errorMessage
{
	// MRZ capturing encountered errors
}

/**
 * onParsedXmlFromlMrz - SCIXavierClientProtocol implementation
 */
-(void) onParsedXmlFromlMrz: (NSString*) parsedXmFromlMrz
{
	// Parsed MRZ in XML format
}

/**
 * onParsedJsonFromlMrz - SCIXavierClientProtocol implementation
 */
-(void) onParsedXmlFromlMrz: (NSString*) parsedXmFromlMrz
{
    // Parsed MRZ in JSON format
}

/**
 * onMetrics - SCIXavierClientProtocol implementation
 */
-(void) onMetrics: (SCIMetrics*) metrics
{
	// Captured Metrics data for analysis purpose
}

-(void) onCapturedBarcode: (NSString*) barcode
{
	// Barcode data captured
}
Swift:
@objc func **onRawMrz**(rawMrz: String!) -> Void {
	//Raw MRZ lines
}

@objc func **onParsedXmlFromlMrz**(parsedXmFromlMrz: String!) -> Void {
// Parsed MRZ in XML format
}

@objc func **onParsedJsonFromlMrz**(parsedJsonFromlMrz: String!) -> Void {
// Parsed MRZ in JSON format
}

@objc func onMetrics(metrics: SCIMetrics!) -> Void {
// Captured Metrics data for analysis purpose
}

@objc func **onMrzCaptureCompleted**() -> Void {
//MRZ capture complete event
}

@objc func **onError**(errorMessage: String!) -> Void {
// MRZ capturing encountered errors
}

@objc func onCapturedBarcode(_barcode: String!) {
	// Barcode data captured
}
Use Xavier with the front camera:
Xavier can now be used with the device's front camera. To use this feature, initialize the Xavier controller as follow: Objective-C:
_xavierViewController = [[SCIXavierViewController alloc] init:false andUseFrontCam:true];
Swift:
xavierVC = SCIXavierViewController.init(true, andUseFrontCam: true)
XML Tag Description
The “onCapturedMRZ” callback returns the validated and corrected MRZ. Attributes are used to indicate validation states and corrected field values.
A ParsedMRZ XML tag is created when an MRZ is parsed. The lines of an ParsedMRZ are put into an XML tag called “ParsedLineList”. Each line is put into a “ParsedLine” XML tag. These are characters that are recognized by the OCR engine in a raw state. Each line is delimited by a carriage return or line feed.
The document type determines the schema of the MRZ. Fields are defined by their line and position within each line of the MRZ. Each field consists of descriptors.
- alpha - the field only contains upper case alpha characters
- checkDigit - the field is a number and is a check digit of a field
- futureDate - the field is a date in the future (with the format YYMMDD)
- mandatory - the field must not be blank (“<“)
- numeric - the field is numeric
- pastDate - the field is a date in the past
- set - the field is in a set (i.e. M, F, X - male, female, other)
Fields found in each “ParsedLine” are put into “ParsedField” tags. The “ParsedField” tags have the following attributes:
- name - the name of the field. Some fields can have different names but similar function from other travel documents.
- value - the value of the field from the MRZ
- correctedValue - the corrected value of the field fro the MRZ
- failedDescriptor - this attribute only appears when a descriptor fails when validating the MRZ. If there are multiple detected failures, a list of them will be created for the attribute value.
Sample MRZ result data
The onRawMrz callback receives the raw MRZ lines. The onParsedXmlFromlMrz callback receives the parsed MRZ elements in XML format. The onMetrics callbacks receives the collected metrics data.
Error Handling
When an error occurrs, the onError callback will be called.
Additional Information
Please feel free to contact us at admin@blacksharktech.com for any questions.
Release Notes
1.6
- Fix stability issue
1.5
* Return result in both XML and JSON format * Fix an issue with landscape orientation * Performance enhancement * Bug fixes
1.4.3
* Expose front camera mode
1.4.2
* Add universal framework
1.4.1
* Update engine to latest version. Minor accuracy improvement
1.4
* Add capability to read barcode
1.3
* Add new plist properties to improve performance
1.2.0
* Minor bug fixes
1.1.0
* Added portrait capture mode * Added support for Apple Tablets. * Updated to Tesseract 3.03 * Added configuration through Plist
1.0.0
Initial release of Xavier Evaluation SDK
© 2017 Blackshark Tech All Rights Reserved.

