This program was made for the martian club(link coming soon) that was started at my school, Centaurus High School.
This code is made in c# using the MonoGame XNA Framework with Visual Studios. All code for the UI can be found in: MarsImageThing/Game1.cs The classification algorithum can be found in: MarsImageThing/ClassifyImage.cs and MarsImageThing/SpectralDataPoint.cs
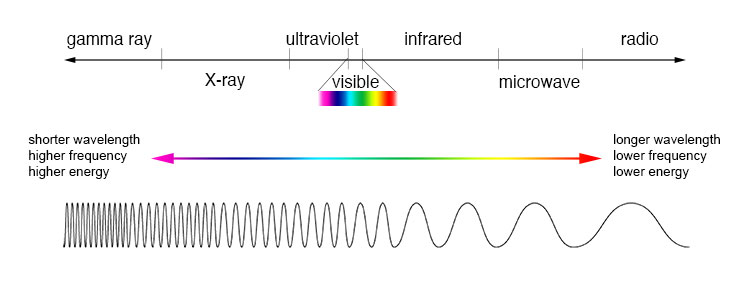
In everyday life everything absorbs and reflects light; This in turn, gives it its color. While we humans can only see the visible spectrum (400nm - 700nm) there are still more wavelengths that are also affected by objects in the same way. Although for opportunity only near-UV to near-IR wavelengths are used as filters for the cameras.
In windows, opening a file using their built in using System.Windows.Forms.OpenFileDiolog can be done like this:
OpenFileDialog openFileDialog = new OpenFileDialog();
openFileDialog.Filter = "Image File (*.jpg)|*.jpg|All files (*.*)|*.*";
openFileDialog.FilterIndex = 1;
openFileDialog.RestoreDirectory = true;
Stream stream;
if (openFileDialog.ShowDialog() == DialogResult.OK)
{
    if ((stream = openFileDialog.OpenFile()) != null)
    {
        Console.WriteLine("Done")
        //Code that uses the stream goes here
    }
}
In this example the file is never used, but the file location is saved to the variable stream when stream = openFileDialog2.OpenFile() was used. Also for Part 4 this same methed can be used to save the file, use System.Windows.Forms.SaveFileDiolog.
Here, the file paths are converted in to a System.Drawing.BitMap where each pixel can be used independently:
for(int i = 0; i < ImageLocations.Length; i++)
{
    if (ImageLocations[i] != null)
    {
        Bitmap tempImage = new Bitmap(ImageLocations[i]);

        if (tempImage.Size.Height == firstImageSize.Y && tempImage.Size.Width == firstImageSize.X)
            imageList[i] = tempImage;
    }
}
The colors list I used for all six points:
System.Drawing.Color[] colors = { System.Drawing.Color.FromName("Red"), System.Drawing.Color.FromName("Blue"), System.Drawing.Color.FromName("Green"), System.Drawing.Color.FromName("Orange"), System.Drawing.Color.FromName("Gold"), System.Drawing.Color.FromName("Purple") };This is done by taking the dot product of two vectors, this can be expressed by: 
for (int i = 0; i < Points.Count; i++)//both Variation 1 and 2
{
    for (int x = 0; x < ImageSize.X; x++)
    {
        for (int y = 0; y < ImageSize.Y; y++)
        {
            double sum = 0;//could also be an int
            double aMag = 0;
            double bMag = 0;
            for(int j = 0; j < imageList.Length; j++)//dot product
            {
                if (imageList[j] == null)
                    continue;
                aMag += Math.Pow(imageList[j].GetPixel(x, y).B), 2);
                bMag += Math.Pow(imageList[j].GetPixel(Points[i].X, Points[i].Y).B, 2);
                sum += imageList[j].GetPixel(x, y).B, 10) * imageList[j].GetPixel(Points[i].X, Points[i].Y).B;
            }
            aMag = Math.Sqrt(aMag);
            bMag = Math.Sqrt(bMag);

            classifiedImage[x, y, i] = (sum) / (aMag * bMag);
        }
    }
}
An important thing to note is that when using both the right and left cameras, there must be a smaller x dimension to compensate for the offset of the cameras; Meaning that the value of imageSize.X will be smaller than the original images. All of this data can be found with the images.
Vector values can be set to that same value as the brightness of each pixel, represented by the Red, Green or Blue values (I used the Blue value). This is done for both vectors a and b, where vector a is the current pixel and vector b is the location of the clicked point.
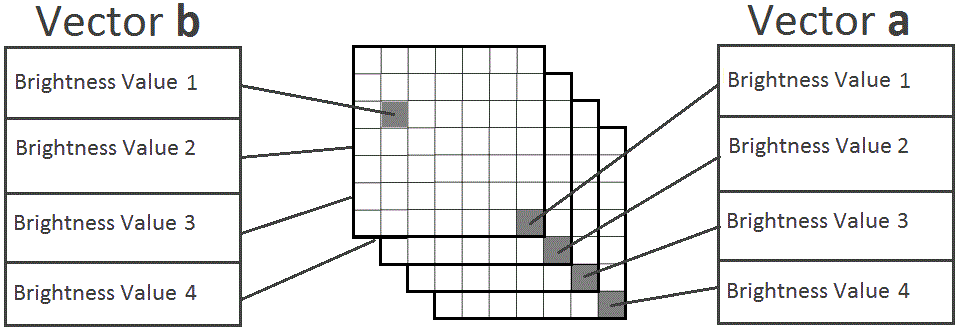
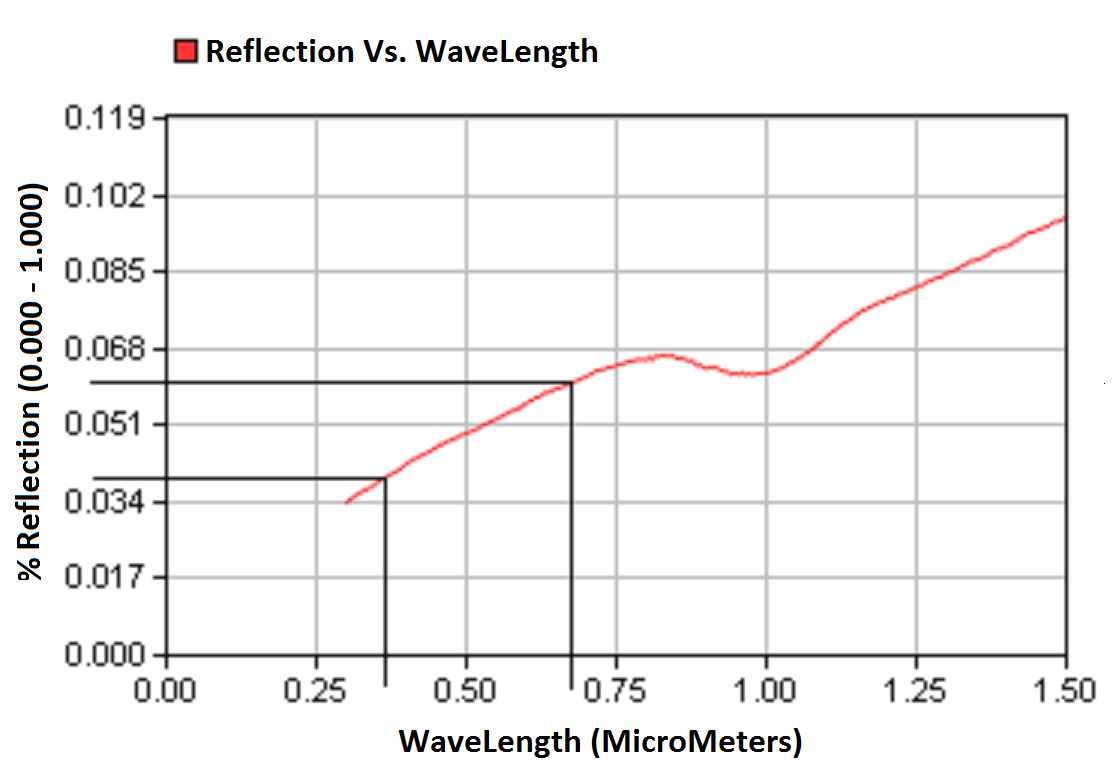
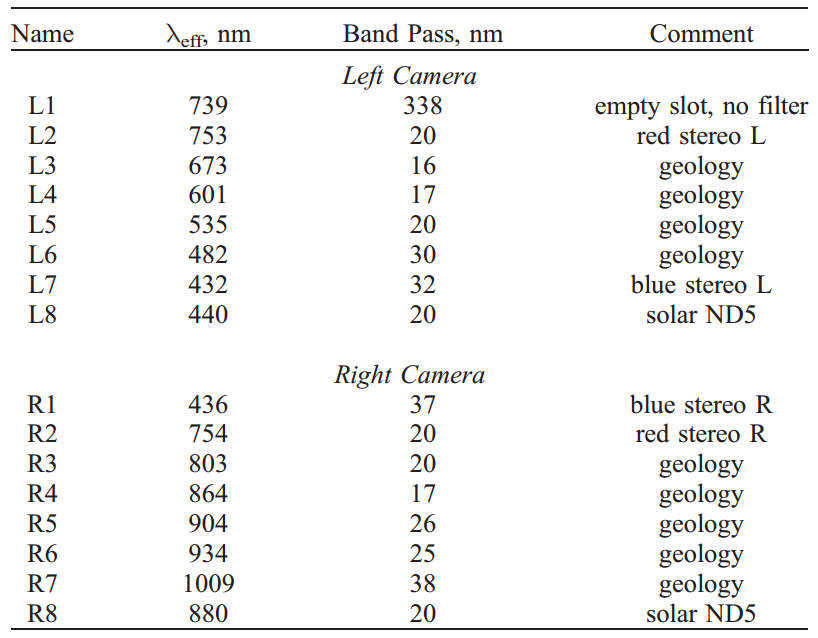
Vector a is set in the same way as in Variation 1, while vector b is set using spectral data from a list of data points. To do this a Reflection vs. wavelength graph must be used as F(x), it should return the % reflection when x is equal to the wavelength. This can be done using the known wavelength of each filter on each camera.
 To get the wavelengths for each filter use this chart:
This is where it iterates over each pixel of the classifiedImage and selects the maximum value for the Cos(θ) respective to that pixel and that of vector b.
for (int x = 0; x < ImageSize.X; x++)
{
    for (int y = 0; y < ImageSize.Y; y++)
    {
        int pointClosest = 6;
        for (int i = 0; i < Points.Count; i++)
        {
            if(pointClosest == 6)
                pointClosest = i;
            else
                if(classifyedImage[x,y,i] > classifyedImage[x,y,pointClosest])
                    pointClosest = i;
        }
        outputImage.SetPixel(x, y, colors[pointClosest]);
    }
}Something like:
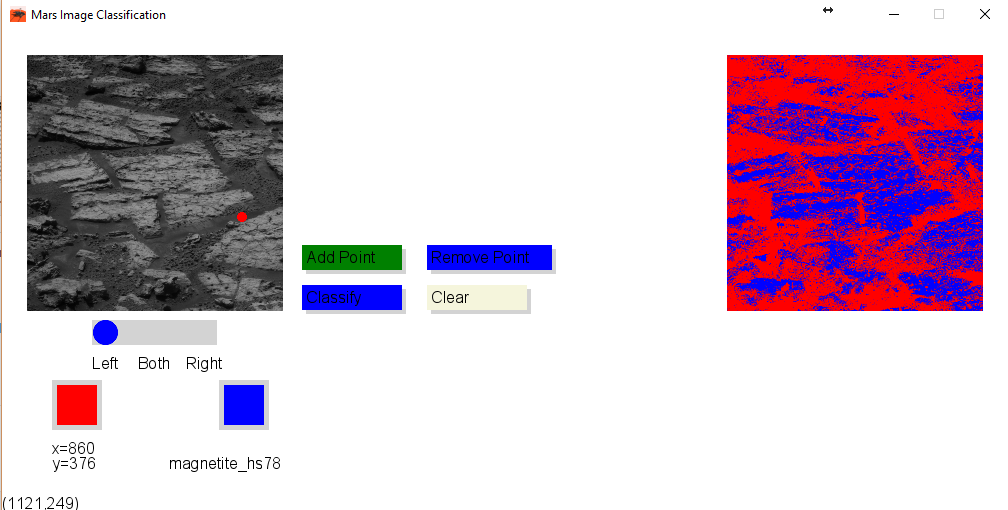 The first point is set to the dirt and dust around the rocks and the second point is set to the spectral data file for magnetite, MarsImageThing/SpectralData/magnetite_hs78.13233.asc, which is commonly found in the rocks on mars.
The application file can be ran from: MarsImageThing/Release/MarsImageThing.exe
The images must be in .jpg format and the example images can be found in: MarsImageThing/MartianProjectImages/
All of the images are from http://anserver1.eprsl.wustl.edu/ from oppritunity.
To add spectral data to classify with, use a .asc file, examples can be found in: MarsImageThing/SpectralData/ or at https://speclab.cr.usgs.gov/spectral.lib06/
Last edit: 3/8/2017
Made By: Zack Jorquera
Thanks to Samuel Estrella for the original concept for classification
