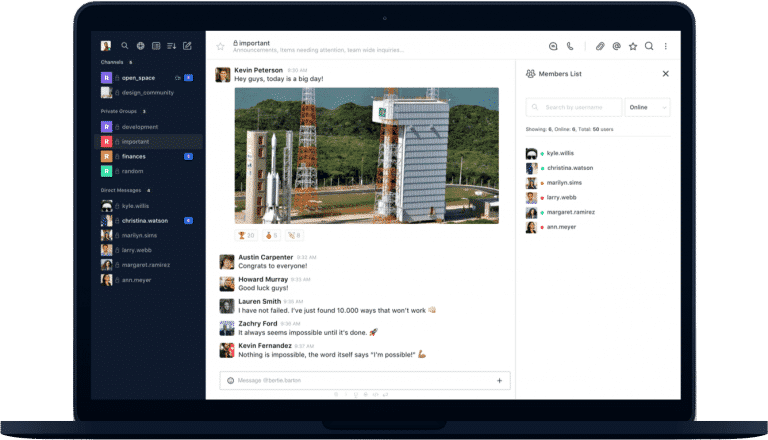
Desktop application for Rocket.Chat available for macOS, Windows and Linux using Electron.
We’d love to hear about your experience and potentially feature it on our Blog.
Once a month our marketing team releases an email update with news about product releases, company related topics, events and use cases. Sign Up!
You can download the latest version from the Releases page.
Launch the installer and follow the instructions to install.
On Windows you can run a silent install by adding the /S flag. You can also
add the options below:
/S- Silent install/allusers- Install for all users (requires admin)/currentuser- Install only the for current user (default)/disableAutoUpdates- Disable automatic updates
Prerequisites:
Now just clone and start the app:
git clone https://github.com/RocketChat/Rocket.Chat.Electron.git
cd Rocket.Chat.Electron
yarn
yarn startThe source is located in the src folder. Everything in this folder will be
built automatically when running the app with yarn start.
The build process compiles all stuff from the src folder and puts it into the
app folder, so after the build has finished, your app folder contains the
full, runnable application.
Following the ongoing changes in Rocket.Chat codebase, the app was rewritten in TypeScript 4 to address issues regarding maintainability.
The build process is founded upon rollup bundler. There are three entry files for your code:
-
src/main.ts, the script running at the main Electron process, orchestrating the whole application; -
src/rootWindow.ts, the script that renders the UI of the root window, the app's main window; -
and
src/preload.ts, which runs in a privileged mode to connect the app and the webviews rendering Rocket.Chat's web client.
Remember to respect the split between dependencies and devDependencies in
package.json file. Only modules listed in dependencies will be included into
distributable app.
Follow the installation instruction on node-gyp readme.
You will need to install the following packages:
build-essential
libevas-dev
libxss-devYou will need to install the following packages:
libX11
libXScrnSaver-devel
gcc-c++On Windows 7 you may have to follow option 2 of the node-gyp install guide and install Visual Studio.
yarn testWe use Jest testing framework with the Jest electron runner. It searches
for all files in src directory that match the glob pattern
*.(spec|test).{js,ts,tsx}.
To package your app into an installer use command:
yarn releaseIt will start the packaging process for operating system you are running this
command on. Ready for distribution file will be outputted to dist directory.
All packaging actions are handled by electron-builder. It has a lot of customization options.
The servers.json file will define what servers the client will connect to and
will populate the server list in the sidebar. It contains a list of default
servers which will be added the first time the user runs the app (or when all
servers are removed from the list).
The file syntax is as follows:
{
  "Demo Rocket Chat": "https://demo.rocket.chat",
  "Open Rocket Chat": "https://open.rocket.chat"
}You can bundle a servers.json with the install package, the file should be
located in the root of the project application (same level as the
package.json). If the file is found, the initial "Connect to server" screen
will be skipped and it will attempt to connect to the first server in the array
that has been defined and drop the user right at the login screen. Note that the
servers.json will only be checked if no other servers have already been added,
even if you uninstall the app without removing older preferences, it will not be
triggered again.
If you can't (or don't want to) bundle the file inside the app, you can create a
servers.json in the user preferences folder which will overwrite the packaged
one. The file should be located in the %APPDATA%/Rocket.Chat/ folder or the
installation folder in case of an installation for all users (Windows only).
For Windows, the full paths are:
~\Users\<username>\AppData\Roaming\Rocket.Chat\~\Program Files\Rocket.Chat\Resources\
On macOS, the full path is:
~/Users/<username>/Library/Application Support/Rocket.Chat//Library/Preferences/Rocket.Chat/
On Linux, the full paths are:
/home/<username>/.config/Rocket.Chat//opt/Rocket.Chat/resources/
You can override the user settings by creating an overridden-settings.json in
the user preferences folder.
The file should be located in the %APPDATA%/Rocket.Chat/ folder or the
installation folder in case of an installation for all users (Windows only).
Every setting set on the file will override the default and user settings. Then you can use it for disabling the default features like auto-update and even create a single server mode.
| Setting | Description |
|---|---|
"isReportEnabled": true, |
Sets if the bugs will be reported to developers. |
"isInternalVideoChatWindowEnabled": true, |
Sets the video calls will be opened in an internal window. |
"isFlashFrameEnabled": true, |
Sets if the flash frame will be enabled. |
"isMinimizeOnCloseEnabled": false, |
Sets if the app will be minimized on close. |
"doCheckForUpdatesOnStartup": true, |
Sets if the app will check for updates on startup. |
"isMenuBarEnabled": true, |
Sets if the menu bar will be enabled. |
"isTrayIconEnabled": true, |
Enables Tray Icon, the app will be hidden to the tray on close. Overrides "isMinimizeOnCloseEnabled" |
"isUpdatingEnabled": true, |
Sets if the app can be updated by the user. |
"isAddNewServersEnabled": true, |
Sets if the user can add new servers. |
If the setting "isAddNewServersEnabled": false is set, the user will not be able to add new servers.
The buttons and shortcuts will be disabled. Then you will have to add the server to the servers.json file.
With this, you can create a single server mode or just don't let the user to add new servers by his own.
overridden-settings.json file:
{
   "isTrayIconEnabled": false,
   "isMinimizeOnCloseEnabled": false
}
When isTrayIconEnabled is enabled, the app will be hidden on close.
When isMinimizeOnCloseEnabled is enabled, the app will be minimized on close.
When both are disabled, the app will quit on close.
Released under the MIT license.


