| Badges | |
|---|---|
| fairness |  |
| package | |
| docs | |
| tests | |
| license |  |
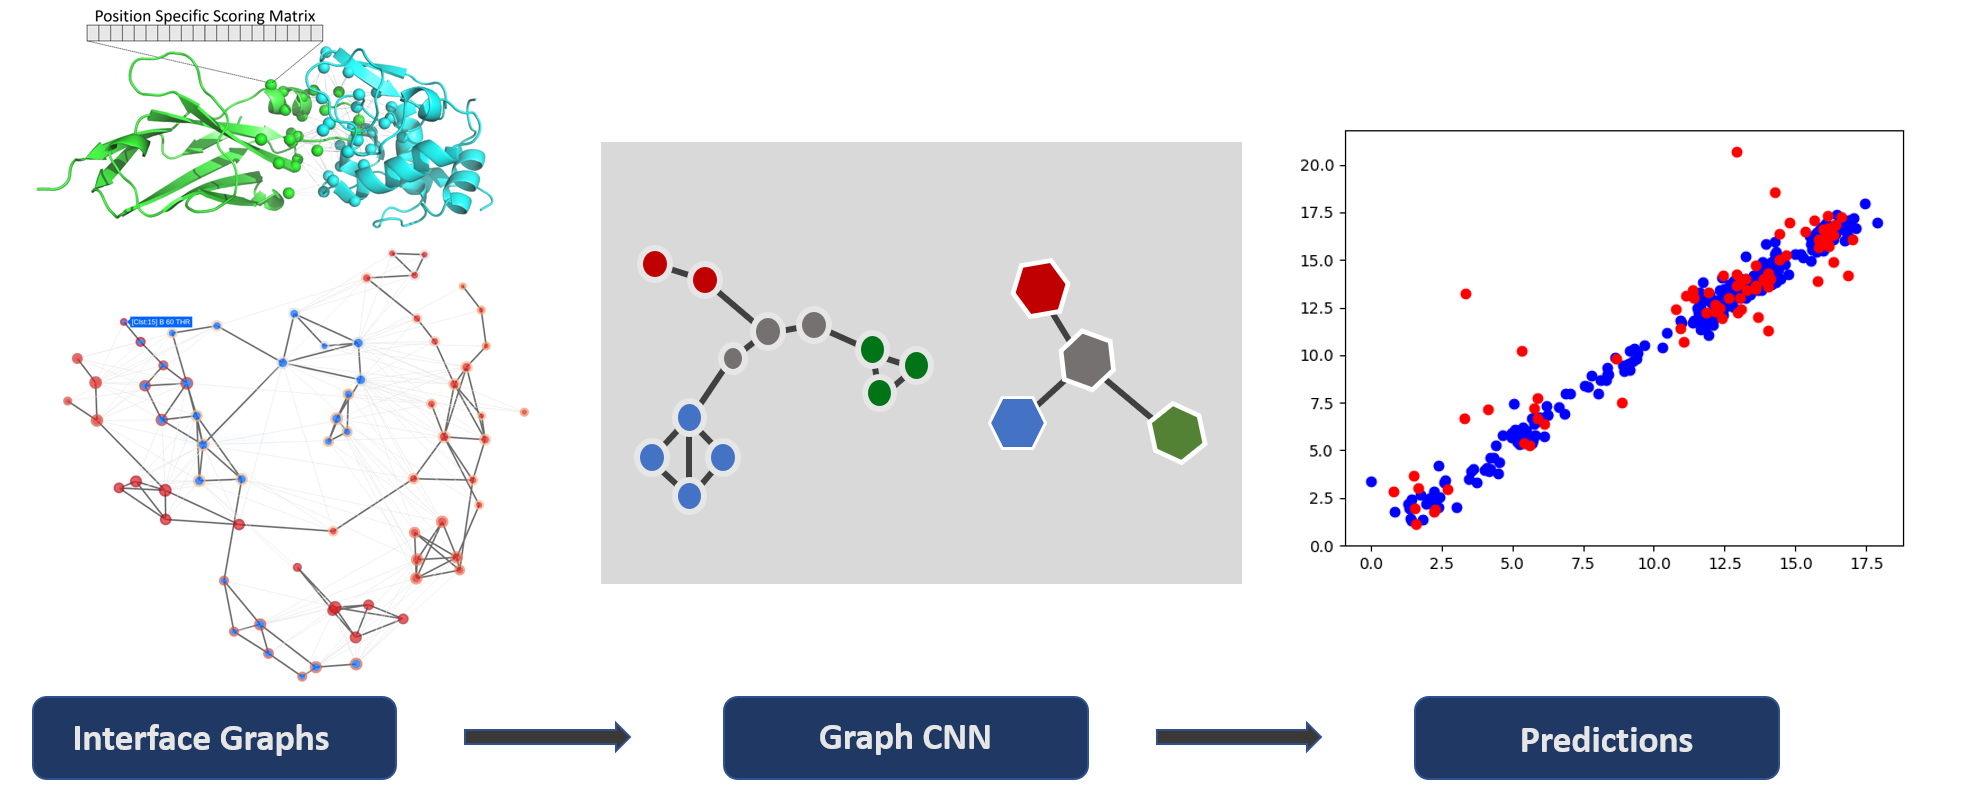
Deeprank-Core is a deep learning framework for data mining Protein-Protein Interactions (PPIs) using Graph Neural Networks.
Deeprank-Core contains useful APIs for pre-processing PPIs data, computing features and targets, as well as training and testing GNN models.
- Predefined atom-level and residue-level PPI feature types
- e.g. atomic density, vdw energy, residue contacts, PSSM, etc.
- Predefined target type
- e.g. binary class, CAPRI categories, DockQ, RMSD, FNAT, etc.
- Flexible definition of both new features and targets
- Graphs feature mapping
- Efficient data storage in HDF5 format
- Support both classification and regression (based on PyTorch and PyTorch Geometric)
Deeprank-Core documentation can be found here : https://deeprankcore.rtfd.io/.
Before installing deeprank-core you need to install:
- reduce: follow the instructions in the README of the reduce repository.
- How to build it without sudo privileges on a Linux machine. After having run
makein the reduce/ root directory, go to reduce/reduce_src/Makefile and modify/usr/local/to a folder in your home directory, such as/home/user_name/apps. Note that such a folder needs to be added to the PATH in the.bashrcfile. Then runmake installfrom reduce/.
- How to build it without sudo privileges on a Linux machine. After having run
- msms:
conda install -c bioconda msms. For MacOS with M1 chip users: you can follow these instructions. - pytorch:
conda install pytorch -c pytorch. Note that by default the CPU version of pytorch will be installed, but you can also customize that installation following the instructions on pytorch website.
Once the dependencies installed, you can install the latest release of deeprank-core using the PyPi package manager:
pip install deeprankcore
You can get all the new developments by cloning the repo and installing the code with
git clone https://github.com/DeepRank/deeprank-core
cd deeprank-core
pip install -e ./
- For MacOS with M1 chip users only: see this solution if you run into problems with PyQt5 during deeprank-core installation.
The documentation can be found here.
The process of generating graphs takes as input .pdb files representing protein-protein structural complexes and the correspondent Position-Specific Scoring Matrices (PSSMs) in the form of .pssm files. Query objects describe how the graphs should be built.
from deeprankcore.preprocess import preprocess
from deeprankcore.models.query import ProteinProteinInterfaceResidueQuery
from deeprankcore.feature import bsa, pssm, amino_acid, biopython

feature_modules = [bsa, pssm, biopython, atomic_contact]

queries = []

# Append data points
queries.append(ProteinProteinInterfaceResidueQuery(
    pdb_path = "1ATN_1w.pdb",
    chain_id1 = "A",
    chain_id2 = "B",
    targets = {
        "binary": 0
    },
    pssm_paths = {
        "A": "1ATN.A.pdb.pssm",
        "B": "1ATN.B.pdb.pssm"
    }
))
queries.append(ProteinProteinInterfaceResidueQuery(
    pdb_path = "1ATN_2w.pdb",
    chain_id1 = "A",
    chain_id2 = "B",
    targets = {
        "binary": 1
    },
    pssm_paths = {
        "A": "1ATN.A.pdb.pssm",
        "B": "1ATN.B.pdb.pssm"
    }
))
queries.append(ProteinProteinInterfaceResidueQuery(
    pdb_path = "1ATN_3w.pdb",
    chain_id1 = "A",
    chain_id2 = "B",
    targets = {
        "binary": 0
    },
    pssm_paths = {
        "A": "1ATN.A.pdb.pssm",
        "B": "1ATN.B.pdb.pssm"
    }
))

# Generate graphs and save them in hdf5 files
# The default creates a number of hdf5 files equals to the cpu cores available
# See deeprankcore.preprocess.preprocess for more details
output_paths = preprocess(feature_modules, queries, "<output_folder>/<prefix_for_outputs>")
The user is free to implement his/her own query class. Each implementation requires the build_graph method to be present.
As representative example, the following is the hdf5 structure generated by the previous phase for 1ATN_1w.pdb, so for one single graph:
└── ppi-1ATN_1w:A-B
    ├── edge_features
    │   ├── _index
    │   ├── _name
    │   ├── covalent
    │   ├── distance
    │   ├── electrostatic
    │   ├── same_chain
    │   ├── vanderwaals
    ├── node_features
    │   ├── _chain_id
    │   ├── _name
    │   ├── _position
    │   ├── bsa
    │   ├── hse
    │   ├── info_content
    │   ├── res_depth
    │   ├── pssm
    └── target_values
        └── binary
This graph represents the interface between two proteins contained in the .pdb file at the residue level. Each graph generated by deeprank-core has the above structure (apart from the features and the target that are specified by the user).
It is always a good practice to first explore the data, and then make decision about splitting them in training, test and validation sets. For this purpose, users can either use HDF5View, a visual tool written in Java for browsing and editing HDF5 files, or Python packages such as h5py. Few examples for the latter:
import h5py
from deeprankcore.domain.features import groups

with h5py.File("<hdf5_path.hdf5>", "r") as hdf5:

    # List of all graphs in hdf5, each graph representing a ppi
    ids = list(hdf5.keys())

    # List of all node features
    node_features = list(hdf5[ids[0]]["node_features"])
    # List of all edge features
    edge_features = list(hdf5[ids[0]]["edge_features"])
    # List of all edge targets
    targets = list(hdf5[ids[0]]["target_values"])

    # BSA feature for ids[0], numpy.ndarray
    node_feat_polarity = hdf5[ids[0]]["node_features"]["bsa"][:]
     # Electrostatic feature for ids[0], numpy.ndarray
edge_feat_electrostatic = hdf5[ids[0]]["edge_features"]["electrostatic"][:]Data can be split in sets implementing custom splits according to the specific application. Utility splitting functions are currently under development.
Assuming that the training, validation and testing ids have been chosen (keys of the hdf5 file), then the corresponding graphs can be saved in hdf5 files containing only references (external links) to the original one. For example:
from deeprankcore.DataSet import save_hdf5_keys

save_hdf5_keys("<original_hdf5_path.hdf5>", train_ids, "<train_hdf5_path.hdf5>")
save_hdf5_keys("<original_hdf5_path.hdf5>", valid_ids, "<val_hdf5_path.hdf5>")
save_hdf5_keys("<original_hdf5_path.hdf5>", test_ids, "<test_hdf5_path.hdf5>")
Now the HDF5DataSet objects can be defined:
from deeprankcore.DataSet import HDF5DataSet

node_features = ["bsa", "res_depth", "hse", "info_content", "pssm"]
edge_features = ["distance"]

# Creating HDF5DataSet objects
dataset_train = HDF5DataSet(
    hdf5_path = "<train_hdf5_path.hdf5>",
    node_feature = node_features,
    edge_feature = edge_features,
    target = "binary"
)
dataset_val = HDF5DataSet(
    hdf5_path = "<val_hdf5_path.hdf5>",
    node_feature = node_features,
    edge_feature = edge_features,
    target = "binary"

)
dataset_test = HDF5DataSet(
    hdf5_path = "<test_hdf5_path.hdf5>",
    node_feature = node_features,
    edge_feature = edge_features,
    target = "binary"
)Let's define a Trainer instance, using for example of the already existing GNNs, GINet:
from deeprankcore.Trainer import Trainer
from deeprankcore.ginet import GINet
from deeprankcore.models.metrics import OutputExporter, ScatterPlotExporter

metrics_output_directory = "./metrics"
metrics_exporters = [OutputExporter(metrics_output_directory)]

trainer = Trainer(
    dataset_train,
    dataset_val,
    dataset_test,
    GINet,
    batch_size = 64,
    metrics_exporters = metrics_exporters
)
Optimizer (torch.optim.Adam by default) and loss function can be defined by using dedicated functions:
import torch

trainer.configure_optimizers(torch.optim.Adamax, lr = 0.001, weight_decay = 1e-04)
Then the Trainer can be trained and tested, and the model can be saved:
trainer.train(nepoch = 50, validate = True)
trainer.test()
trainer.save_model(filename = "<output_model_path.pth.tar>")It is also possible to define new network architectures:
import torch

def normalized_cut_2d(edge_index, pos):
    row, col = edge_index
    edge_attr = torch.norm(pos[row] - pos[col], p=2, dim=1)
    return normalized_cut(edge_index, edge_attr, num_nodes=pos.size(0))

class CustomNet(torch.nn.Module):
    def __init__(self):
        super(Net, self).__init__()
        self.conv1 = SplineConv(d.num_features, 32, dim=2, kernel_size=5)
        self.conv2 = SplineConv(32, 64, dim=2, kernel_size=5)
        self.fc1 = torch.nn.Linear(64, 128)
        self.fc2 = torch.nn.Linear(128, 1)

    def forward(self, data):
        data.x = F.elu(self.conv1(data.x, data.edge_index, data.edge_attr))
        weight = normalized_cut_2d(data.edge_index, data.pos)
        cluster = graclus(data.edge_index, weight)
        data = max_pool(cluster, data)

        data.x = F.elu(self.conv2(data.x, data.edge_index, data.edge_attr))
        weight = normalized_cut_2d(data.edge_index, data.pos)
        cluster = graclus(data.edge_index, weight)
        x, batch = max_pool_x(cluster, data.x, data.batch)

        x = scatter_mean(x, batch, dim=0)
        x = F.elu(self.fc1(x))
        x = F.dropout(x, training=self.training)
        return F.log_softmax(self.fc2(x), dim=1)

trainer = Trainer(
    dataset_train,
    dataset_val,
    dataset_test,
    CustomNet,
    batch_size = 64,
    metrics_exporters = metrics_exporters
)

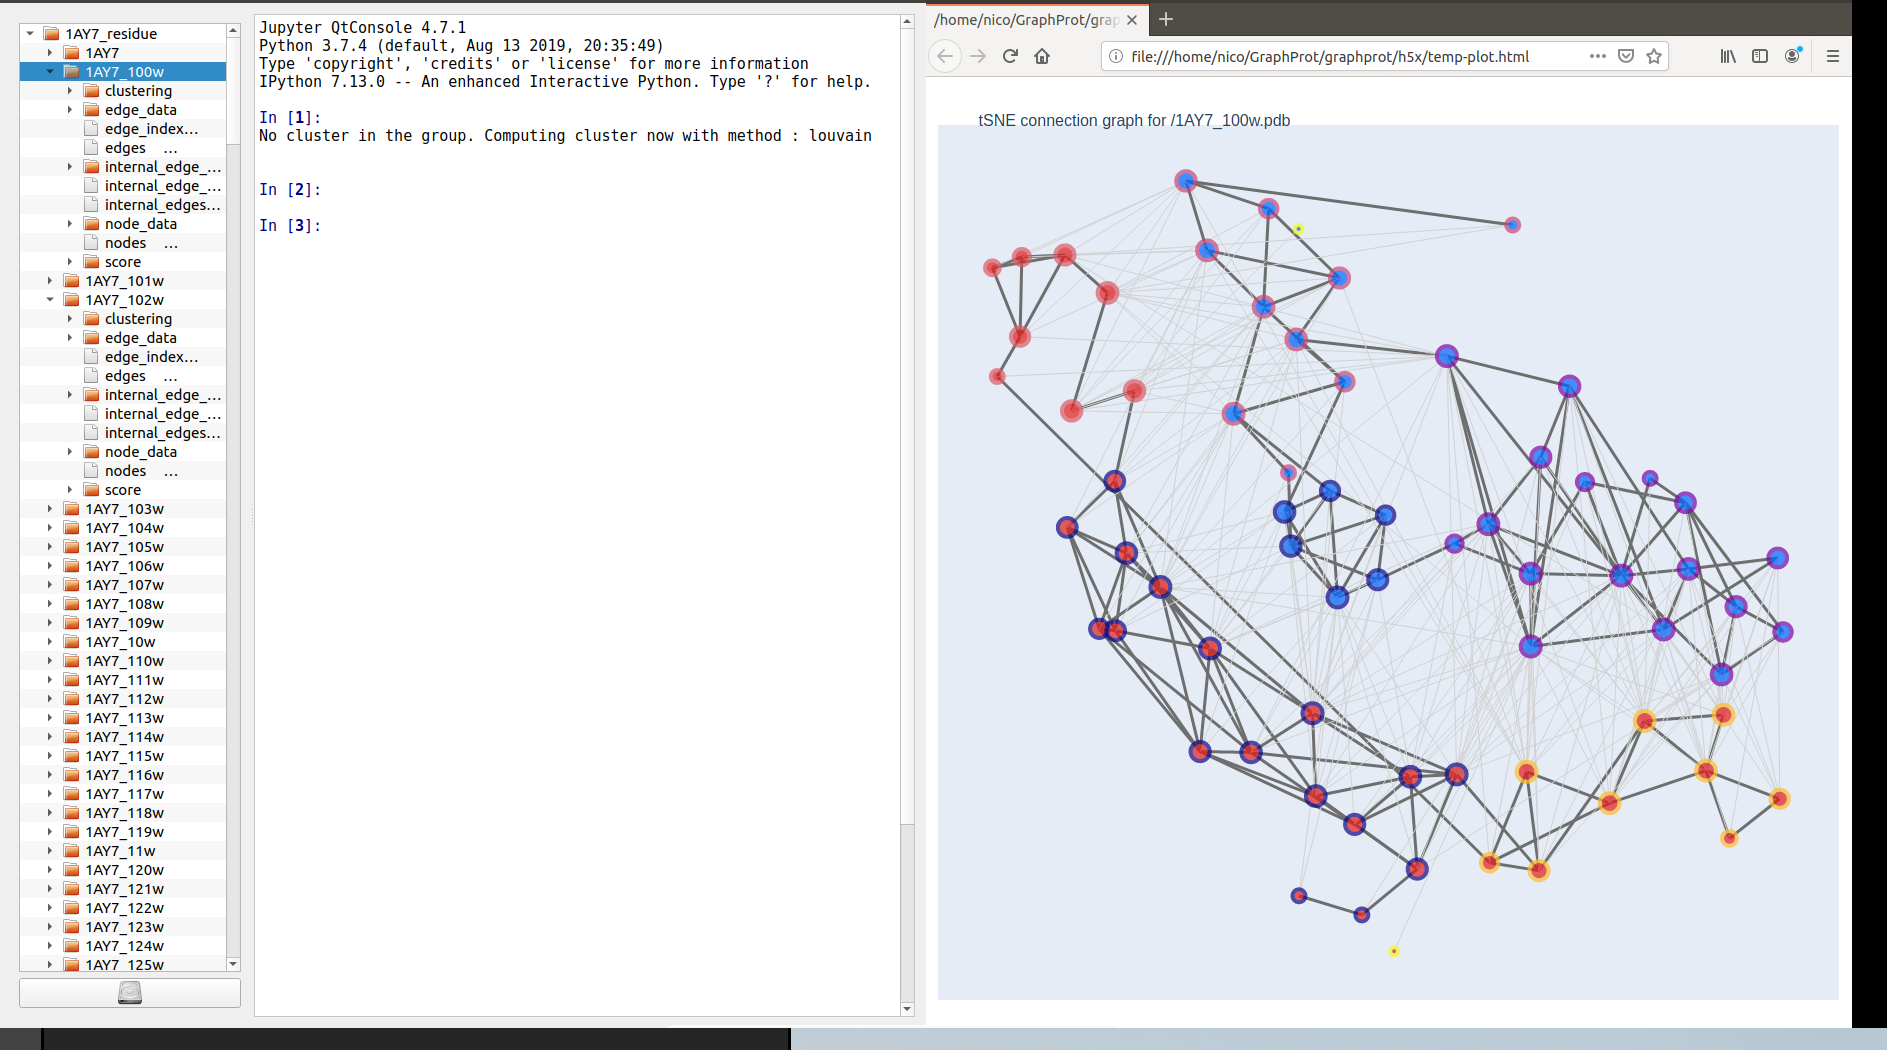
trainer.train(nepoch=50)After installing h5xplorer (https://github.com/DeepRank/h5xplorer), you can execute the python file deeprankcore/h5x/h5x.py to explorer the connection graph used by deeprank-core. The context menu (right click on the name of the structure) allows to automatically plot the graphs using plotly as shown below.
Before creating a new package release, make sure to have updated all version strings in the source code. An easy way to do it is to run bump2version [part] from command line after having installed bump2version on your local environment. Instead of [part], type the part of the version to increase, e.g. minor. The settings in .bumpversion.cfg will take care of updating all the files containing version strings.

