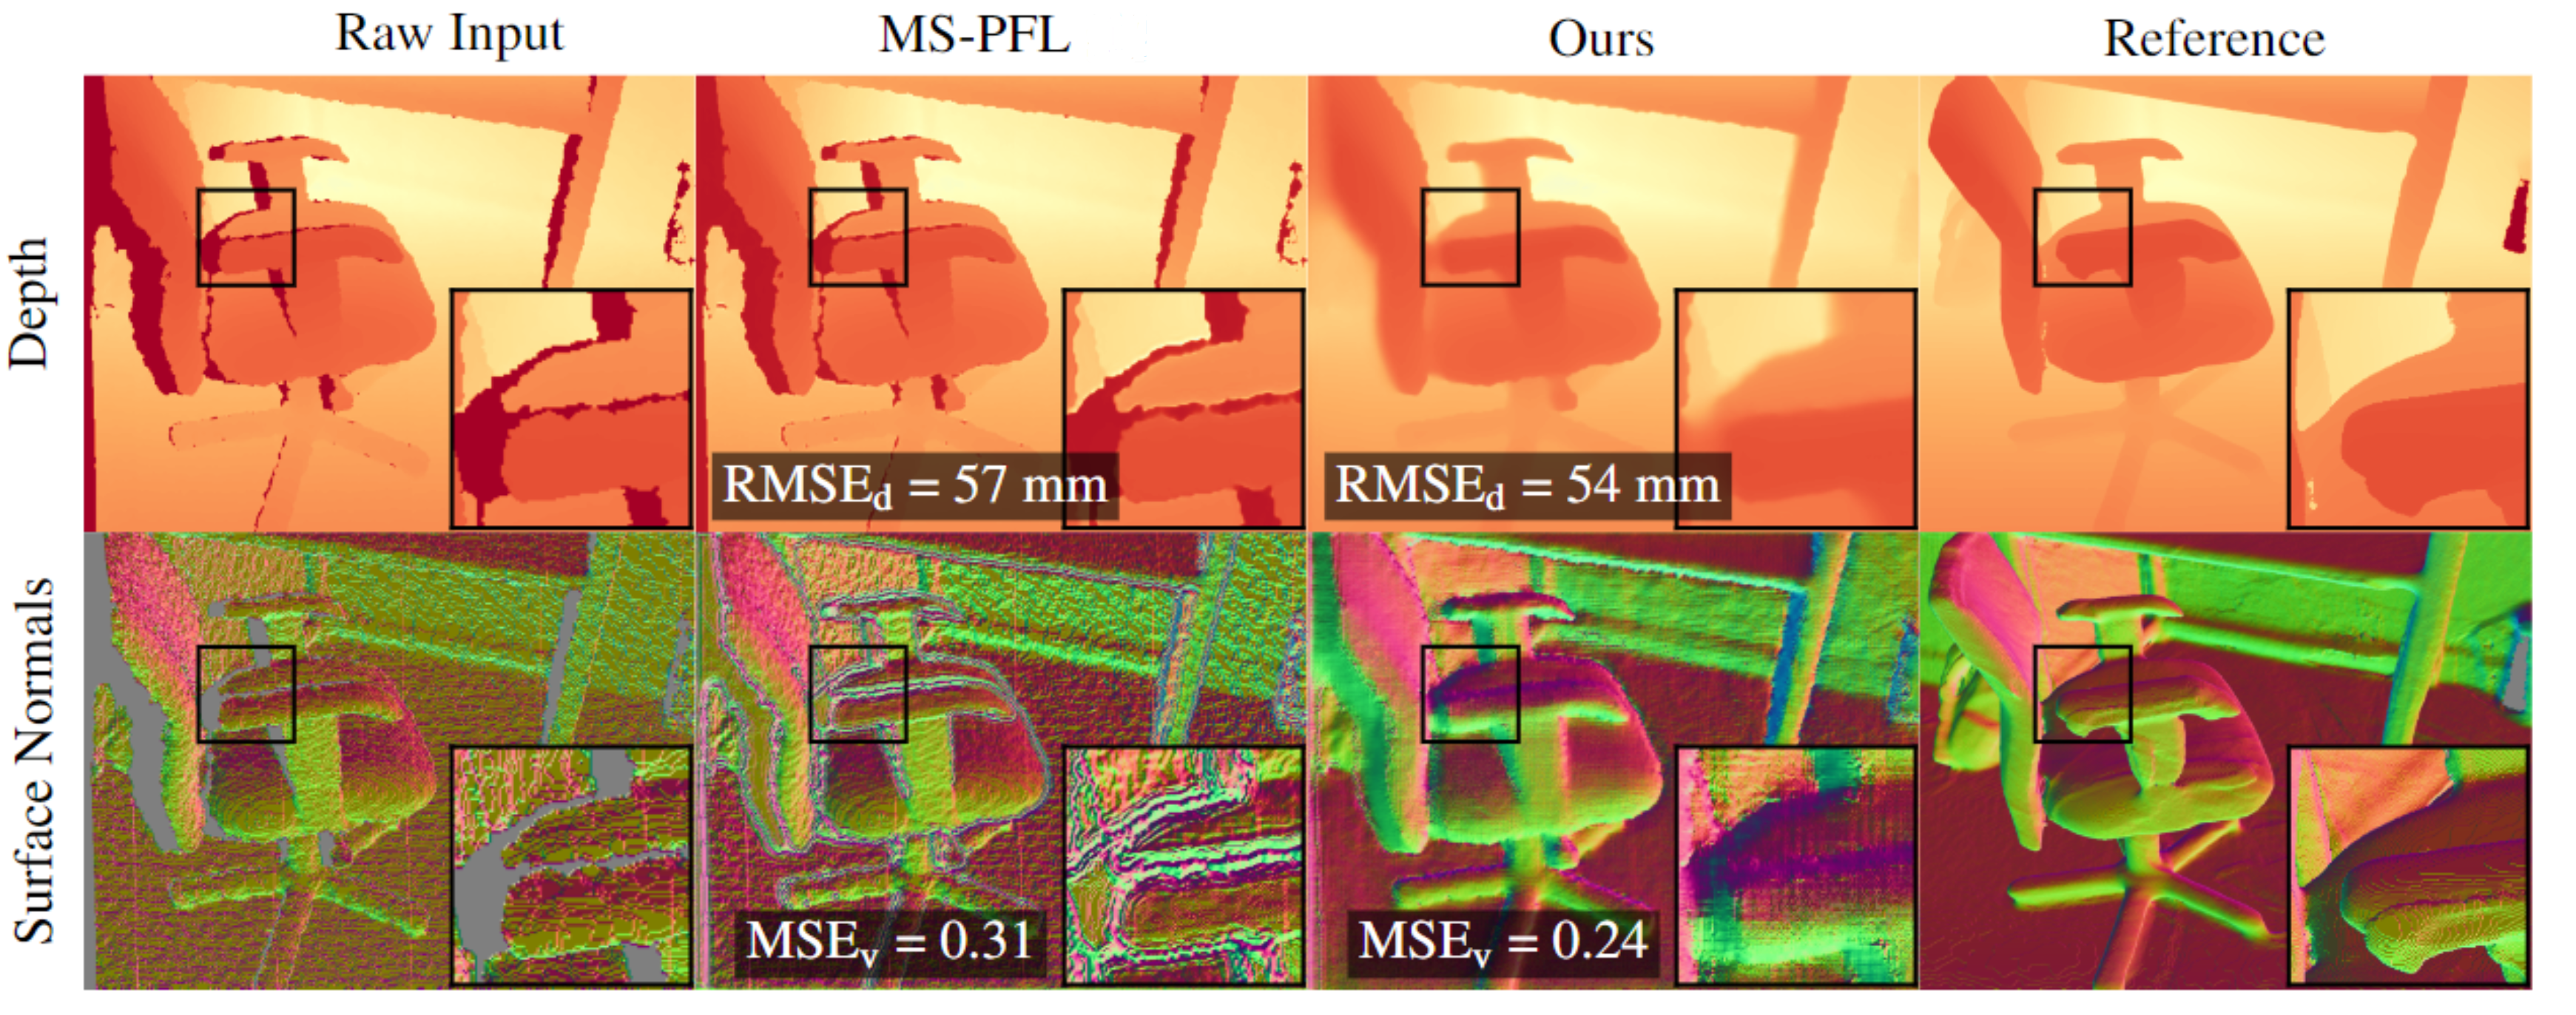
Towards Unpaired Depth Enhancement and Super-Resolution in the Wild
Please refer to the sourse paper.
First of all you need to download Scannet dataset and Interiornet dataset (if needed).
Notebook for exporting depth, image, poses and intrinsics from Scannet's .sens data and following rendering is located at
/scannet_rendering/render_scannet.ipynb
Notebook for filterind Scannet and creating clear crops is located at
/scannet_rendering/filtering.ipynb
Lists for filenames for Scannet train/test split are located in /split_file_names
Folder structure and options
You shouldn't have any special structure for your data, but in train and test running commands you have to add --path_A --path_B --path_A_test --path_B_test --A_add_paths (for train A images) --B_add_paths (for train B images) --A_add_paths_test (for test A images) --B_add_paths_test (for test B images) , or you can set this paths as default paths in options/train_options.py; it can be more convenient.
--path_to_intr - is a folder where you exported Scannet's depth, image, poses and intrinsics. It is the same folder as output_path from render_scannet.ipynb.
Train Image Guidance Network
To quick Image Guidance Network run:
python main.py --name folder_for_saving_weights_name --gpu_ids 0,1,2,3 --display_freq 20 --print_freq 20 --n_epochs 150 --n_epochs_decay 150 --image_and_depth --continue_train --batch_size 12 --custom_pathes --w_real_l1 1 --w_syn_l1 1 --lr 0.0002 --Imagef_outf 128 --Imagef_basef 32 --use_scannet --model I2D --norm_loss --do_trainFollowed options is valid for Train Main network and Fine-tune Main network for super-resolution
You can add --use_wandb to use wandb - good and easy-to-use logging tool. Before using it, you have to create an account on https://wandb.ai/ and log in on you machine.
You can add --do_test to see test set result after each epoch, or you can swich --do_train to --do_test and set --n_epochs 1 --n_epochs_decay 0 --save_all --save_image_folder name_of_folder if you want to save predicted test images in your name_of_folder.
Train Translation Network
To start training Translation Network, prepare dataset with the following structure for train folders as depicted:
your_dataset_folder        # Your dataset folder name
├── trainA
│   ├── img                # folder with .jpg RGB images
│   └── depth              # folder with .png depth maps (stored as uint16)
├── trainB
│   ├── img
│   └── depth
├── testA
└── testB
And similarly in should have testA, testB, valA, valB. Each of those folders should have depth and img folders inside as trainA and trainB. Then to specify path to your data, add --dataroot path_to_your_dataset to the command.
Then, run this command
python main.py --gpu_ids 0,1 --display_freq 20 --print_freq 20 --n_epochs 20 --n_epochs_decay 60 --custom_pathes --use_scannet --lr 0.0002 --model translation_block --save_all --batch_size 6 --name translation --netD n_layers --crop_size_h 256 --crop_size_w 256 --do_train --dataroot path_to_your_dataset --max_distance 5100 --init_type xavier --model_type translationTrain Main network
Before start training main part you have to end train Image Guidance Network and Translation network. Then create a folder with location checkpoints/your_folder_name with the followed structure:
.
├── ...
├── your_folder_name                  # Your folder name
│   ├── latest_net_G_A_d.pth          # generator (HQ to LQ from translation). Copy corresponding checkpoint
│   ├── latest_net_I2D_features.pth   # feature extractor from  Image Guidance Network
│   └── latest_net_Image2Depth.pth    # main part (U-net) in Image Guidance Network
└── ...
To start training process of main network you have to run:
python main.py --gpu_ids 0,1,2,3 --display_freq 20 --print_freq 20 --n_epochs 20 --n_epochs_decay 60 --image_and_depth --continue_train --custom_pathes --use_image_for_trans --w_syn_l1 15 --w_real_l1_d 40 --norm_loss --w_syn_norm 2 --use_smooth_loss --w_smooth 1 --w_syn_holes 800 --w_real_holes 1600 --use_masked --use_scannet --lr 0.0001 --model main_network_best --save_all --batch_size 6 --name your_folder_name --do_train --model_type main --use_wandbAfter that you have to add flag --no_aug to turn off augmentation and fine-tune network on full-size RGBDs and continue training by the following command:
python main.py --gpu_ids 0,1,2,3 --display_freq 20 --print_freq 20 --n_epochs 10 --n_epochs_decay 20 --image_and_depth --continue_train --custom_pathes --use_image_for_trans --w_syn_l1 15 --w_real_l1_d 90 --norm_loss --w_syn_norm 2 --use_smooth_loss --w_smooth 1 --w_syn_holes 1600 --w_real_holes 1600 --use_masked --use_scannet --lr 0.00002 --model main_network_best --save_all --batch_size 3 --name your_folder_name --model_type main --use_wandb --no_augIf you use InteriorNet as HQ dataset you must use almost the same commands, you only have to change weights as stated in article and additionally use --interiornet flag.
Fine-tune Main network for super-resolution
Before training please copy your your_folder_name folder (to save enhancement results) and rename it (for example your_sr_folder_name)
To start fine-tuning process of main network for super-resolution you have to run:
python main.py --gpu_ids 0,1,2,3 --display_freq 20 --print_freq 20 --n_epochs 5 --n_epochs_decay 15 --image_and_depth --continue_train --custom_pathes --use_image_for_trans --w_syn_l1 15 --w_real_l1_d 90 --norm_loss --w_syn_norm 3 --use_smooth_loss --w_smooth 1 --w_syn_holes 1600 --w_real_holes 1600 --use_masked --use_scannet --lr 0.00002 --model main_network_best --save_all --batch_size 1 --name your_sr_folder_name --do_train --crop_size_h 512 --crop_size_w 640 --use_wandb --model_type main --SR If you use InteriorNet as HQ dataset you must use almost the same commands, you only have to change weights as stated in the article and additionally use --interiornet flag.
