- Overview
- Prerequisites
- Deployment
- Connection
- Nodes management
- Users management
- Cluster customization
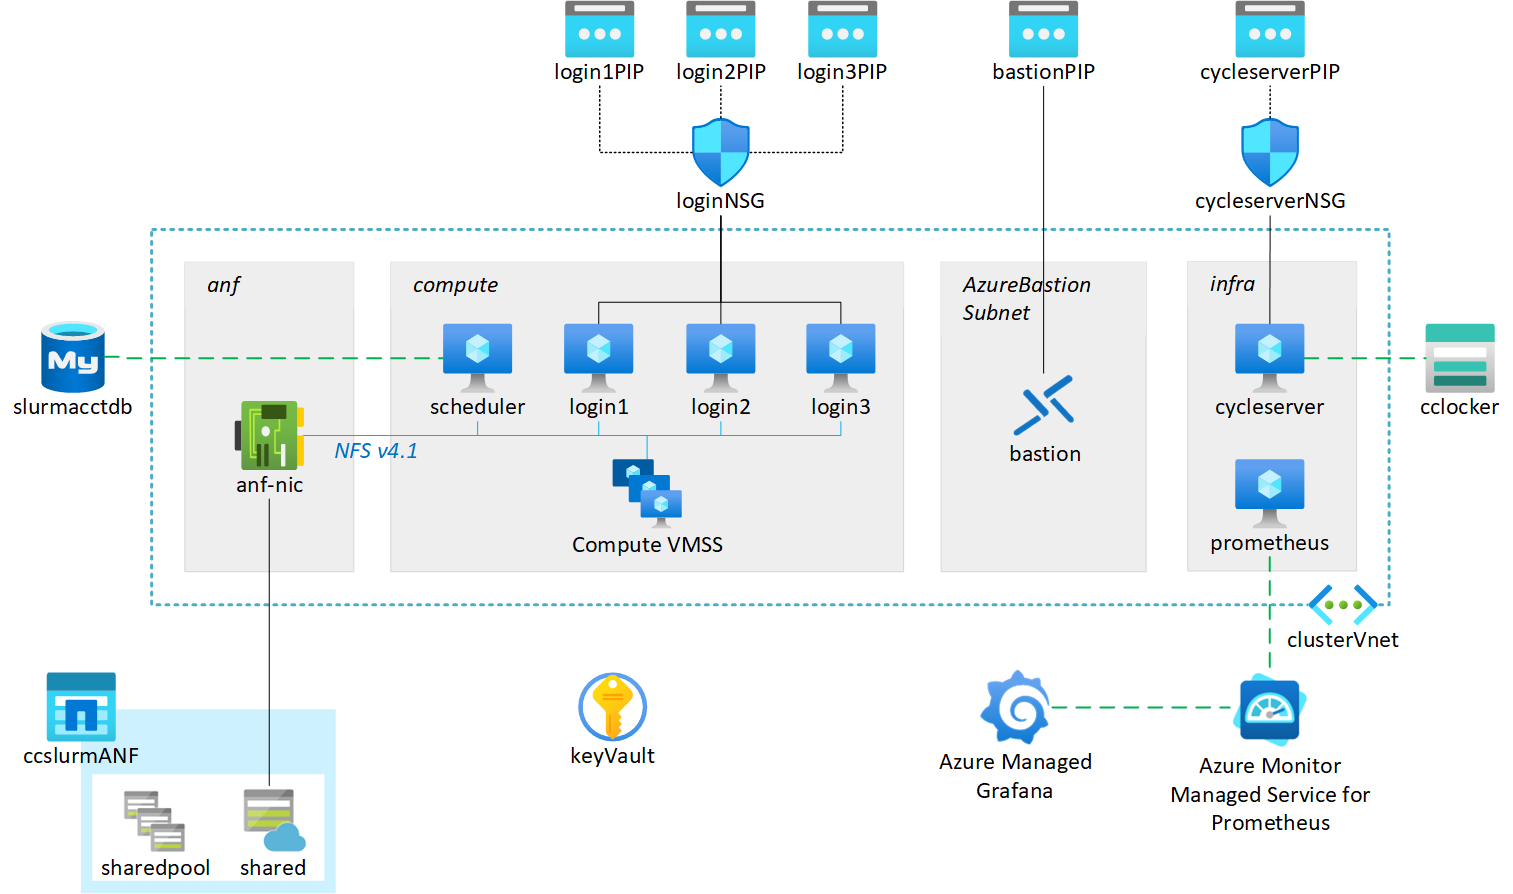
This infrastructure-as-code template automates the deployment of a CycleCloud Slurm cluster for running AI applications on Azure. The Azure infrastructure is deployed using Bicep while the configuration of all the components is performed with Ansible.
- A Unix-like terminal with a Bash-compatible shell (on Windows use WSL2).
- Azure CLI installed (docs here) and signed into the desired Azure tenant (docs here).
- The following Azure CLI extensions must be installed (docs here):
- ssh:
az extension add --name ssh - bastion:
az extension add --name bastion
- ssh:
- Your Azure account must have "Owner" role on the target subscription and resource group.
- When using the default configuration, the target subscription must have the following minimum compute quota (see here on how to check):
- Standard NDSH100v5: 192 vCPUs
- Standard Dsv4: 36 vCPUs
- Additional software:
- jq JSON processor
- yq YAML processor
- perl interpreter
- rsync
- git
-
Clone this repository in the local machine:
git clone https://github.com/vanzod/ccslurm4ai.git
and change into the newly created directory:
cd ccslurm4ai -
Edit the
config.yamlfile with the required and optional parameters in the table below.Parameter Description Required Value regionAzure region Yes string subscription_nameSubscription name Yes string resource_group_nameResource group name Yes string hpc_skuVM series name for HPC partition nodes Yes Standard_ND96asr_v4
Standard_ND96amsr_A100_v4
Standard_ND96isr_H100_v5hpc_max_core_countTotal vCPU core count for HPC partition Yes int > 0 resource_group_tagsTags to assign to resource group No dictionary monitor_tagsTags to assign to Azure Monitor Workspace No dictionary -
Execute the install script:
./install.sh
If ran without options, the install script will first perform the infrastructure deployment through Bicep and then the configurations via Ansible. It also provides the option of running a single step by using the
-aflag for Ansible or-bfor Bicep. This is useful for applying changes to the template after the initial deployment.
The install script will automatically generate a set of new SSH keys for the cycleadmin user. Such keys and the CycleCloud password for this user are then stored in a Key Vault in the target resource group.
For security reasons access to all VMs is allowed only through Bastion by default.
The installer script will automatically generate a set of Bash scripts to simplify the connection as the cycleadmin user to the deployed resources through Bastion. There are two sets of scripts to perform two different actions:
-
Connect via SSH (
bastion_ssh_*.sh)The script opens an SSH connection to the desired resource (cycleserver/scheduler/login nodes).
Since multiple login nodes are deployed (3 in the default configuration), the
bastion_ssh_login.shaccepts an optional integer parameter corresponding to the desired login node to connect to. For example, to connect to thelogin2VM:./bastion_ssh_login.sh 2
The default value is 1 if no optional index is provided.
-
Open a tunnel to a VM (
bastion_tunnel_*.ssh)The script opens a tunnel to a target port on the remote VM on the specified local port. The command syntax is the following:
./bastion_tunnel_scheduler.sh <target_port> <local_port>
./bastion_tunnel_login.sh <target_port> <local_port> [VM index]
Note that the last optional integer parameter indicates which of the login VMs to target and is not required for cycleserver and scheduler VMs.
Terminating the script execution with
Ctrl+Cwill close the tunnel.Some examples where this script can be useful are:
-
Open a tunnel and perform data transfer from/to the remote VM
On a terminal, open the tunnel targeting the remote SSH port (in the example on
login3) as follows:./bastion_tunnel_login.sh 22 10022 3
on a separate terminal, start the file transfer (in this case with
scp) targeting port 10022 on the local host:scp -P 10022 test_file.txt cycleadmin@127.0.0.1:
-
Open the CycleCloud portal from your local browser
On a terminal, open the tunnel targeting the remote HTTPS port on
cycleserveras follows:./bastion_tunnel_cycleserver.sh 443 10443
Open your internet browser and use the URL:
https://127.0.0.1:10443
-
This option is strongly discouraged as it would increase the exposure of your infrastructure to external attacks.
The infrastructure configuration provides public IPs for the cycleserver and login nodes. By default no external traffic is allowed to reach those VMs. To change this, simply add an inbound security rule to the corresponding Network Security Group as described here.
You can connect to the Slurm cluster scheduler or login nodes using Visual Studio Code Remote Development in two ways.
Please note that this method requires a valid GitHub account.
First connect to the desired VM (in this example login1) by using the script generated at deployment:
./bastion_ssh_login 1In the VM terminal, start the tunnel using the Code CLI:
slurmcluster-login1:~$ code tunnelIf this is the first time a tunnel is opened from this VM, Code CLI will ask to authenticate via GitHub. Use the web browser to reach https://github.com/login/device, use the code provided in the command output and authorize the required access. Keep this process running in the open terminal to keep the tunnel open.
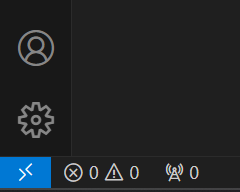
Open a local Visual Studio Code window and click on the blue icon on the bottom left corner to open a remote window:
Then select "Connect to Tunnel..." in the drop-down menu:
followed by "GitHub" as the type of account used to start the tunnel:
Once successfully connected to the GitHub account, select the remote VM name.
The local Visual Studio Code instance is now connected to the remote VM.
On a terminal in the local computer, open the tunnel targeting the remote SSH port (in the example on login3) by using the generated script as follows:
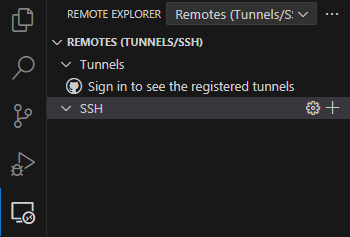
./bastion_tunnel_login.sh 22 10022 3After installing the Remote Explorer extension in VS Code and copying the user private SSH key to a location in the Windows file system, select the Remote Explorer icon on the left bar and select "Remotes (Tunnels/SSH) in the drop-down menu:
Create a new SSH remote by clicking on the + icon and adding the ssh command line (with the appropriate changes for SSH key path and remote user name) as shown below:
Hit enter and select the SSH config file to add the remote settings to.
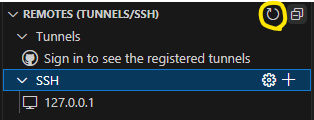
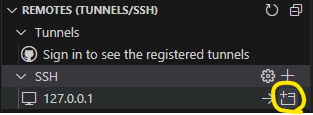
After reloading the remotes by clicking on the highlighted icon, the new remote connection will appear in the SSH list:
Now the remote configuration is complete. To connect to the target VM, hover on the remote line and click on the "Connect in New Window" icon:
The default CycleCloud Slurm cluster configuration does not enable autoscale on the cluster as deploying ND VMs is a time consuming process. Hence compute nodes must be manually started and terminated.
When the Slurm cluster is first started, all nodes are set in FUTURE state:
To start one or more nodes, use the following command:
sudo /opt/azurehpc/slurm/resume_program.sh slurmcluster-hpc-[1-2]Note that the script accepts node names compliant to Slurm nomenclature.
Similarly, nodes can be terminated with:
sudo /opt/azurehpc/slurm/suspend_program.sh slurmcluster-hpc-[1-2]To prevent affecting running jobs it is important to ensure that no jobs are running on nodes that are being terminated by draining nodes first.
The cluster users management is provided through CycleCloud built-in authentication system. Detailed documentation can be found here.
Once the user and its SSH public key are added to CycleCloud, edit the bastion_ssh_login.sh and bastion_tunnel_login.sh scripts (or the equivalent ones for the scheduler if login nodes are not desired) with the appropriate username and private SSH key file path. The new user can now use those scripts to access the cluster through Bastion.
Although this project is aimed at providing an easy-to-deploy infrastructure, attention has been paid to ensure it can be easily used as starting platform for further customizations.
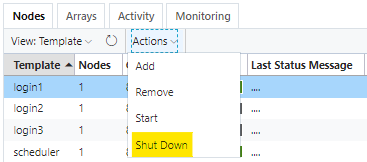
The default Slurm cluster configuration creates three login nodes for user access to the cluster. If less or no login nodes are needed, select the desired node from the CycleCloud Portal and request a shut down from the Actions drop-down menu:
To resume a login node, select the Start option from the same menu.
The Slurm CycleCloud cluster is configured by Ansible as part of the cyclecloud_cluster playbook role.
The cluster template and parameters files are stored as Jinja2 templates in ansible/playbooks/roles/cyclecloud_cluster/templates and can be modified to introduce the desired customizations.
Similarly, CycleCloud projects are stored in ansible/playbooks/roles/cyclecloud_cluster/files/cc_projects. The entire content of this directory is synced on the cycleserver VM and all the projects are automatically uploaded to the CycleCloud locker by Ansible.
