This repository contains the information for devices that sends Particulate Matter information to receiving nodes using LoRa for AireLibre
It consists of two main parts:
- Suchi: The firmware for the sensors that sends the data
- Ma-ti: The firmware for the node that receives the data from suchi and forwards it to Linka
The idea is to have a way to deploy multiple nodes that report the values gathered from the PMS to some areas where the access to a network connection or even electricity are somewhat restricted or areas where makes sense to deploy some hardware under minimal infraestructure, or even off the grid, to gather the particulate matter information
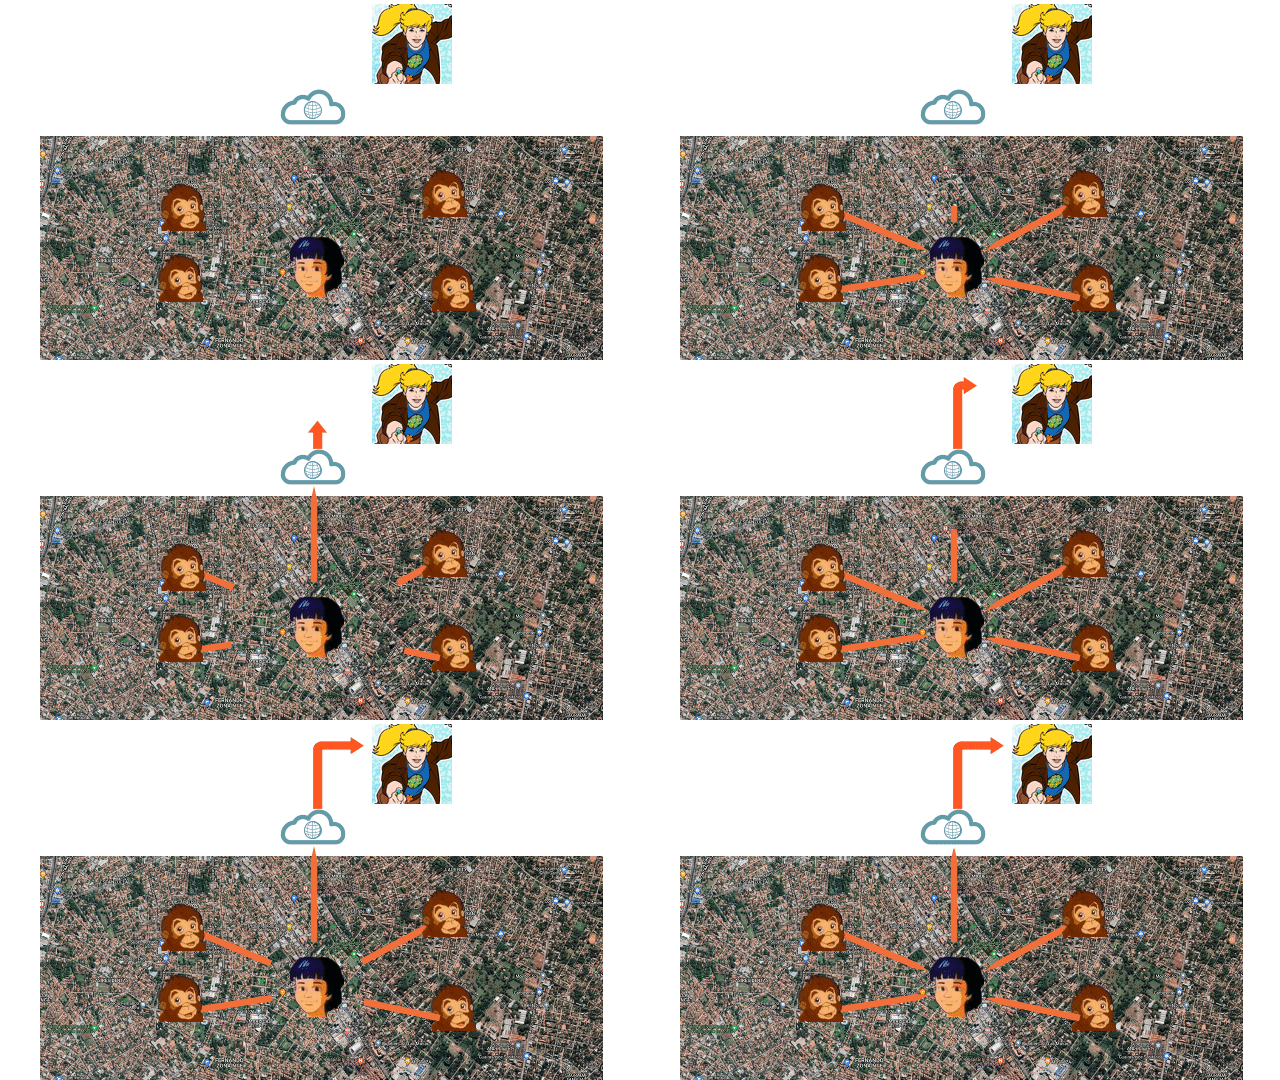
The following "cutting edge" animation will show the idea in a more "eye-candy" way:
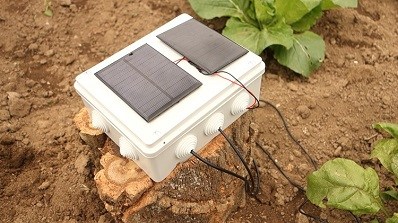
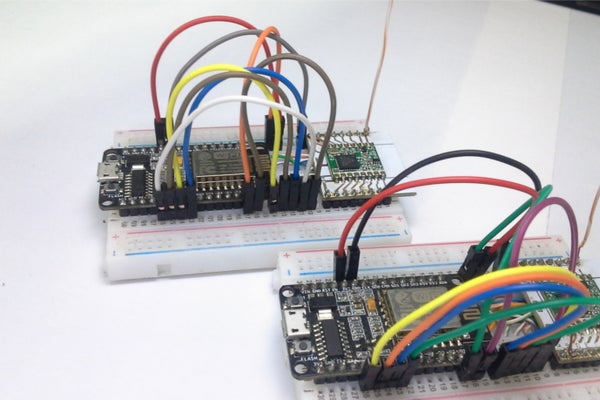
Every node on the field should be an independently working suchi node that should look something like this (image only for reference)
image from https://randomnerdtutorials.com/esp32-lora-rfm95-transceiver-arduino-ide/
I just recently found out about all the LoRa stuff, and since it's relatively new to me (even though it has been around quite some years already) I have been trying to devise a project to use it
Around this time, I stumble with the AireLibre initiave, and since the project is revolving around ubiquitous sensors, the opportunitty of implementing a self sustainable sensor (solar charged, low power) using hobbiest level hardware was the answer I was looking for!
I know that probably there's no need to separate both roles (the sender and the receiver) in two projects, since we could've just manage those differences using precompiled macros
The reason for not doing that, is that we want a minimal codebase in order to have a small memory footprint for the nodes, and having to manage precompiled macros and the resulting code from them will probably result in someone (mainly myself) making a regrettable mistake
Also, it looks cleaner to have those two things separated for people not very keen into coding but that wants to contribute to the project in a foreseeable future, so in the meantime we will mantain these two projects until we see otherwise even if that means that some lines of code will be duplicated
We are following with the main theme of naming our projects with a planeteers name within AireLibre. Refer to this answer for more information about that
Ma-ti is the planeteer of south america and Suchi was his pet monkey
The first prototype for this project was indeed a LoRaWAN node in order to use the TTN infraestructure
But gateways are rather scarse in Paraguay (0 gateways actually in my city) so I began to construct one of those single channel gateways (or single channel relays.. or whatever they are called now...) for testing purposes, only to find out that those are condemned by the TTN community and that the V2 of the TTN will be shutdown this 1 of december 2021
Because of this, at the current date, TTN V2 is not registering new gateways anymore, only leaving me with the V3 option that only accepts official (proper) gateways from one of the selected manufacturers or to buildin a proper one myself.
All that just gives me the same headache you're probably having now, so I will only use LoRa for the moment since the application in this case scenario is rather simple
Maybe in the future I will reevaluate to use LoRaWAN
Thank you for reading until this point, If I haven't lost you, let's proceed to the more interesting part of the project
- Plantower PM2.5 PMS7003 G7 with Adapter Board and Cable AliExpress Amazon
- 18650 battery AliExpress Amazon
- Exterior plastic box 100x100mm Luminotecnia
The following parts are just here for reference since I will test them on christmas (no, I am not kidding, I need to wait 3 months for these stuff to arrive)
- Solar Panel 5V 250mA (anny size will do, but it needs to fit in the top off your case) AliExpress Amazon
- TP4056 Charging Module AliExpress Amazon
Both projects (suchi and ma-ti) supports the next boards as the core hardware (we will be adding more in the near future)
======= CAUTION =======
DANGER WILL ROBINSON! DANGER!
Do not power the LoRa modules without an antenna or you risk frying your module!!!
======================
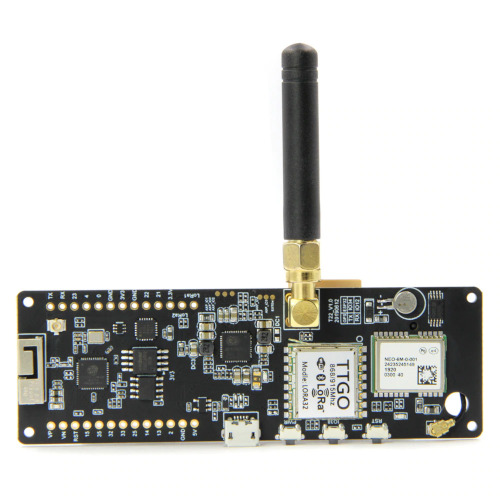
- TTGO T-Beam ESP32 915MHz AliExpress Amazon
This board comes with an esp32, a NEO-6M GPS module, a Bluethoot module and a SX1276 LoRa module embedded in the board. Also comes with an external antenna and a 18650 battery holder
It is the more expensive alternative, but it comes with almost everything needed to deploy a node right away
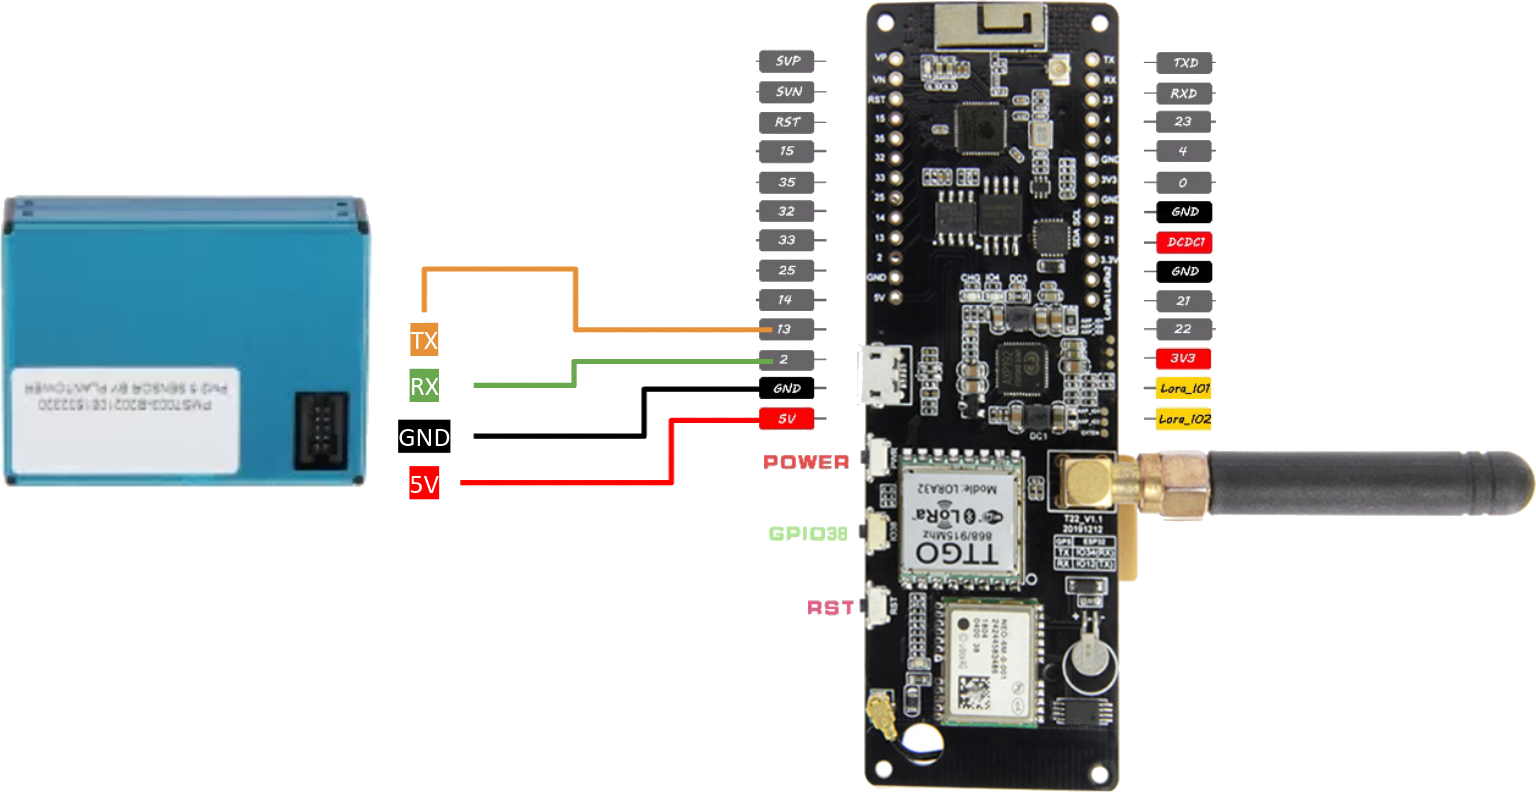
Wiring for Suchi
Just connect the Plantower pins corresponding to the ground and voltage and use the pins 2 and 13 for the Rx and Tx communication
Wiring for Ma-ti
No need to wire anything since everything is already connected in the board. So, here's a kitty
- HopeRF RFM95W 915Mhz, LoRa Ultra Long Range Transceiver, SX1276 AliExpress Amazon
- Esp32 doit devkit v1.1 AliExpress Amazon
This is the more barebone alternative. The links to buy these parts are just for reference, if you find a better price for these parts go ahead!
Wiring for suchi
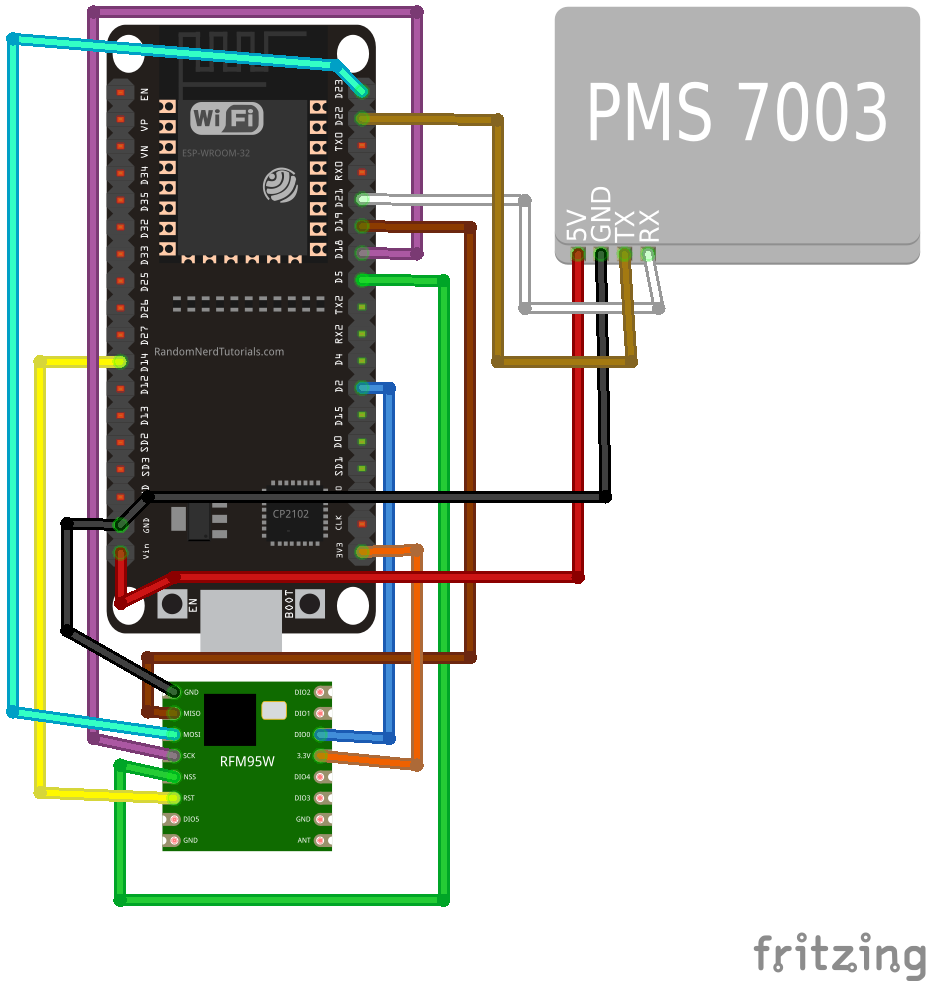
Below is presented the schematic to connect the LoRa modules with the PMS to the esp32 devkit
Wiring for Ma-ti
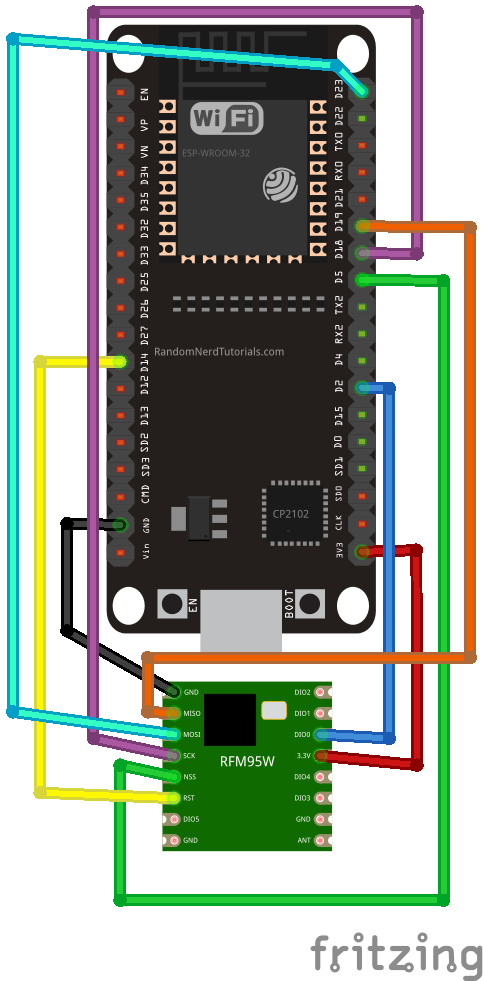
The wiring for ma-ti is the same for the LoRa module without the PMS
Antenna
It is recommended to use a proper atenna (for 915 MHz modulation in this case) for better results in receiving the data from the nodes
But if you really wanna go with the homeless approach you can manufacture the antenna from a UTP cable you don't need anymore
Thanks to this instructables , mannufacturing a antenna for the module was quite easy
Just cut 7.8 cm of a single cable form your UTP Cable (Unshielded Twisted Pair), thanks to absolutelyautomation.com for the information, to calculate the length of the antenna, only the most important parameter "Frequency" needs to be inserted, in the case of my module it is to 915.0
The antenna should look something like this
image from https://www.instructables.com/Communication-LoRa-ESP8266-Radio-RFM95/
WIP since I still haven't received the parts. Will update this as soon as I get my hands on them
Reference for the firmware installation are in their corresponding projects:

