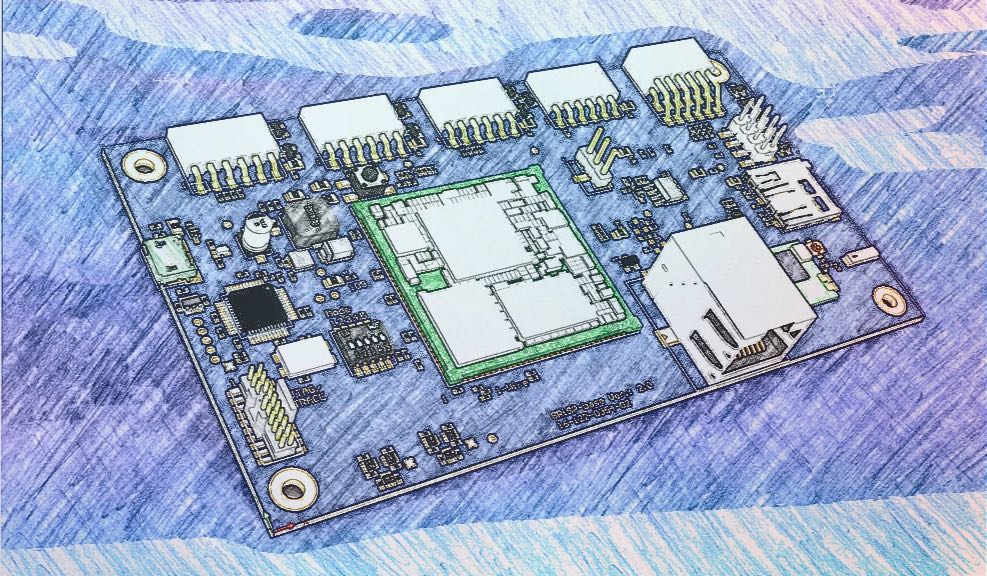
This might be the base Nerves System configuration for the GRiSP 2.
This is a work in progress. It may change in backwards incompatible ways and the documentation might be lacking.
To do:
- Bring up Ethernet
- Bring up WiFi
- Verify RGB LEDs
- Verify DIP switches
- Enable 1-Wire and test
- Verify SPI
- Verify MicroSD card works
- Verify ATECC608B
- Verify HW watchdog
- Add ramoops support
- Review GRiSP2 specs to see what else there is to verify
- Check that
TARGET_GCC_FLAGSare right - Update Linux kernel to 5.10
- Update Nerves Toolchain 1.5.0 version
- Implement A/B firmware updates work
- Create example app that uses GRiSP2. See Circuits Quickstart and Nerves Livebook
- Review Linux kernel options and compare with other systems
- Clean up debug and low hanging items to improve boot time
- Clean up changes to GRiSP repositories and send PRs
- Use GRiSP serial number in hostname
| Feature | Description |
|---|---|
| CPU | NXP iMX6ULL, ARM Cortex-A7 @ 696 MHz |
| Memory | 512 MB DRAM |
| Storage | 4 GB eMMC and optional MicroSD |
| Linux kernel | 5.15 w/ Phytec patches |
| IEx terminal | ttymxc0 |
| GPIO, I2C, SPI | Yes - Elixir Circuits |
| LEDs | Yes - named red:indicator-1, etc. in sys/class/leds |
| ADC | - |
| PWM | - |
| UART | ttymxc0-ttymxc5 |
| Camera | None |
| Ethernet | Yes |
| WiFi | Yes - 2.4GHz station mode (no Soft-AP) (R8188EU) |
| HW Watchdog | i.MX6 watchdog enabled on boot |
The most common way of using this Nerves System is create a project with mix nerves.new and to export MIX_TARGET=grisp2. See the Getting started
guide
for more information.
If you need custom modifications to this system for your device, clone this repository and update as described in Making custom systems
This system isn't ready for general use. If you know how to build a Nerves system, then it will probably be a little frustrating, but you'll get something to boot.
-
Build the system
-
Create a test Nerves project or try
circuits_quickstartto use it. -
Build the project with
mix firmware. Then runmix firmware.imageto get an image file. -
gzip the image file and copy to a FAT-formatted MicroSD card.
-
Connect the GRiSP2's USB port to your computer and open up a terminal session (115200 8N1).
-
Boot the GRiSP2 and press a key to break into the bootloader.
-
Run:
uncompress /mnt/mmc/myfirmware.img.gz /dev/mmc1 reset -
Now you should be able to use
mix uploador./upload.shfor subsequent updates. The firmware is set to auto-validate.
GRISP2 will create two virtual UART ports when plugged in. The second of these will contain a system console where you can interact with BareBox and the Elixir Shell. On Linux, this looks like:
/dev/ttyUSB0
/dev/ttyUSB1
You can connect via picocom with:
picocom /dev/ttyUSB1 115200
NOTE: This differs from the Official GRISP2 guide in that we don't need the
--echoflag.
The GRiSP 2 has five PMOD interfaces. GPIO pins should all be accessible. Pins for other functions are configured for those functions:
- UART PMOD - access the UART pins via
ttymcx3 - I2C PMOD - access I2C via
i2c-1 - SPI1 PMOD - access SPI via
spidev0.0 - SPI2 PMOD - access SPI via
spidev0.1
TODO: The GRiSP 2 includes an ATECC608A so provisioning the board for use with NervesHub can be done without setting U-Boot environment variables.
TBD
We're currently using PHYTEC's Linux kernel fork from git.phytec.de/linux-mainline.

