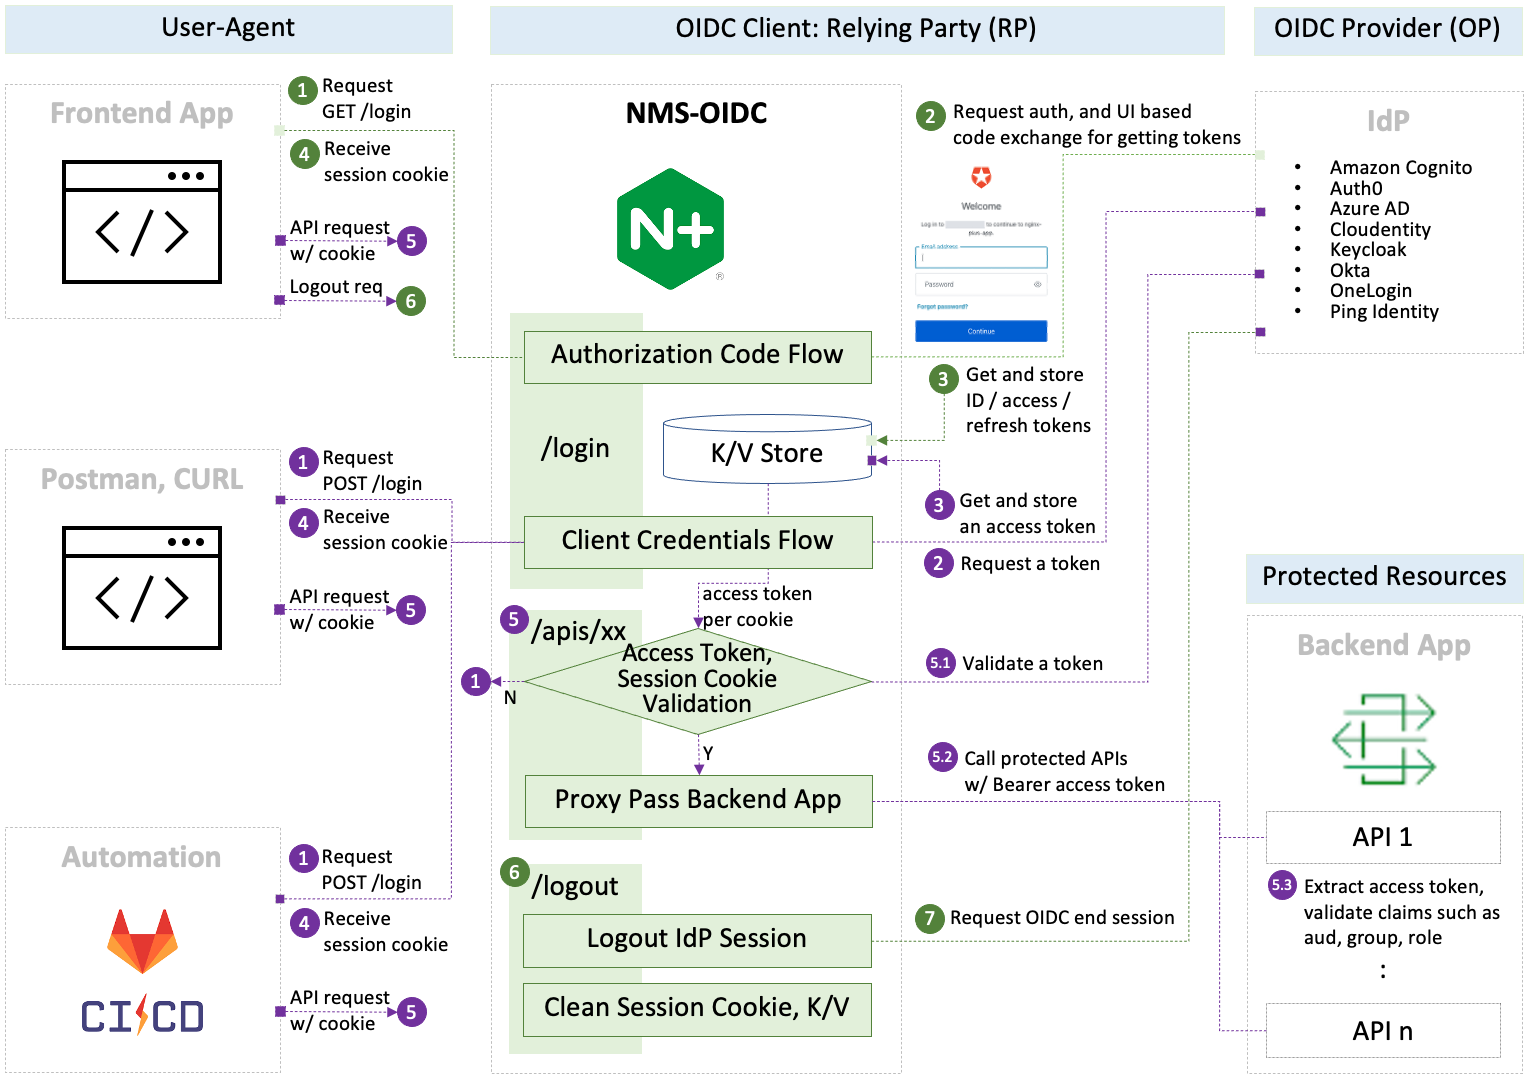
Reference Implementation of NGINX Management Suite(NMS) with Authorization Code Flow and Client Credentials Flow for OpenID Connect(OIDC) Authentication.
This repo is to manage the core NJS and sample configuration regarding the reference implementation of NMS OIDC. In addition to that you can find how to set up IdP, NGINX Plus and locally test OIDC flow in your machine before installing and configuring NMS products.
Note: The main
README.mdof this repo explains several options in detail. But this doc focuses onStart Guideto quickly set up and test the OIDC flow locally using bundled frontend app and backend environment on behalf of NMS.
- 1. Prerequisites
- 2. Running a Keycloak Docker Container (Optional)
- 3. Configuring Environment Variables and NGINX
- 4. Running a NMS-OIDC Simulaiton Docker Container
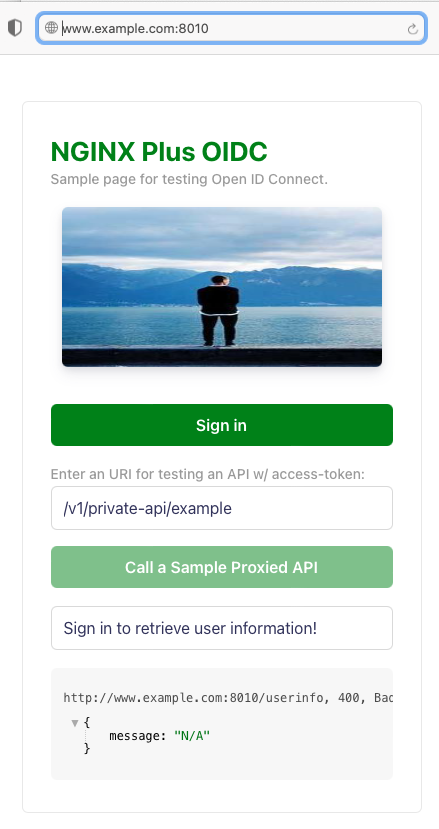
- 5. Running a Browser and Checking If Bundle Page Works
- 6. Setting up an Identity Provider (IdP)
- 7. Testing NGINX-NMS OIDC
- 8. Stop and Remove Docker Containers
-
Install and Run Docker in your local machine.
-
Edit
hostsfile in your laptop via if you want to locally test NGINX Plus OIDC:$ sudo vi /etc/hosts or notepad.exe c:\Windows\System32\Drivers\etc\hosts 127.0.0.1 www.example.com 127.0.0.1 host.docker.internal
Note: The
host.docker.internalis used for Keycloak. Thewww.example.comis used for any IdP. -
Download NGINX Plus license files, and copy them to ./docker/build-context/ssl/
nginx-repo.crt
nginx-repo.key
-
Clone the nginx-openid-connect/nms-oidc GitHub repository, or download the repo files.
git clone https://github.com/nginx-openid-connect/nms-oidc.git
-
Start a Docker container:
$ make start-keycloak
Note:
- In this example, a Keycloak container image (
jboss/keycloak:15.1.0) is used. - Please try another version of Keycloak container images in
docker-compose.ymlif you have any issue when starting it in your local machine.
- In this example, a Keycloak container image (
-
Edit and run either
~/.bash_profileor batch file in Windows:export AZURE_TENANT_ID=d106871e-7b91-4733-8423-xxxx export AZURE_CLIENT_ID=478bbf72-65c1-4878-9f5f-xxxx export AZURE_CLIENT_SECRET=crh8Q~z9mT7oxxxx export KEYCLOAK_CLIENT_SECRET=pEOW0ugyQ6O4Exxxxxx
-
Edit environment variables in
var-azuread.envandvar-keycloak.envfor Docker -
Edit NGINX configuration variables in
openid_configuration.conf(./openid_configuration.conf):map $host $oidc_client_credentials_flow_enable { # Both of Client Credentials Flow and AuthCode Flow are supported if enable. # Client Credentials Flow is executed if bearer token is in the API request # and this flag is enabled. Otherwise AuthCode Flow is executed. default 1; } map $host $oidc_client_credentials_token_body { SERVER_FQDN OIDC_CLIENT_CREDENTIALS_TOKEN_BODY; # Custom extra body in the token endpoint for Client Credentials Flow default "scope=$oidc_client/.default"; #www.example.com "audience=https://dev-abcdefg.us.auth0.com/api/v2/"; }
Note:
- Check the specification per each IdP if you want to support and test the Client Credentials Flow.
- Add additional parameters (e.g.,
scope=xxxfor Azure AD and Keycloak oraudience=xxxfor Auth0 if needed.
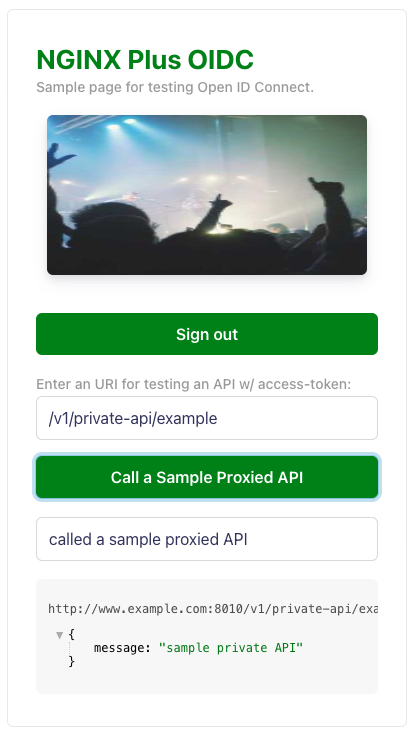
Run a Web Browser with the following URL, and check if the bundle frontend landing page is shown:
Choose one of your prefered IdPs, and set up your IdP by referencing the following guides:
- Create and configure an app in Amazon Cognito
- Create and configure an app in Auto0
- Create and configure an app in Azure AD
- Create and configure an app in Keycloak
- Create and configure an app in Okta
- Create and configure an app in OneLogin
- Create and configure an app in Ping Identity
Notes:
- In this example, Keycloak is used as it can be installed as one of Docker containers in your local machine.
- Client ID:
my-client-id- Access Type:
confidentialfor PKCE- Valid Redirected URIs:
http://www.example.com:8010/_codexchhttp://www.example.com:8010/_logout(IdP callback URI is not supported yet for NMS. The callback URI is only supported for ACM as for now.)
-
Click
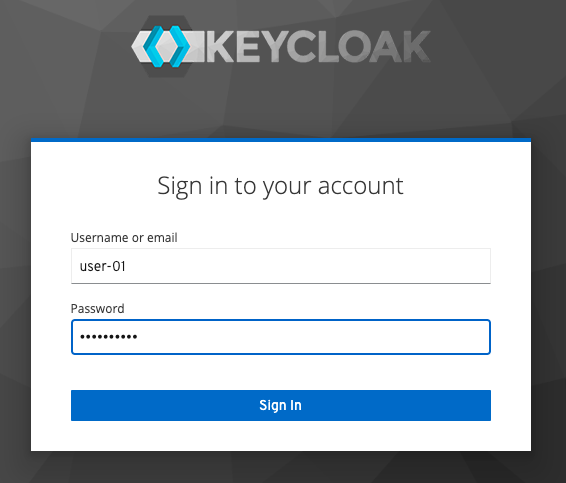
Sign Inbutton: -
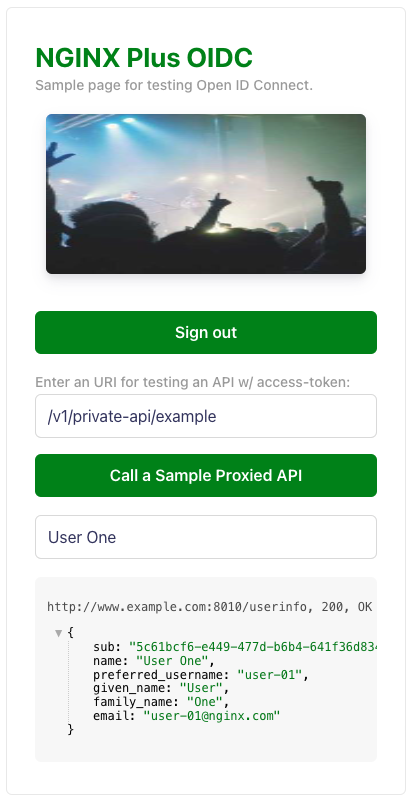
Click
Call a Sample Proxied APIbutton:Note:
-
In the
nms-http-simple.conf, you can add additional API endpoints like:location /v1/private-api { auth_jwt "" token=$access_token; # Use $session_jwt for Azure AD auth_jwt_key_request /_jwks_uri; # Enable when using URL proxy_set_header Authorization "Bearer $access_token"; proxy_pass http://my_backend; }
-
So you can enter a different URI for testing your additional API endpoints via this bundled frontend tool.
-
-
Stop Docker containers
$ make down
$ make down-keycloak
-
Remove Docker container images
$ make clean
$ make clean-all
