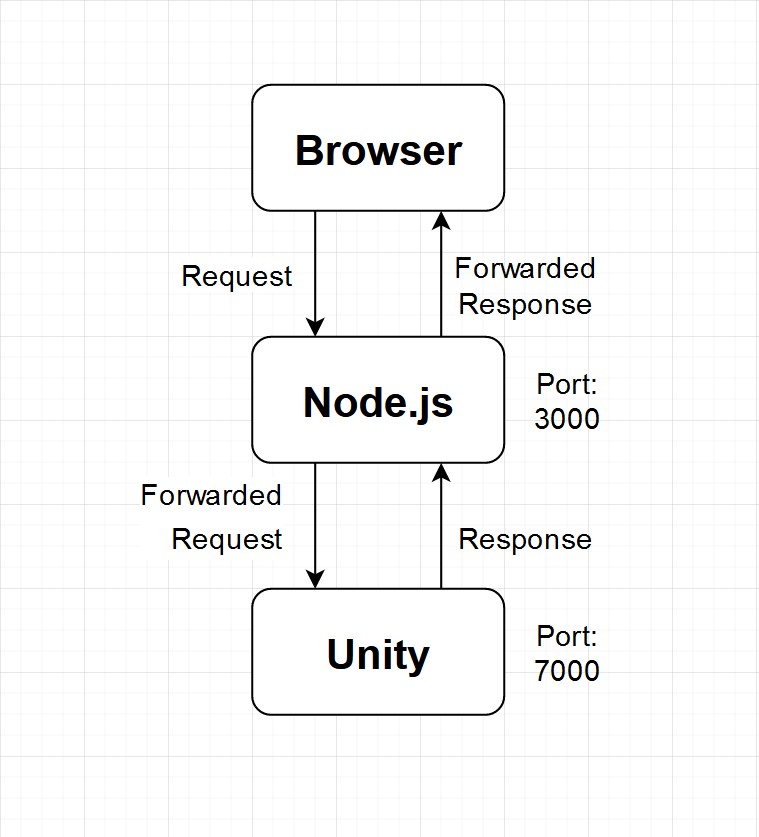
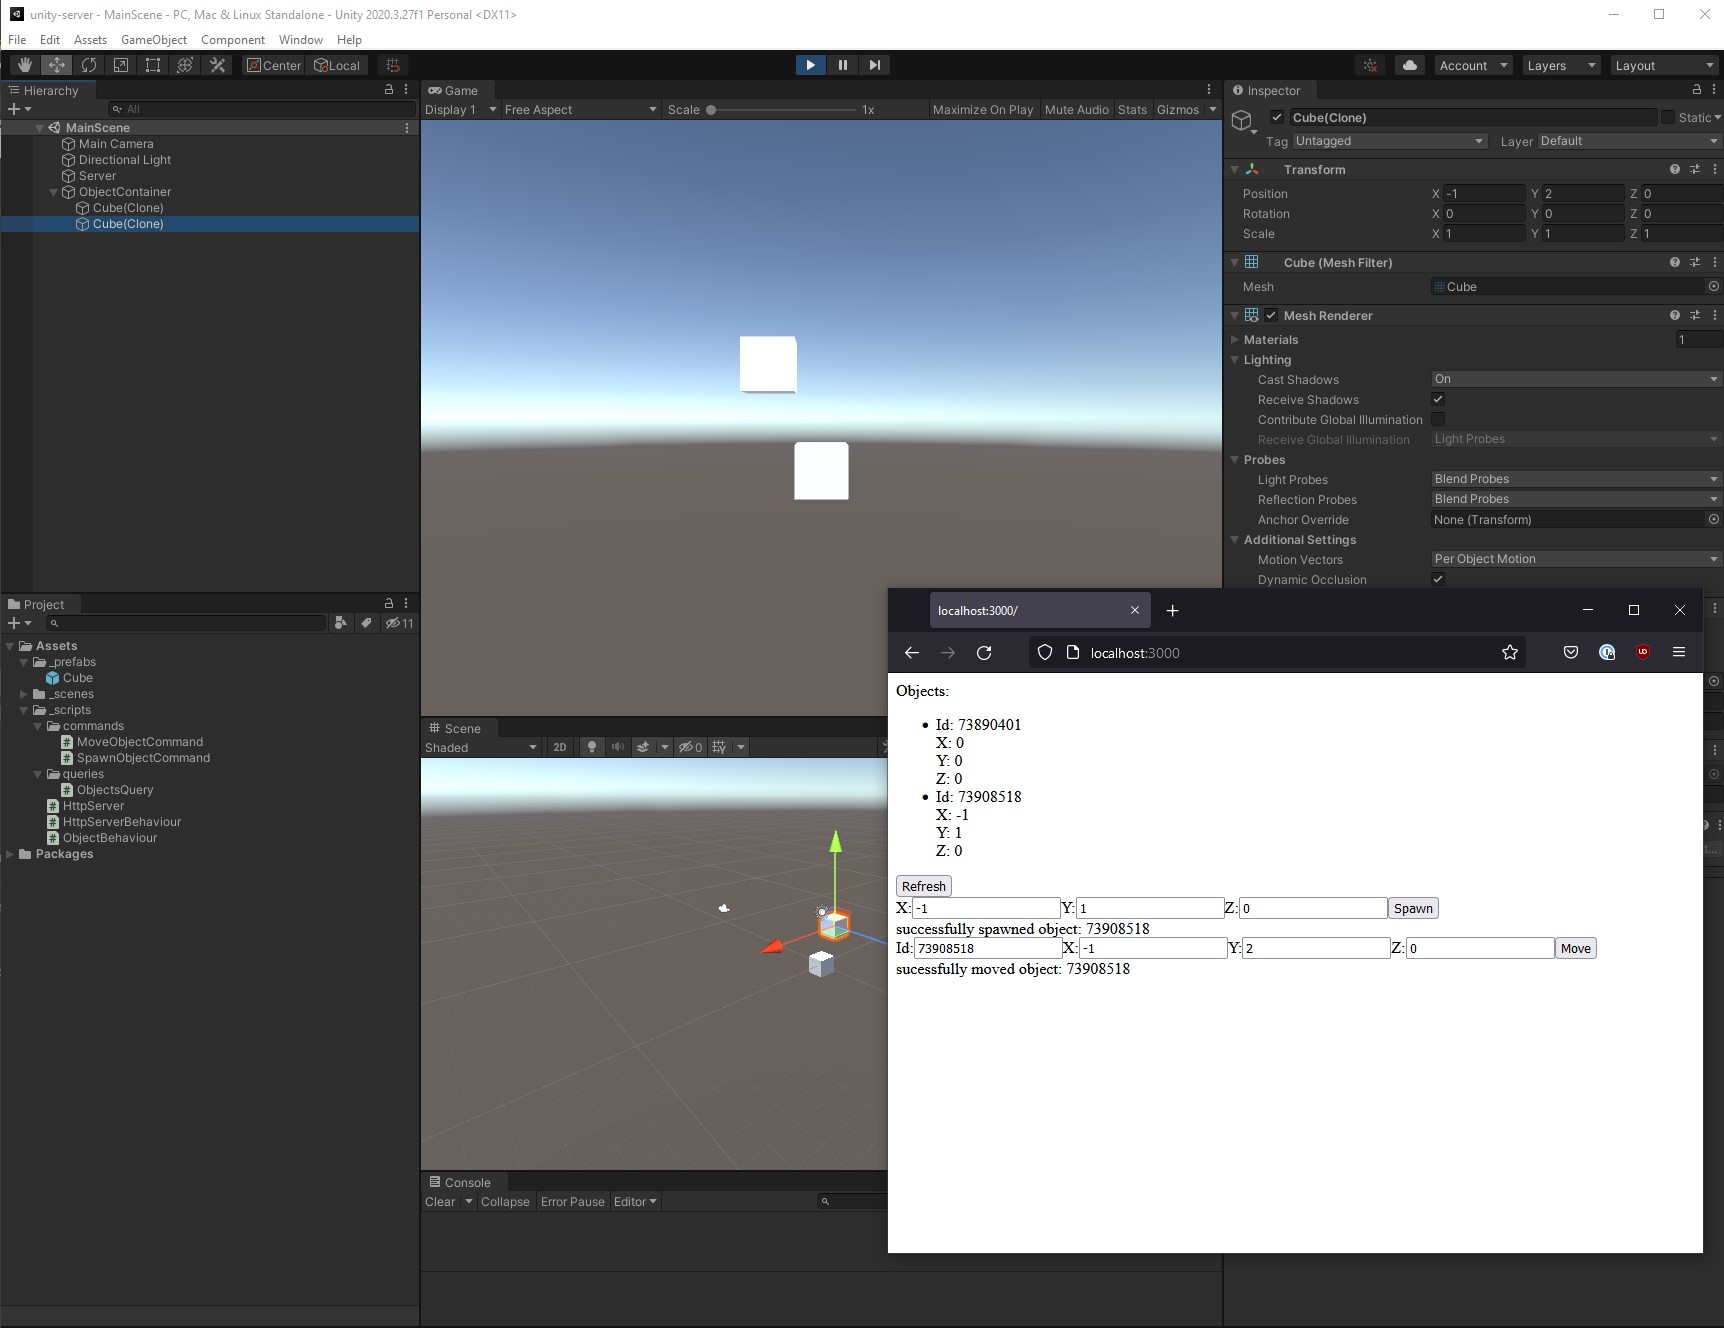
unity-web-server is an example project showing how you can use a web server hosted within Unity plus a Node.js React Web UI to remotely query and issue commands to Unity.
The example showcases creating, moving, and listing the objects inside a Unity scene while the game is running.
How the interface works is as follows:
- A request is made on the web UI to the Node.js proxy server
- The request is remapped and sent to the web server running inside of Unity
- Unity processes the request and queues it so it can be processed within the next game loop
- We process the request and respond back
- The Node.js proxy receives the response and forwards it to the UI
Just like that, we've created an interactive loop that we can issue commands and queries to a Unity instance that is running.
If you want to start up the project, you need to do two things:
- Load up the Unity editor and open the project stored in the
unity-serverfolder - Make sure you have the
MainSceneopen - Click play button inside Unity to start the game simulation (usually in the center top of Unity Editor UI)
-
Once Unity is running the game simulation you can start the web UI client
-
Open a terminal in the
clientfolder and run the following commandsnpm install npm run start- NOTE: subsequent runs will only need to call
npm run startto build and run the Node.js proxy and web UI. (i.e. you only need to runnpm installonce)
- NOTE: subsequent runs will only need to call
-
Open a browser and navigate to: http://localhost:3000/
-
Congrats, you should be staring at a web UI to control Unity! Try spawning some objects, moving them, and refreshing for the list of current objects in the scene!

