DKAN is the Drupal-specific version of CKAN, an open source data portal and data management system. While it is possible to follow the standard instructions for Installing DKAN, they have a number of dependencies, ranging from Drush to MySQL and Apache. Instead, we recommend building DKAN with Vagrant, a portable development environment manager based on VirtualBox, and served up by nginx for speed and ease of configuration. Code courtesy of Brian McGuirk.
Vagrant allows the user to work in a Unix environment regardless of operating system. In the following steps, links will be created between the Vagrant VirtualBox and a local copy of DKAN files. Editing one will automatically update the other, and changes can then be viewed locally at dkan-test.local.com.
Install VirtualBox: choose the OS-appropriate version at https://www.virtualbox.org/wiki/Downloads and follow installation instructions.
Install Vagrant: again, choose the OS-appropriate version at https://www.vagrantup.com/downloads.html and follow installation instructions.
Now that you've got VirtualBox and Vagrant installed, download or clone the current repository and navigate to its base directory. You should see a Vagrantfile as well as a .provision folder. Inside the .provision folder is a bash script bootstrap.sh which contains the instructions for installing and building DKAN, as well as MySQL, PHP5, and a variety of other dependencies. Check out this file if you want to edit the DKAN version or see information about the database and root user.
Inside the base directory, run
$ vagrant up
Now DKAN will be installed per the instructions in bootstrap.sh. This should create a .vagrant folder in which the ubuntu/trusty64 machine will be stored; meanwhile, Drupal/DKAN files will be stored in the newly created dkan directory. If any major errors arise at this point, you can always run vagrant destroy to remove the virtual machine and start over. See the Getting Started for more commands with Vagrant.
Finally, we need to define the host so that we can see the site at dkan-test.local.com. To do so, edit the /etc/hosts file to include the IP listed in the Vagrantfile:
$ cd /etc/
$ sudo nano hosts
If you don't have nano, open the hosts file with the editor of your choice. Just make sure to do so with admin priviledges. Then add the following line
192.168.68.15 dkan-test.local.com
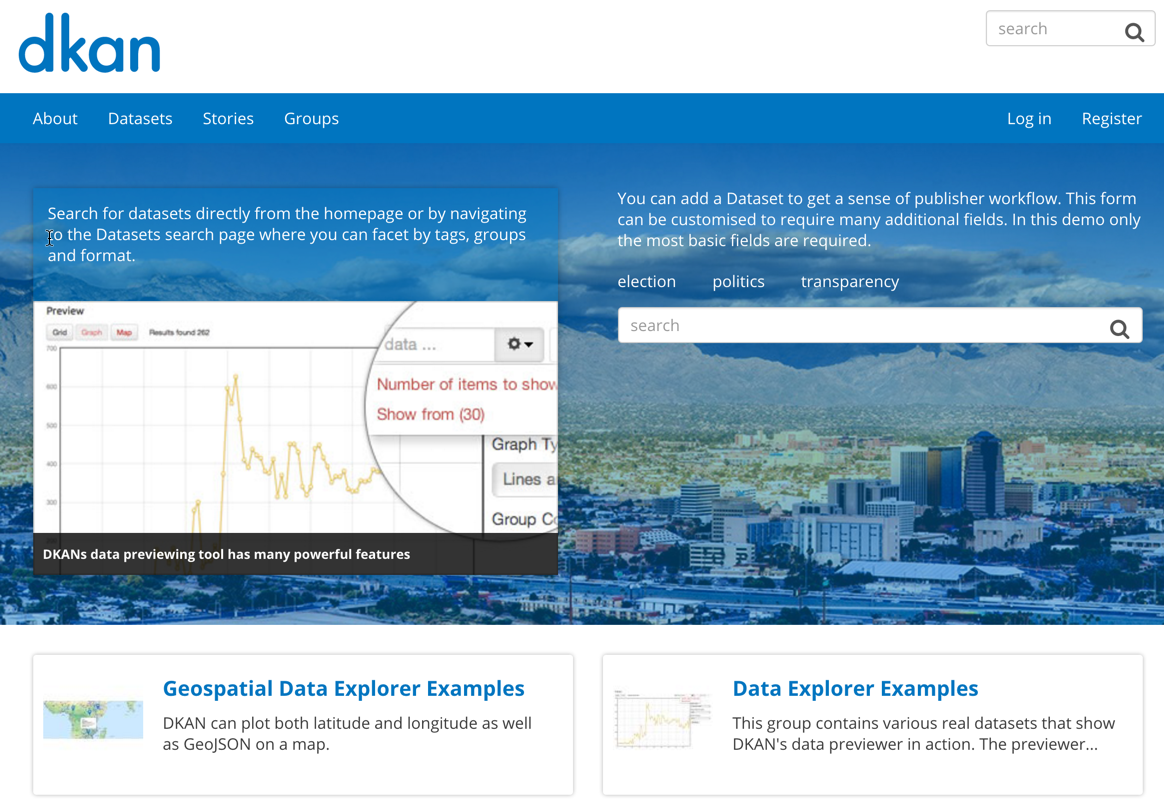
Now, you can test out the site by visiting dkan-test.local.com in the browser of your choice. You should see a website that looks something like the above image. To login to the admin panel of the site, click the "Log in" button and input "admin" for both the user and password, as defined in the bootstrap.sh file. For this and other reasons, system hardening will be required before this vagrant image can be pushed to a production server.
Should you want to have your sitename be something different (my.dkan.isthebest.com), you should modify the nginx.conf to reflect the servername, as well as the hosts file as described just above.
When you're done working with the site, again navigate to the base directory and run the following command:
$ vagrant suspend
This will make sure that work isn't lost when the computer is turned off or restarted. To resume work on the site, simply run vagrant up again.
