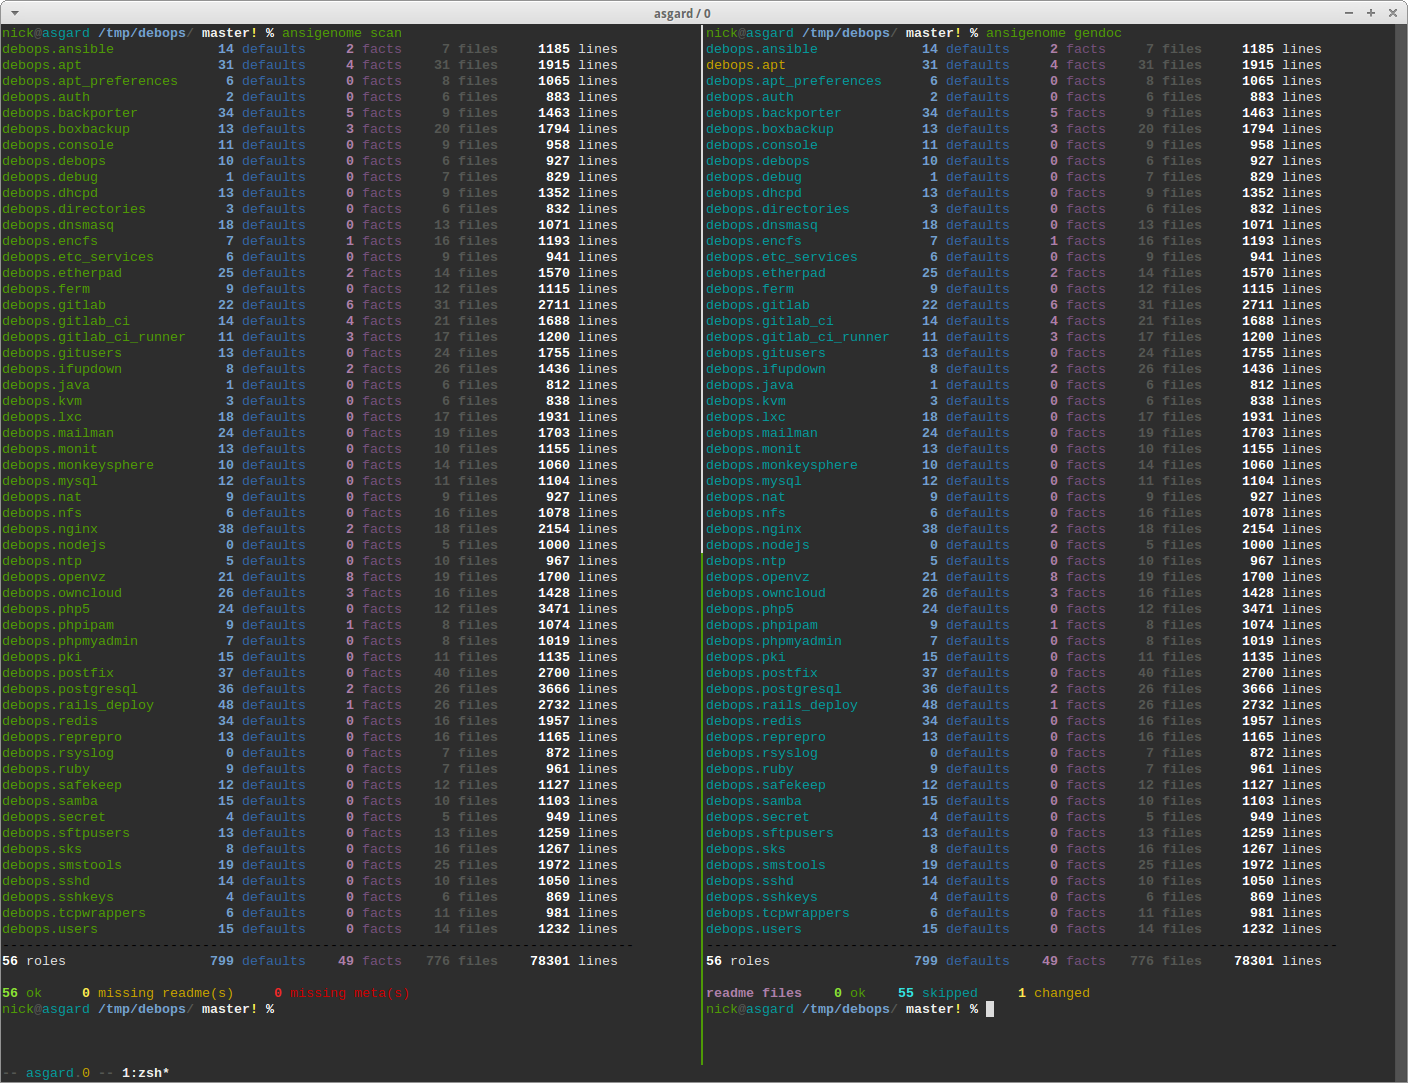
Ansigenome is a command line tool designed to help you manage your Ansible roles.
Scan your roles and organize your documentation
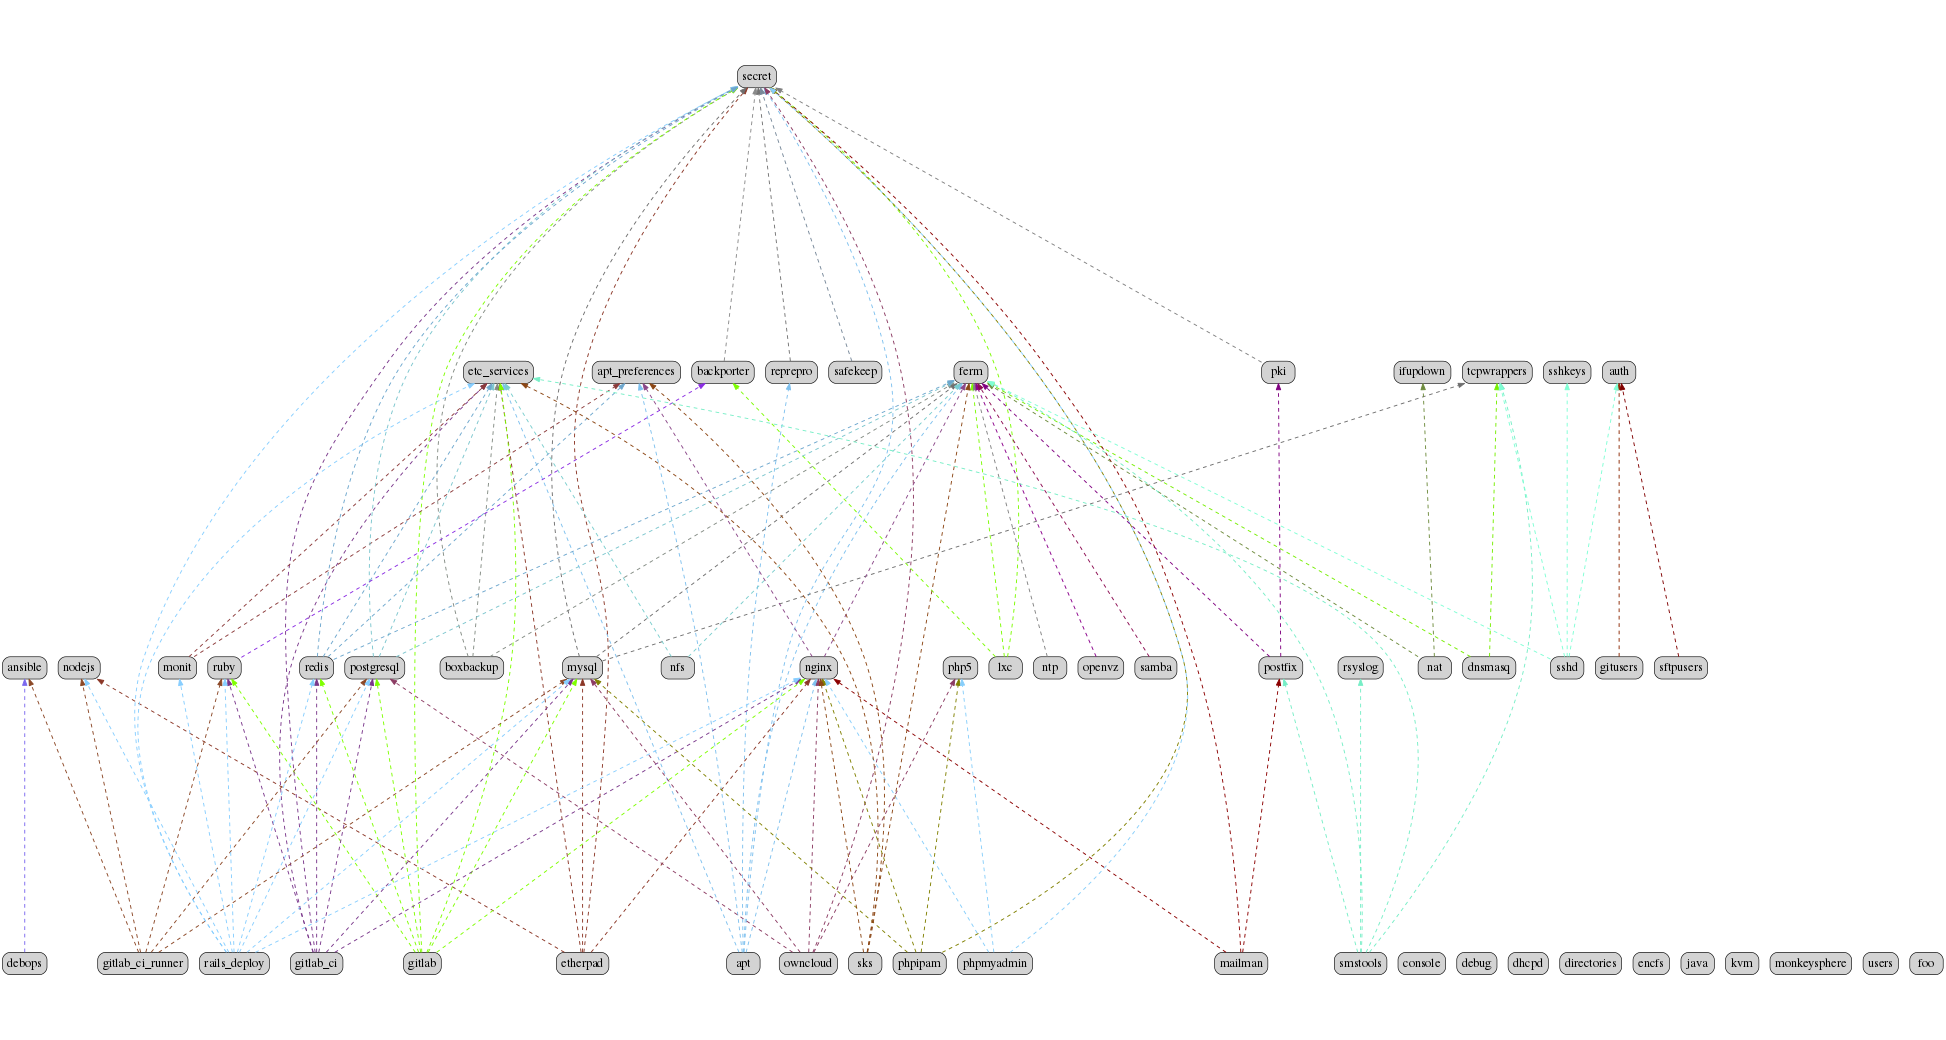
Create dependency graphs in seconds
Generated from the DebOps project.
...and more!
Are you someone with 1 or 100+ roles? Then you will benefit from using Ansigenome, let's go over what Ansigenome can do for you:
- Gather metrics on your roles
- Standardize your readmes in an automated way
- Augment existing meta files
- Export graphs and requirements files
- Create brand new roles
- Run shell commands in the context of each role
Just run ansigenome scan at a path containing all of your roles or ansigenome scan /path/to/roles and it will gather stats such as:
- Number of defaults, facts, files and lines found in each role and total them
- Verify if you're missing meta or readme files
Nope. This command is completely read only. All of your custom formatting and content is safe.
When I started to get to about 5 roles I dreaded making readmes for each one because there's so much boilerplate and duplication. We're programmers, so let's use tools to help us.
ansigenome gendoc will do the same as scan except it will read your meta/main.yml file and generate a readme based on the stats it found and also format your readme based on a jinja2 template.
It can generate both RST and MD readmes.
You can use the default template or optionally supply a custom template using blocks to customize the entire readme to your liking.
It will not modify your meta file but it will overwrite your existing readme file for each role it's ran against. You can still add custom info to the readme, but this will be done through the meta file, don't worry about that just yet.
Absolutely. This project sprung out of need while working on the DebOps project. There's about 60 roles all using an Ansigenome generated readme.
All of them were fully generated with 0 manual edits.
You might have 35 roles already written and might want Ansigenome to help you make the adjustment over to using Ansigenome.
ansigenome genmeta will take a peek at your meta files for each role, replace certain fields with values you provided to its config (more on this later) and add ansigenome-only fields to that meta file.
If you wanted to migrate over to using Ansigenome then this is what you'll want to run before ansigenome gendoc. After running genmeta you will be able to take your old readme files and move some of it to the new meta file that genmeta made for you.
It will rewrite your meta file for each role but it will not mess with your formatting. It will only augment a few fields that are missing and overwrite things like the galaxy_info.company name with what you supplied in the Ansigenome config (more on this later, we're almost there).
Just run ansigenome export -o <path to png output file> and it will use
Graphviz to create a dependency graph.
You can also tweak the size and DPI of the graph with a few flags or even
set the output format to be -f dot so you can pipe it to a different
Graphviz graphing utility.
Have a go with ansigenome export -t reqs -o <path to output file> to
generate a file for consumption by ansible-galaxy install -r <file>. It also supports the -f yml flag to use the new yaml format.
You can also dump everything Ansigenome gathered to json by running
ansigenome export -t dump -o <path to output file>.
You could then feed that to some database back end or a javascript based graphing utility, etc..
Yes, all of the export commands will output to stdout if you omit the -o flag. The only exception to this is the PNG graph.
Not at all. It just reads a few files.
Everyone loves making new roles right? Well, ansigenome init <role name/path> will do just that for you. What's different from using ansible-galaxy init? Here, I'll tell you:
- Creates an "Ansigenome ready" meta file
- Creates a
tests/directory and.travis.ymlfile for you automatically
It uses a tool called Rolespec for the test code. Don't worry, you don't need to download anything.
You'll also never have to write messy Travis configs again but you can still benefit from Travis itself.
Nah, but it will make a brand new shiny role for you.
Sometimes you just want to run a shell command against all of your roles. Similar to how Ansible lets you run adhoc commands on hosts.
ansigenome -m 'touch foo' would create the foo file in the root directory of each role.
If you have Ansible installed then you already have all of the dependencies you need to run Ansigenome. Pick one of the way below:
# Pick an installation method that agrees with you.

pip install ansigenome
easy_install ansigenome

# If you want to live on the edge...

git clone https://github.com/nickjj/ansigenome
cd ansigenome ; sudo python setup.py develop
So Ansigenome is installed, well done. Just run ansigenome config and answer a few questions. You only need to do this once.
At this point you can run any of the commands below.
Usage: ansigenome [config|scan|gendoc|genmeta|export|init|run] [--help] [options]


ansigenome config --help
create a necessary config file to make ansigenome work

ansigenome scan --help
scan a path containing Ansible roles and report back useful stats

ansigenome gendoc --help
generate a README from the meta file for each role

ansigenome genmeta --help
augment existing meta files to be compatible with Ansigenome

ansigenome export --help
export roles to a dependency graph, requirements file and more

ansigenome init --help
init new roles with a custom meta file and tests

ansigenome run --help
run shell commands inside of each role's directory


Options:
  --version   show program's version number and exit
  -h, --help  show this help message and exit

ansigenome command --help for more info on a command
- Do not forget to check out the
--helpfor each command - Learn how jinja2 extends works, you can use it for the readme template
- You're best off copying the base README and place it next to the custom j2
- Then you can
{% extends "README.md.j2" %}
gendocaccepts-f mdto generate markdown readmes instead of rstscan,gendoc,genmetaandrundon't require a roles path- It will try
$PWD/playbooks/rolesthen$PWD - This allows you to run Ansigenome from your roles path easily
- It will try
- You can write a config out to a custom path with
-o <path> - The non-home version of the config will be used if found
- Feel free to edit the config file by hand later to change values
- You can write a config out to a custom path with
- The
export -t reqscommand accepts a-vflag to read in a VERSION file - The
initcommand accepts a-cflag - Supply a comma separated list of Galaxy categories
- The
scan,gendoc,genmeta,runanddumpaccept an-lflag- Supply a comma separated list of roles to white list
- If you are the only author you do not need to specify
ansigenome_info.authors
Here's the available variables you can use in your meta file or optional custom readme template:
# Access a single author (taken from your config).
author.name
author.company
author.url
author.email
author.twitter
author.github

# Access all of the authors.
authors

# License.
license.type
license.url

# SCM (source control management).
scm.type
scm.host
scm.user
scm.repo_prefix

# Dynamic items (they are calculated/normalized for you automatically).
role.name
role.galaxy_name
role.slug

# Standard items (you can access any property of these objects).
dependencies
galaxy_info
ansigenome_info

  # ansigenome_info fields.
  galaxy_id   : String based ID to find your role on the Galaxy
  travis      : Boolean to determine if this role is on Travis-CI

  status      : Dictionary with info about the status
     name        : String, currently supported are: beta, deprecated
     note        : String containing additional information about the status

  synopsis    : String block containing what your role does
  usage       : String block containing a detailed usage guide
  custom      : String block containing anything you want

  authors     : List containing information about each author
You can find many meta example files at the DebOps project page.
You might decide that the current template doesn't suite your style. That's completely reasonable. You can supply your own readme template and extend the base one.
Just add the path to the custom readme template to your config file. Then copy the base template from this repo to somewhere on your workstation, perhaps next to your custom template.
Then in your custom template you can extend it like this:
{% extends "README.md.j2" %}

<insert the blocks you want to replace here>
- title
- ansigenome_managed
- badges
- status
- beta
- deprecated
- synopsis
- installation
- dependencies
- standalone
- defaults
- facts
- usage
- authors
- footer
If you would like to contribute then check out Ansible's contribution guide because this project expects the same requirements and it contains great tips on using git branches.
In addition to that your code must pass the default pep8 style guide. I have Travis running a test to ensure the code follows that guide but your best bet is to find a plugin for your editor if you don't have one already.
Ansigenome was created by Nick Janetakis nick.janetakis@gmail.com.
Special thanks to @drybjed for coming up with the name of the tool. This project idea spawned from trying to break up the DebOps project into multiple roles. Neither of us wanted to manually make 50 repos and 50 readmes so I decided to learn Python and make this tool instead.


