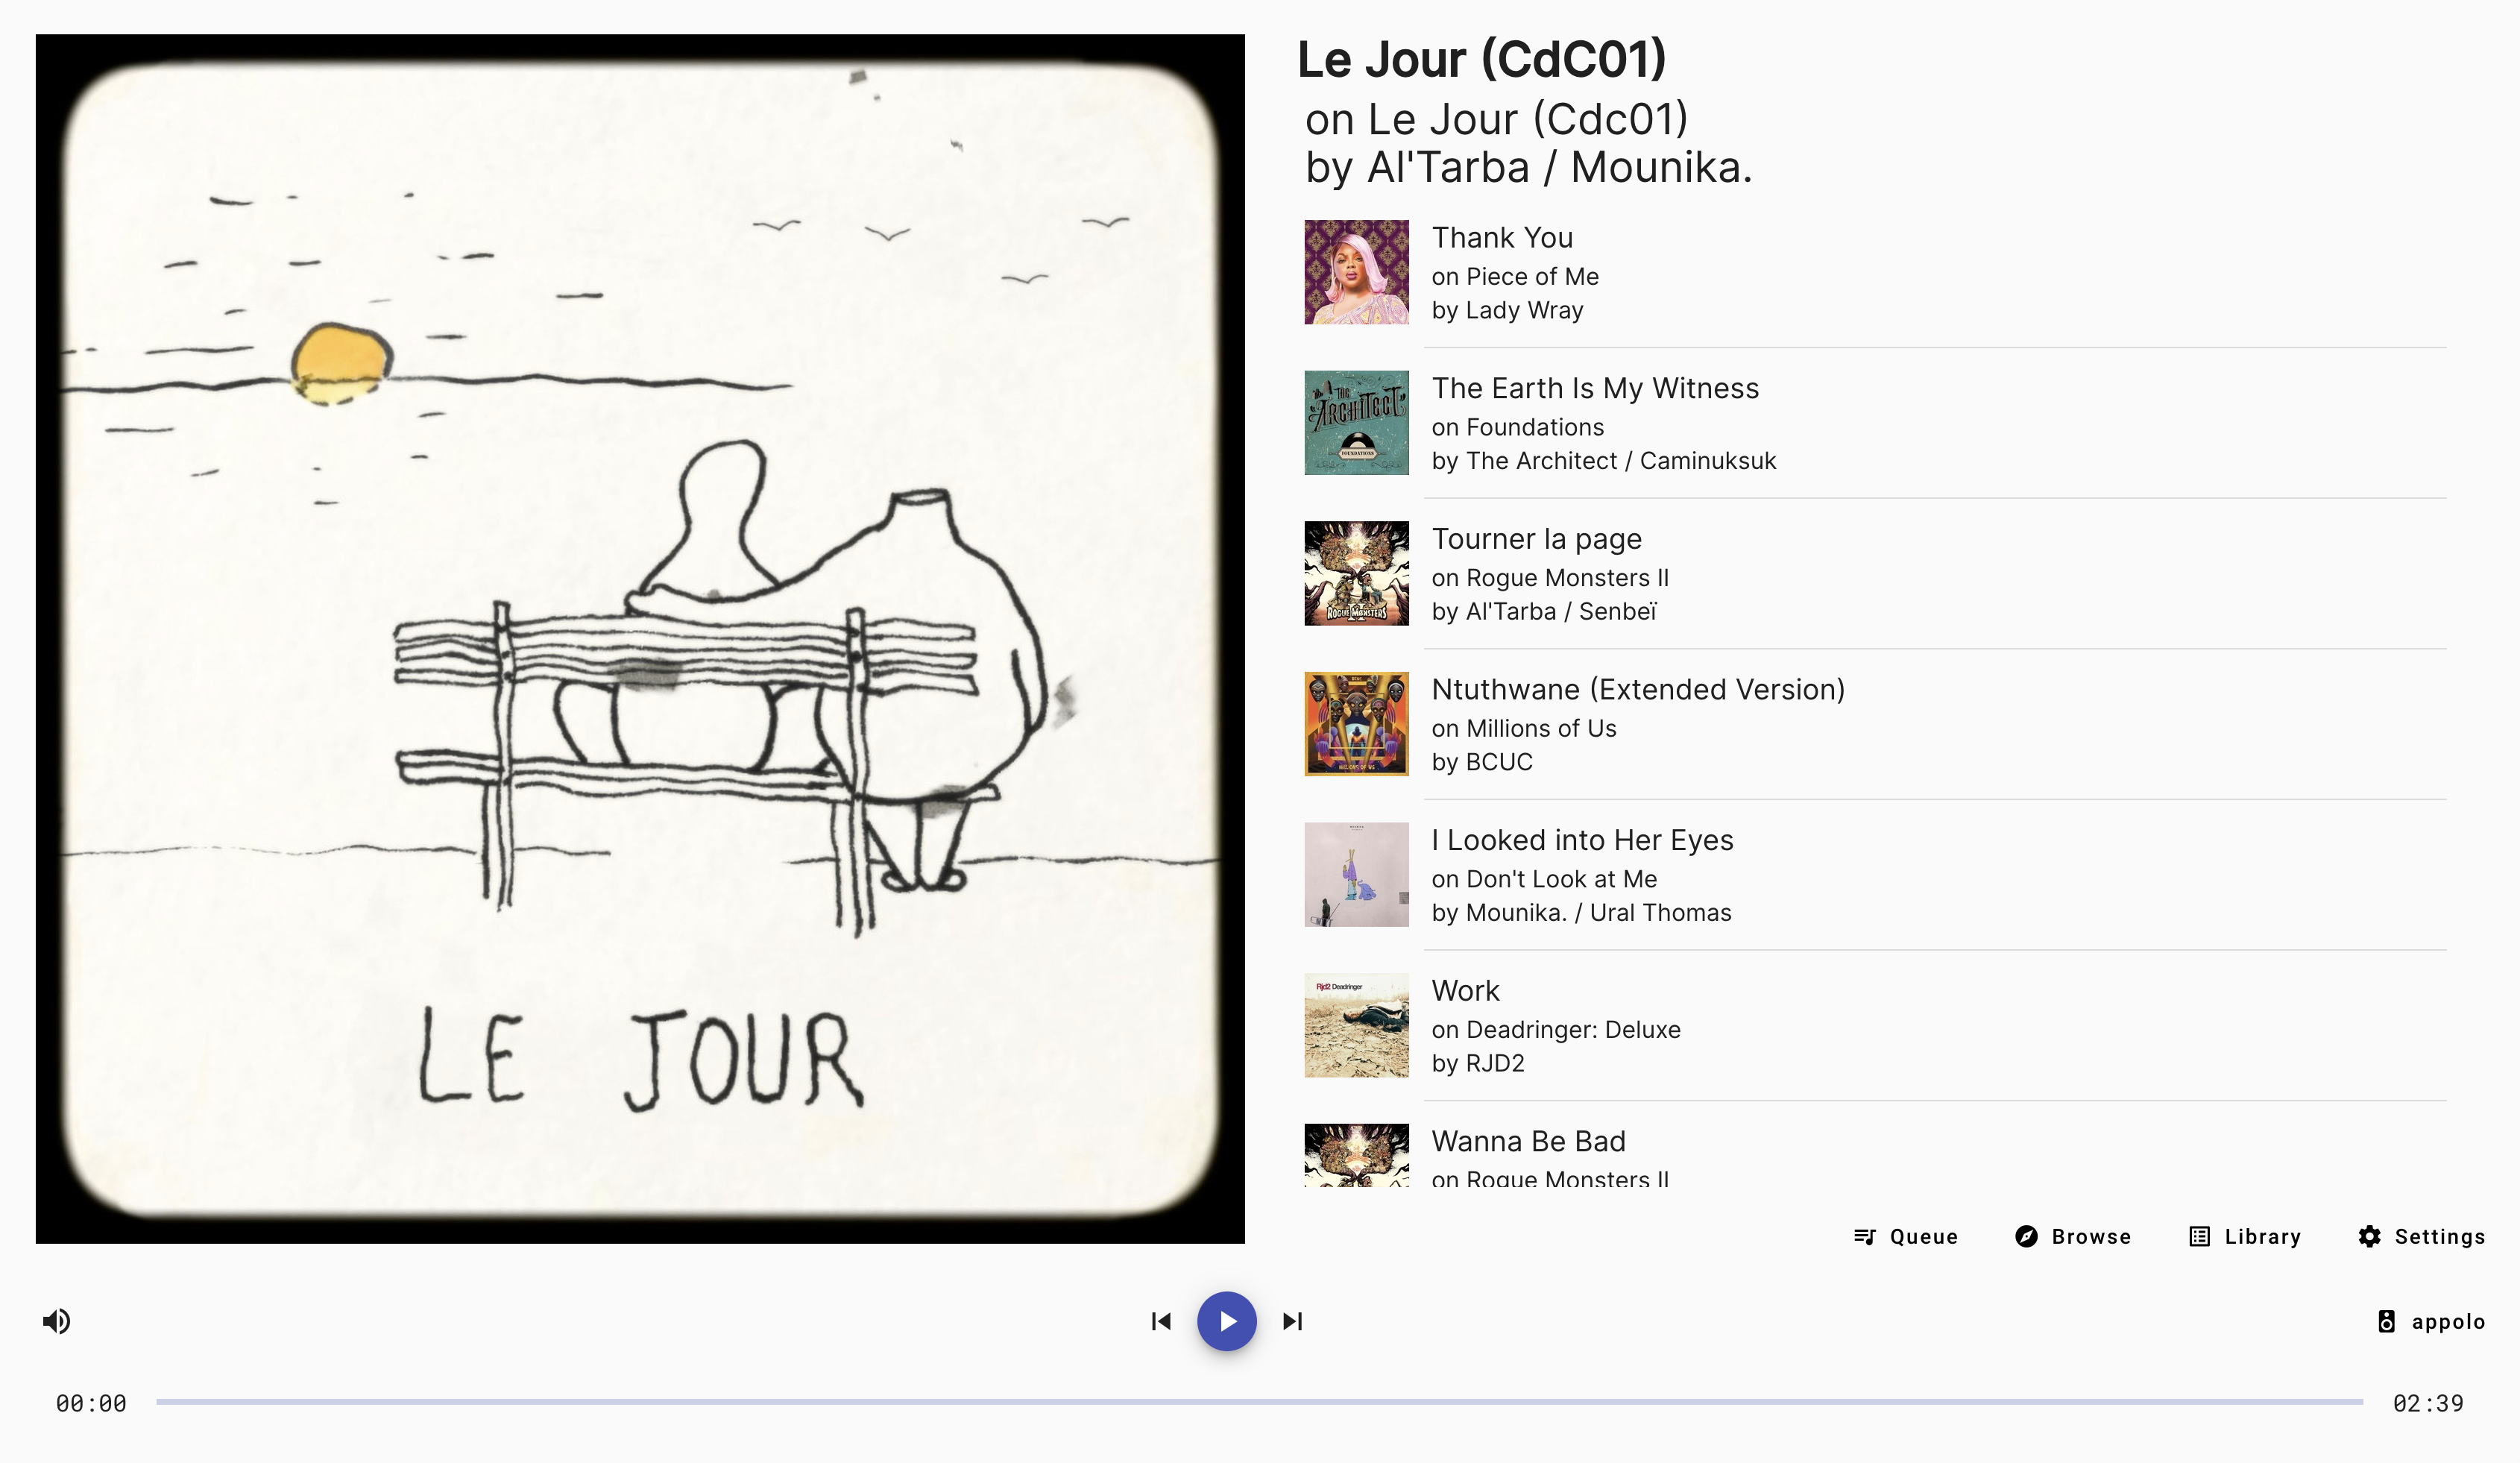
An ensemble of tools to drive roon, from a web browser.
The final produced artifact is a docker image containing a node application serving both an Angular app and a node CQRS http proxy fronting the node roon api.
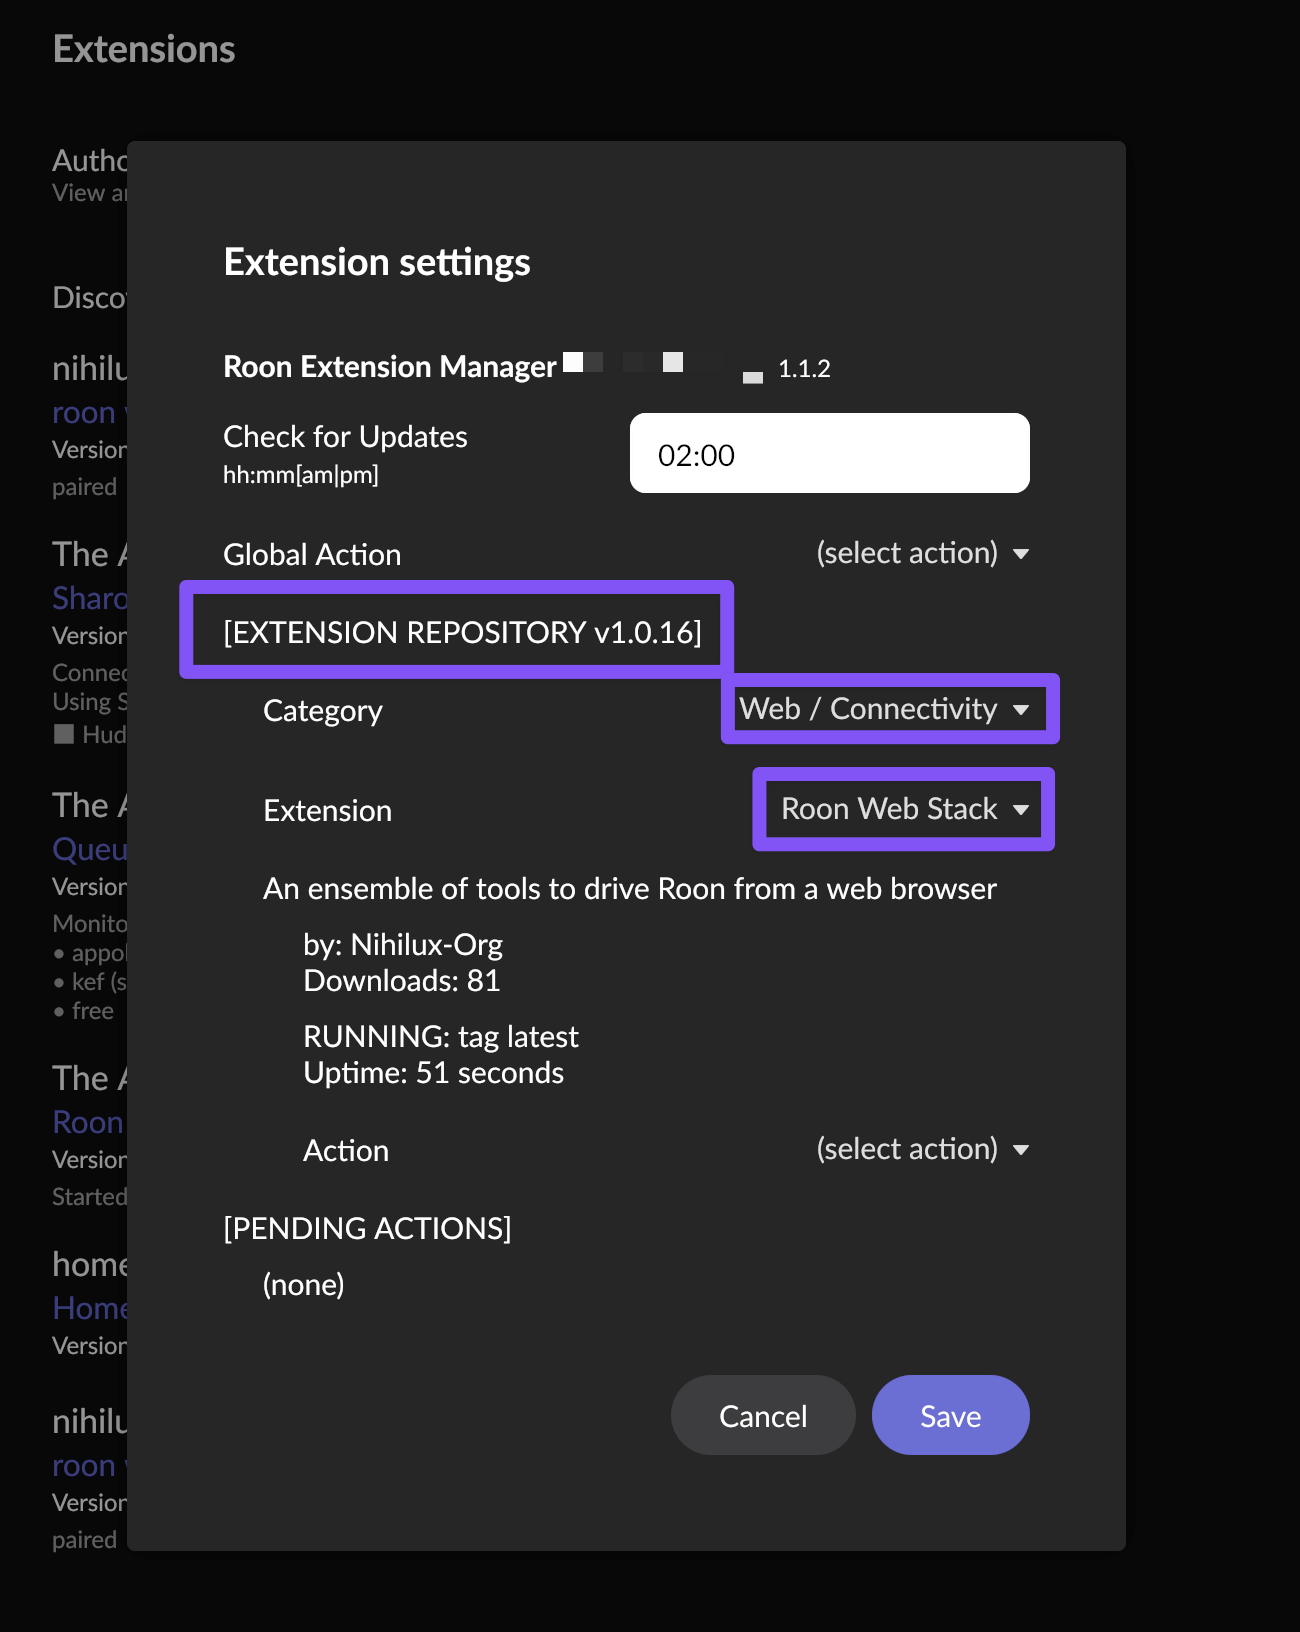
Thanks to The Appgineer, this app is available in roon extension manager starting with version 1.0.16 of the repository:
This is the easiest way to use it.
You can find more info about this tool on roon forum or in its GitHub project.
Once again, big thanks to The Appgineer, both for the roon extension manager and for the integration in the repository.
How to use the docker image available on docker hub:
docker run \
-d \
--network host \
--name roon-web-stack \
-e PORT=8282 \
-e LOG_LEVEL=info
-v {somewhere_on_your_host}/config:/usr/src/app/config
nihiluxorg/roon-web-stack- The
network hostsetting is needed to enable autodiscovery of yourroonserver.
It should be possible to make this requirement optional by providing explicit information about theroonserver to connect with.
This will be explored later, so for now, this is mandatory. - You can configure the
portused bynodewith the-e PORT={port_number}env variable definition.
If you don't specify aport, thenodedefault,3000will be used. - You can configure the
loglevel used by thenodeapp via the-e LOG_LEVEL={level}env variable definition.
Supported values are one oftrace|debug|info|warn|error.
If you don't set this variable,infowill be used. - The volume mounted by
-v {somewhere_on_your_host}/config:/usr/src/app/configis here to save theconfig.jsonfile used by theroonextension.
The correspondingpathis declared as avolumein the Dockerfile and asymlinkis present to make theconfig.jsonfile accessible to thenodeapp.
This directory must be readable and writable by the user inside thedocker.
disclaimer:
There's a bug somewhere between node lts-alpine images, qemu, buildx and github actions that breaks them for armv7 (32 bits ARM, like Raspberry Pi 2 and older).
I want neither to add a dedicated pipeline for this architecture as a workaround, nor I want to use debian as base image, because it's hundred of MB larger.
Waiting for this bug to be resolved, this platform is not supported (see this issue and this repo that reproduces this bug).
Another way to ease all that has been described above is to go with docker-compose (or any equivalent solution to lightly orchestrate containers).
Here is an exemple of a docker-compose.yaml (that I use on dietpi to run this app at home):
version: '3.8'
services:
  roon-web-stack:
    image: nihiluxorg/roon-web-stack
    container_name: roon-web-stack
    network_mode: host
    volumes:
      - config:/usr/src/app/config
    environment:
      - "PORT=8282"
      - "LOG_LEVEL=info"
volumes:
  config:
In this exemple, the config volume is created and reused by docker-compose without any need to map it to your host filesystem.
Once again, there are many ways to achieve this kind of configuration. These exemples are just here to provide indication on what's needed for this docker image to work.
Once the container has started, just go to http://{host}:{port} with any modern browser.
You should be welcome by the application.
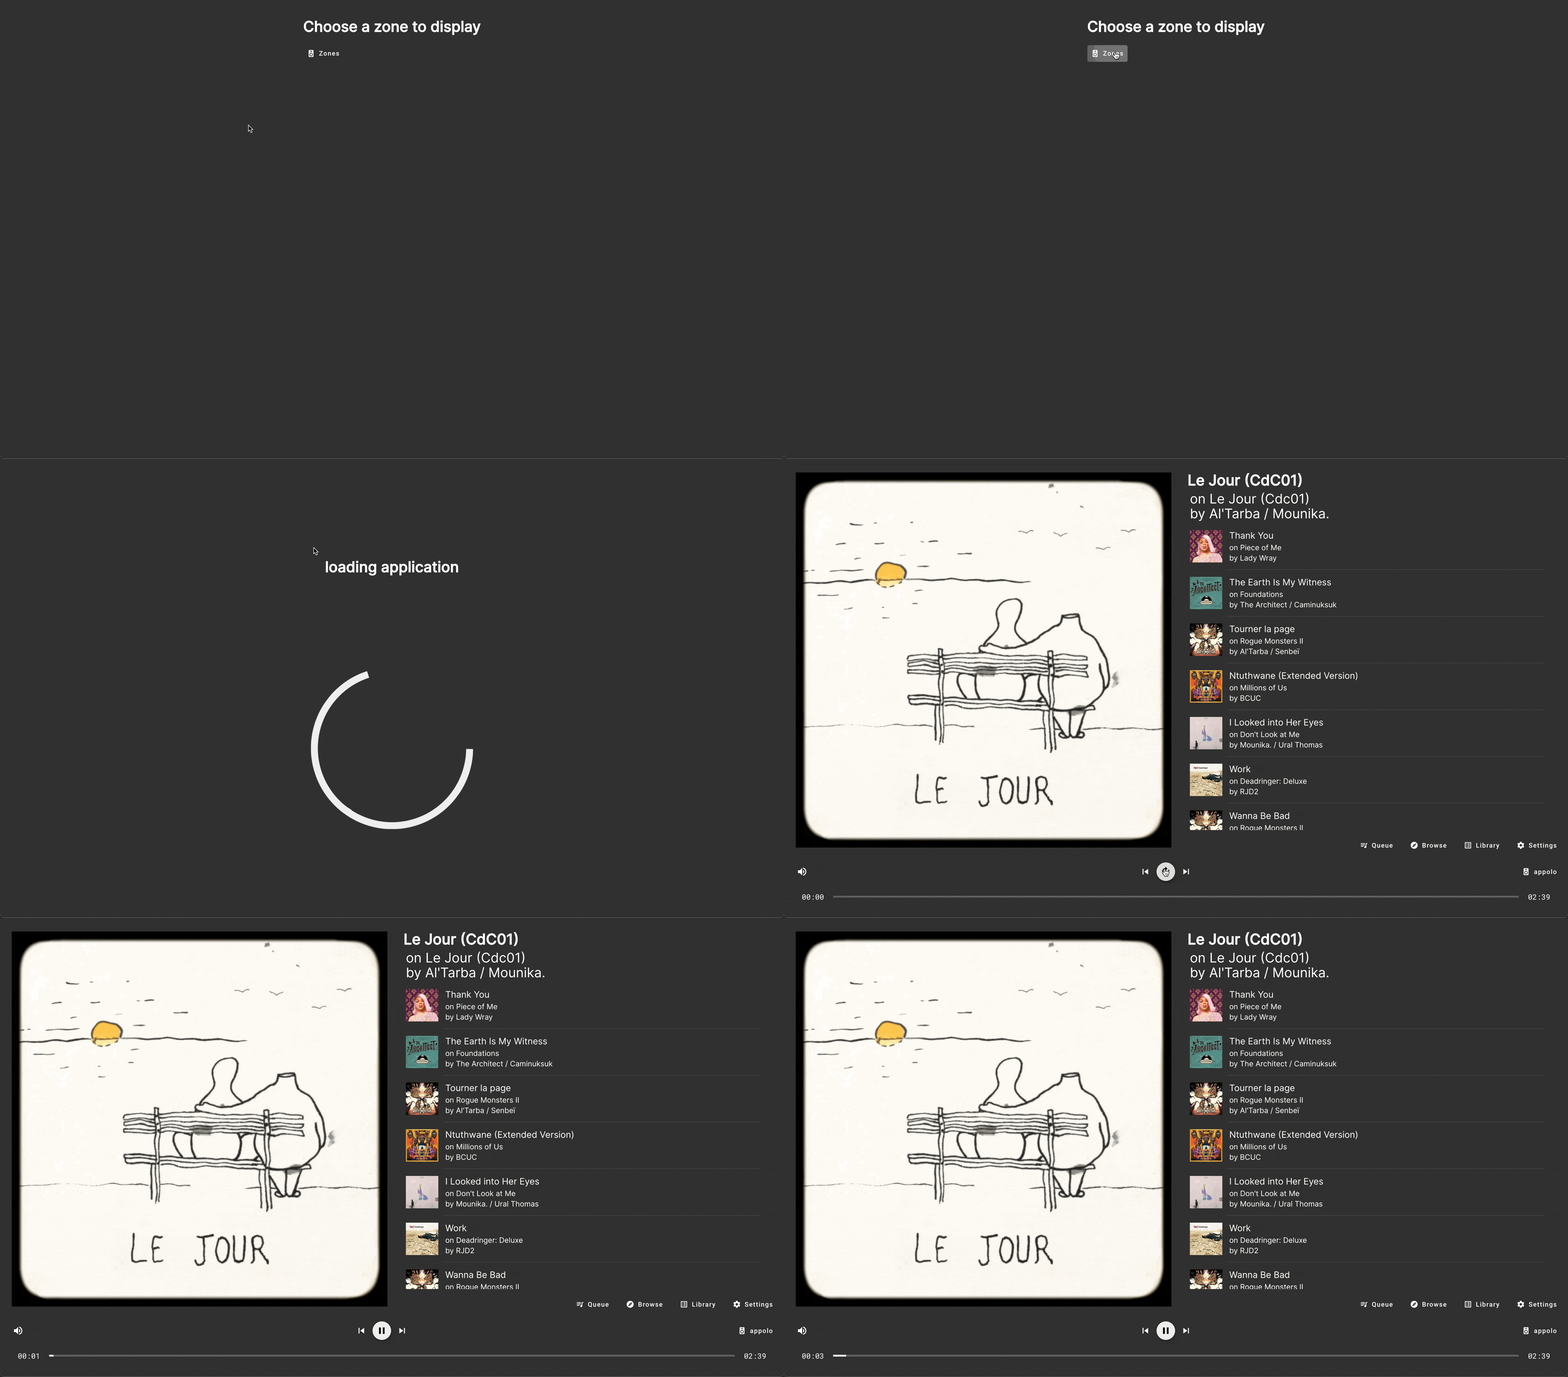
On first launch, you'll be asked to choose a zone to display.
Choose one, and voilà:
After this first boot, the app will display the last displayed zone.
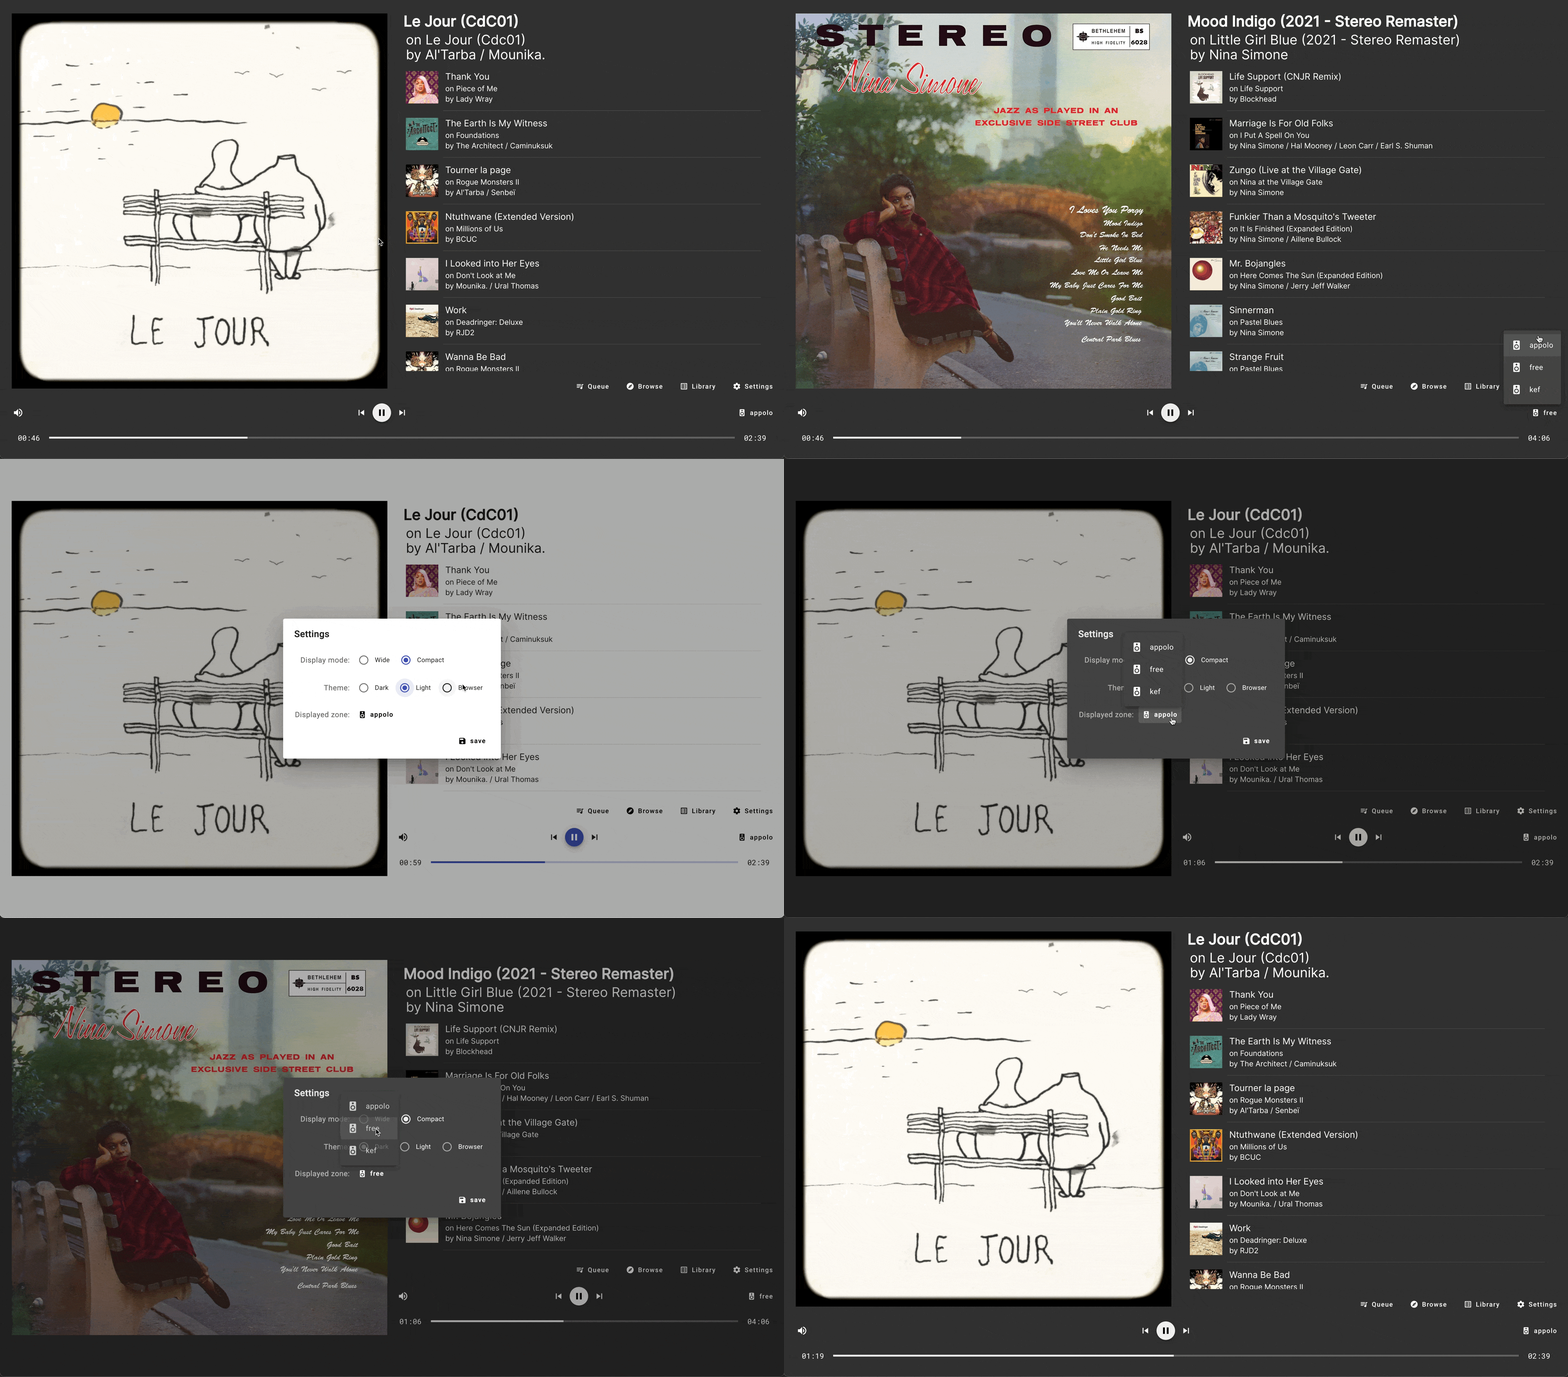
You can change the displayed zone with the zone selector on the app main screen and via the settings:
Settings are kind of minimal for now:
- you can choose the theme used
- you can choose between two display modes
- you can select the displayed zone
As features will be added, settings will be added, if needed, to support them.
These settings are saved in localstorage, so they're both linked to the host serving the app and to the browser instance they've been set. Changing one of these parameters will reset all settings to their default value.
Using the app should be pretty straight-forward for anyone using roon, still, there's a user guide (with a FAQ) available.
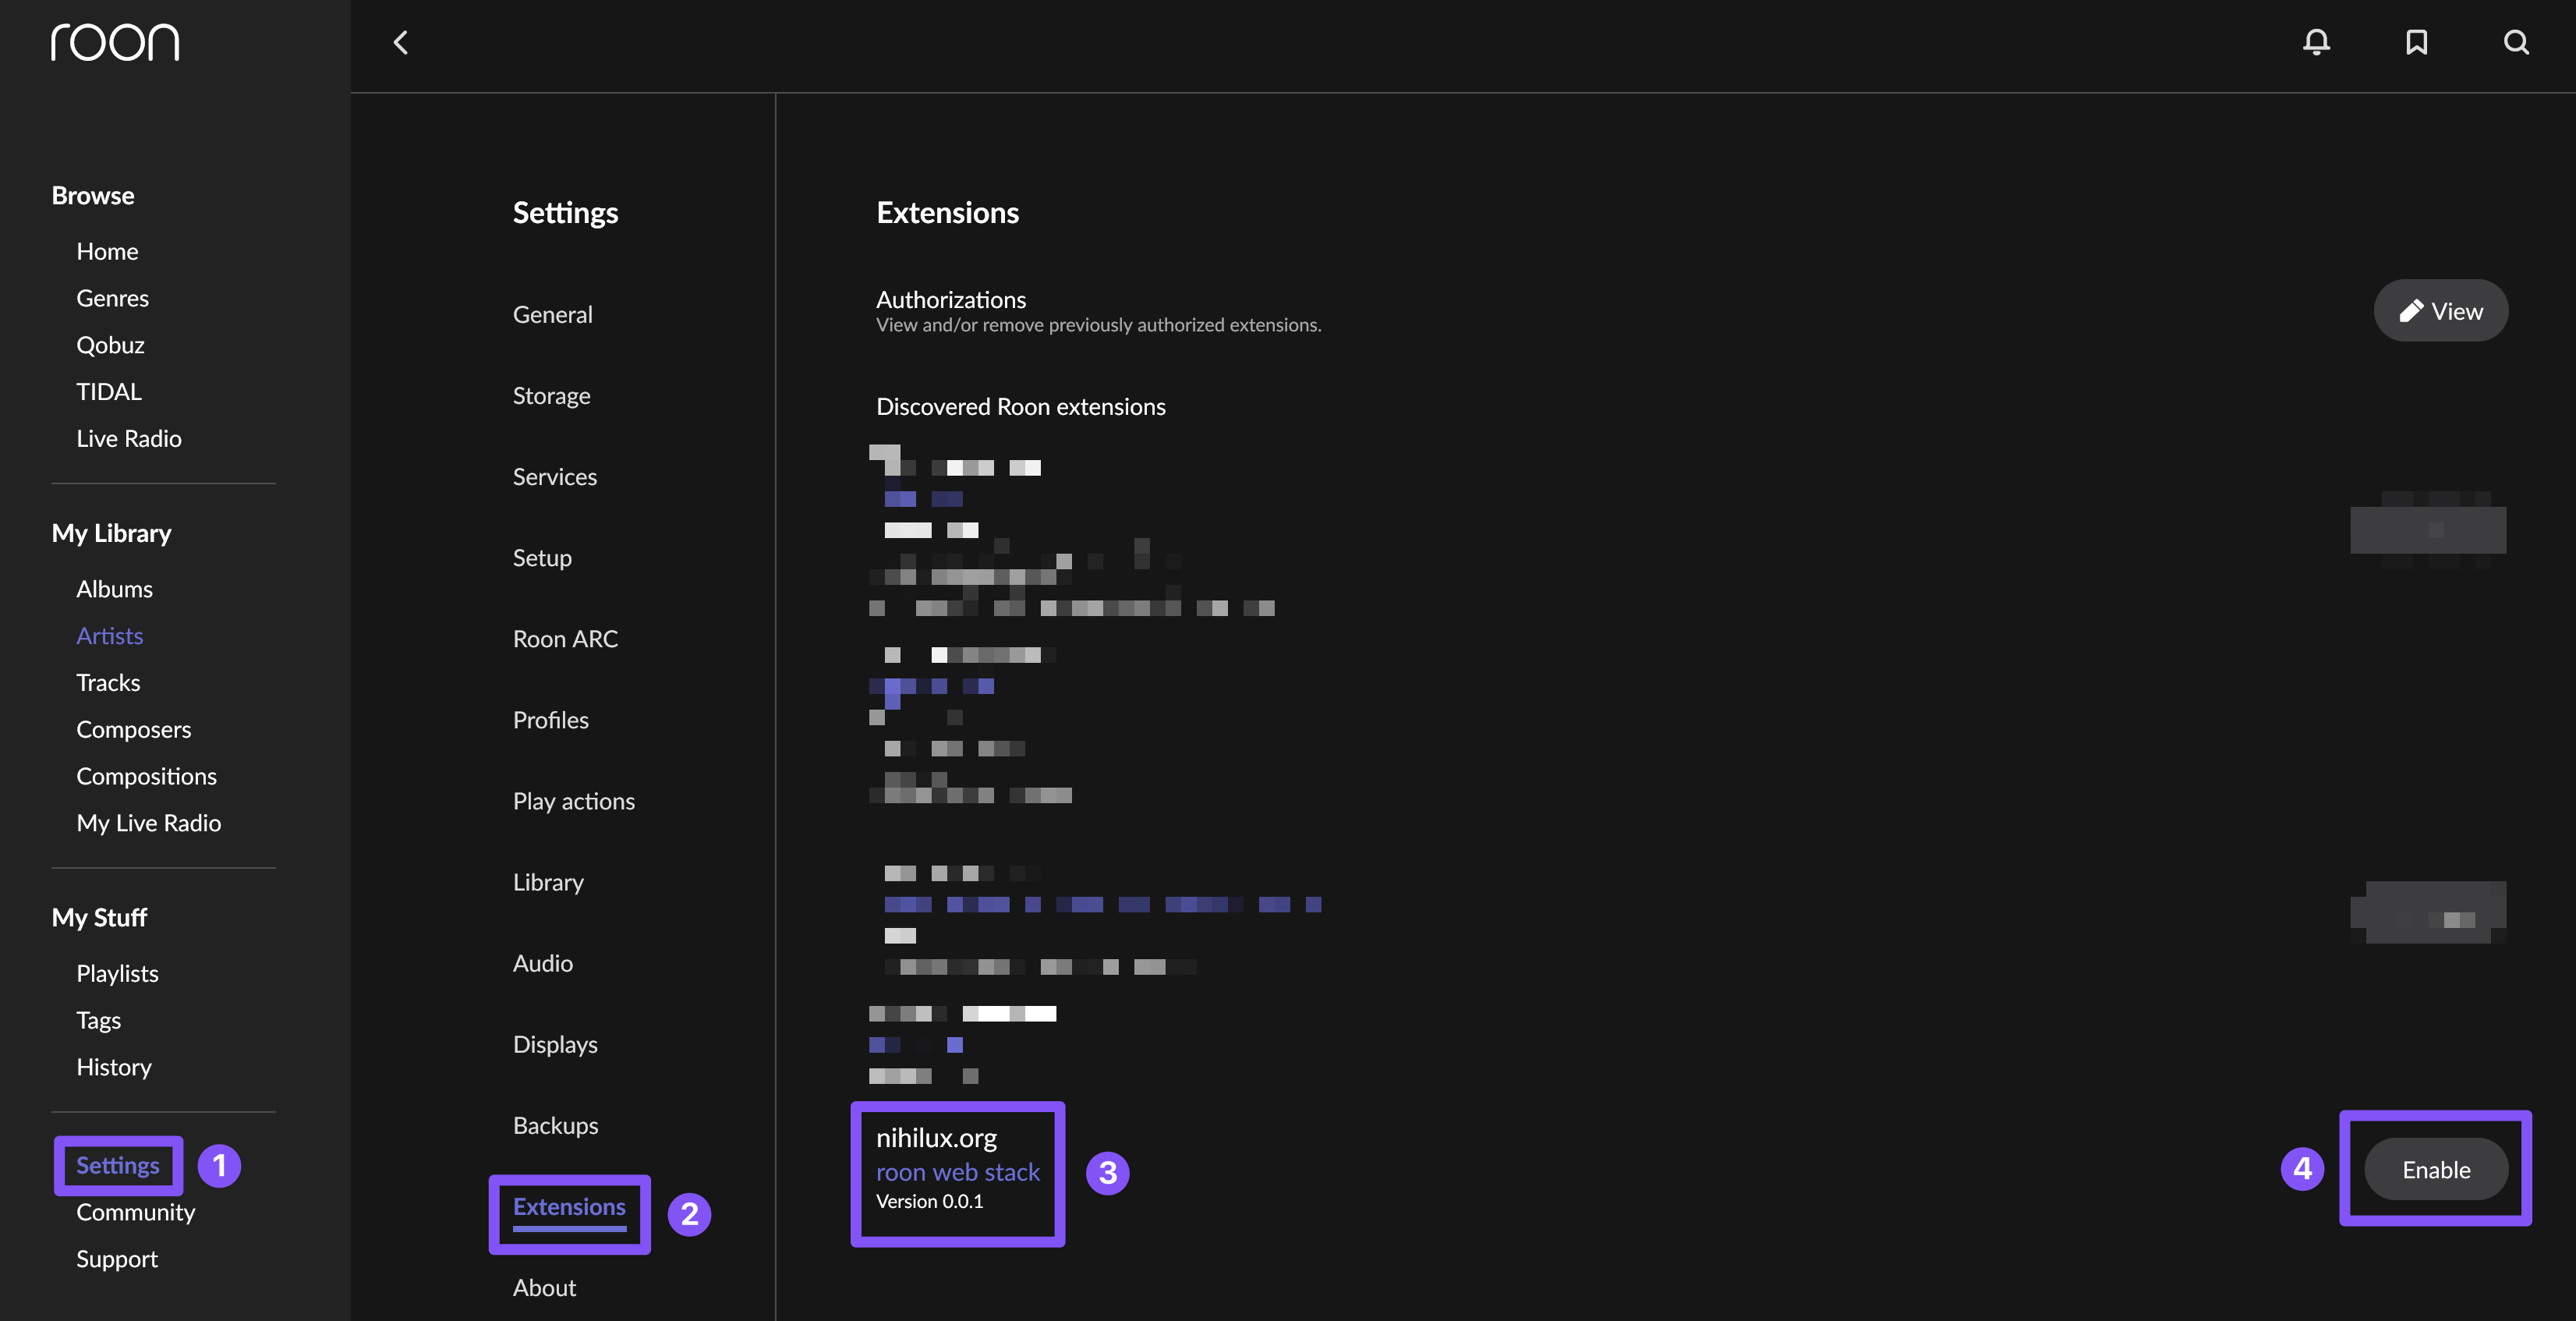
Don't forget to enable the extension in roon settings (might be needed every time you recreate or restart the container if you don't mount the config volume).
If you don't, you'll see this message in the browser:
As a reminder, this is how to enable an extension in roon settings:
First, you'll need the last lts version of node (newer might work, not tested though). Currently, the CI and the CD are using what's defined in the main package.json: node >= 22.6.0. This will follow availability of node lts in github actions.
How you install node is your story, after all you want to build from sources.
Checkout the code and cd in the directory.
This monorepo uses yarn 4.4.0 as it's package manager as defined in the root package.json.
To enable corepack for this project, you'll be good for a pair of:
corepack install
corepack enable yarn
Then install, build (just to check everything works fine), have fun:
yarn install
yarn build
To launch the backend in watch mode:
yarn backendTo launch the frontend in watch mode:
yarn frontendMost commands are available at root of the monorepo:
yarn lint       #lint every workspace in their dependency order
yarn lint:fix   #lint and auto-fix every workspace in their dependency order
yarn build      #build every workspace in their dependency order, run lint during build process
yarn test       #test every workspace in their dependency order
The angular dev server is configured to proxy calls to the api on the node default port, so everything should be ready for you to code.
If you want to build locally the docker image, you'll have to manually copy the built Angular app in the build folder of the api, then run docker build:
yarn build
cp -r ./app/roon-web-ng-client/dist/roon-web-ng-client/browser ./app/roon-web-api/bin/web
docker build -t nihiluxorg/roon-web-stack:latest -f app/roon-web-api/Dockerfile .
Then you can use the docker command already mentioned to launch your freshly built image.
This project is young and at its very early stage. It's just enough functionalities to be usable and I value the feedback from the community. The idea is to feed further development by these feedbacks.
Also, despite building software for a living, I'm not a frontend developer.
My core experiences and expertises are in designing and building distributed and scalable apis (µ-services, cloud stuff, k8s, dbs and all the usual suspects).
Recently I've only used typescript, at work, to build serverless and @edge stuffs.
This project was for me an occasion to go back to web development (I'd not done that for at least 7 years), helping to deal with some personal stuff in the process.
So, development will be agile, on my personal time. I'm not planning spending more than 3 to 5 hours a week on this project in the future. Otherwise, it should become my job.
See what's coming for this project to learn how to submit feature request and how to participate in the priorisation process.
Any contribution is welcome, see CONTRIBUTING for info.
Constructive remarks on the stack choices or better way to code a modern Angular app are also welcome (last project I've worked on as a fullstack dev was almost a decade ago, during the early days of Angular 2).
This monorepo includes inlined sources coming from Stevenic/roon-kit.
It's stated everywhere it makes sens, and this is one of these places.
See the README.md in the corresponding source folder for more details (and here for the model part).
This app would not have been possible without the vitality of open source projects, so thanks to all of them.
Sorry if I forgot anyone, please don't argue on the order.
- Stevenic for roon-kit
- roon for node roon api
- Angular
- Angular Material
- Fastify
- Fastify SSE v2
- Fastify static
- graceful server
- nanoid
- ts-retry-promise
- fast-equals
- rxjs
- jest
- node
- typescript
- yarn
- Sass
- webpack (can't list every plugin used, but thanks to everyone!)
- eslint (can't list everything's used, but thanks to everyone!)
- prettier
- editorconfig
- docker
- GitHub, with a special thanks to everyone involved in the
actionsin used in this repo - alpine
- linux and git
