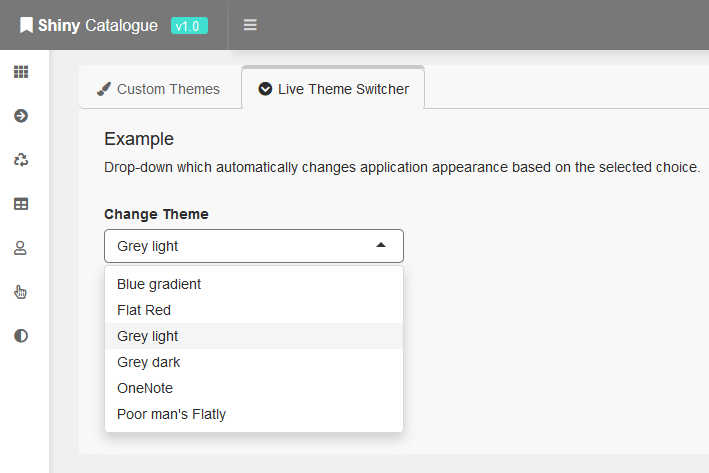
An example of how to create a live theme switcher for R Shinydashboard applications.
- Install the dashboardthemes R package from GitHub.
- Load the package within your application code:
library(dashboardthemes)- Copy the below Shiny Module code.
- Create a new script called 'moduleChangeTheme.R' within your project and paste the code inside.
- Source the module within your application using source("./YourDirectory/moduleChangeTheme.R")
  # Ui functions ------------------------------------------------------------
  uiChangeThemeDropdown <- function(dropDownLabel = "Change Theme", defaultTheme = "grey_light")
  {
    changeThemeChoices <- c(
      "Blue gradient" = "blue_gradient",
      "Flat Red" = "flat_red",
      "Grey light" = "grey_light",
      "Grey dark" = "grey_dark",
      "OneNote" = "onenote",
      "Poor man's Flatly" = "poor_mans_flatly",
      "Purple gradient" = "purple_gradient"
    )

    ns <- NS("moduleChangeTheme")
    dropdown <- tagList(
      selectizeInput(
        inputId = ns("dbxChangeTheme"),
        label = dropDownLabel,
        choices = changeThemeChoices,
        selected = defaultTheme
      )
    )

    return(dropdown)
  }

  uiChangeThemeOutput <- function()
  {
    ns <- NS("moduleChangeTheme")
    themeOutput <- tagList(
      uiOutput(ns("uiChangeTheme"))
    )

    return(themeOutput)
  }


  # Server functions --------------------------------------------------------
  serverChangeTheme <- function(input, output, session)
  {
    observeEvent(
      input$dbxChangeTheme,
      {
        output$uiChangeTheme <- renderUI({
          shinyDashboardThemes(theme = input$dbxChangeTheme)
        })
      }
    )
}In the Ui part of your application:
- Insert the uiChangeThemeOutput() function within the body of the application.
- This will ensure the CSS styles sent by the server part of the application are received and applied in real-time.
  ...
  # Body --------------------------------------------------------------------
  body = dashboardBody(

    # Custom theme ------------------------------------------------------------
    uiChangeThemeOutput(),

    # Ui tabs -----------------------------------------------------------------
    tabItems(
...- Insert the uiChangeThemeDropdown() function where you want the live theme switcher drop-down to be displayed.
- This will create a drop-down with Id 'dbxChangeTheme', which can be monitored in the server part of the application.
  ...
  # Tab content -------------------------------------------------------------
  tabItem(
    tabName = "tabThemes",
    fluidRow(
      column(
        width = 12,

        # Theme drop-down ---------------------------------------------------------
        uiChangeThemeDropdown()
      )
...- Alternatively, it's possible to change the default drop-down label and default selected theme by changing the dropDownLabel and defaultTheme parameters respectively.
  ...
  uiChangeThemeDropdown(dropDownLabel = "Your Label", defaultTheme = "onenote")
...In the Server part of your application:
- Call the Shiny Module created above using the callModule() function.
- This will create an ObserveEvent that monitors the 'dbxChangeTheme' drop-box created within the Ui, and dynamically inject CSS styles into the application in real-time.
  server <- function(input, output, session) {
    ...
    # Changing theme ----------------------------------------------------------
    callModule(module = serverChangeTheme, id = "moduleChangeTheme")
    ...
  }