Auxiliary resources for the workshop Extending the Camunda Modeler for Fun and Profit, helt at CamundaCon 2019.
The goal of this workshop is to integrate diagram validation into the Camunda Modeler and implement our own plug-in that contributes custom validation rules.
More specific, we set out to accomplish the following:
- Install Camunda Modeler Linter plug-in
- Create own Camunda Modeler plug-in
- Setup for plug-in development
- Create bpmnlint plug-in
- Integrate bpmnlint plug-in with our Camunda Modeler plug-in
- Write our own validation rules: No user tasks and external tasks only
- You have an appropriate command line set up (NO
cmdbut something likegit-bashon Windows) - You've downloaded the Camunda Modeler
- You have Node.js (LTS or higher) installed
- You have an editor / IDE suitable for JavaScript development
- You can open the Camunda Modeler
- You can retrieve versions of
node,npmandnpxvia the command line:node -v npm -v npx -v
Locate the Camunda Modeler resources/plugins director (cf. plug-in search paths) on your operating system:
- Windows:
%APPDATA%/camunda-modeler/resources/plugins - Linux:
$XDG_CONFIG_HOME/camunda-modeler/resources/pluginsor~/.config/camunda-modeler/resources/plugins - MacOS:
~/Library/Application Support/camunda-modeler/resources/plugins
You may need to create that directory.
Within that directory execute:
npx degit github:camunda/camunda-modeler-linter-plugin camunda-modeler-linter-pluginAs an alternative to the above command, you may download the plug-in from GitHub and unpack it manually, too.
Restart the Camunda Modeler.
- The Linter plug-in is downloaded and unpacked to the
resources/plugins/camunda-modeler-linter-plugindirectory. - After restarting the Camunda Modeler validation controls show up when opening a BPMN diagram:
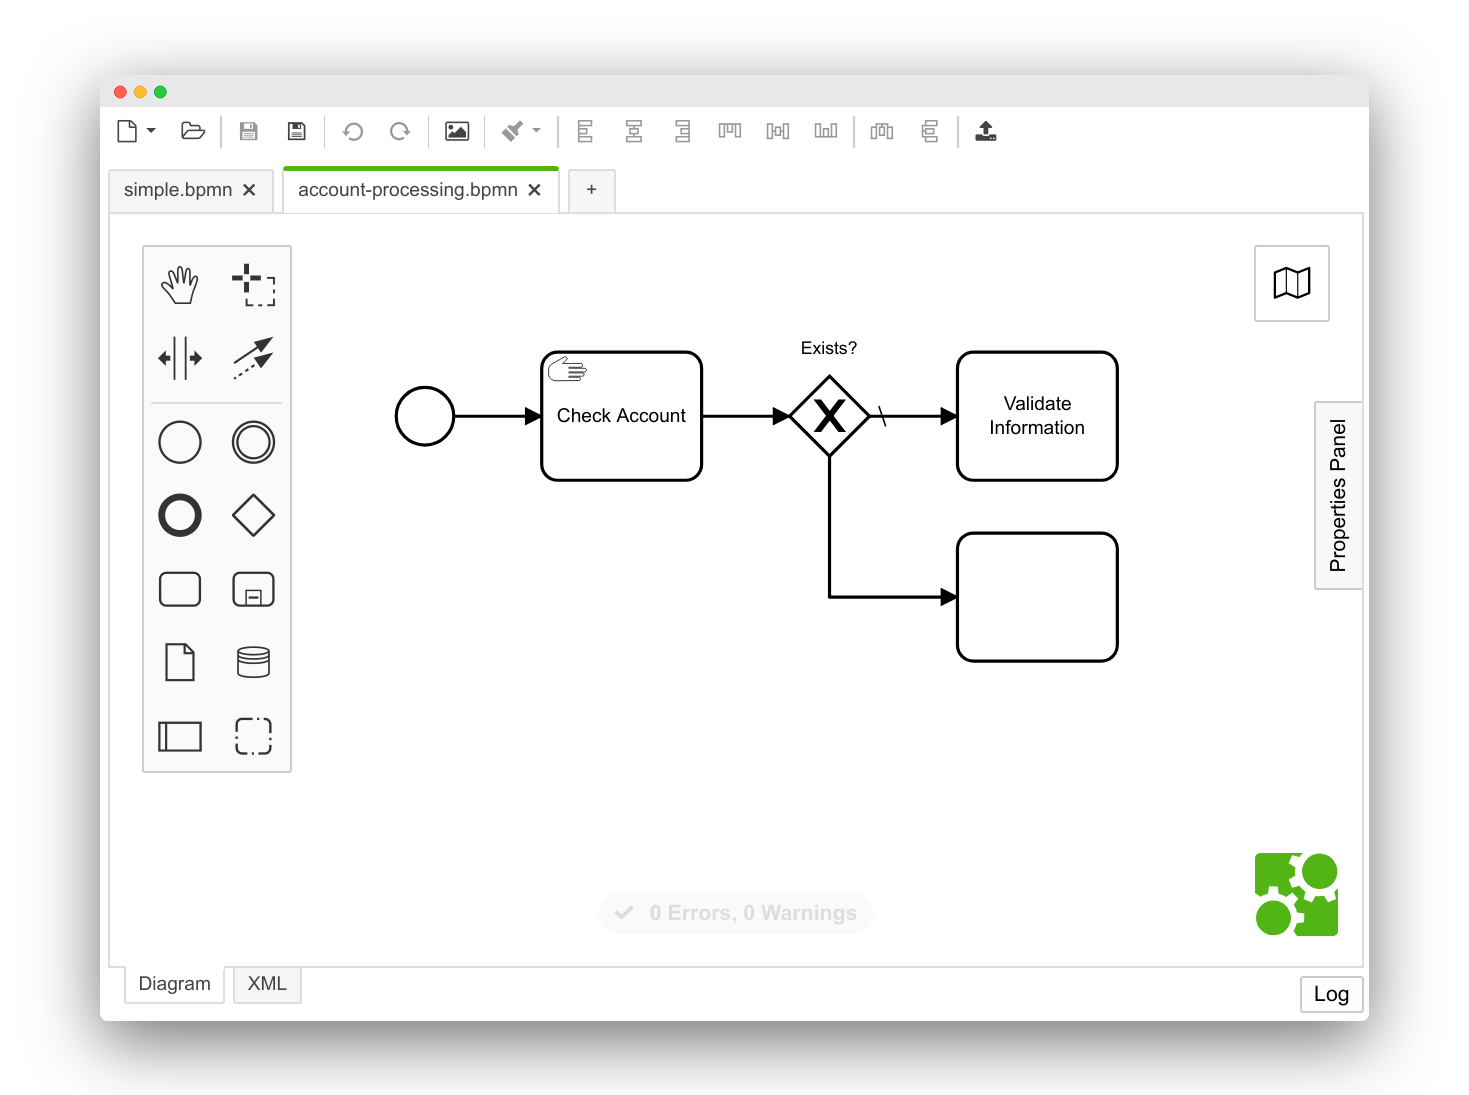

You got a local BPMN diagram? Open the diagram.
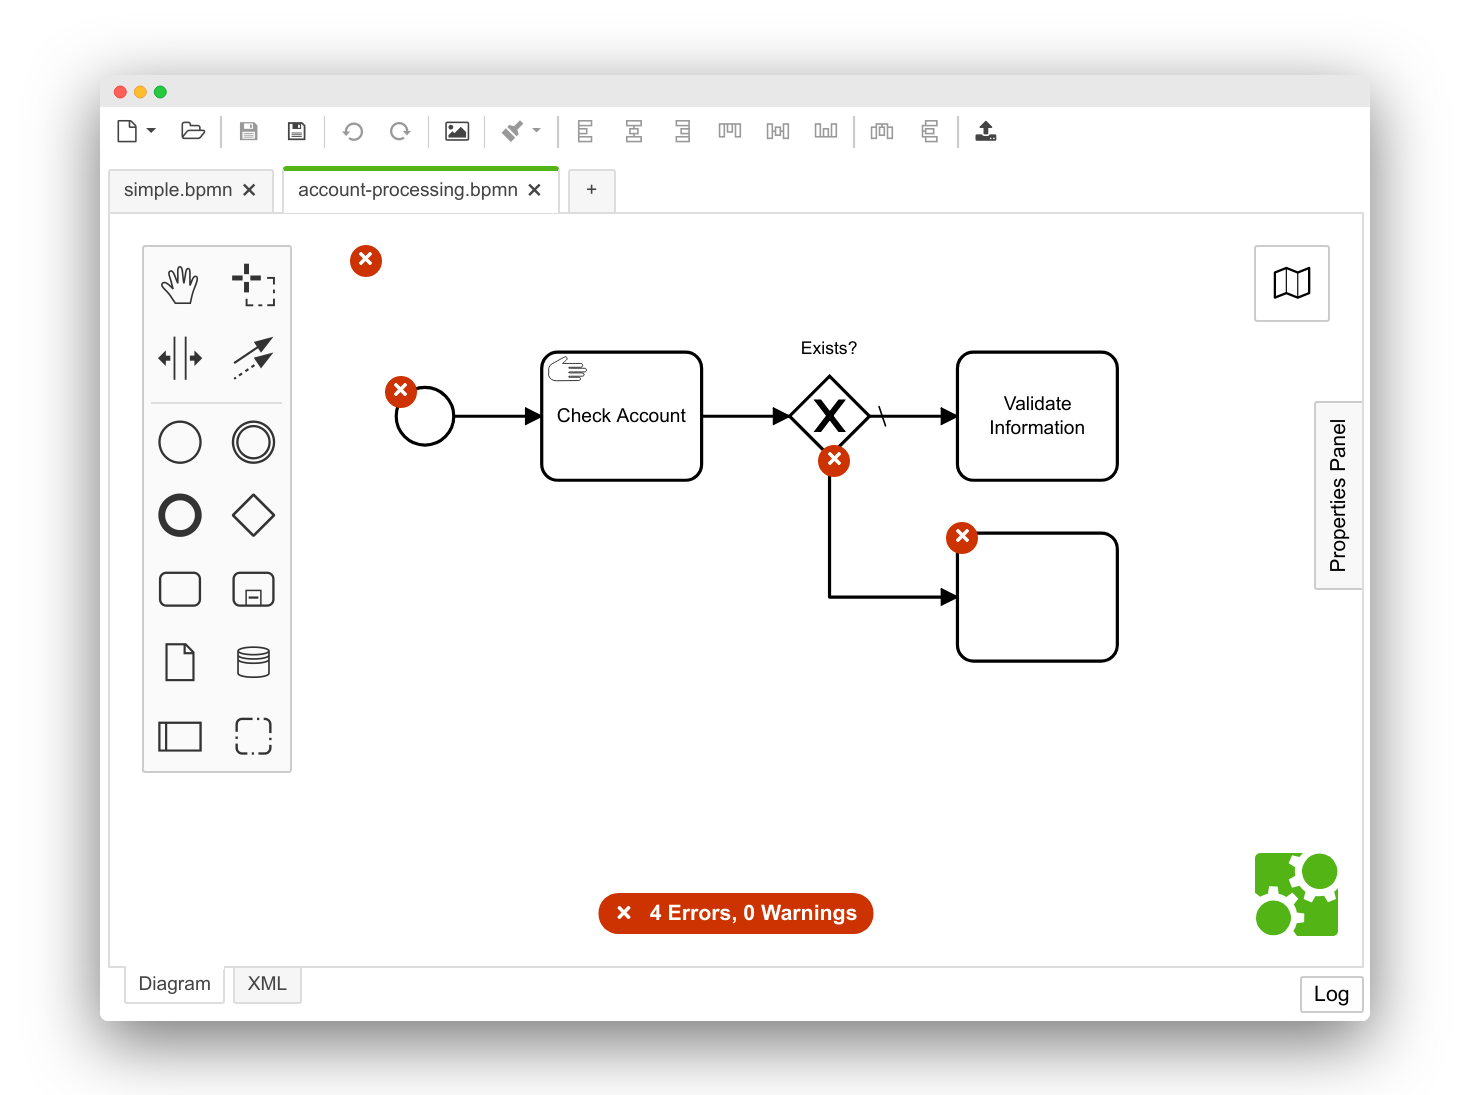
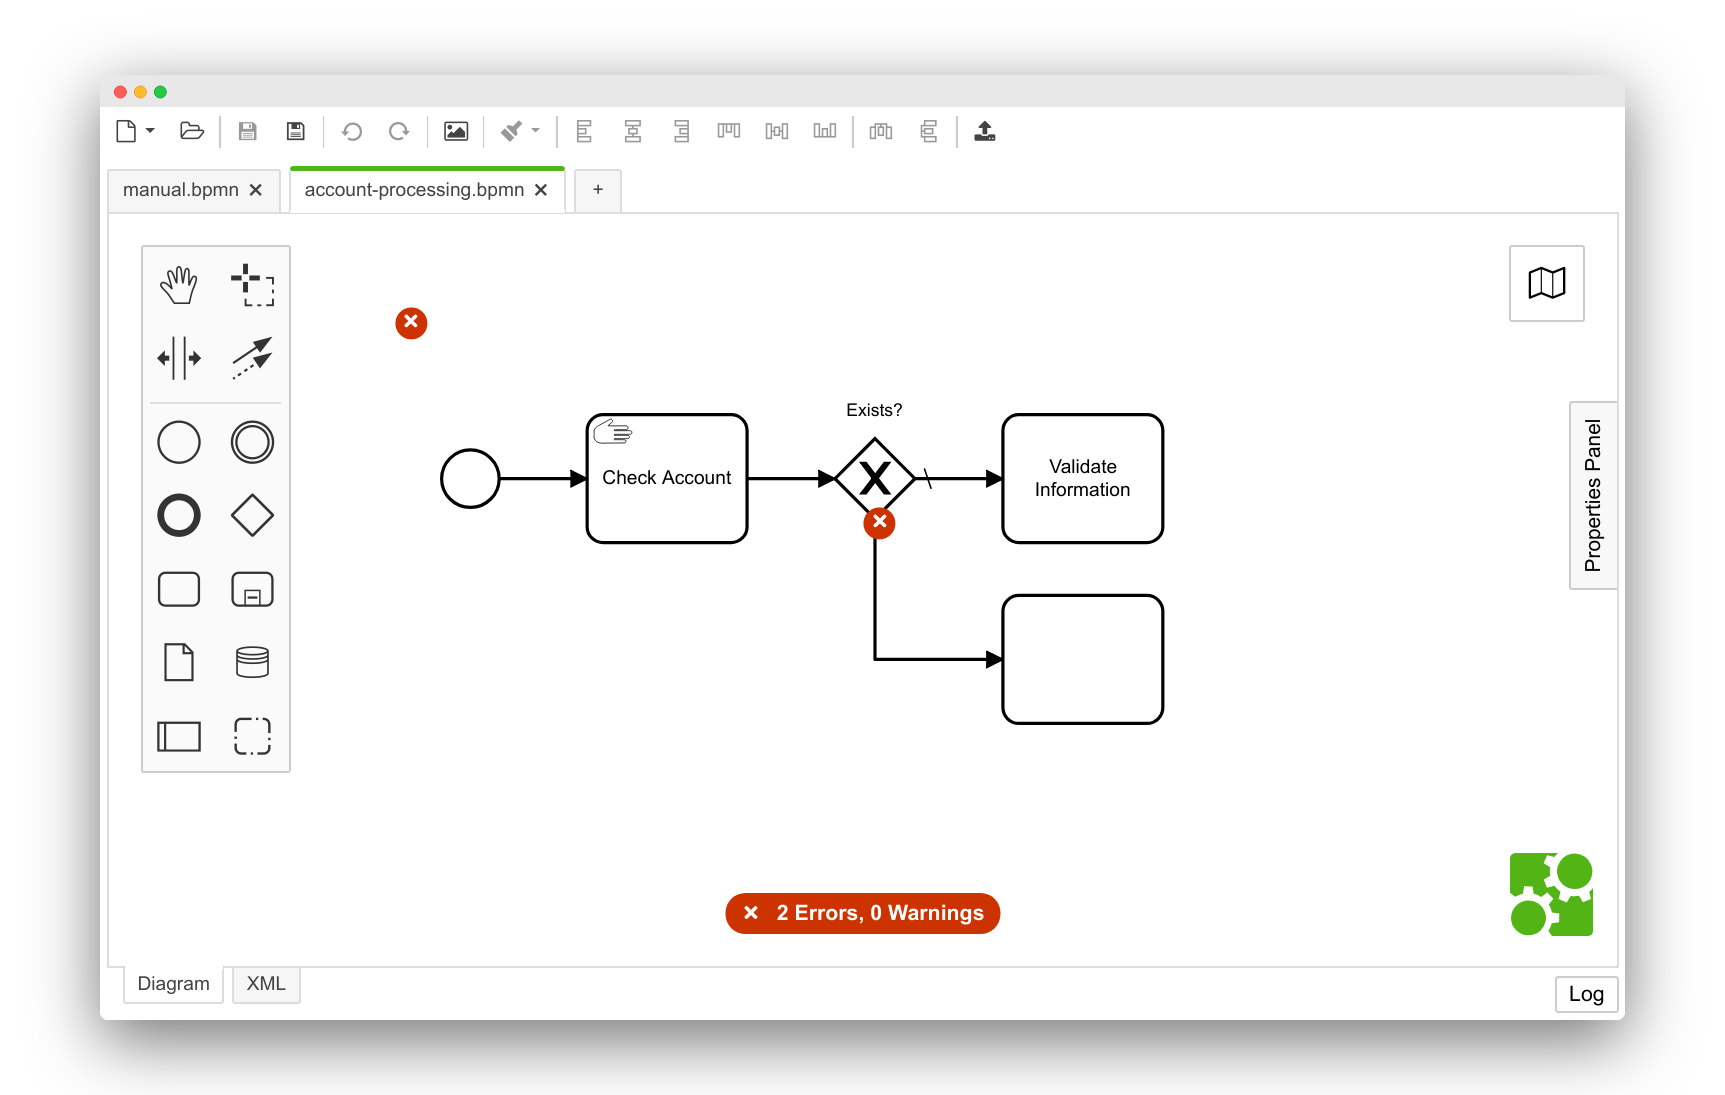
Activate the linting mode by clicking the lint result overlay and see how validation kicks in.
- Linter errors and warnings show up on the diagram. Or your diagram is bullet-proof already!

The linter plug-in has a documented extension point to override the provided lint rules with custom ones.
We will create our own plug-in that provides our own, custom rules to the app.
To start, create the directory camunda-modeler-workshop and work from there in the next steps.
mkdir camunda-modeler-workshop
cd camunda-modeler-workshop
This roughly resembles steps three, four, five, six, and seven.
If you are new to JavaScript and/or Camunda Modeler plug-in development, take this route.
After completing this step, jump right to step eight.
The linter plug-in offers an extension point to contribute your own lint rules. We create our own plug-in that uses this extension point to contribute validation rules to the app.
Within the camunda-modeler-workshop directory, download and setup the Custom Linter Rules plug-in:
npx degit github:camunda/camunda-modeler-custom-linter-rules-plugin custom-linter-rulesSetup the plug-in:
cd custom-linter-rules
npm install
Spawn the plug-in in development setup to automatically re-build it on every change:
npm run devFollow the development setup hints and link your plug-in to the Camunda Modeler resources/plugins directory via a symbolic link. This ensures the editor recognizes changes you make to the plug-in, as you develop.
Restart the Camunda Modeler to make it recognize the new plug-in.
- The plug-in is checked out in the
camunda-modeler-workshop/custom-linter-rulesdirectory - The plug-in contains a
.bpmnlintrcthat configures our used bpmnlint rules{ "extends": [ "bpmnlint:recommended", "plugin:custom/recommended" ], "rules": { "label-required": "off", "custom/no-manual-task": "warn" } } - The plug-in ships with a bpmnlint extension that implements a
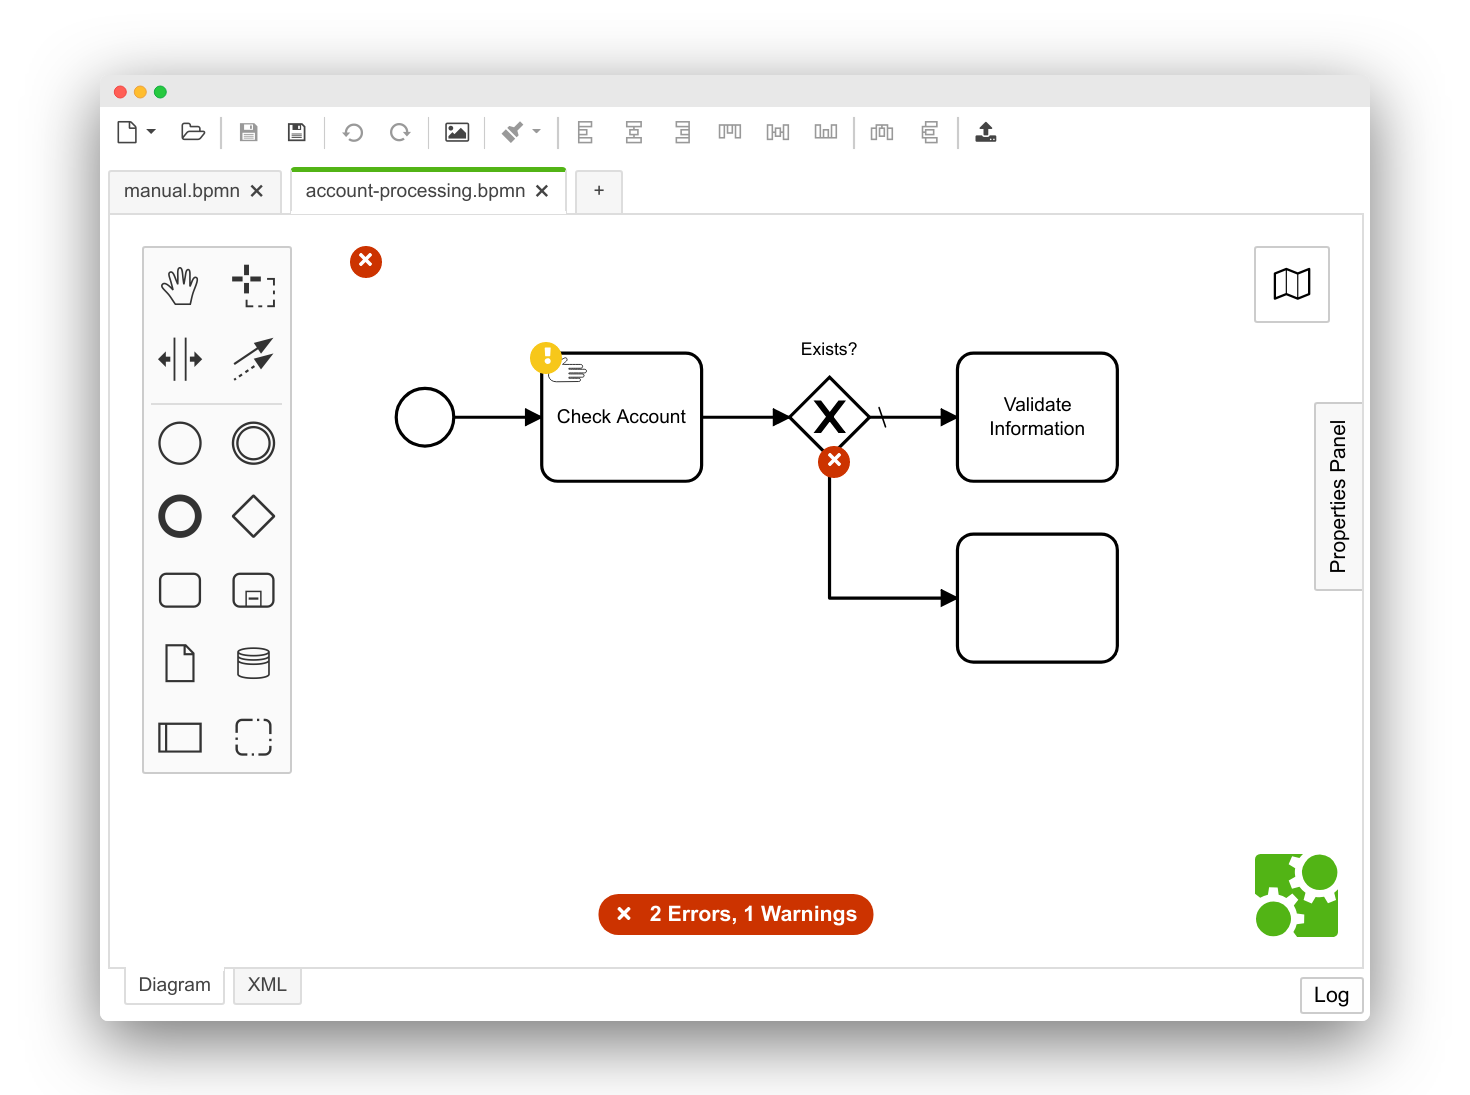
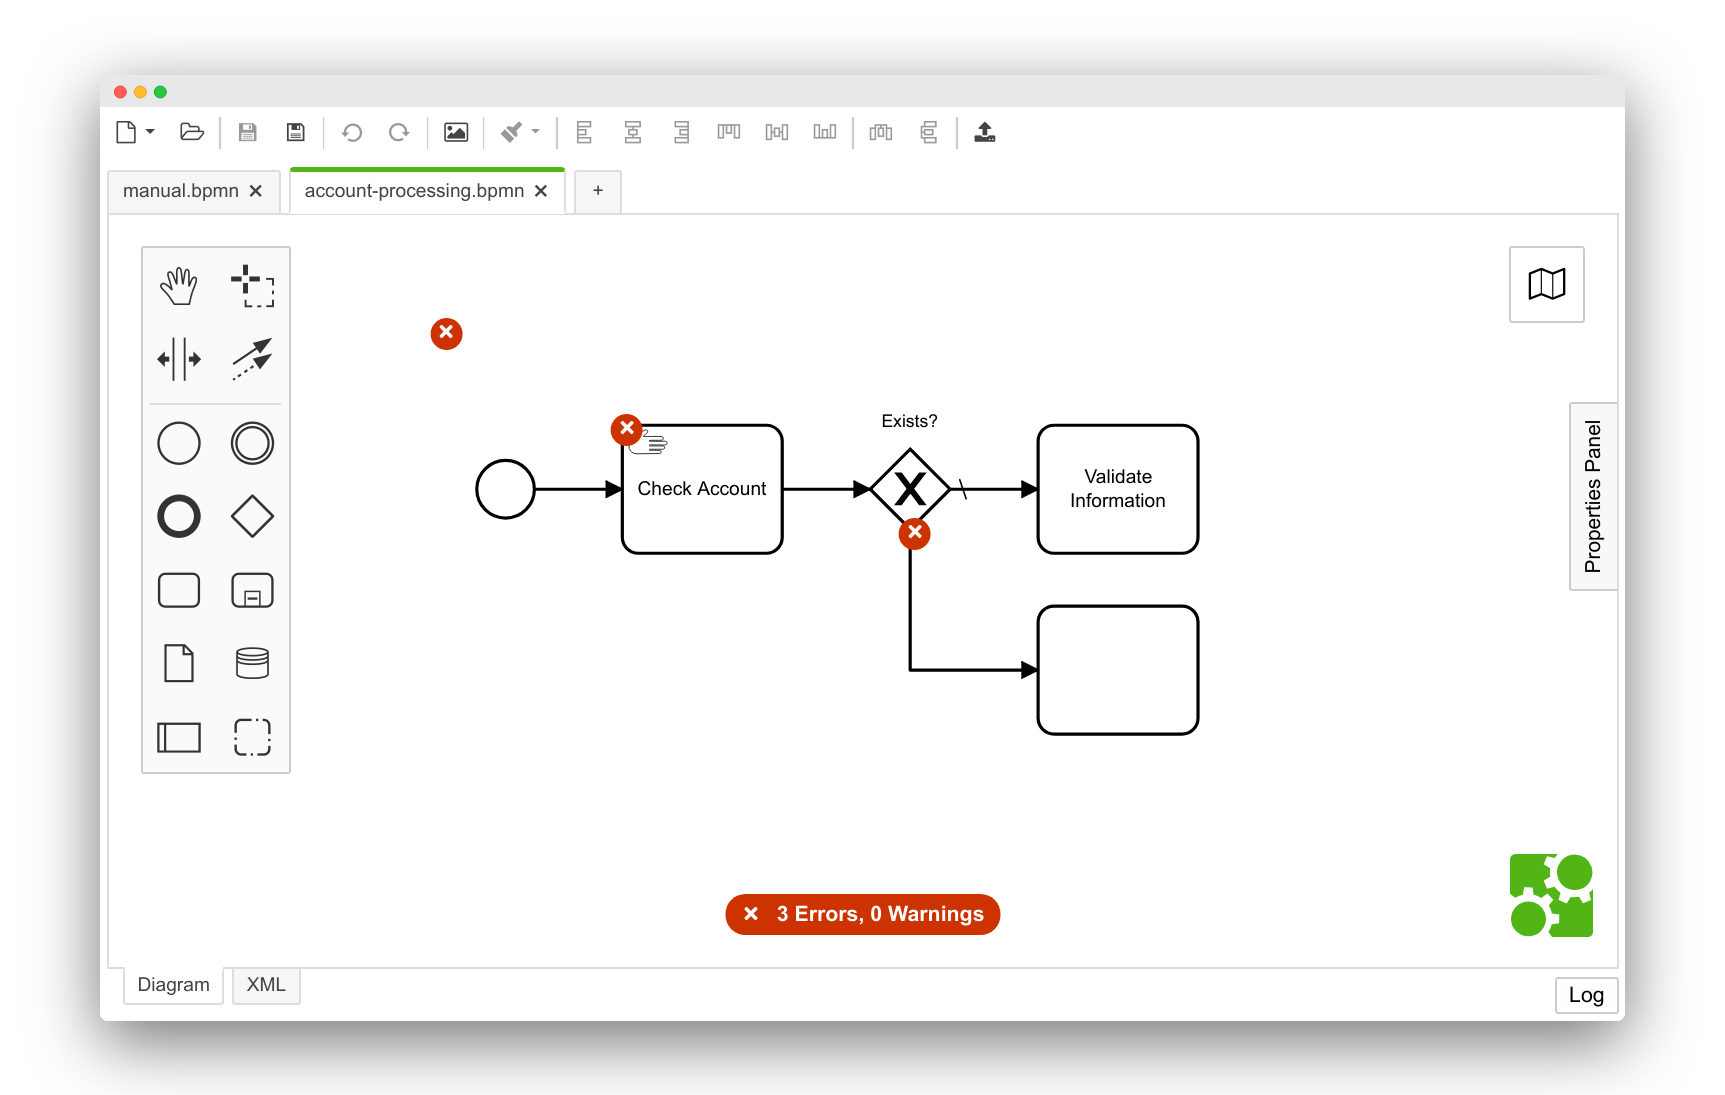
no-manual-taskrule in the filebpmnlint-plugin-custom/rules/no-manual-task.js - Modeling a manual task in the Camunda Modeler triggers a warning:

Go to step eight next.
We'll create a new plug-in in the directory camunda-modeler-workshop/camunda-modeler-plugin-custom.
npx create-camunda-modeler-plugin custom
Alternatively you may clone or download the example plug-in directly from GitHub, too.
Next up, we create post download steps to install plug-in dependencies and spawn it in dev mode.
cd camunda-modeler-plugin-custom
npm install
npm run dev
- The above steps completed successfully
- The
camunda-modeler-workshop/camunda-modeler-plugin-customdirectory contains your modeler plug-in.
Follow the Development Setup hints and link your plug-in to the Camunda Modeler resources/plugins directory via a symbolic link.
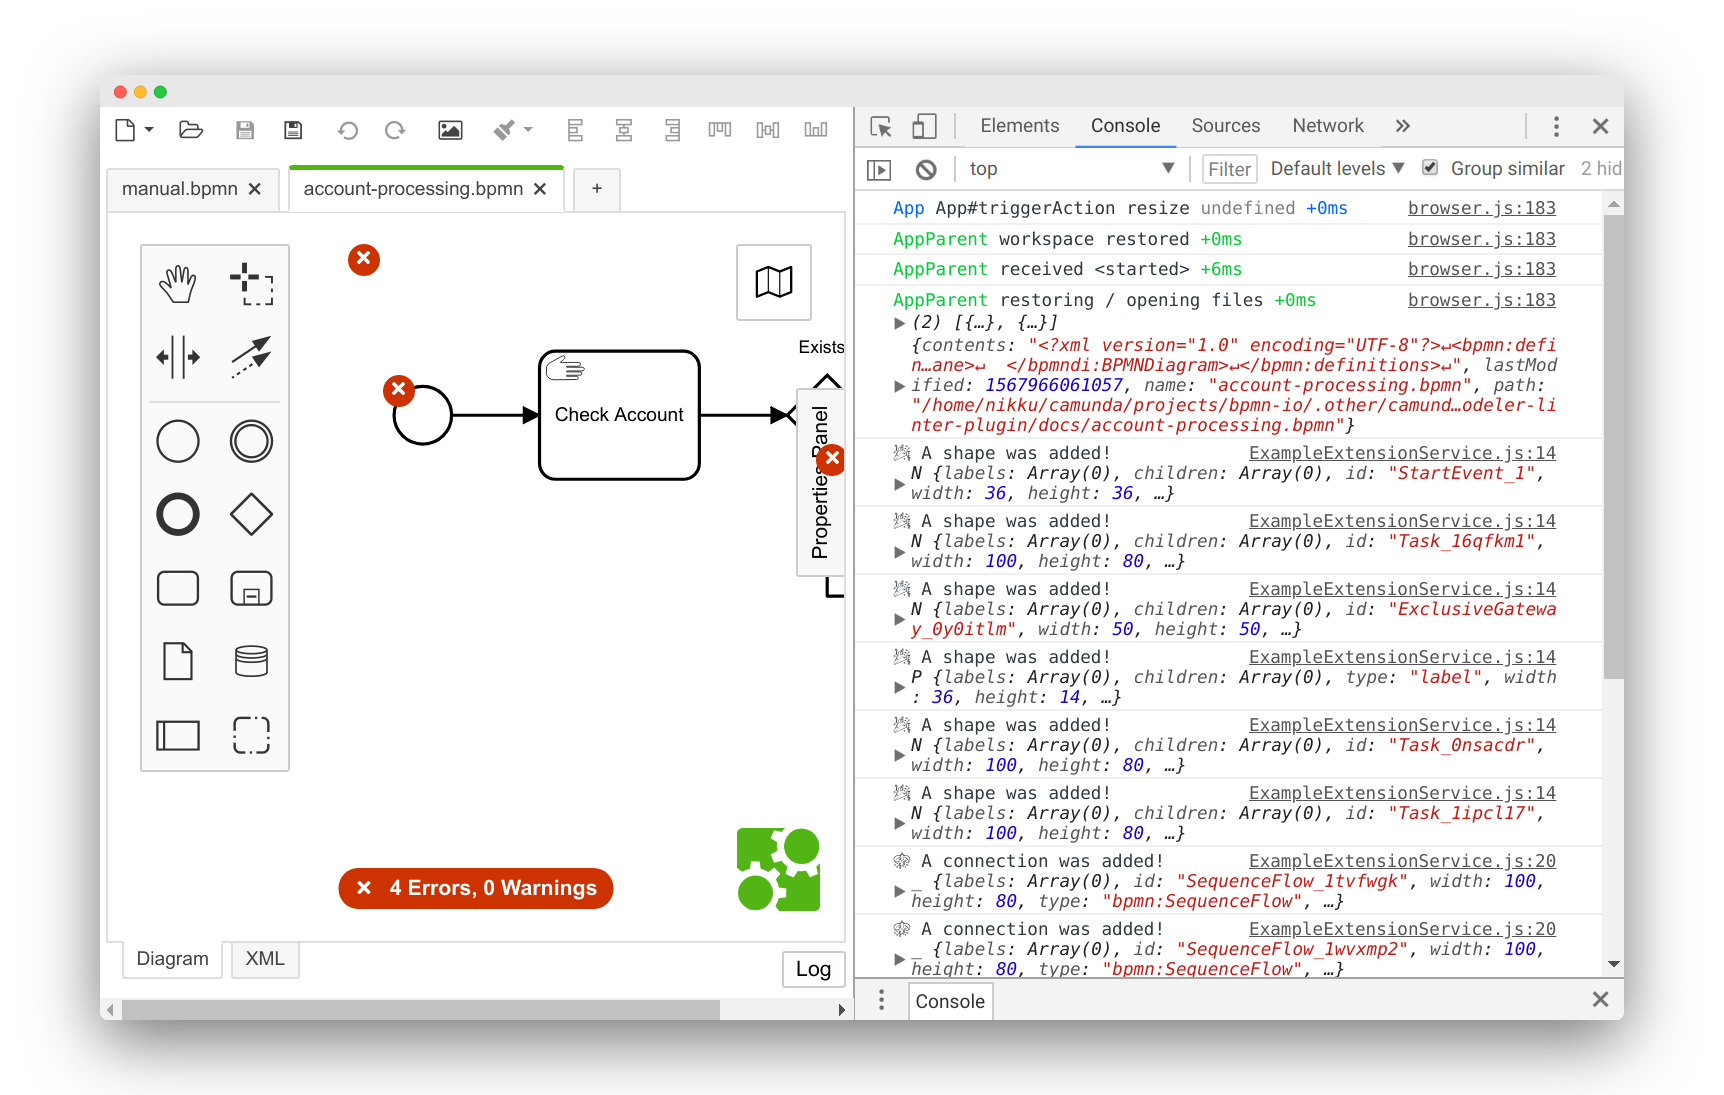
Restart the Camunda Modeler. Open the developer console via F12. Create a BPMN element via the palette.
- The
Pluginsmenu shows acustom Plug-inentry - Inside the developer tools you see additional log output that a shape got added

The linter plug-in offers a way how we can configure used linter rules and provide our own rules. Lets use this to get rid of the annoying label required rule.
Within the camunda-modeler-plugin-custom directory, install the bpmnlint-loader.
npm install bpmnlint bpmnlint-loader --save-devExtend the webpack.config.js as documented to use the loader to consume bpmnlint configuration files.
Create a .bpmnlintrc file, describing our configured rules in the client directory like this:
{
  "extends": [
    "bpmnlint:recommended"
  ],
  "rules": {
    "label-required": "off"
  }
}
Replace your client/index.js file with the one documented.
Restart your plug-in development build
npm run dev
Go into the Camunda Modeler and reload it by pressing CtrlOrCmd+R within the development tools.
- The label required rule is disabled in the Modeler

The Camunda Modeler linter plug-in uses bpmnlint under the hood.
To create our own rules, generate a rule extension project from within the camunda-modeler-workshop directory.
npx create-bpmnlint-plugin custom

cd bpmnlint-plugin-custom
npm install
npm test
This generated the extension in the bpmnlint-plugin-custom sub-directory.
- The above steps completed successfully
- The
camunda-modeler-workshop/bpmnlint-plugin-customdirectory contains your bpmnlint plug-in.
Within the camunda-modeler-plugin-custom directory, link the local plug-in:
npm install bpmnlint-plugin-custom@file:../bpmnlint-plugin-custom
Update the client/.bpmnlintrc file in the camunda-modeler-plugin-custom directory to enable the custom/no-manual-task rule:
{
  "extends": [
    "bpmnlint:recommended"
  ],
  "rules": {
    "label-required": "off",
    "custom/no-manual-task": "error"
  }
}
Reload the Camunda Modeler.
Model a manual task.
- The linter warns you when modeling the manual task

A couple of ideas what to do next:
- Copy the
no-manual-taskrule to warn on user tasks. We want to avoid them during black-box processing. - Debug rule evaluation, dig into elements that are being validated and the properties the BPMN meta-model exposes.
- Can you create a rule that warns on all but external tasks for implementing work with the engine?
- Inside the Camunda Modeler, open the developer console via
F12. - Press
CmdOrCtrl + Rwithin the developer console to reload the app. This will make it aware of any linked plug-in changes. - Use the debugger built into the developer console (cf.
Sourcetab) to investigate the inner workings of your plug-ins.
This work is licensed under a Creative Commons Attribution 4.0 International License.