
./00_FVT_CREATE_SECRETS.shPlease drop me a note on Slack or by mail nikh@ch.ibm.com if you find glitches or problems.
Those are the steps that you have to execute to install a complete demo environment:
❗You can find a PDF version of this guide here: PDF.
🚨🚨🚨🚨 📺 Here is a video that walks you through the complete installation process.
These are the high level steps that you need to execute to install the demo environment
-
Install AI Manager
ansible-playbook ./ansible/00_aimanager-install-all.yaml -e ENTITLED_REGISTRY_KEY=<REGISTRY_TOKEN>
- Info
- Installation
- Configuration
- Install additional components
This document is a short version of the full README 🐥 that contains only the essential steps.
This is provided as-is:
- I'm sure there are errors
- I'm sure it's not complete
- It clearly can be improved
❗This has been tested for the new CP4WAIOPS v.3.4.0 release on OpenShift 4.8 (4.10 not being available on Techzone yet) on ROKS
So please if you have any feedback contact me
- on Slack: @niklaushirt or
- by Mail: nikh@ch.ibm.com
Clone the GitHub Repository
From IBM internal:
git clone https://<YOUR GIT TOKEN>@github.ibm.com/NIKH/aiops-install-ansible-fvt-33.git
Or my external repo (this is updated less often than the IBM internal one):
git clone https://github.com/niklaushirt/cp4waiops-public.git
I installed the demo in a ROKS environment.
You'll need:
- ROKS 4.8
- 5x worker nodes Flavor
b3c.16x64(so 16 CPU / 64 GB)
You might get away with less if you don't install some components (Event Manager, ELK, Turbonomic,...) but no guarantee:
- Typically 4x worker nodes Flavor
b3c.16x64for only AI Manager
You need the following tools installed in order to follow through this guide:
- ansible
- oc (4.7 or greater)
- jq
- kafkacat (only for training and debugging)
- elasticdump (only for training and debugging)
- IBM cloudctl (only for LDAP)
Just run:
./10_install_prerequisites_mac.shJust run:
./11_install_prerequisites_ubuntu.shYou can get the installation (pull) token from https://myibm.ibm.com/products-services/containerlibrary.
This allows the CP4WAIOPS images to be pulled from the IBM Container Registry.
- ❗ Create the pull secrets for FVT (adapt the file first):
./00_FVT_CREATE_SECRETS.sh- Start the Easy Installer with the token from 2.3.1:
./01_easy-install.sh -t <REGISTRY_TOKEN>- Select option 🐥
00to install the completeAI Managerdemo environment.
there are options to install only vanilla 'AI Manager'
Or directly run:
ansible-playbook ./ansible/00_aimanager-install-all.yaml -e ENTITLED_REGISTRY_KEY=<REGISTRY_TOKEN> This takes about one to two hours. After completion Easy Installer will exit, open the documentation and the AI Manager webpage (on Mac) and you'll have to to perform the last manual steps.
You now have a full, basic installtion of AI Manager with:
- AI Manager
- Open LDAP
- RobotShop demo application
- Trained Models based on precanned data (Log- and Metric Anomalies, Similar Incidents, Change Risk)
- Topologies for demo scenarios
- AWX (OpenSource Ansible Tower) with runbooks for the demo scenarios
- Demo UI
There are some minimal needed configurations that you have to do to fully configure the demo environment. Those are covered in the following chapters.
Those are the manual configurations you'll need to demo the system and that are covered by the flow above.
Basic Configuration
- Configure LDAP Logins
Advanced Configuration
- Enable Story creation Policy
- Create AWX Connection
- Create Runbook Policy
Configure Topology
- Re-Run Kubernetes Observer
Configure Slack
- Setup Slack
❗ Make sure the playbook
00has completed before continuing
You have to do the following:
- Login to AI Manager
- Add LDAP Logins to CP4WAIOPS
- Enable Story creation Policy
- Publish Runbook
- Create Runbook Policy
- Re-Run Kubernetes Observer
- Now you can create the Slack Integration
After successful installation, the Playbook creates a file ./LOGINS.txt in your installation directory.
ℹ️ You can also run
./tools/20_get_logins.shat any moment. This will print out all the relevant passwords and credentials.
-
Open the
LOGINS.txtfile that has been created by the Installer in your root directory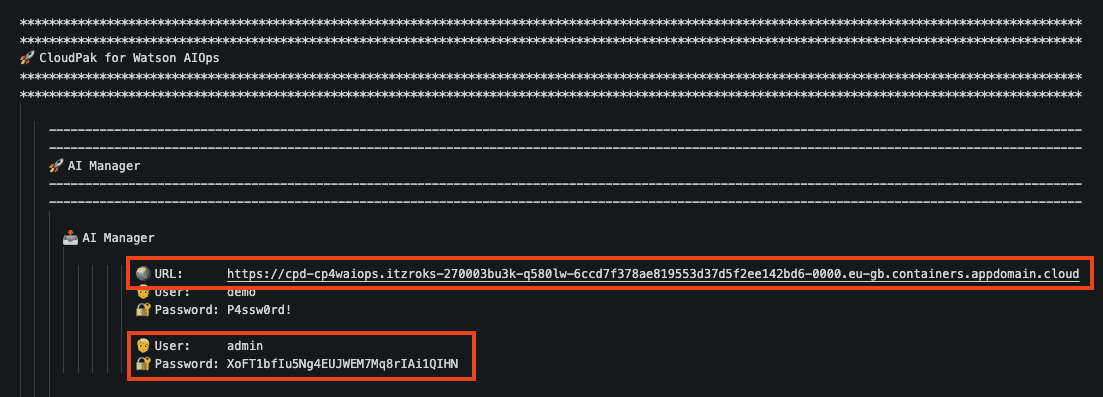
-
Open the URL from the
LOGINS.txtfile -
Click on
IBM provided credentials (admin only)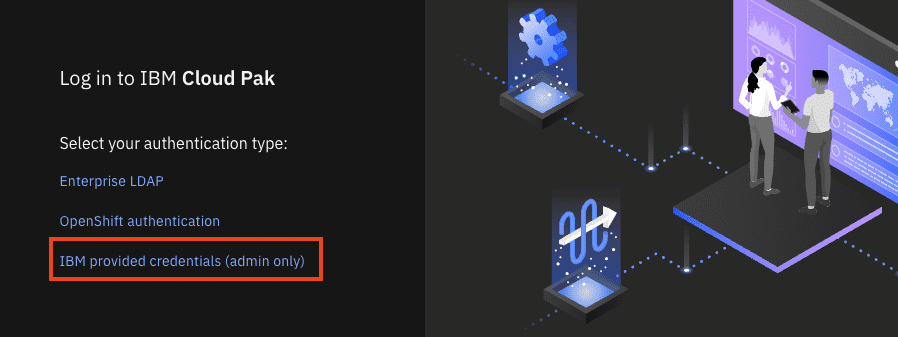


-
Login as
adminwith the password from theLOGINS.txtfile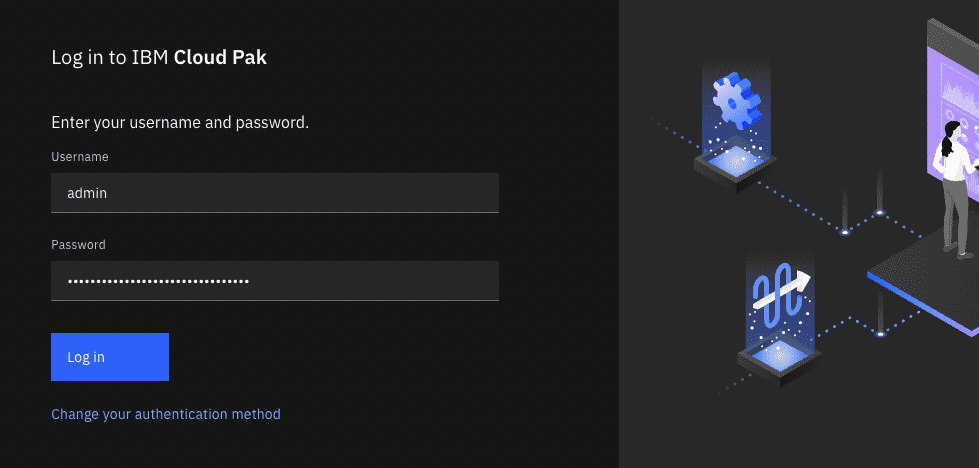

-
Go to
AI ManagerDashboard -
Click on the top left "Hamburger" menu
-
Select
Access Control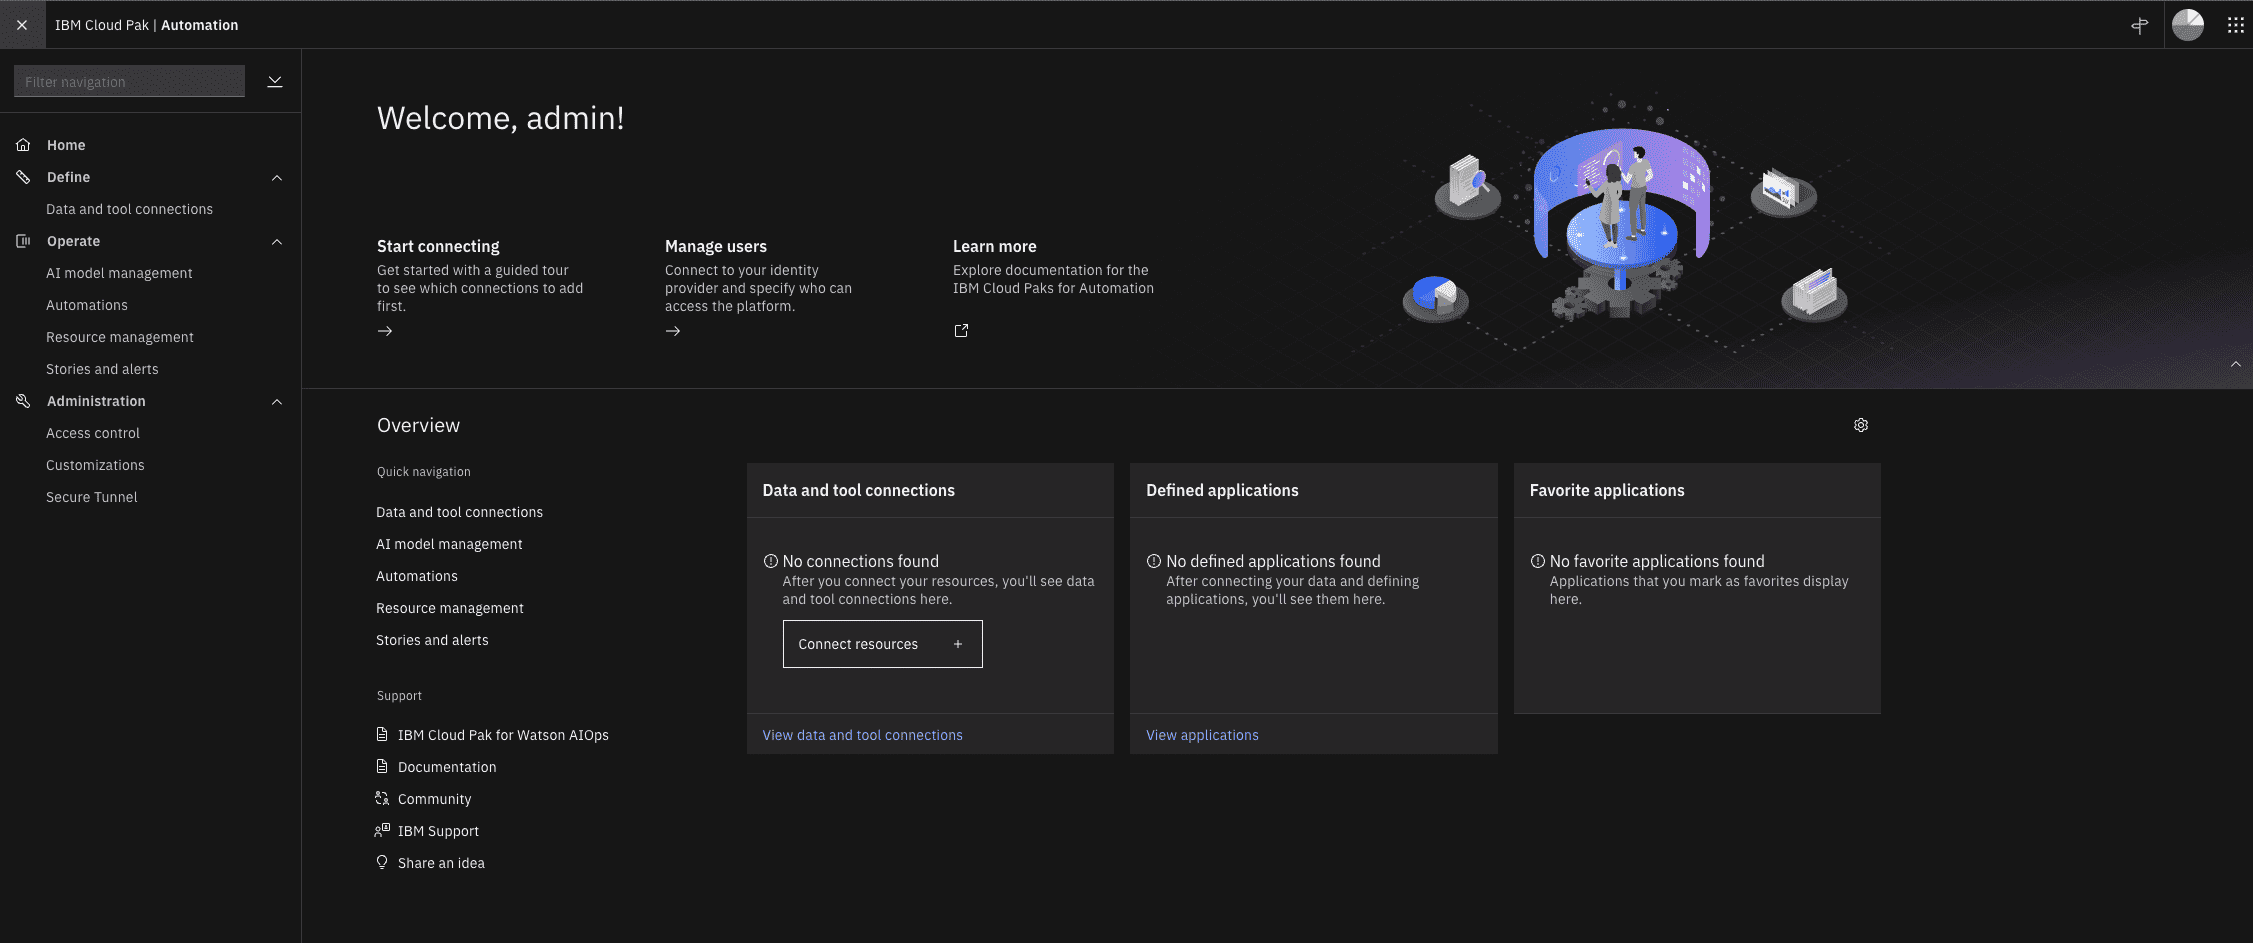
-
Select
User GroupsTab -
Click
New User Group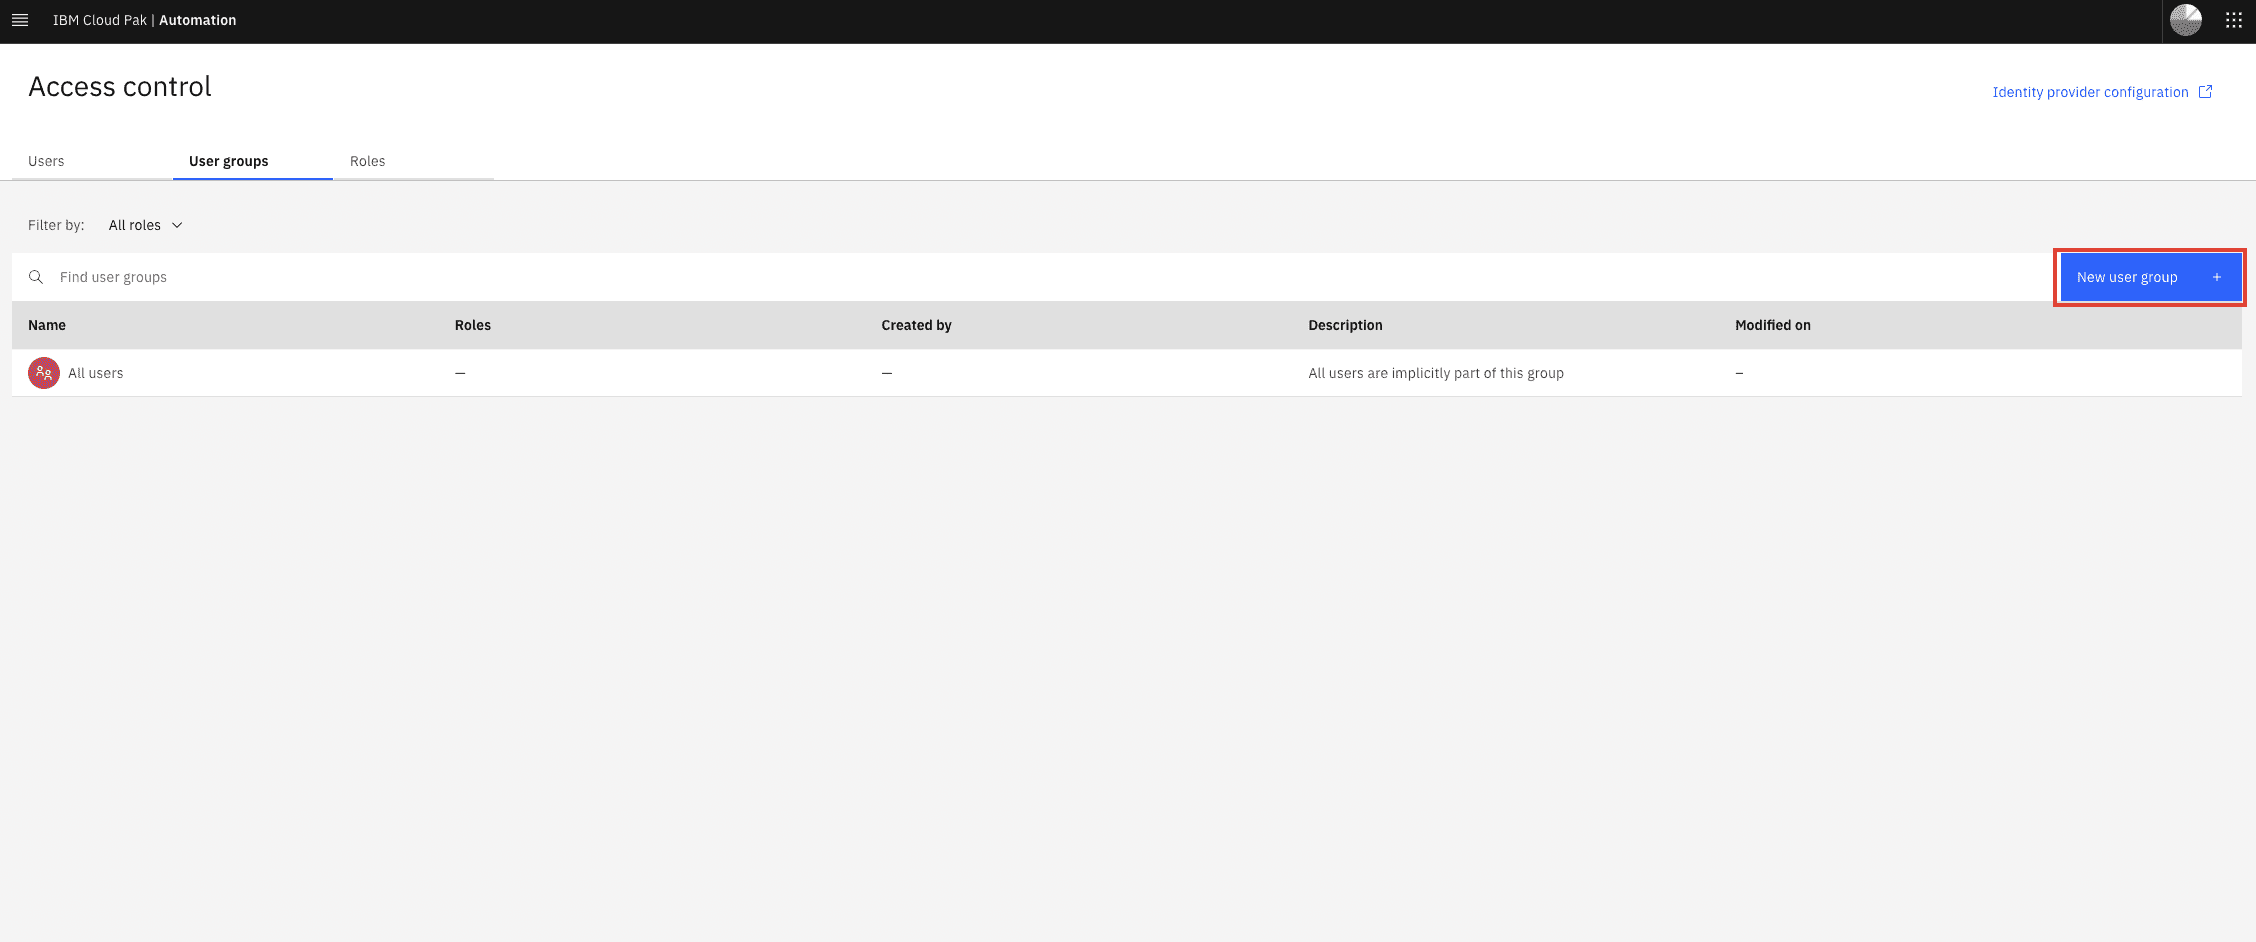
-
Enter demo (or whatever you like)
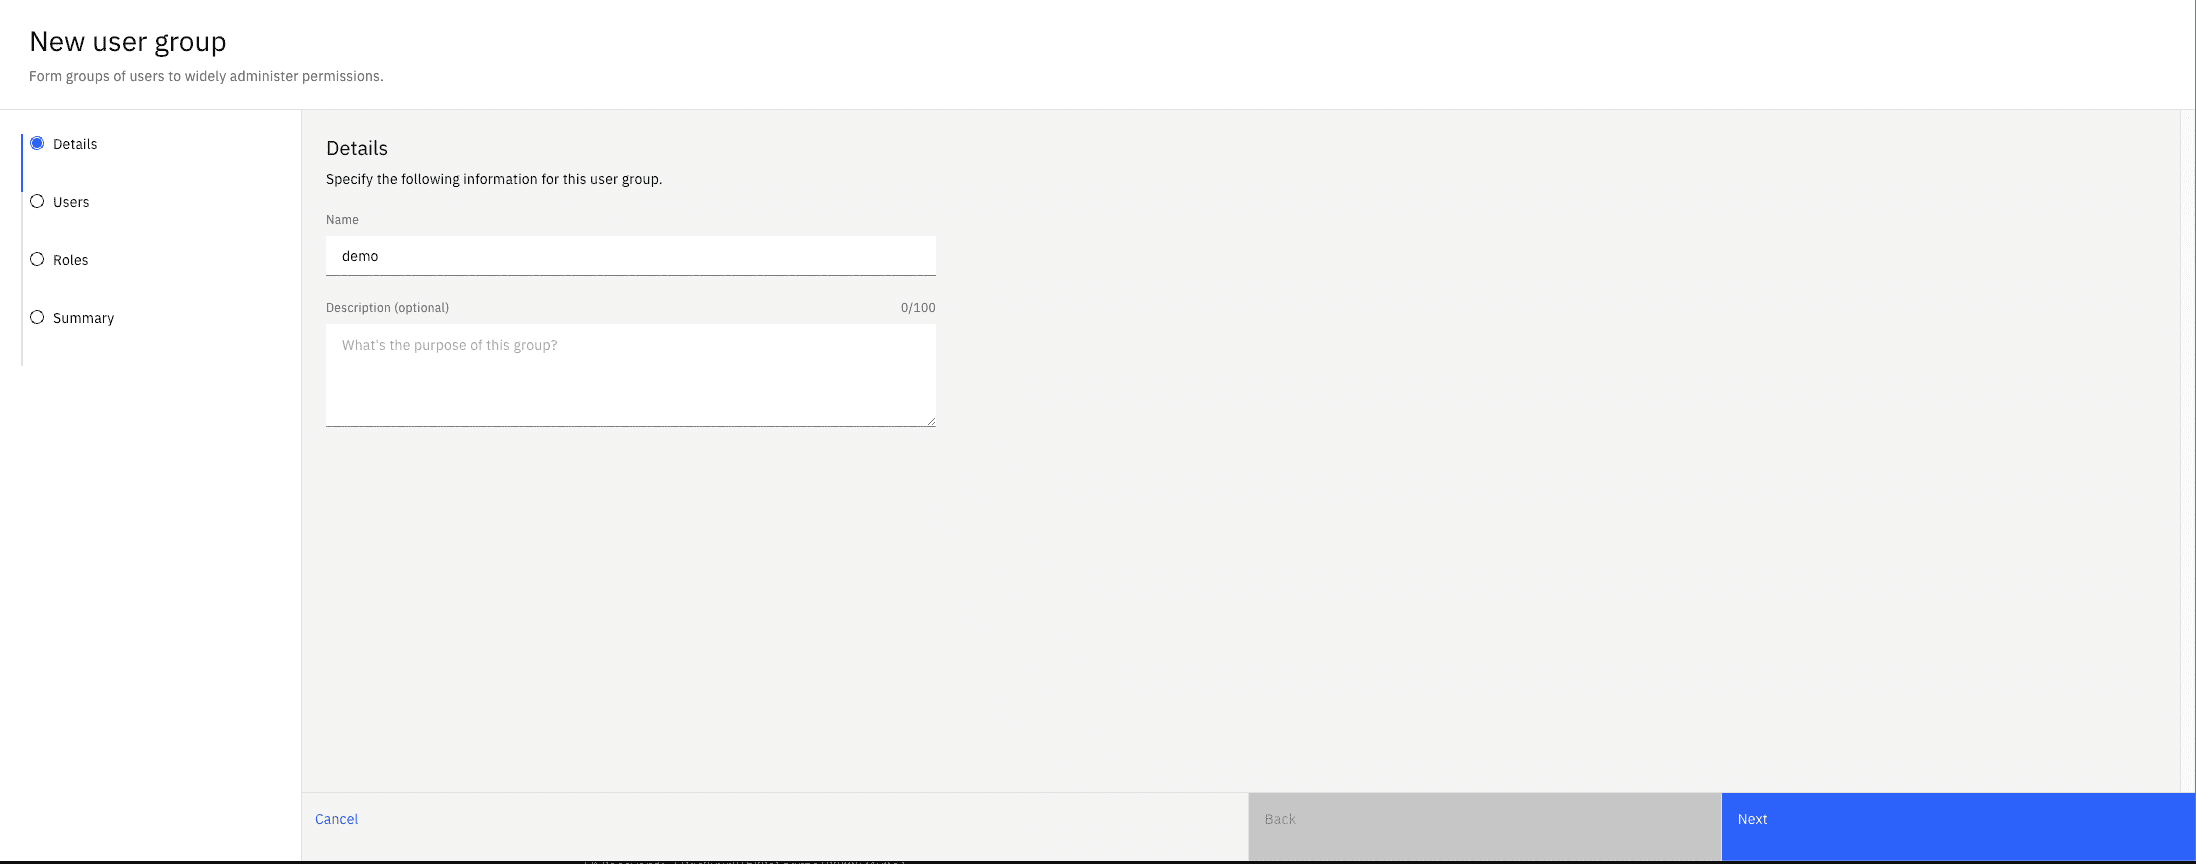
-
Click Next
-
Select
Identity Provider Groups -
Search for
demo -
Select
cn=demo,ou=Groups,dc=ibm,dc=com
-
Click Next
-
Select Roles (I use Administrator for the demo environment)
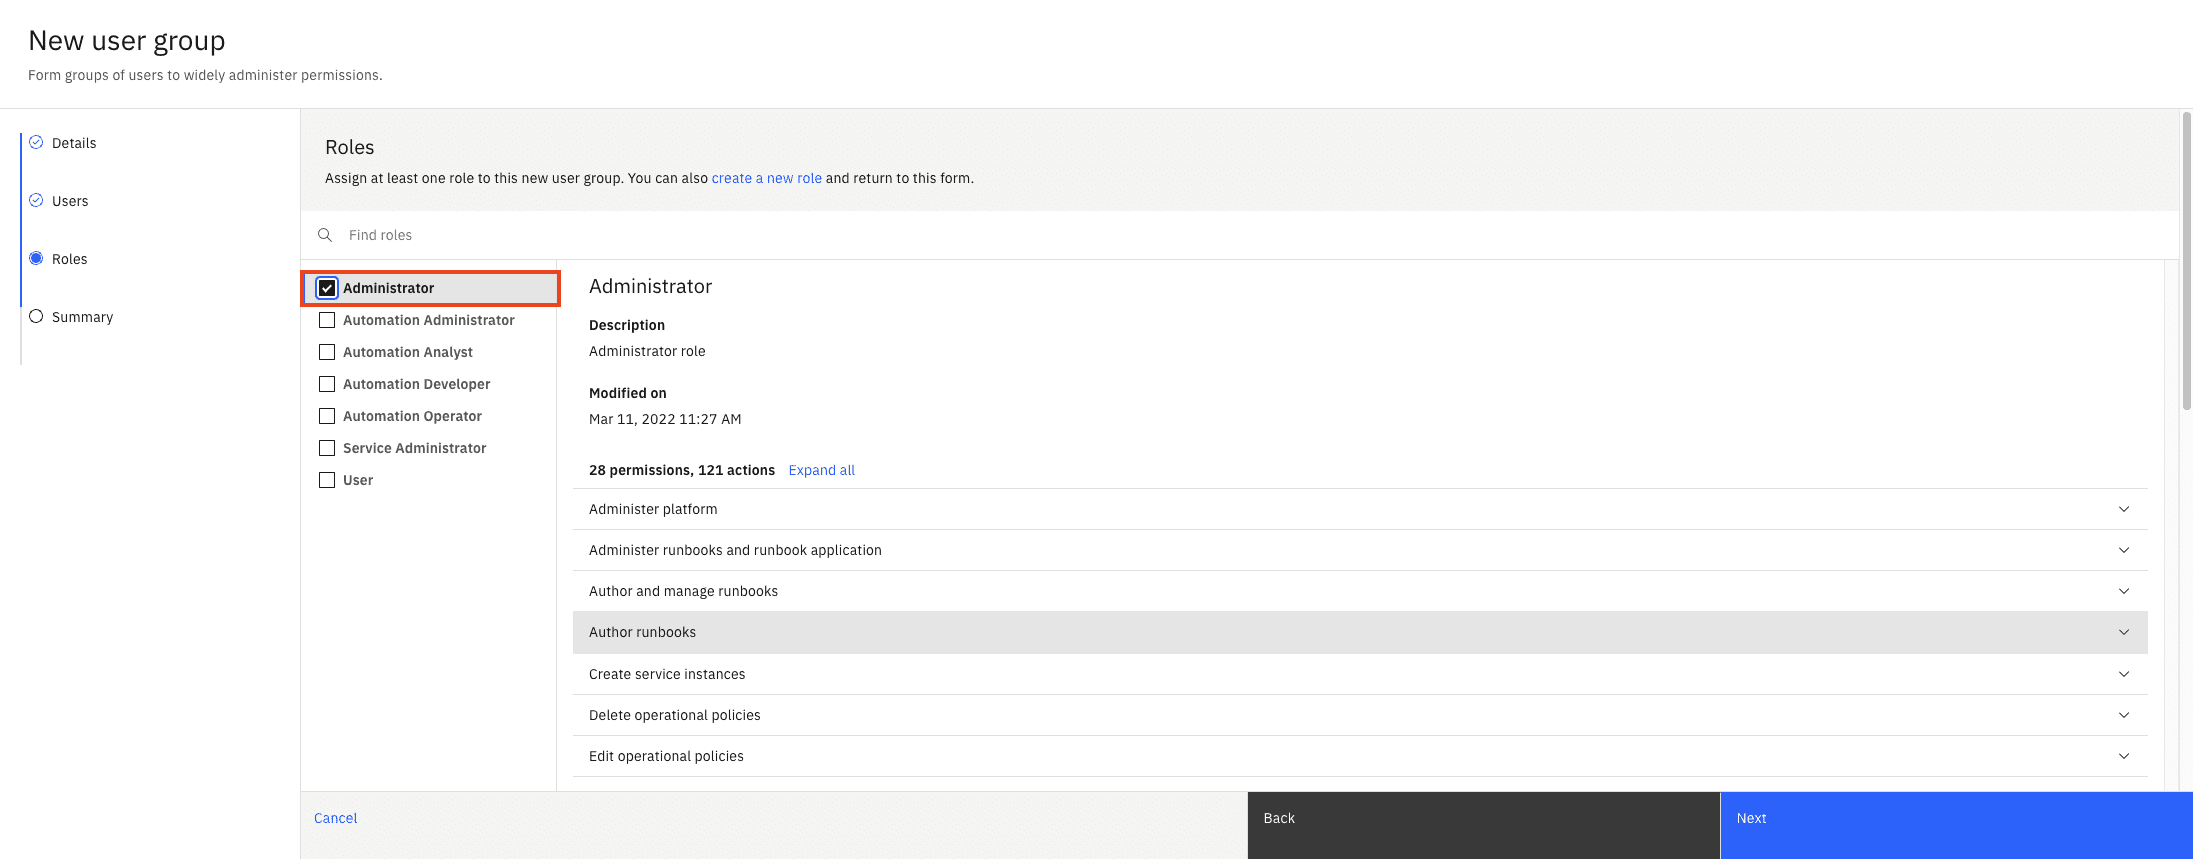
-
Click Next
-
Click Create
-
Click on the top right image
-
Select
Logout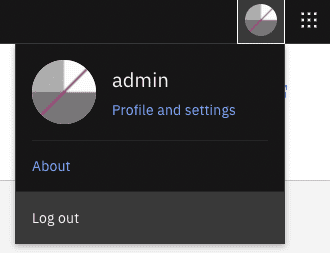
-
Click
Log In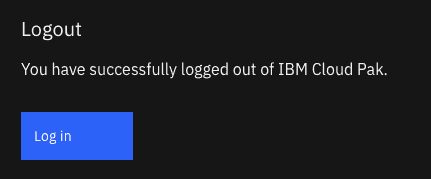


-
Select
Change your Authentication method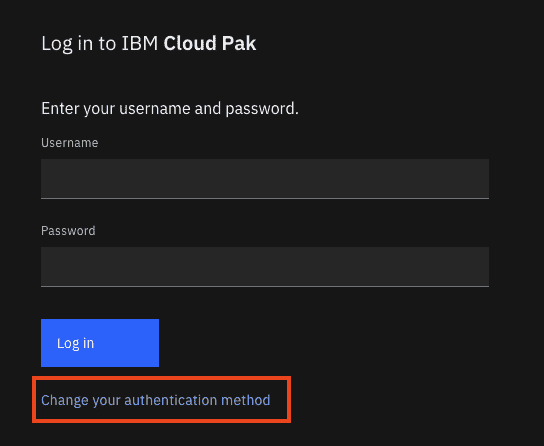
-
Select
Enterprise LDAP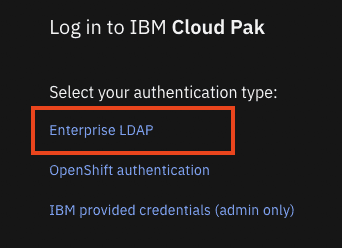


-
In the
AI Manager"Hamburger" Menu selectOperate/Automations -
Under
Policies -
Select
Storiesfrom theTagdropdown menu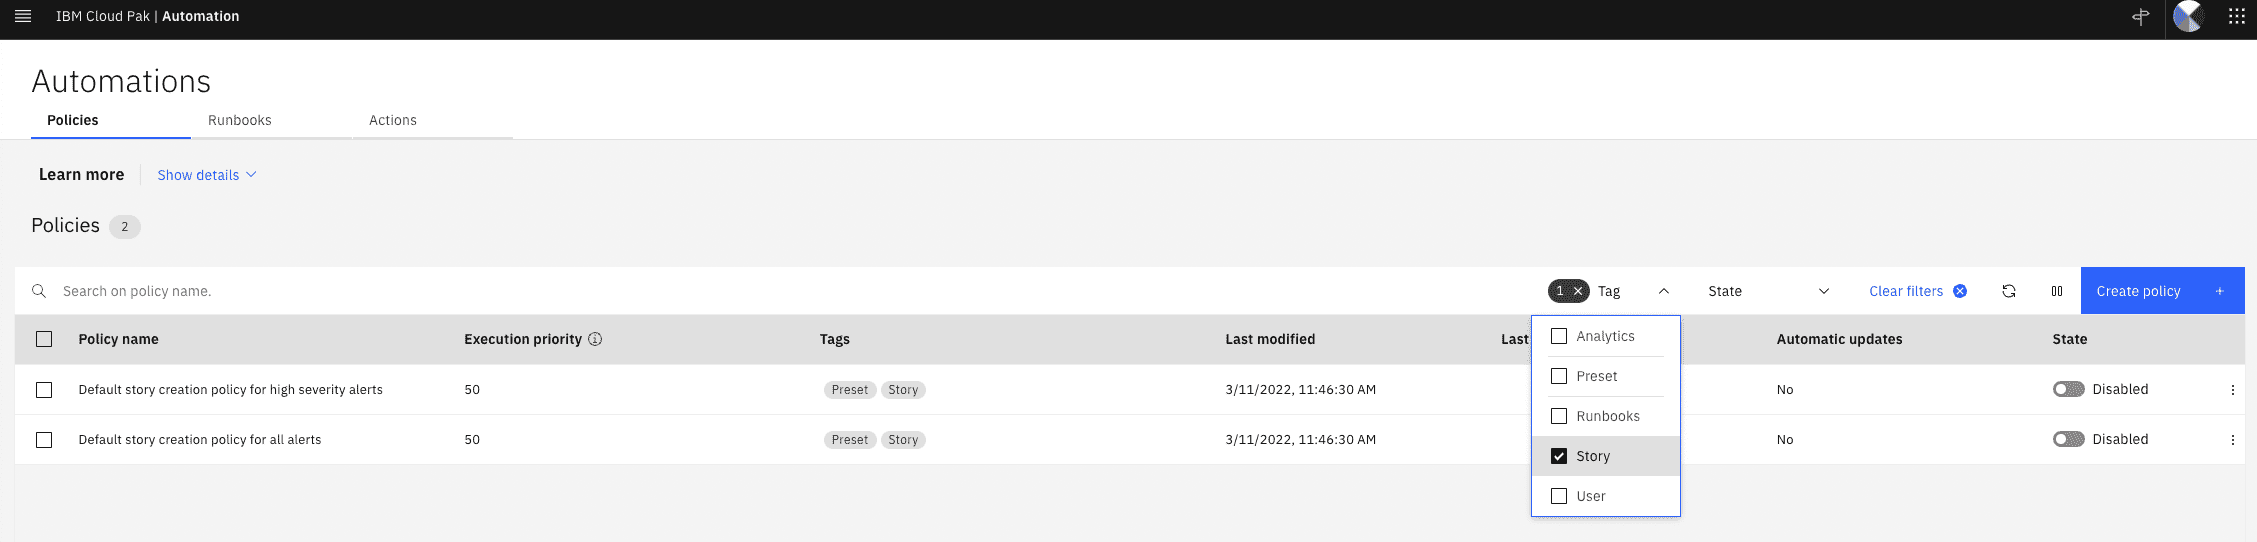
-
Enable
Default story creation policy for high severity alerts -
Also enable
Default story creation policy for all alertsif you want to get all alerts grouped into a story


❗ Wait for the playbook to complete before continuing
❗If you don't get any runbooks you can run the following to try to create them again:
ansible-playbook ./ansible/45_aimanager-load-awx-playbooks-all.yaml
-
In the
AI Manager"Hamburger" Menu selectOperate/Automations -
Select
Runbookstab -
For the
Mitigate RobotShop Problemclick on the three dots at the end of the line -
Click
Edit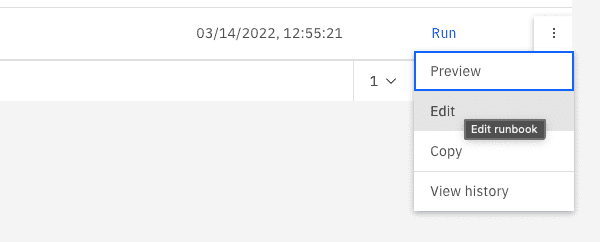
-
Click on the blue
Publishbutton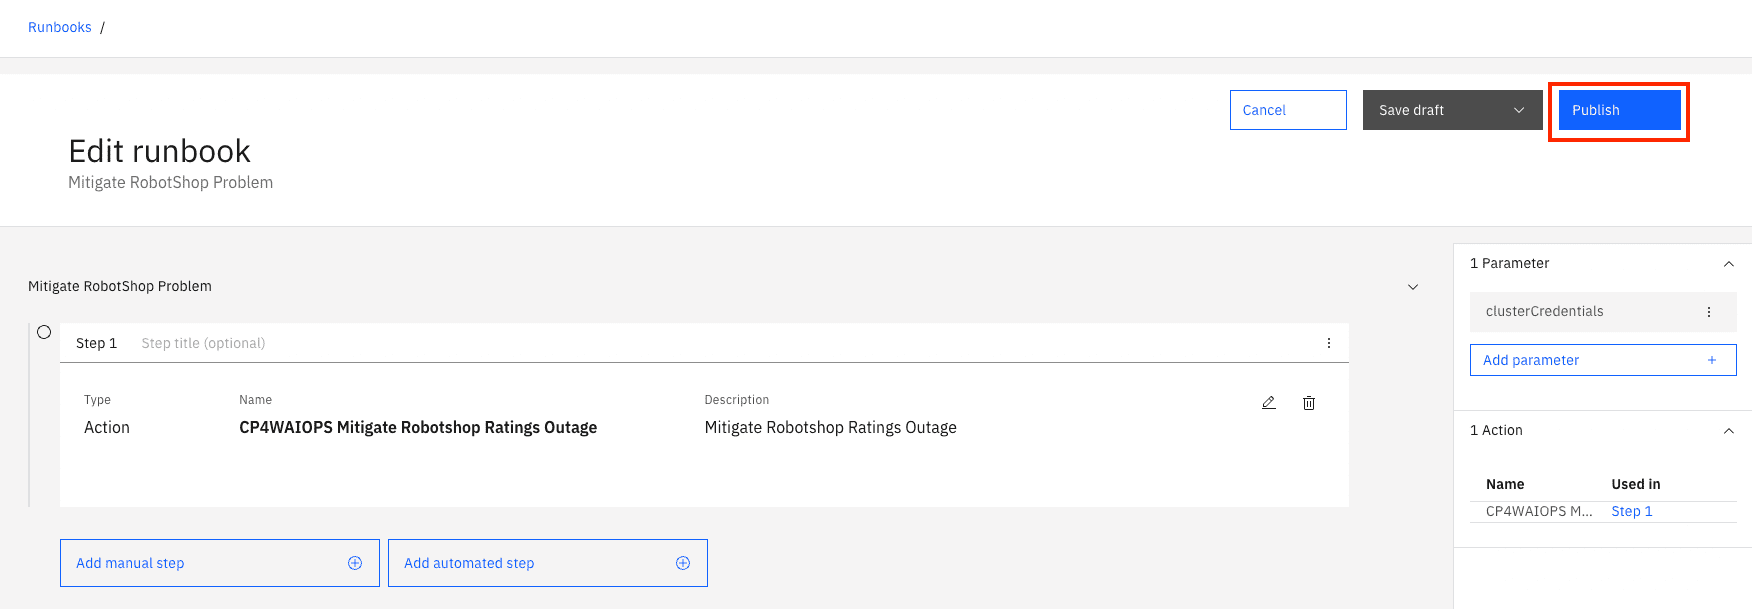
-
Repeat for the other Runbooks


-
In the
AI Manager"Hamburger" Menu selectOperate/Automations -
Under
Policies, clickCreate Policy
-
Select
Assign a runbook to alerts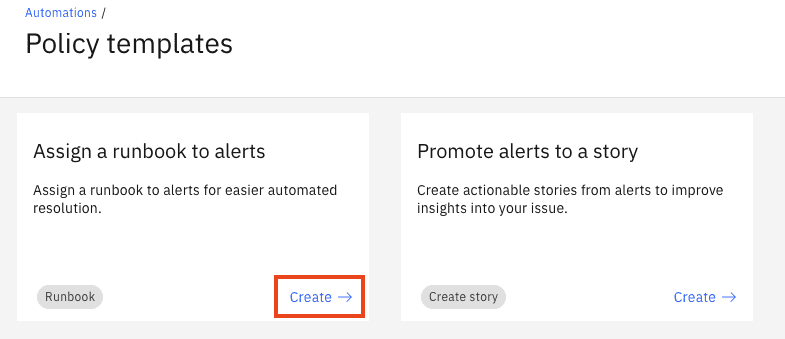


-
Name it
Mitigate RobotShop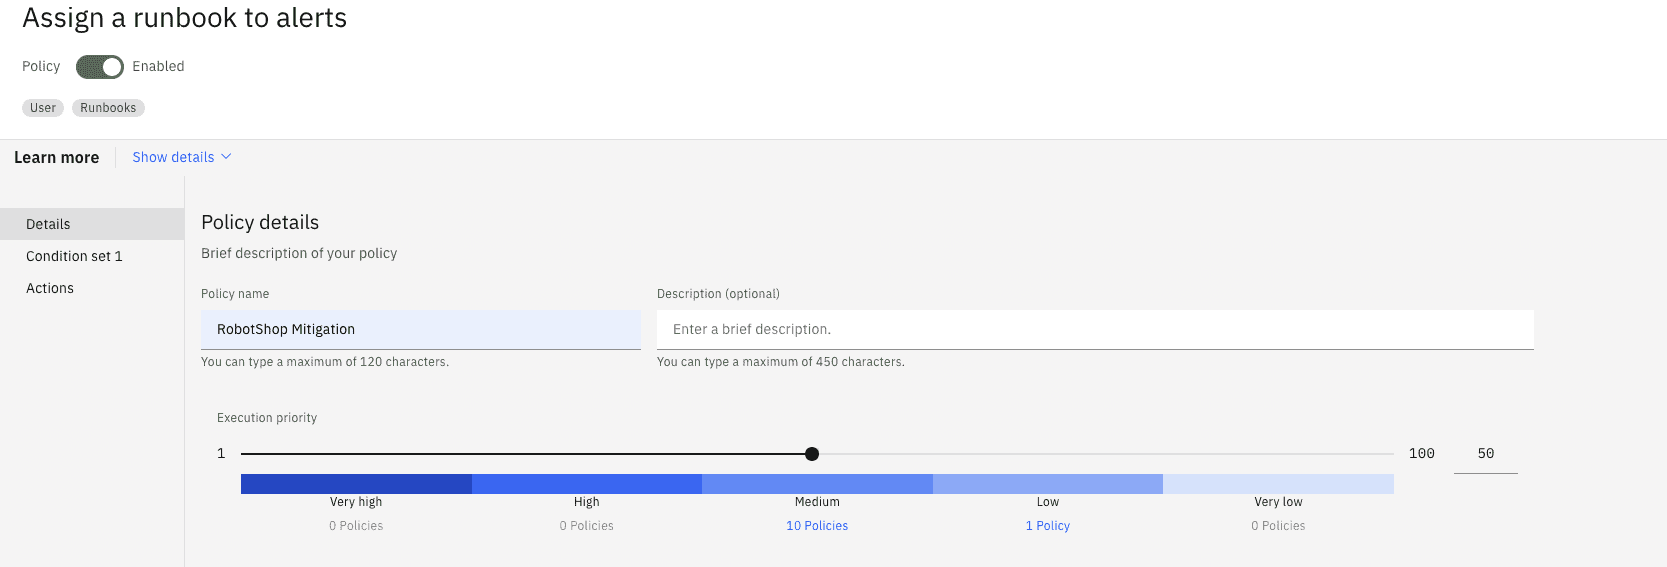
-
Under
Condition set1 -
Select
resource.name(you can typenameand select the name field for resources)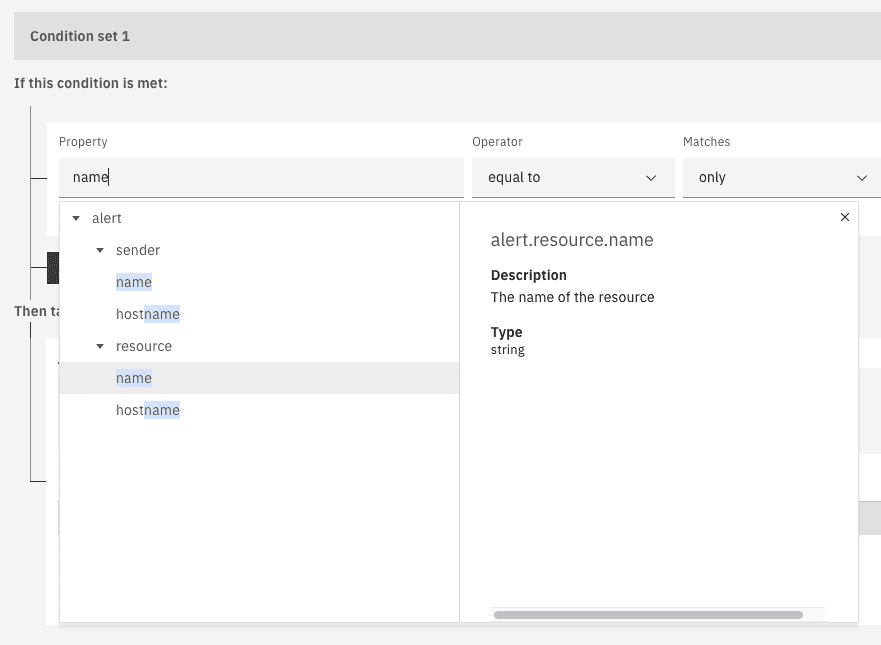
-
Set Operator to
contains


-
And for
valueyou typemysql(selectString: mysql)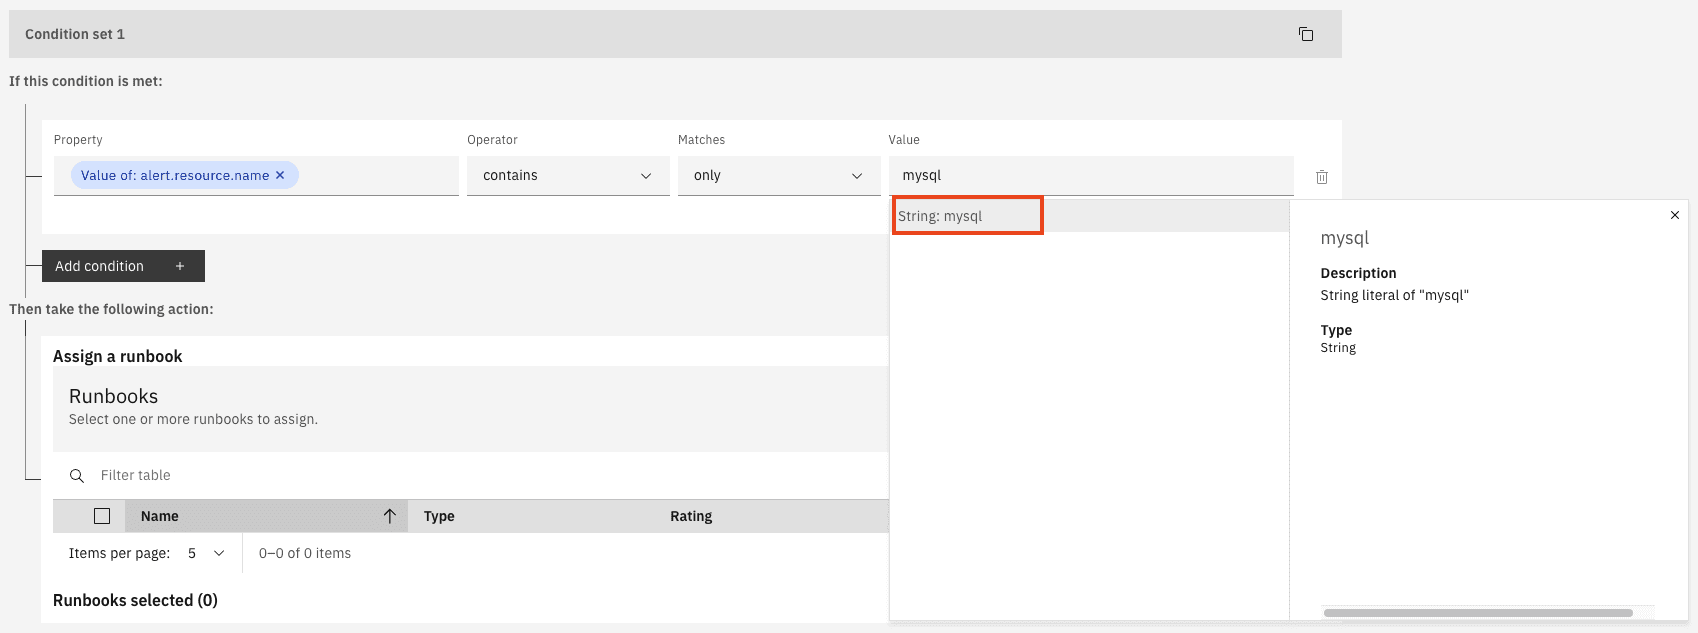
-
Under Runbooks
-
Select the
Mitigate RobotShop ProblemRunbook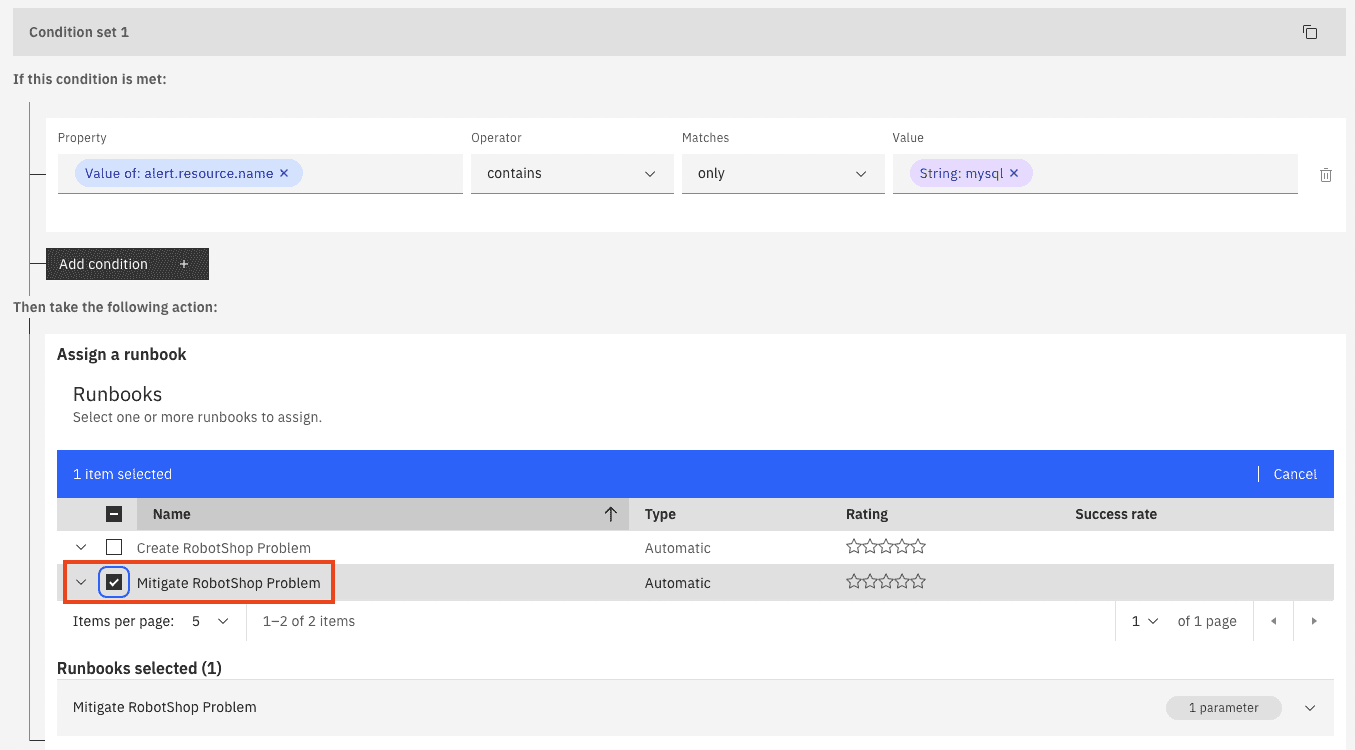


-
Under
Select Mapping Type, selectUse default parameter value(this has been prefilled by the installer)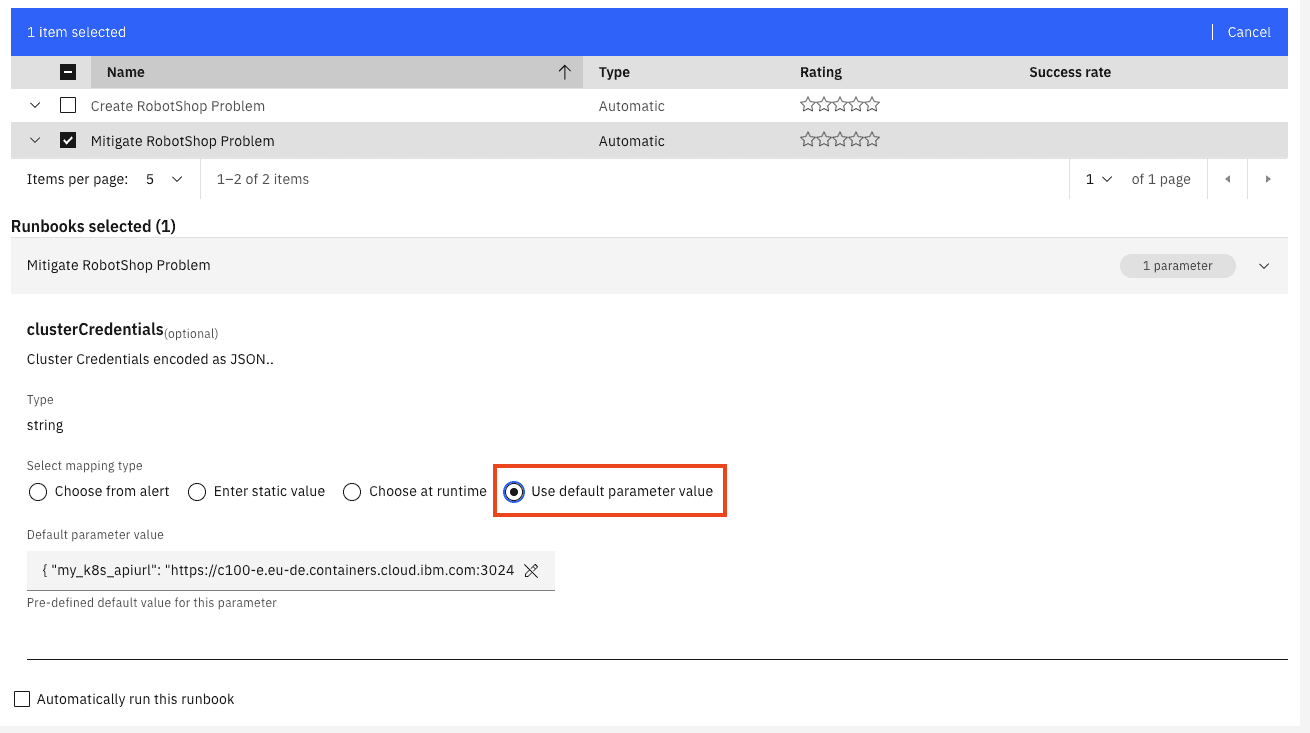
-
Click
Create Policy

In the AI Manager (CP4WAIOPS)
- In the
AI Manager"Hamburger" Menu selectDefine/Data and tool integrations - Click
Kubernetes - Under
robot-shop, click onRun(with the small play button)
For the system to work you need to follow those steps:
- Create Slack Workspace
- Create Slack App
- Create Slack Channels
- Create Slack Integration
- Get the Integration URL
- Create Slack App Communications
- Slack Reset
- Create a Slack workspace by going to https://slack.com/get-started#/createnew and logging in with an email which is not your IBM email. Your IBM email is part of the IBM Slack enterprise account and you will not be able to create an independent Slack workspace outside if the IBM slack service.

- After authentication, you will see the following screen:

-
Click Create a Workspace ->
-
Name your Slack workspace

Give your workspace a unique name such as aiops-<yourname>.
- Describe the workspace current purpose

This is free text, you may simply write “demo for Watson AIOps” or whatever you like.

You may add team members to your new Slack workspace or skip this step.
At this point you have created your own Slack workspace where you are the administrator and can perform all the necessary steps to integrate with CP4WAOps.

Note : This Slack workspace is outside the control of IBM and must be treated as a completely public environment. Do not place any confidential material in this Slack workspace.
-
Create a Slack app, by going to https://api.slack.com/apps and clicking
Create New App.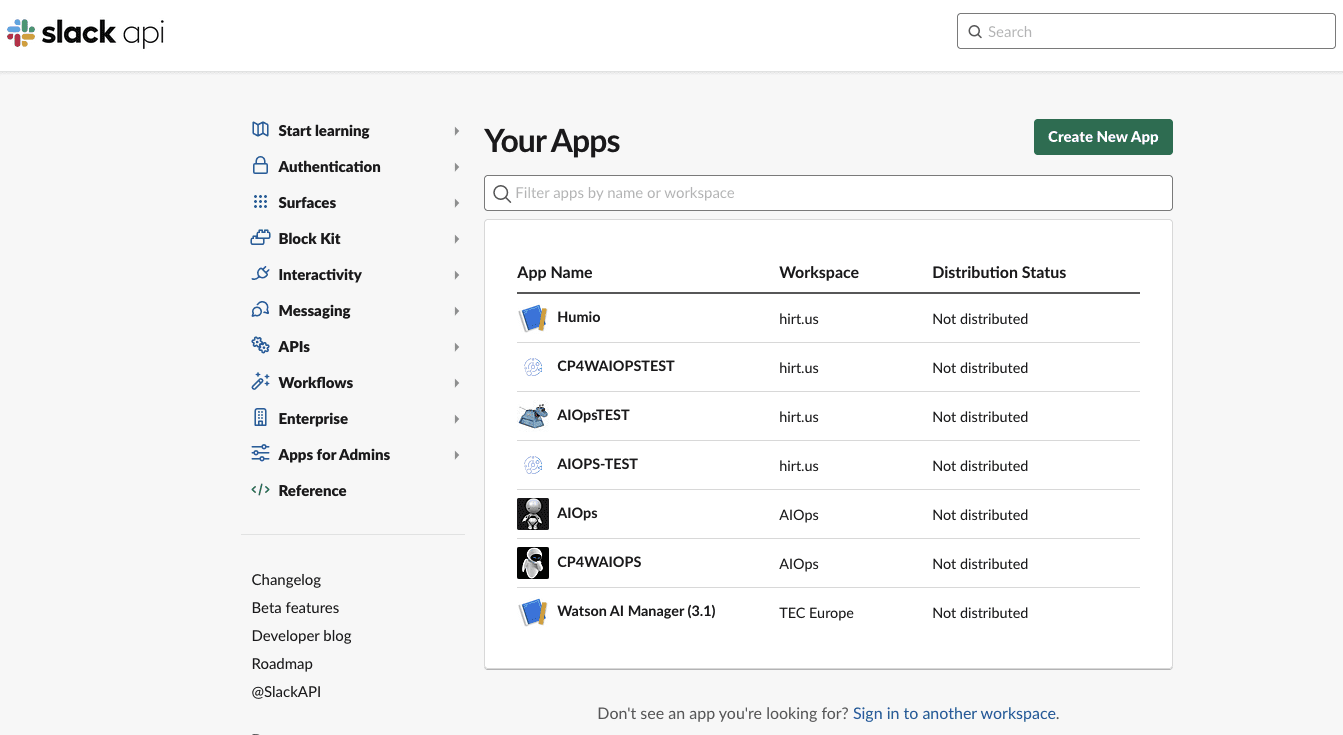
-
Select
From an app manifest


-
Select the appropriate workspace that you have created before and click
Next -
Copy and paste the content of this file ./doc/slack/slack-app-manifest.yaml.
Don't bother with the URLs just yet, we will adapt them as needed.
-
Click
Next -
Click
Create -
Scroll down to Display Information and name your CP4WAIOPS app.
-
You can add an icon to the app (there are some sample icons in the ./tools/4_integrations/slack/icons folder.
-
Click save changes
-
In the
Basic Informationmenu click onInstall to Workspacethen clickAllow
-
In Slack add a two new channels:
- aiops-demo-reactive
- aiops-demo-proactive
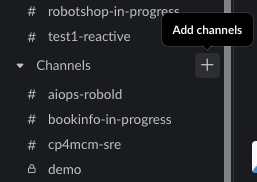
-
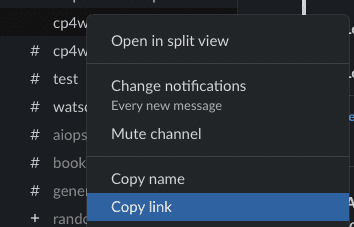
Right click on each channel and select
Copy LinkThis should get you something like this https://xxxx.slack.com/archives/C021QOY16BW The last part of the URL is the channel ID (i.e. C021QOY16BW) Jot them down for both channels
-
Under Apps click Browse Apps
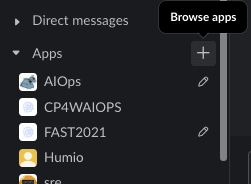
-
Select the App you just have created
-
Invite the Application to each of the two channels by typing
@<MyAppname>
-
Select
Add to channelYou shoud get a message from saying
was added to #<your-channel> by ...


In the Slack App:
-
In the
Basic Informationmenu get theSigning Secret(not the Client Secret!) and jot it down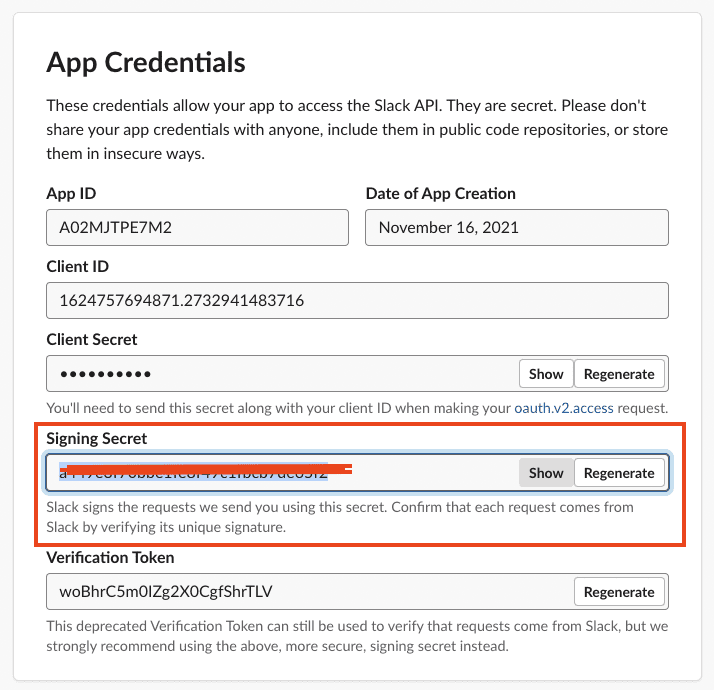
-
In the
OAuth & Permissionsget theBot User OAuth Token(not the User OAuth Token!) and jot it down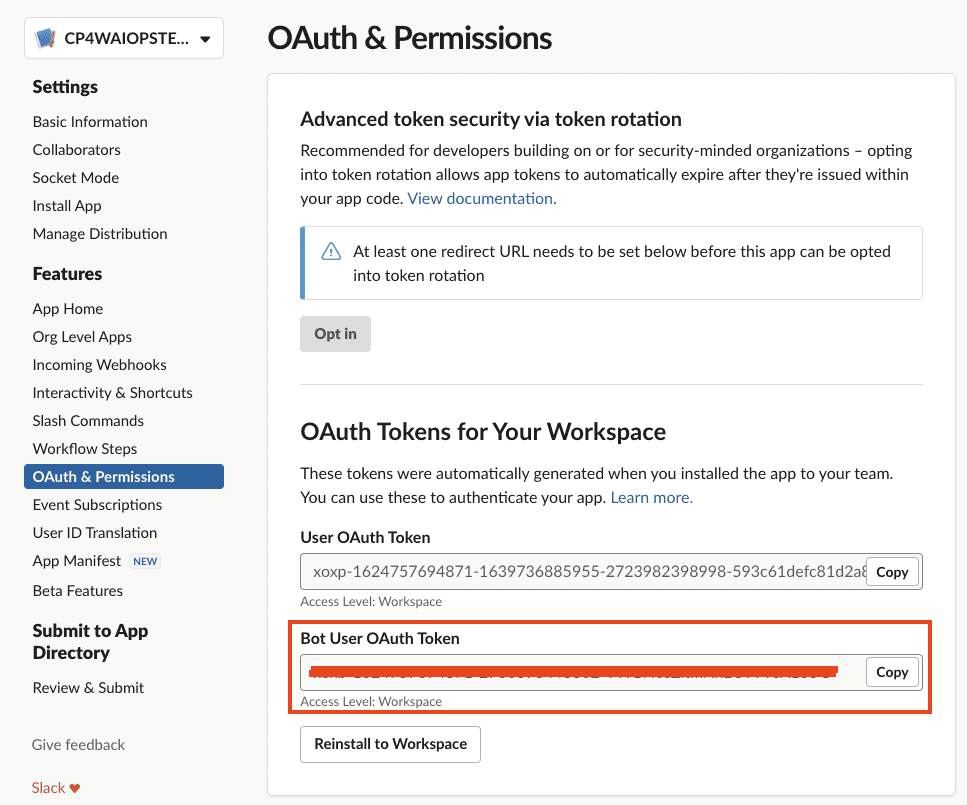


In the AI Manager (CP4WAIOPS)
-
In the
AI Manager"Hamburger" Menu selectDefine/Data and tool integrations -
Click
Add connection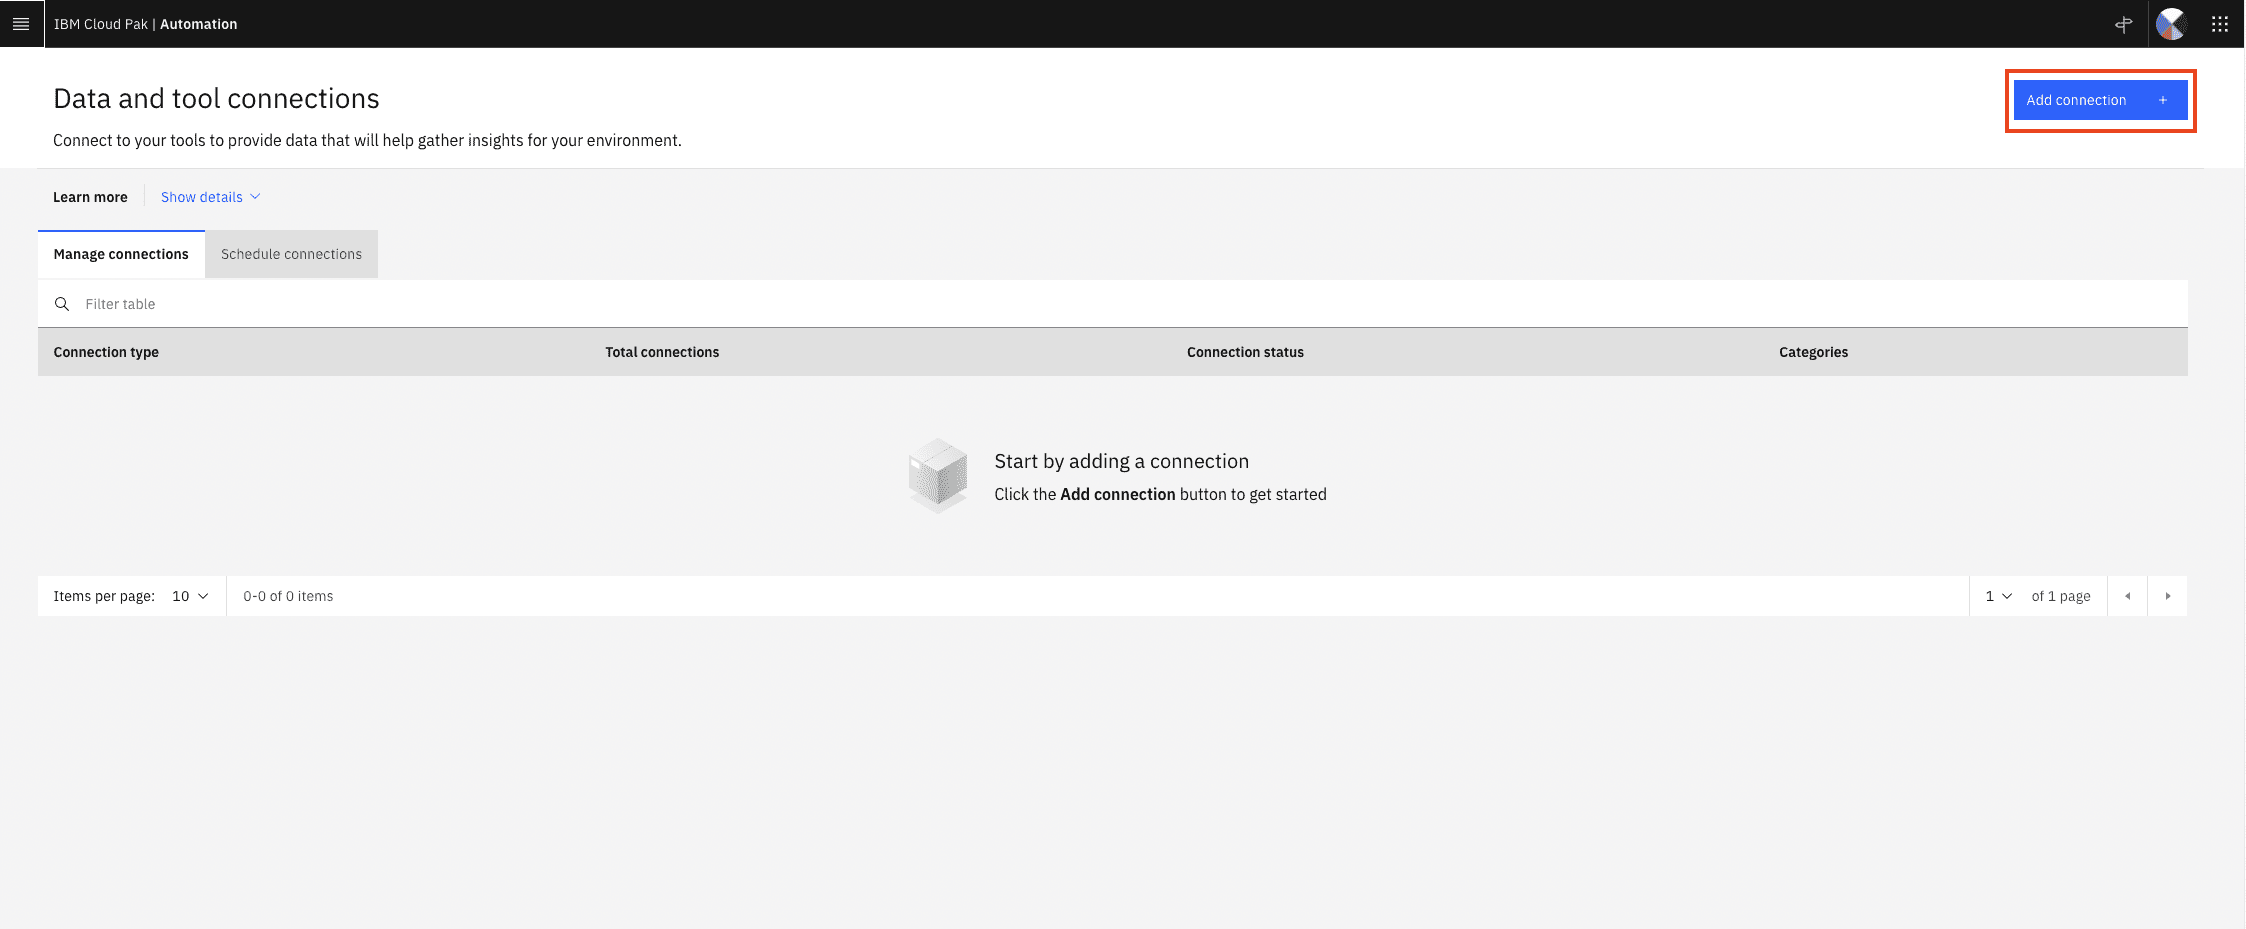
-
Under
Slack, click onAdd Connection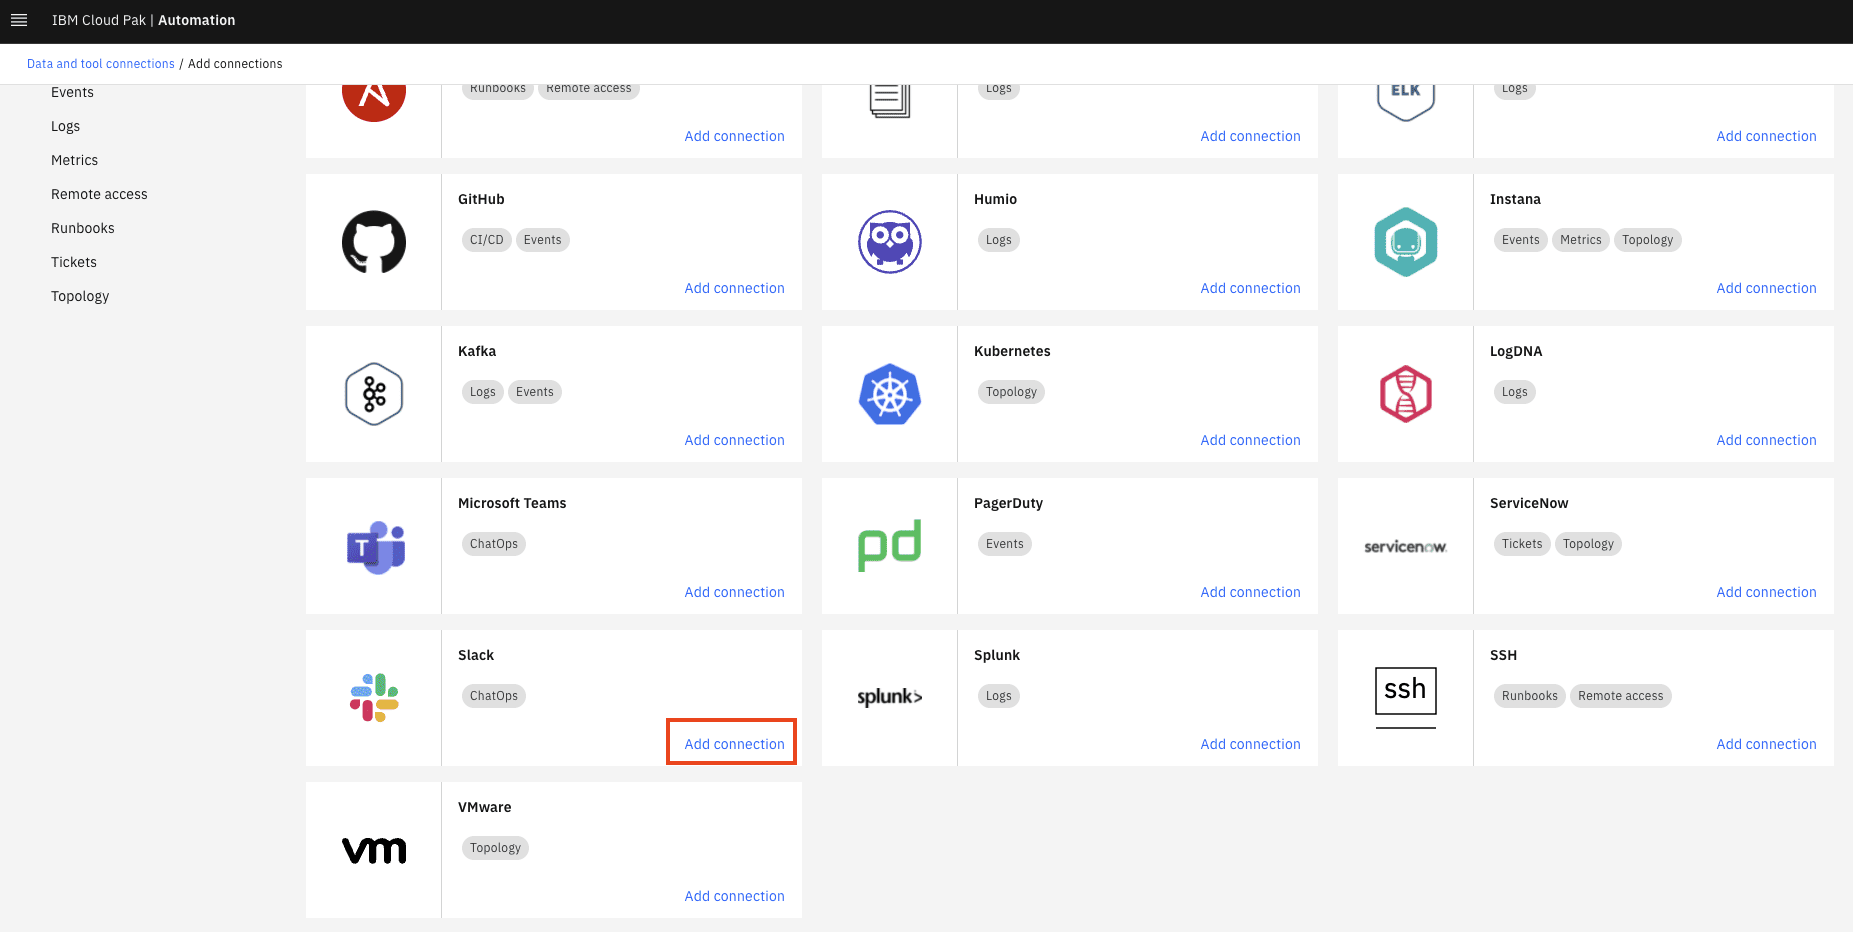
-
Name it "Slack"
-
Paste the
Signing Secretfrom above -
Paste the
Bot User OAuth Tokenfrom above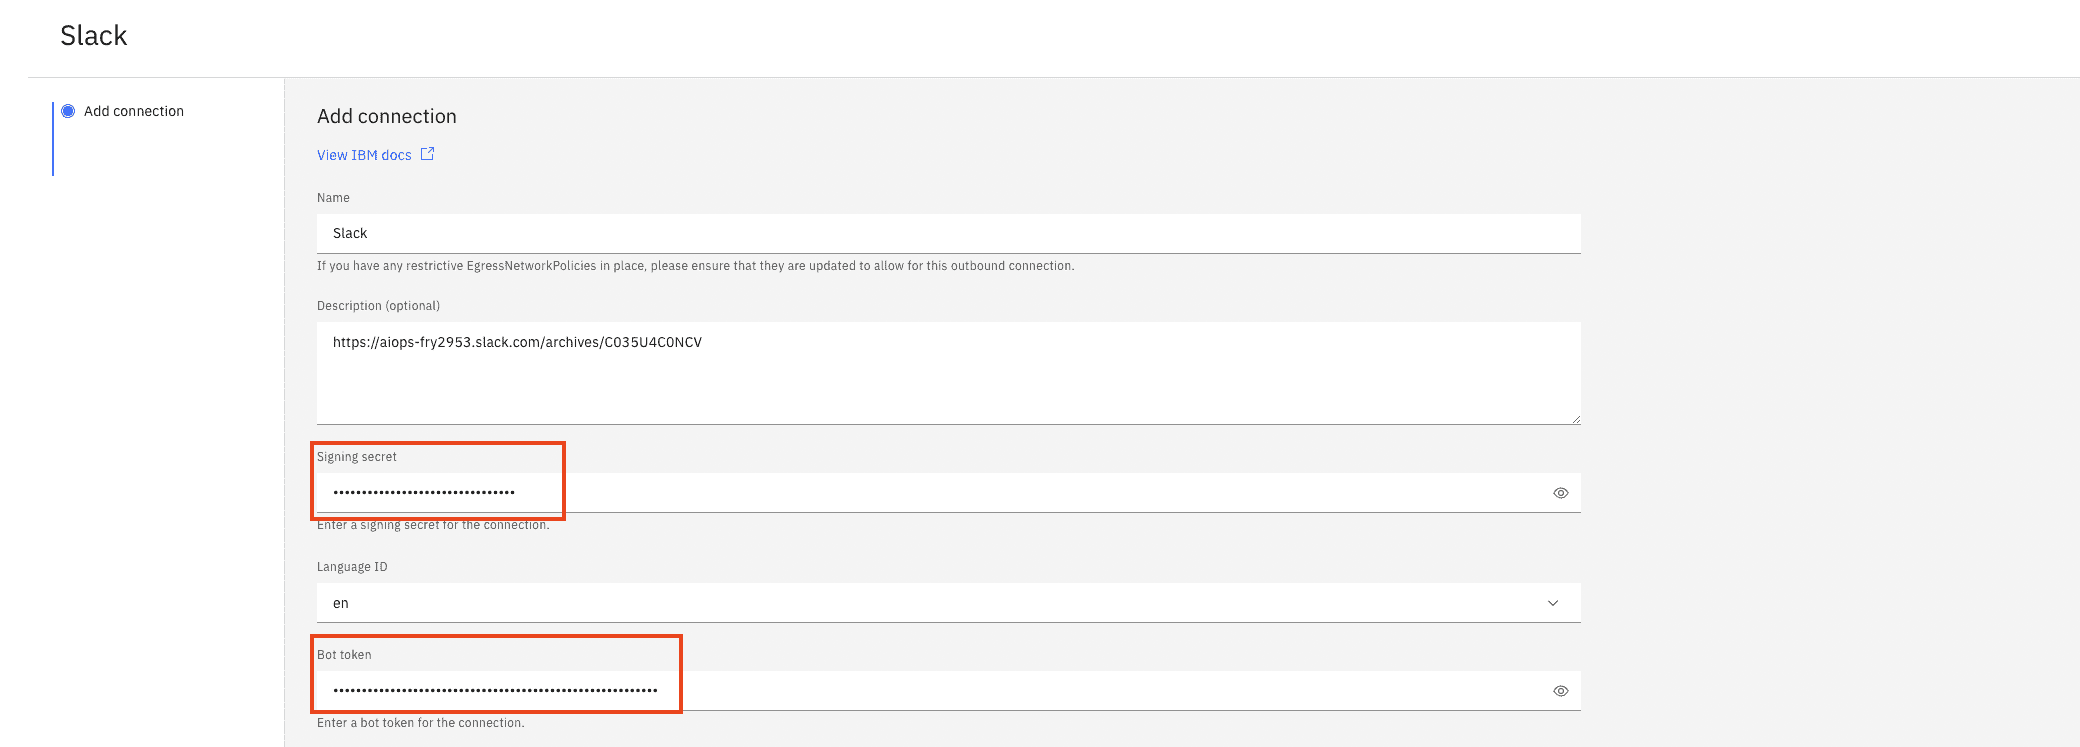
-
Paste the channel IDs from the channel creation step in the respective fields
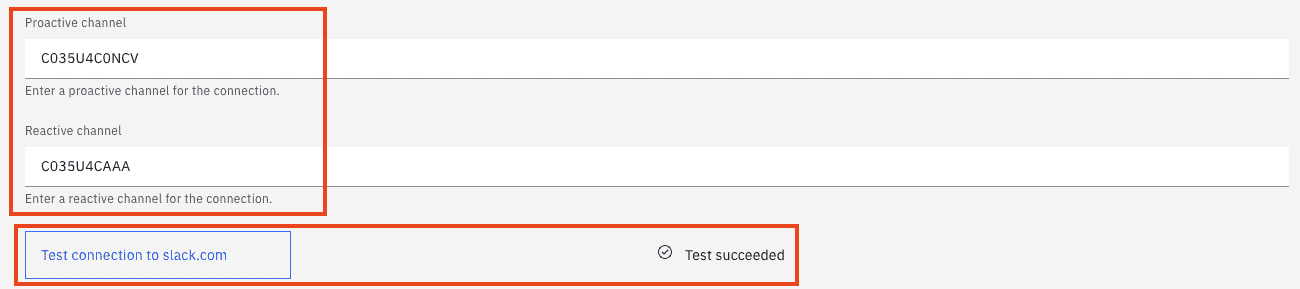
-
Test the connection and click save


In the AI Manager (CP4WAIOPS)
-
Go to
Data and tool integrations -
Under
Slackclick on1 integration -
Copy out the URL
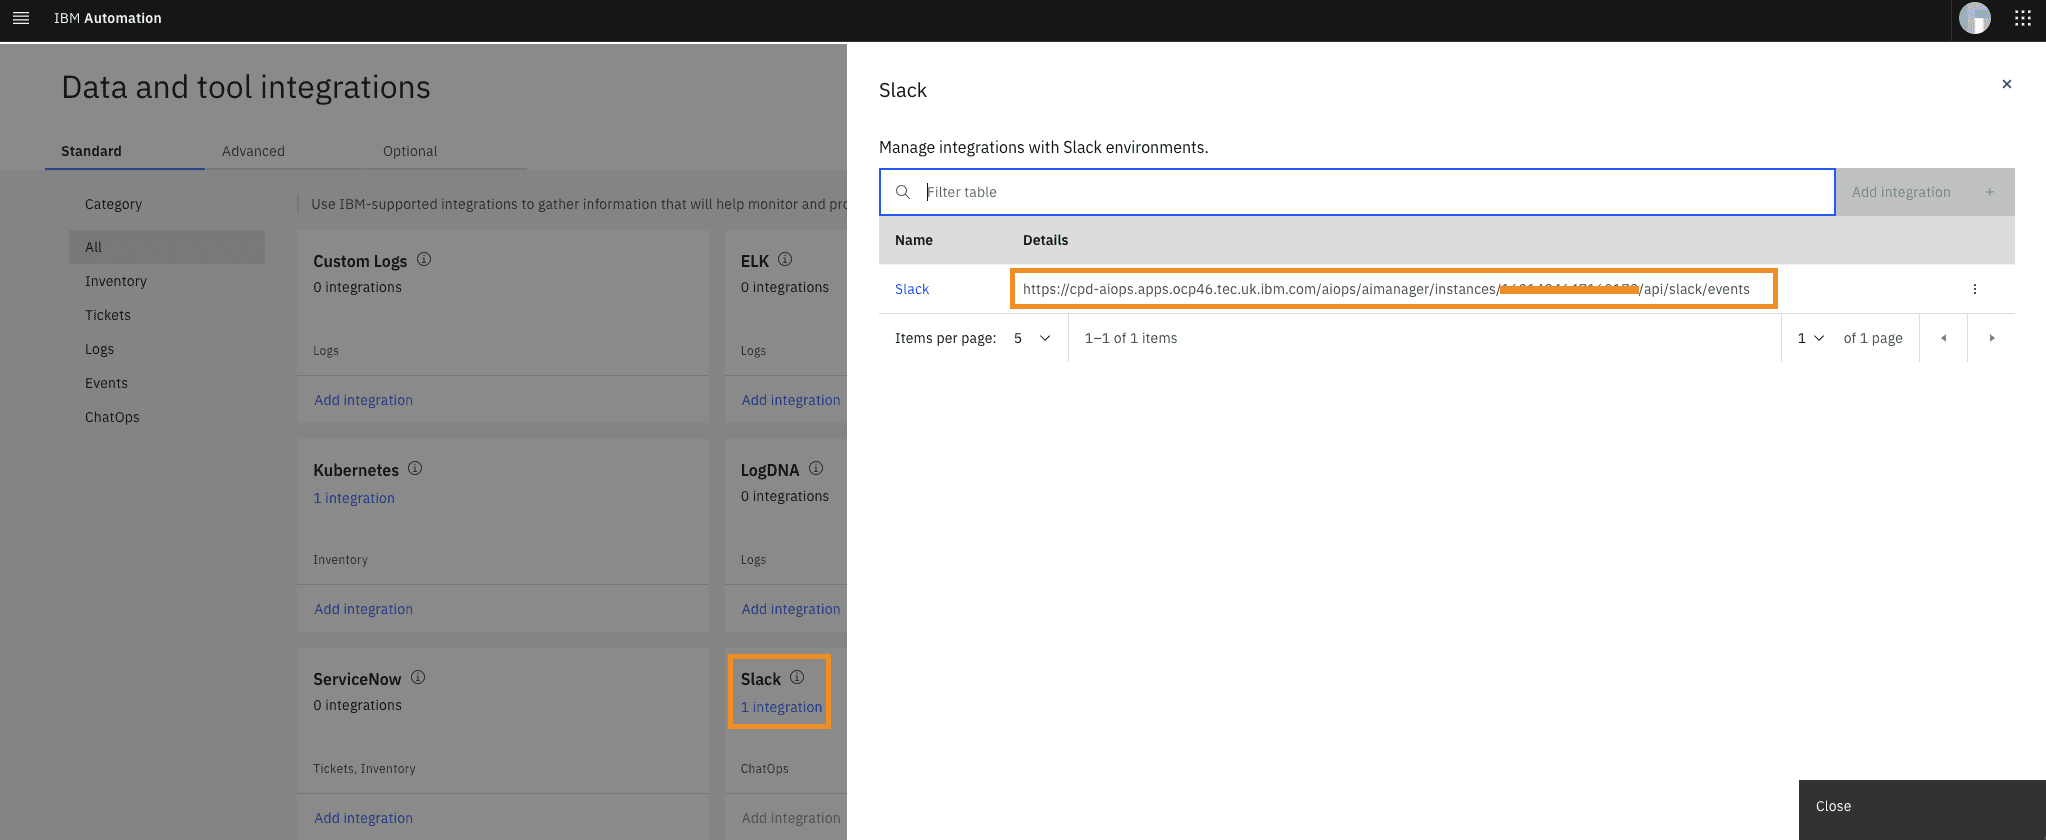

This is the URL you will be using for step 6.
Return to the browser tab for the Slack app.
-
Select
Event Subscriptions. -
In the
Enable Eventssection, click the slider to enable events. -
For the Request URL field use the
Request URLfrom step 5.e.g:
https://<my-url>/aiops/aimanager/instances/xxxxx/api/slack/events -
After pasting the value in the field, a Verified message should display.
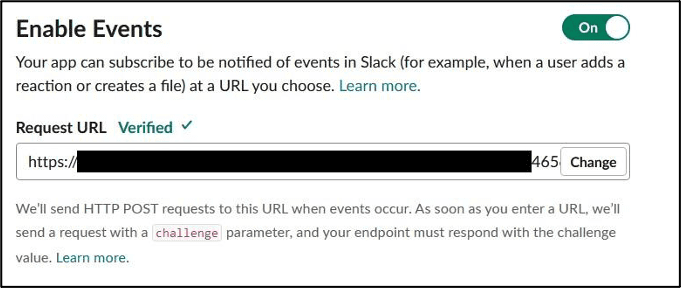
If you get an error please check 5.7
-
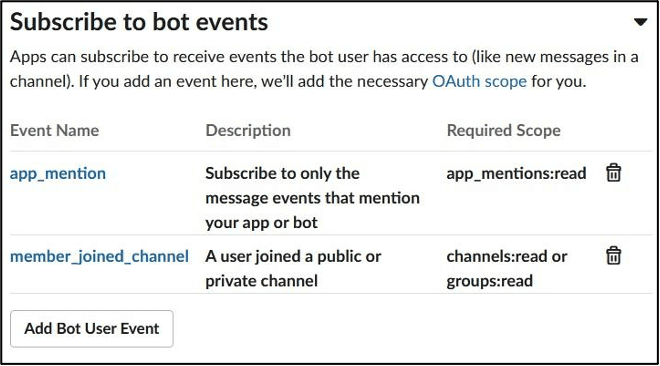
Verify that on the
Subscribe to bot eventssection you got:app_mentionandmember_joined_channelevents.
-
Click
Save Changesbutton.


-
Select
Interactivity & Shortcuts. -
In the Interactivity section, click the slider to enable interactivity. For the
Request URLfield, use use the URL from above.
There is no automatic verification for this form

- Click
Save Changesbutton.
Now, configure the welcome slash command. With this command, you can trigger the welcome message again if you closed it.
-
Select
Slash Commands -
Click
Create New Commandto create a new slash command.Use the following values:
Field Value Command /welcome Request URL the URL from above Short Description Welcome to Watson AIOps -
Click
Save.
The Slack app must be reinstalled, as several permissions have changed.
- Select
Install App - Click
Reinstall to Workspace
Once the workspace request is approved, the Slack integration is complete.
If you run into problems validating the Event Subscription in the Slack Application, see 5.2
Installer should aready have done this.
But if there still are problems, you can directly run:
ansible-playbook ./ansible/31_aimanager-create-valid-ingress-certificates.yamlThis is needed for the reset scripts in order to empty/reset the Slack channels.
This is based on Slack Cleaner2. You might have to install this:
pip3 install slack-cleaner2In your Slack app
- In the
OAuth & Permissionsget theUser OAuth Token(not the Bot User OAuth Token this time!) and jot it down
In file ./tools/98_reset/13_reset-slack.sh
- Replace
not_configuredfor theSLACK_TOKENparameter with the token - Adapt the channel name for the
SLACK_REACTIVEparameter
In your Slack app
- In the
OAuth & Permissionsget theUser OAuth Token(not the Bot User OAuth Token this time!) and jot it down (same token as above)
In file ./tools/98_reset/14_reset-slack-changerisk.sh
- Replace
not_configuredfor theSLACK_TOKENparameter with the token - Adapt the channel name for the
SLACK_PROACTIVEparameter
Call either of the scripts above to reset the channel:
./tools/98_reset/13_reset-slack.sh

or

./tools/98_reset/14_reset-slack-changerisk.sh
Make sure you are logged-in to the Kubernetes Cluster first
In the terminal type
./tools/01_demo/incident_robotshop.shThis will delete all existing Alerts/Stories and inject pre-canned event, metrics and logs to create a story.
ℹ️ Give it a minute or two for all events and anomalies to arrive in Slack. ℹ️ You might have to run the script 3-4 times for the log anomalies to start appearing.