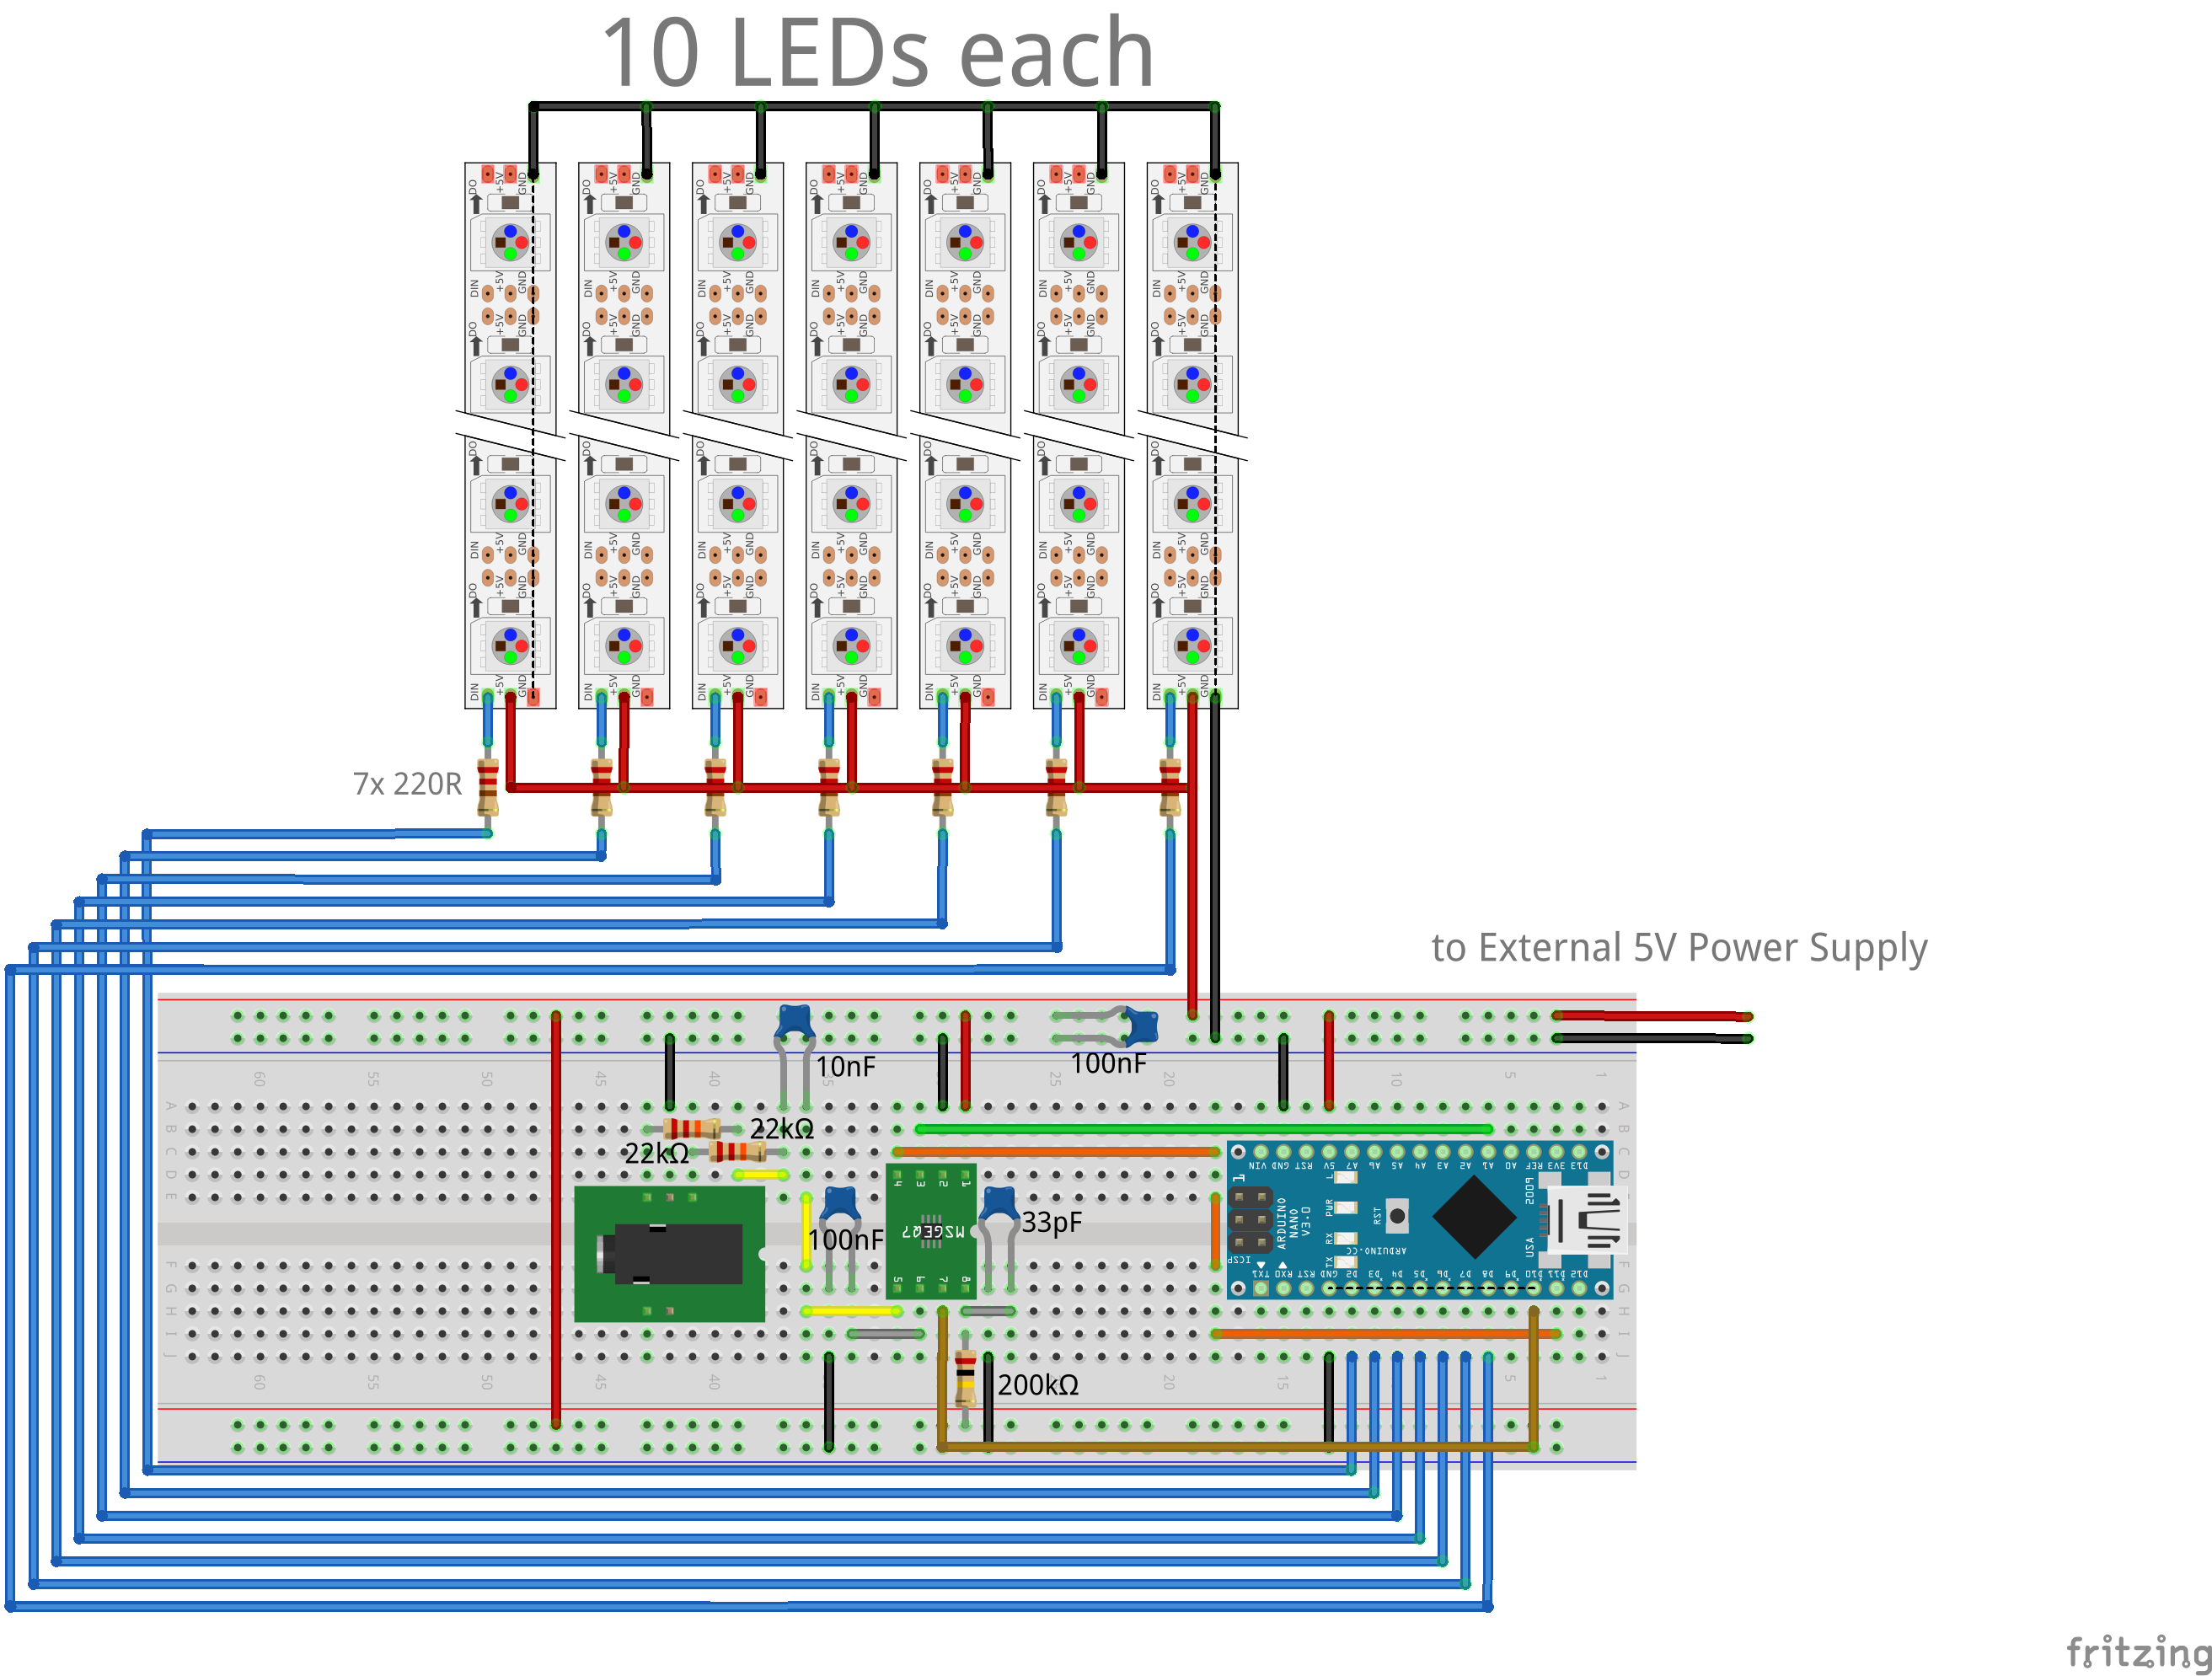
This is the Arduino Library for the ninSpectrumDisplay which you can find on my blog (link) to build it by yourself.
The Display consists of an Arduino Nano, an MSGEQ7 IC for the frequency splitting and 7 WS2812 Strips a 10 LEDs to visualize the input sound levels. Additionally you can use the display to show text or small images, a sample font file you can find in the library folder.
Note: If you want to change the size of the Display, you had to change some values in the header file of the library too.
- 24-Bit Colors
- Integrated Spectrum Analyzer function
- Full set pixel functions
- Print scrolling text
- Own fonts applicable (see fonts.h)
- All Arduino boards (Uno, Due, Mini, Micro, Yun...)
Download the zip file from the repository or check it out anywhere.
Then you have to copy the ninSpectrumDisplay folder to your Arduino/libraries folder in your Arduino environment.
Load any of the example sketches from the examples/ directory.
ninSpectrumDisplay(STROBE, RESET, VOUT, [L1P, L2P, L3P, L4P, L5P, L6P, L7P])
Initializes the display. If the pins (L1P to L7P) for the WS2812 strips are omitted it uses the default hardcoded pins (digital pin 2 to 8).
STROBE is the Strobe pin of the MSGEQ7 IC
RESET is the Reset pin of the MSGEQ7 IC
VOUT is the DC Out pin of the MSGEQ7 IC (must be an ADC pin)
ninSpectrumDisplay ninDisplay(11, 10, ADC1);
or
ninSpectrumDisplay ninDisplay(11, 10, ADC1, 2, 3, 4, 5, 6, 7, 8);
showSpectrum()
Shows the Spectrum of the Audio input by predefined colors and noise levels This function got no parameters.
Example:
void loop() {
  ninDisplay.showSpectrum();
}
setPixel(x, y, [color])
Sets a defined pixel to color x and y are the pixel coordinates of the changing pixel color is the 24bit color value (optional, if omitted it uses the color set by setColor)
Example
// Set Pixel 1,1 to bright blue color
ninDisplay.setPixel(1, 1, 0x0000FF);
// or
ninDisplay.setColor(0x0000FF);
ninDisplay.setPixel(1, 1);
The area got coordinates from x=1 to 7 and y=1 to 10 the beginning pixel (1,1) was on the lower left side
printChar(uint8_t x, uint8_t y, char c)
Prints a character from ascii charset on the display x and y are the coordinates where the characte should be start drawing c is the character to show itself
Example:
ninDisplay.printChar(1, 1, 'y');
printString(uint8_t x, uint8_t y, uint16_t delay, char text[])
Prints a string to the display char by char with a defined delay of x milliseconds x and y are the coordinates where the seperate characters are drawn to. delay is the time in milliseconds which are between each character text is the character array which holds the string to be shown.
Example:
ninDisplay.printString(1, 1, 350, "Hello World!");
The code is published under Creative Common License 4.0 See LICENSE file


