Credit to Jen Spencer for support and amendments to this workshop!
To understand the potential of faking requests to your server for the purposes of testing responses.
Tape is an npm module used for testing server side code written in Node.js. This workshop will demonstrate using tape results piped through the tape-spec module to prettify the test response output
Shot is used in this workshop to simulate fake server requests without the need to have the server listening via a socket connection to respond to the requests. Fake requests are simply objects passed to your routes;
{
  method: 'get',
  url: '/'
}
You can view the full request/response values available in shots demonstration.
Throughout this workshop, it is very important that you don't copy/paste the code, but write each line yourself and make sure you understand what you're writing. This may seem unnecessary and slightly irritating, but if you copy/paste now, you will find yourself copy/pasting from your old repos in future. It is far better that you write it from scratch enough times for you to remember it. It's a good idea to give your partner a gentle reminder when you're pairing too.
- Create a new directory, move into it, and then set up blank node project with a package.json
mkdir <<name of directory>> && cd <<name of directory>>
npm init
- Create a server file (not strictly necessary in this walkthrough but you might as well get the practice of doing a full set up), and enter the necessary code to get your server running;
$ touch server.js
const http = require('http');
const hostname = process.env.HOSTNAME || 'localhost';
const port = process.env.PORT || 4000;

http.createServer(router).listen(port, () => {
  console.log(`Server running at port http://${hostname}:${port}`)
});- Remember that
npm startis a default command that will runnode server.jsunless you specify otherwise. So, if you have called this file server.js, there is no need to write a start script yourself. Type this into your terminal now, just to make sure everything has been written correctly
$ npm start
- Install tape, tap-spec and shot as dev dependencies
$ npm install tape shot tap-spec --save-dev
- Create a file to hold your tests
$ touch test.js
- Inside test.js, require tape and shot;
const test = require('tape');
const shot = require('shot');- Write a test to ensure tape is working;
test('Initialise', (t) => {
  let num = 2
  t.equal(num, 2, 'Should return 2');
  t.end(); // Remember to call t.end() after every test call, to ensure tests run in order. You can also investigate t.plan() in the docs
})- Edit the test script in your package.json file
"scripts": {
  "test": "node test.js | tap-spec"
}
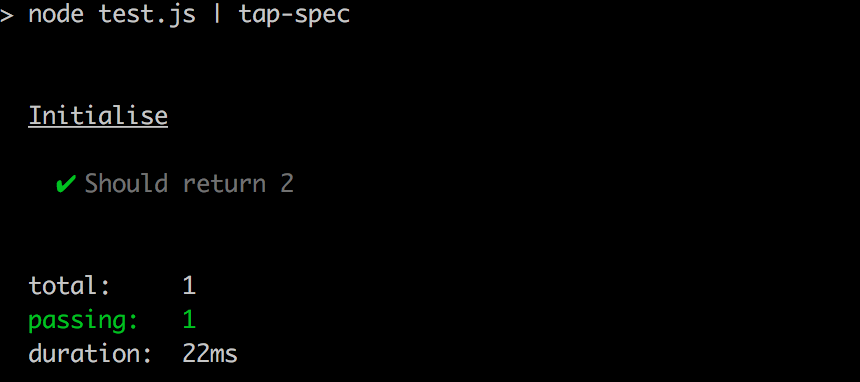
- Run
npm testin the terminal to check the test is passing-
- You're going to start by testing your routes, so create a router file
$ touch router.js
- Back in test.js, require in your new router file
const router = require('./router'); // remember: absolute paths are needed for local modules, and if you're working with a javascript file, the '.js' extension is not required (you can still add the extension if you like)- Now let's create a failing test to check your router.js logic. Start by describing what you are testing
// Home Route
test('Home route returns a status code of 200', (t) => {
})- Use the shot.inject method, which is given three arguments (1. the router, 2. the fake request object, and a callback function with the response). We've already required in the router, so here we're saying we want to make a get request to the home route ('/')
// Home Route
test('Home route returns a status code of 200', (t) => {
  shot.inject(router, { method: 'get', url: '/' }, (res) => {
    // we're going to deal with the response here
  })
})- In this callback, we want to check the status code of the response in the form of res.statusCode.
// Home Route
test('Home route returns a status code of 200', (t) => {
  shot.inject(router, { method: 'get', url: '/' }, (res) => {
    t.equal(res.statusCode, 200, 'should respond with status code of 200');
    t.end();
  })
})
We're using tape's t.equal method which takes an initial argument, a comparison argument, and a string containing a message that should describe the test, and t.equal will only succeed if the two arguments are equal.
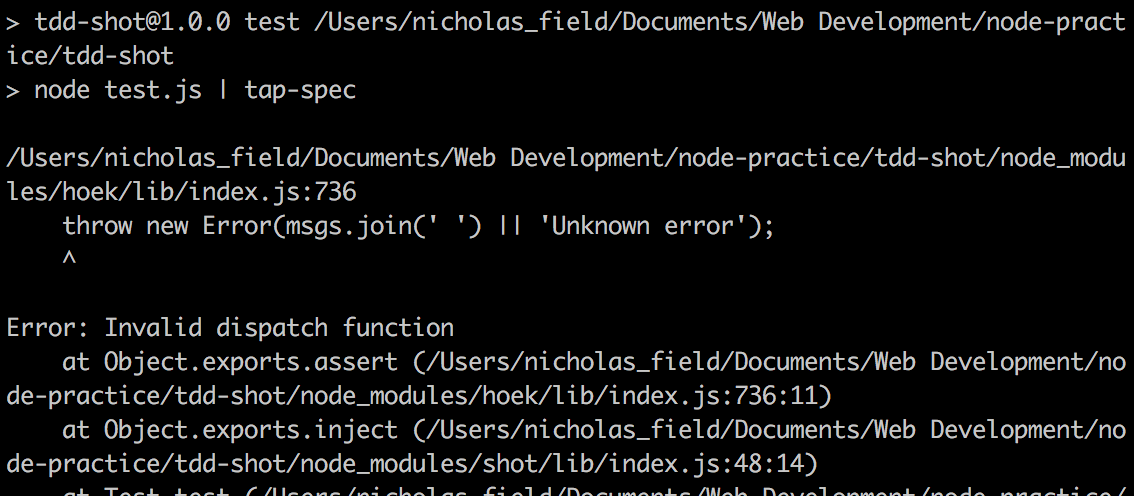
Now when you run npm test you should see the following error;
 Invalid dispatch function explained: - the 'dispatch function' is simply the first argument that shot.inject expects. It is simply the function which the fake request object will be sent into, i.e. your router.js file. So shot is returning an error here with Invalid dispatch function as the dispatch function we've given (the contents of router.js) is undefined. Router.js needs to return a function which can take a request and return a response, so let's fix this failing test...
- In router.js, add a function called router, that includes arguments request and response
const router = (req, res) => {
}
And export the router function;
module.exports = router- Add an if branch, the condition should be if the url property of the request object matches '/';
const router = (req, res) => {
  if (req.url == '/') {
  }
}- Next, inside this branch, call the writeHead method with a response code of 200 and a header object containing the content-type;
const router = (req, res) => {
  if (req.url == '/') {
    res.writeHead(200, {'content-type' : "text/html"})
  }
}- Finally, call the end method on the response object;
const router = (req, res) => {
  if (req.url == '/') {
    res.writeHead(200, {'content-type' : "text/html"})
    response.end()
  }
}- Run
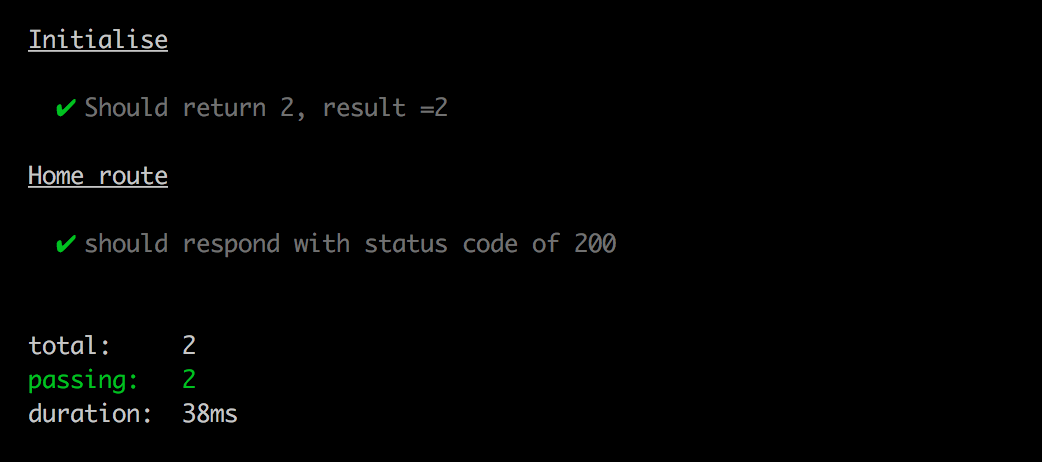
npm testagain to validate
- You've written your first passing test of your servers logic, congrats! Now you can build on this test by adding another test to check the response payload;
test('Home route - payload', (t) => {
  shot.inject(router, { method: 'get', url: '/' }, (res) => {
    t.equal(res.payload, 'Hello', 'should return \'hello\' in the payload');
    t.end();
  })
})- Run
npm testto make sure this test fails as expected - Now make the test pass by adding 'Hello' to the payload in your home route
const router = (req, res) => {
  if (req.url == '/') {
    res.writeHead(200, {'content-type' : "text/html"})
    response.end('Hello')
  }
}- Now refactor, by making your code DRY and putting two assertions into one test
test('Home route', (t) => {
  shot.inject(router, { method: 'get', url: '/' }, (res) => {
    t.equal(res.statusCode, 200, 'should respond with status code of 200');
    t.equal(res.payload, 'Hello', 'response should contain \'Hello\'');
    t.end();
  })
})There are a wide range of request methods that you can use with shot to test your server logic. Combined with tapes testing methods you can build a robust set of tests to ensure all your server endpoints are tested.
Next, find a partner that you haven't worked with before. Use TDD and the ping-pong method that you learned in week 2 to add & test the following features :
- For unknown routes (e.g '/elephants') respond with a status code of 404, and a message 'unknown uri'
- A new route at '/blog'; if the request method is get, respond with a status code of 200, and a JSON object containing an array of three strings... (If you get stuck on how to start, have a look at router.js and test.js in this repo)
- For the new '/blog' route, if the request method is post and the request header contains a key of "password" and a value of "potato", should respond with a status code of 200, with a JSON object containing an array of strings that includes what was given as the request payload.
- If the method is post, but the password key/value pair is NOT included in the request, respond with a status code of 403, and the payload string 'Forbidden'.
- If the method is post, and the password key/value pair IS included, BUT no payload is given in the request, then respond with a status code of 302, and simply write a header containing the key "Location", and value "/blog". This is to simulate redirecting a user back to the '/blog' route if they attempt to submit an empty post.
Good luck :)
