This is an example of using Vagrant to create a Linux VM and then running an Ansible playbook.
The following prerequisites are not covered in this README.
- Vagrant installed locally
- Ansible installed locally
- VMware Hypervisor of either
- VMware ESXi 6.x or 7.x Server
- VMWare Workstation or Fusion
VMware Workstation / Fusion requires the installation of a Vagrant plugin.
-
Install the
vmware-desktopplugin for Vagrant.# install plugin vagrant plugin install vagrant-vmware-desktop
VMware ESXi requires the installation of a Vagrant plugin.
-
Install the
vmware-esxiplugin for Vagrant.# install plugin vagrant plugin install vagrant-vmware-esxi
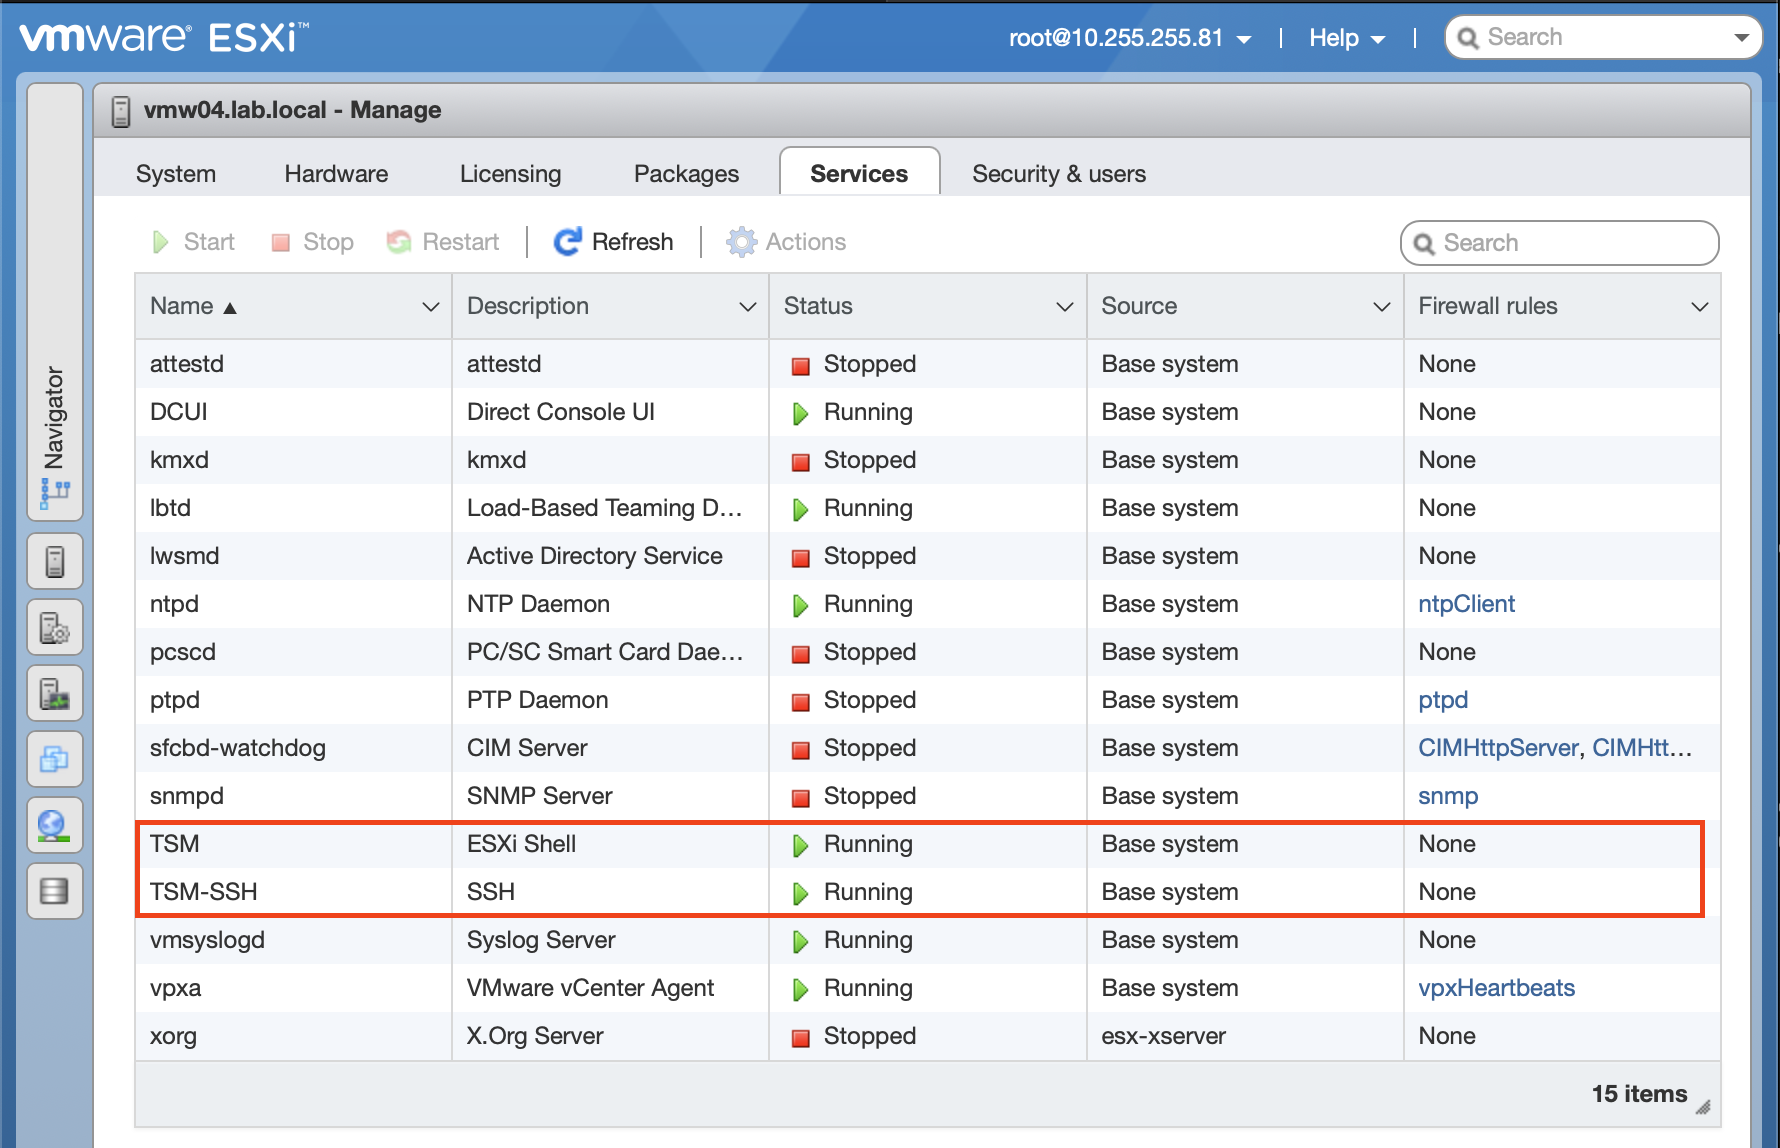
Additionally, this automation requires SSH to be enabled on the ESXi host.
-
Enable TSM and TSH-SSH Service.
-
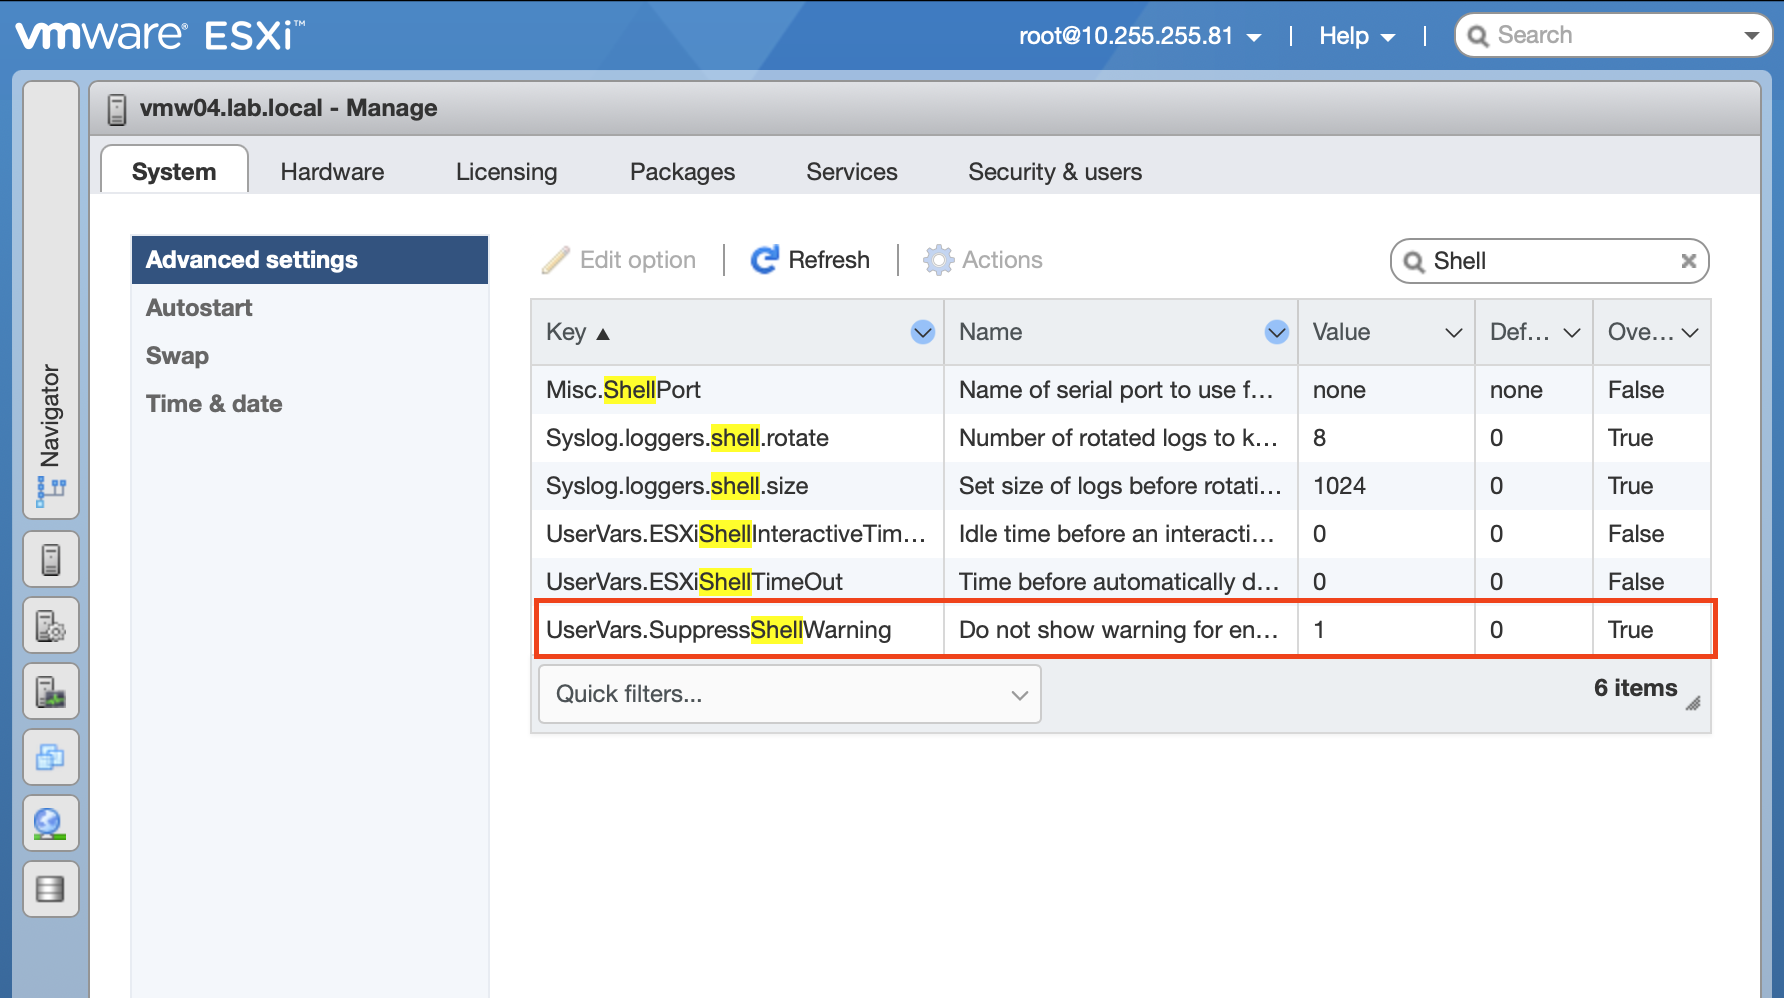
Supress Shell Warning (optional)
If you wish to leave SSH enabled and supress the console warning that it is enabled, adjust the following setting.
Furthermore... The VMware ESXi plugin for Vagrant also uses the VMware OVFTOOL to perform it's operations. You can find the download through VMware after a free registration. It will be provided as a zip file. Extract the contents to your desired location and make sure you add it to the machine path that you are running Vagrant from.
-
Update your local machine PATH prior to running any Vagrant commands.
export PATH=$PATH:/path/to/ovftool
-
(Optional) Add the previous line to the relevant OS config file to persist the setup.
The config_example.yml file contains the configuration options for the environment setup.
-
Create a custom config for your setup.
cp config_example.yml config.yml
-
(If you are deploying to ESXi) Update the
config.ymlwith your ESXi host information. -
(Optional) Update the
config.ymlguest machine setup. Additional machines can be specified if required. -
Add the Guest OS from the Vagrant Repository.
# or similar VMware compatable Vagrant box, must match value in config.yml
vagrant box add generic/ubuntu2210
The following will create each of the VMs that are defined in your config.yml and the run the specified Ansible playbook. Each machine will be configured for SSH auth that will be managed by Vagrant.
This command will start the provisioning process and create the VMs based on the configuration specified in the Vagrantfile.
# deploy automation for vmware workstation/fusion
vagrant up --provider=vmware_desktop

# deploy automation for vmware esxi
vagrant up --provider=vmware_esxi
Wait for the provisioning process to complete. This may take some time depending on the complexity of the setup and the speed of your machine.
This command will gracefully shut down all the VMs that were created using Vagrant.
# gracefully shutdown all virtual machines
vagrant halt
Alternatively, if you want to shut down a specific VM, you can use the following command:
# gracefully shutdown a specific virtual machine
vagrant halt <vm_name>
Replace <vm_name> with the name of the VM you want to shut down.
To remove the environment and delete all the VMs created with Vagrant, you can use the following command:
# destroy all vagrant created machines
vagrant destroy -f
This command will forcefully remove all the VMs without prompting for confirmation. Make sure to use this command with caution as it cannot be undone.
If you want to remove a specific VM, you can use the following command:
# destroy a specific vagrant created machine
vagrant destroy -f <vm_name>
Replace <vm_name> with the name of the VM you want to remove.
After running the vagrant destroy command, all the VMs will be deleted and the environment will be completely removed.
Remember to double-check and ensure that you have backed up any important data before executing the vagrant destroy command.
The MIT License (MIT)
Copyright (c) 2024
Permission is hereby granted, free of charge, to any person obtaining a copy of this software and associated documentation files (the "Software"), to deal in the Software without restriction, including without limitation the rights to use, copy, modify, merge, publish, distribute, sublicense, and/or sell copies of the Software, and to permit persons to whom the Software is furnished to do so, subject to the following conditions:
The above copyright notice and this permission notice shall be included in all copies or substantial portions of the Software.
THE SOFTWARE IS PROVIDED "AS IS", WITHOUT WARRANTY OF ANY KIND, EXPRESS OR IMPLIED, INCLUDING BUT NOT LIMITED TO THE WARRANTIES OF MERCHANTABILITY, FITNESS FOR A PARTICULAR PURPOSE AND NONINFRINGEMENT. IN NO EVENT SHALL THE AUTHORS OR COPYRIGHT HOLDERS BE LIABLE FOR ANY CLAIM, DAMAGES OR OTHER LIABILITY, WHETHER IN AN ACTION OF CONTRACT, TORT OR OTHERWISE, ARISING FROM, OUT OF OR IN CONNECTION WITH THE SOFTWARE OR THE USE OR OTHER DEALINGS IN THE SOFTWARE.

