E-commerce has proven to be a big game-changer in the 21st-century economy. As one of the largest sales channels, second only to physical retail, e-commerce is expected to be responsible for 6.3 trillion USD in worldwide sales by the year 2024.
E-commerce is a highly competitive business, and building a positive user experience is crucial to retaining customers and improving conversions. It is not uncommon for companies to make a significant investment in optimizing the purchase flow on their e-commerce platforms.
One of the most significant components of this experience is the shopping cart.
In this lab, we will be building the IronCart, a shopping cart for the unofficial Ironhack merchandising store. Visitors should be able to add and remove products from the shopping cart, and modify the number (quantity) of items that they want to purchase. Additionally, users should be able to see the subtotal and total price for the items they have added.
-
Fork this repo.
-
Clone it to your machine.
- Upon completion, run the following commands:
$ git add .
$ git commit -m "Solved lab"
$ git push origin master- Create a Pull Request so that your TAs can check your work.
You will do most of your work in the js/index.js file. We added the initial markup in index.html and some basic styling. While developing, make sure you use the same class names as those already used (and available in the CSS file) to make our shopping cart nice and clean.
Let's go!
This LAB is equipped with unit tests to provide automated feedback on your lab progress.
After completing the basic iterations, go to the "Test Your Code" section at the bottom. There you'll be asked to install the testing dependencies and run the tests to check how many tests your code is passing. Once you run the tests, correct your code to pass the failing tests.
Open the index.html in your browser. As you can see, there is only one row in the table that represents one product. In this first iteration, you will be focused just on that product, and later on, we will help you think of ways to upgrade to having multiple products.
Let's take a look at the provided HTML code. We have the table tag with the id #cart, as shown below:
<table id="cart">
  <thead>
    <tr>
      <th>Product Name</th>
      <th>Unit Price</th>
      <th>Quantity</th>
      <th>Subtotal</th>
      <th>Action</th>
    </tr>
  </thead>
  <tbody>
    <tr class="product">
      <!-- ... -->
    </tr>
  </tbody>
  <!-- ... -->
</table>
The one product we currently have in our #cart is placed in the tr with the class product (that goes inside of tbody):
<tr class="product">
  <td class="name">
    <span>Ironhack Rubber Duck</span>
  </td>
  <td class="price">$<span>25.00</span></td>
  <td class="quantity">
    <input type="number" value="0" min="0" placeholder="Quantity" />
  </td>
  <td class="subtotal">$<span>0</span></td>
  <td class="action">
    <button class="btn btn-remove">Remove</button>
  </td>
</tr>
The product has a price and quantity (where quantity represents how many items of a specific product a user has added in the cart). In the provided code, we see that there is also a subtotal price. The subtotal price will be the result of the multiplication of those values.
Your goal is to calculate the subtotal price, but let's approach it gradually. Let's break it down to a couple of steps:
- Step 0: In this step, our goal is to help you understand the provided code in the
js/index.js. Thanks to the provided code, theCalculate Pricesbutton already has some functionality. Using the DOM manipulation, we got the element with theid="calculate"and added an event listenerclickto it. When clicked, this button will fire thecalculateAll()function. The following code snippet does exactly what we explained:
// js/index.js

window.addEventListener('load', () => {
  const calculatePricesBtn = document.getElementById('calculate');
  calculatePricesBtn.addEventListener('click', calculateAll);
});
Don't get confused with .addEventListener() method, it does exactly the same as onclick(), with some differences about which you can find more here. In this lab, you can use whichever method you prefer.
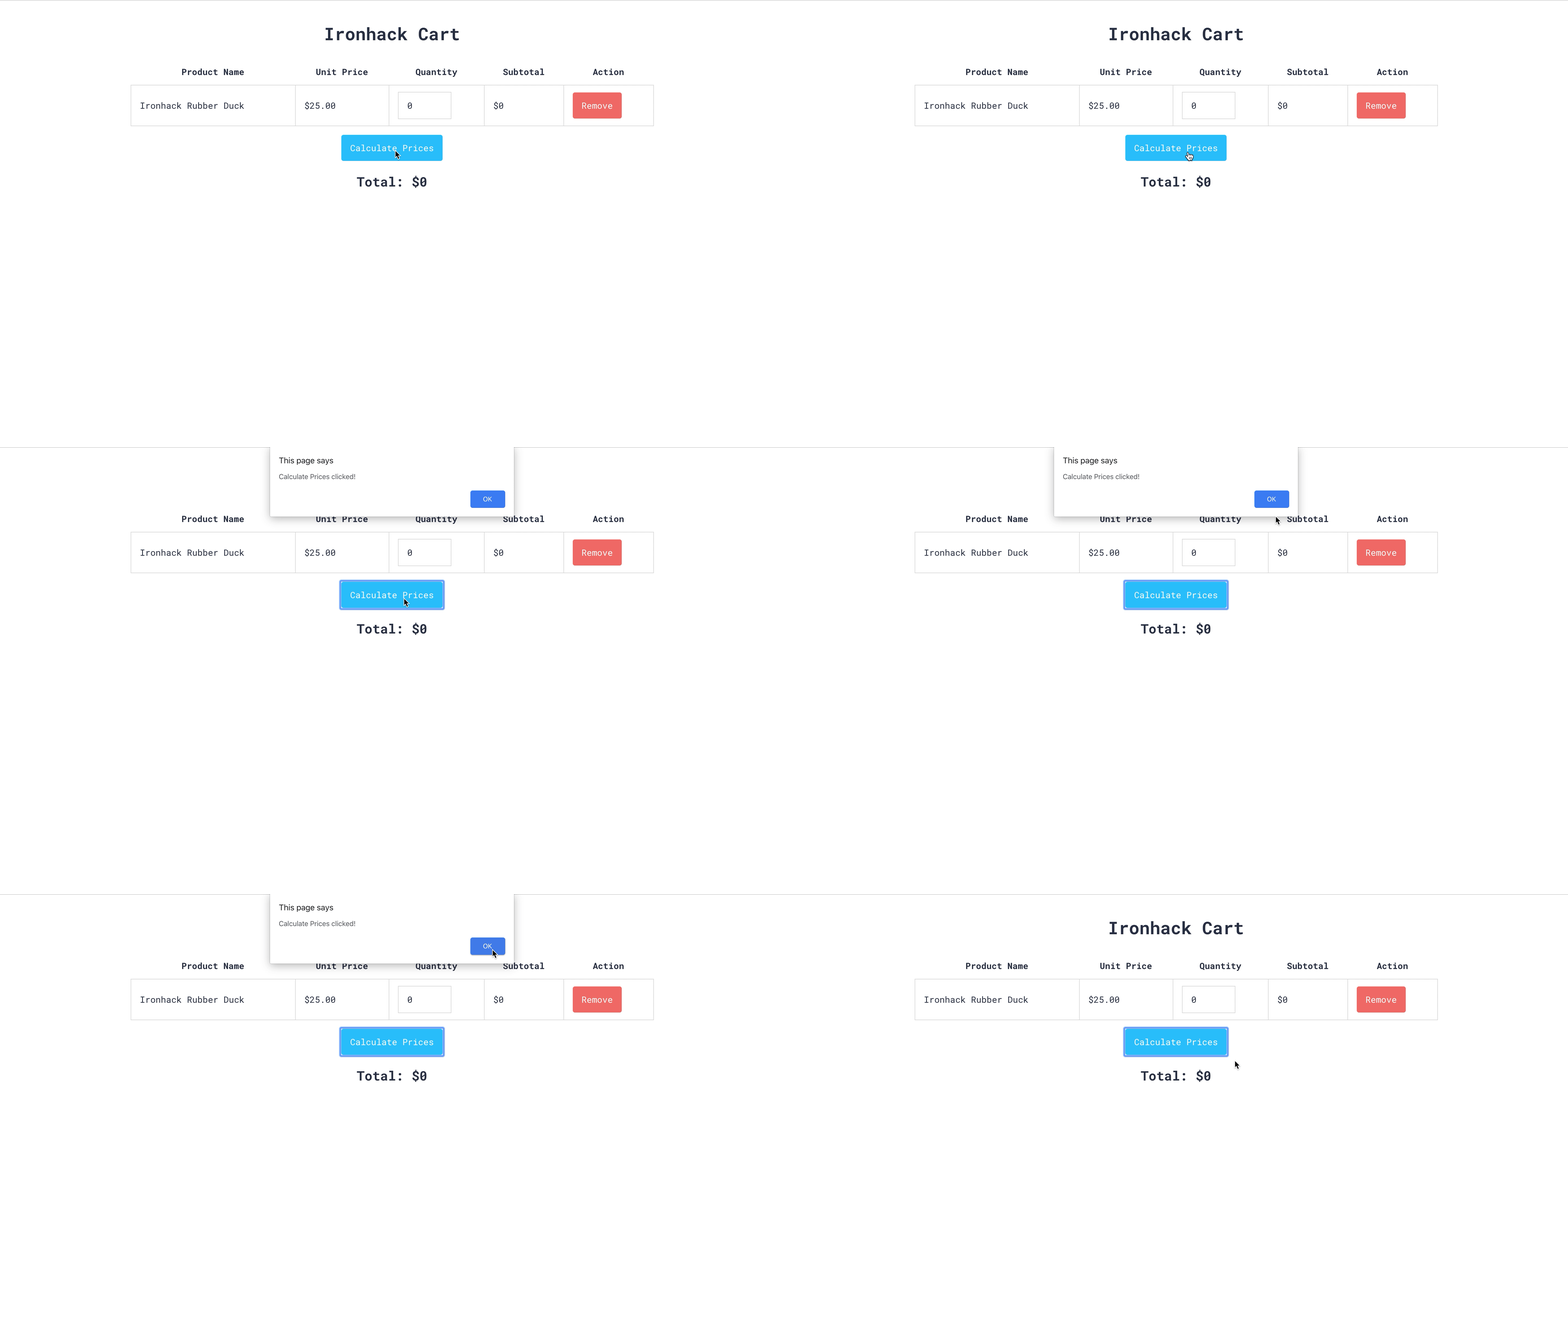
Ok, let's move to the calculateAll() function. In this function, we used querySelector to get the first (and currently the only) DOM element with the class product. This element (which we saved in the variable named singleProduct) is passed as an argument to the updateSubtotal() function. As you can find in the comments, the provided code snippet is used only for testing purposes within iteration 1.
function calculateAll() {
  // code in the following two lines is added just for testing purposes.
  // it runs when only iteration 1 is completed. at later point, it can be removed.
  const singleProduct = document.querySelector('.product');
  updateSubtotal(singleProduct);
  // end of test

  // ITERATION 2
  //...
  // ITERATION 3
  //...
}
And finally, we started the updateSubtotal(product) function. For now, the only thing this function is doing is alerting Calculate Prices clicked! when the Calculate Prices button is clicked.
Let's start:
- Step 1: Inside
updateSubtotal(), create two variables (we suggest naming thempriceandquantity) and use your just gained DOM manipulation skills to GET DOM elements that hold price and quantity. To give you a head start, you could use the following code to get the DOM element holding theprice:
// js/index.js
function updateSubtotal(product) {
  const price = product.querySelector('.price span');
  // ... your code goes here
}-
Step 2: Now, when you got the above mentioned DOM elements, your next step should be extracting the specific values from them. Hint: maybe
innerHTMLrings a bell? In case you are curious to find other ways to achieve the same result, you can start with checkingtextContentandinnerTexton Google. Additionally, you can extract the value from an input by accessing an the input element'svalueproperty. However, don't get distracted here, let this be your additional reading when you complete the lab. -
Step 3: Use the values you extracted from the above mentioned DOM elements to calculate the subtotal price. You can create a new variable, and its value will be equal to the product of these values. Ex. If a user picked 3 Ironhack Rubber Ducks, they should see that the subtotal is 75 dollars ($25 * 3 = $75).
-
Step 4: Now, when you are becoming DOM manipulation ninja, use your skills once again to get the DOM element that should hold the subtotal. Hint: it is the element with the class
subtotal. -
Step 5: In step 3, you calculated the subtotal price, and in step 4, you got the DOM element that should have displaying this price. In this step, your goal is to set the subtotal price to the corresponding DOM element. Also, make sure this function returns the value of subtotal so you can use it later when needed.
In this iteration, you have completed creating the function updateSubtotal that calculates the subtotal for this specific product, updates the subtotal value for that same product in the DOM and return the subtotal value.
As a single argument, the function should take a DOM node that corresponds to a single tr element with a product class. In the boilerplate code included, we called it product.
function updateSubtotal(product) {
  // ...
}
💡 Hint: Make sure your calculateAll() function has the testing code we previously mentioned. If the code is in its place after you successfully finished the updateSubtotal() function, you should be able to see the corresponding updates in the Subtotal field in the table.
Check here the expected output.
Our current code works perfectly for one product, but we expect to have more than one product on our cart. As such, we will use calculateAll to trigger the update of subtotals for every product.
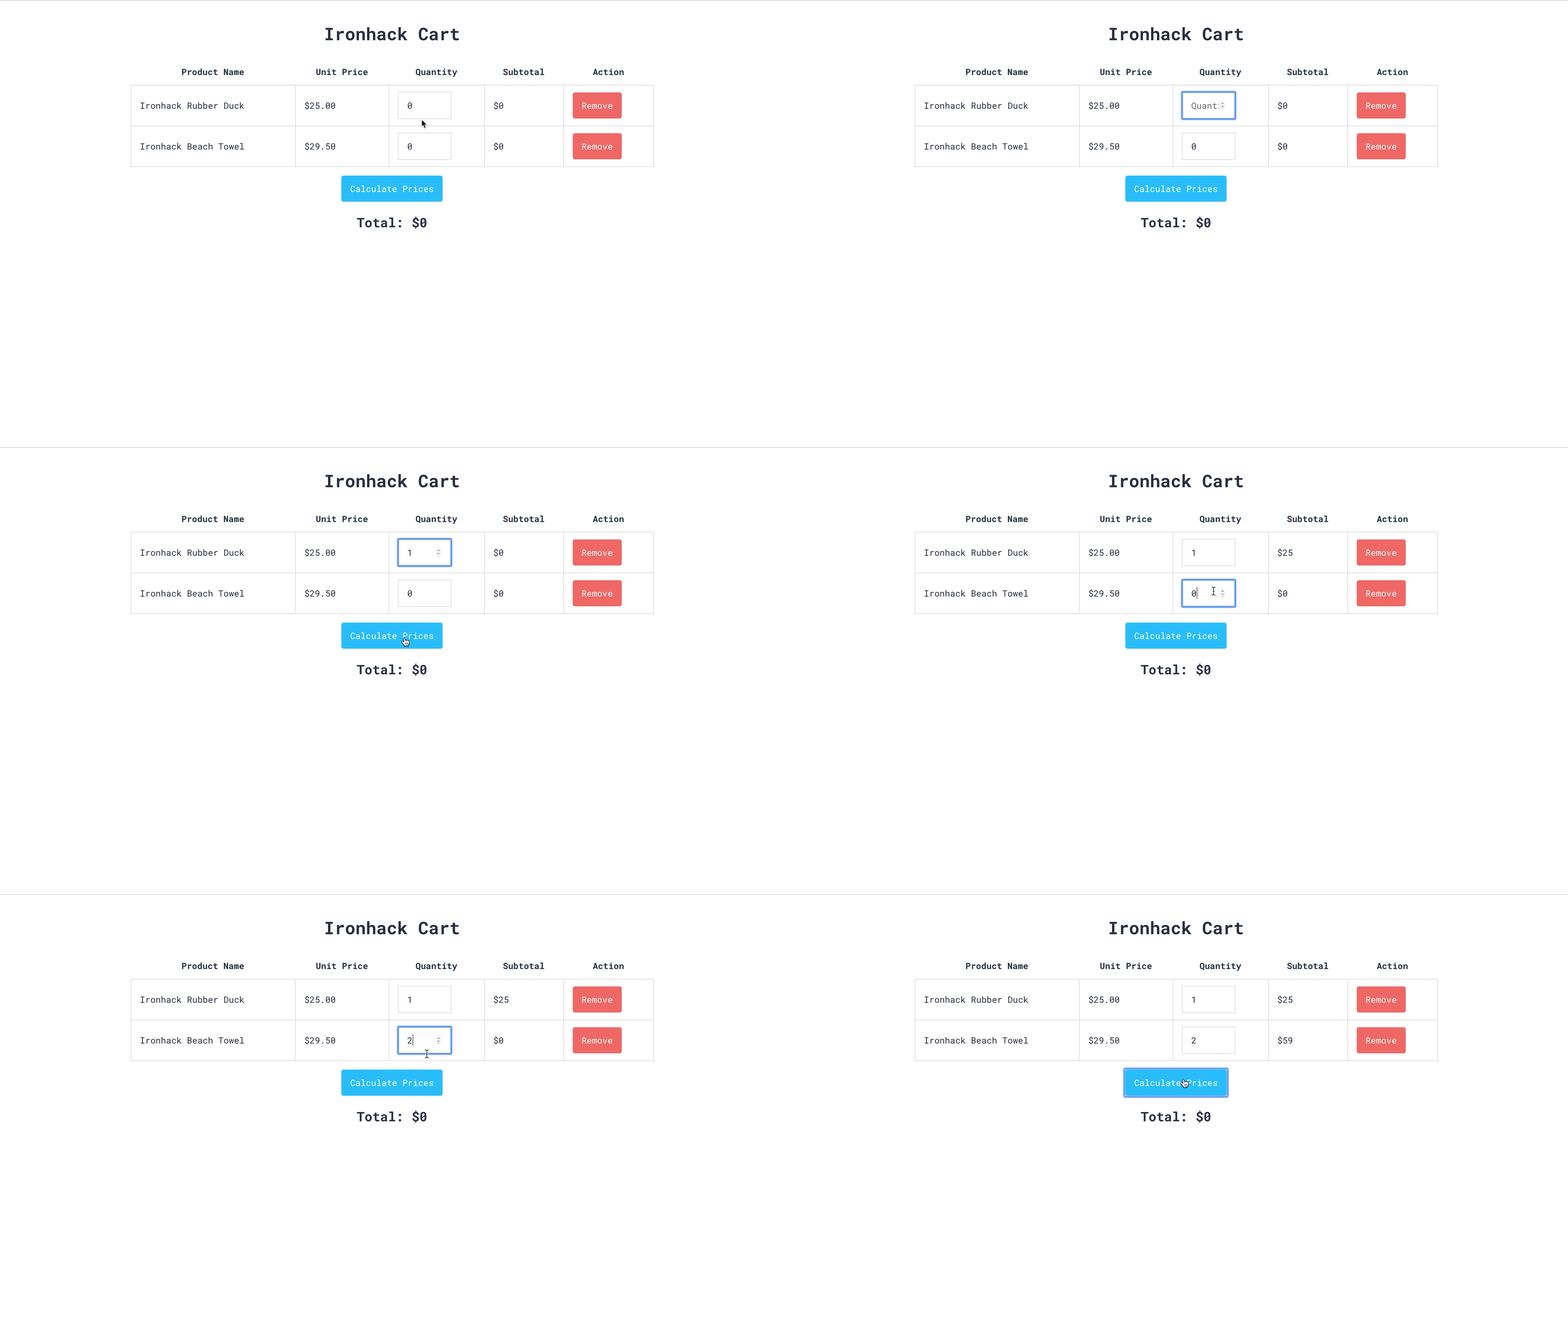
Complete the function named calculateAll(). Its purpose is to call the function updateSubtotal with every tr.product DOM node in the table#cart.
To start, remove or comment out the existing code inside the calculateAll() (the code we used for the testing purposes). Also, let's add a new product to our index.html file. Duplicate the tr with the class product, rename the product inside, and change the product price.
💡 Hint: Start with getting the DOM nodes for each product row. Currently, we have two products; thus, we have two rows with the class product. Maybe using getElementsByClassName could serve well here.
function calculateAll() {
  // ...
}
The final output should look like the following:
Our calculation functionality is still incomplete. The subtotal for each product is being updated, but the total value remains untouched.
At the end of the calculateAll() function, reuse the total value you just calculated in the previous iteration and update the corresponding DOM element. Calculate the total price for the products in your cart by summing all of the subtotals returned by updateSubtotal() when it was called with each product.
Lastly, display that value on your DOM.
Users should be able to remove products from their carts. For that purpose, every product row in our table has a "Remove" button at the end.
But let's try to solve our problem one bit at a time. Inside of the existing function you're passing to window.addEventListener(), start with querying the document for all "Remove" buttons, loop through them, and add a click event listener to each, passing a named function removeProduct as the callback argument. If you need a hint on how to do this, just take a look at how we did it with adding event listener on the calculatePricesBtn.
We already declared removeProduct(event) and added some starter code. After you are done with querying the remove buttons and adding the click event listener on them, open the console and click on any Remove button.
As we can see, removeProduct(event) expects the event as a single argument, and that is going to trigger the removal of the corresponding product from the cart.
💡 Tip: To access the element an event was fired on, you can reference event.currentTarget. To remove a node from the DOM, you need to access its parent node and call removeChild on it. You can access the parent of a DOM node from its property parentNode.
Make sure the price gets updated accordingly when you remove products from the shopping cart.
Click here to see the expected result.
To finish it off, we will allow the user to add a custom product to their cart.
Uncomment the tfoot element and its children from the index.html file:
<table>
  <tbody>
    <!-- ... -->
  </tbody>
  <!-- <tfoot>
    <tr class="create-product">
      <td>
        <input type="text" placeholder="Product Name" />
      </td>
      <td>
        <input type="number" min="0" value="0" placeholder="Product Price" />
      </td>
      <td></td>
      <td></td>
      <td>
        <button id="create" class="btn">Create Product</button>
      </td>
    </tr>
  </tfoot> -->
</table>
The two inputs inside of tfoot represent the name for the new product and the unit price, respectively. The "Create Product" button should add a new product to the cart when triggered.
Add a click event handler to the "Create Product" that will take a function named createProduct as a callback.
In createProduct you should target the name and unit price input DOM nodes, extract their values, add a new row to the table with the product name and unitary price, as well as the quantity input and "Remove" button, and ensure that all of the functionality works as expected.
Remember, the new product should look undistinguished and behave like any of the products previously included in the cart. As such, one should be able to calculate its subtotal when the "Calculate All" button is clicked, and remove the product.
When the product creation is finalized, please, clear the input fields in the creation form.
Click here to see the expected result.
We will be working with automated tests again!
Please, open your terminal, change directories into the root of the lab, and run npm install to install the test runner. Now, you can run the npm run test:watch command to run automated tests in watch mode. Open the resulting lab-solution.html file using the "Live Server" VSCode extension to always see the test results.
$ cd lab-dom-ironhack-cart
$ npm install
$ npm run test:watch
In case you want to check the tests for more details, they are in the tests/ironhack-cart.spec.js file.
Happy coding! 💙


