Materials for a British Library, Digital Scholarship "hack and yack" workshop.
Zooniverse is probably the world’s most popular crowdsourcing platform, used by dozens of cultural heritage organisations. But the resulting annotations from Zooniverse can be hard to use ‘as is’. Do you want to learn how to turn Zooniverse data into something you can use in catalogues, on web pages or in research? Then this session is for you! Zooniverse: how to download and analyse your task annotations will introduce the widely used Zooniverse platform and the services it offers, and share new developments in using the Library’s IIIF items on Zooniverse. Then we get hands-on! You’ll learn how to process your annotations to obtain a clean and readable spreadsheet for your project.
- Learn how to download Zooniverse data
- Learn how to run a Jupyter notebook
- Process your zooniverse data and obtain a
.csvfile
The following tutorial has been created for an audience who has some (basic or advanced) knowledge of Python and Jupyter Notebooks. However it is not just limited to them. In fact we want to make sure it is accessible to everyone, even to people who don't have any prior knowledge. Althought it might appear a bit daunting at the beginning, the code is easy to use and you just need to learn how to go through three main simple steps:
- Downloading Zooniverse data
- Uploading the annotations to the Jupyter Notebook
- Exporting the output to your local computer
To make it easier for you to recognise these three steps, just follow the 📌 📌 📌
If you are interested in the entire process, just follow the notebook step by step. We've described every steps so that you can follow each stage of the process. If you have any questions do note hesitate to get in touch with us.
Options for running a Jupyter Notebook might seem a bit confusing at first. You can install software like Anaconda, or use web-based solutions like Colab, a Google product that allows anybody to write and execute arbitrary Python code through the browser. Colab is especially well suited to machine learning, data analysis and education. If you want to know more about Notebooks, take a look at Daniel van Strien’s "Introduction to Jupyter Notebooks: the weird and the wonderful".
If you have run your own Zooniverse task and want to work on your Zooniverse data, we need to start by downloading it from the platform. In the following steps we'll see how to do so. In the following screenshots we have used a Mac, but if you have a Windows computer, the steps should be similar since you will be using your web browser. The most important part of this first instruction of our processing of your Zooniverse data is to remember where you store the files locally (see step 6 below).
First, log in to Zooniverse as you normally would.
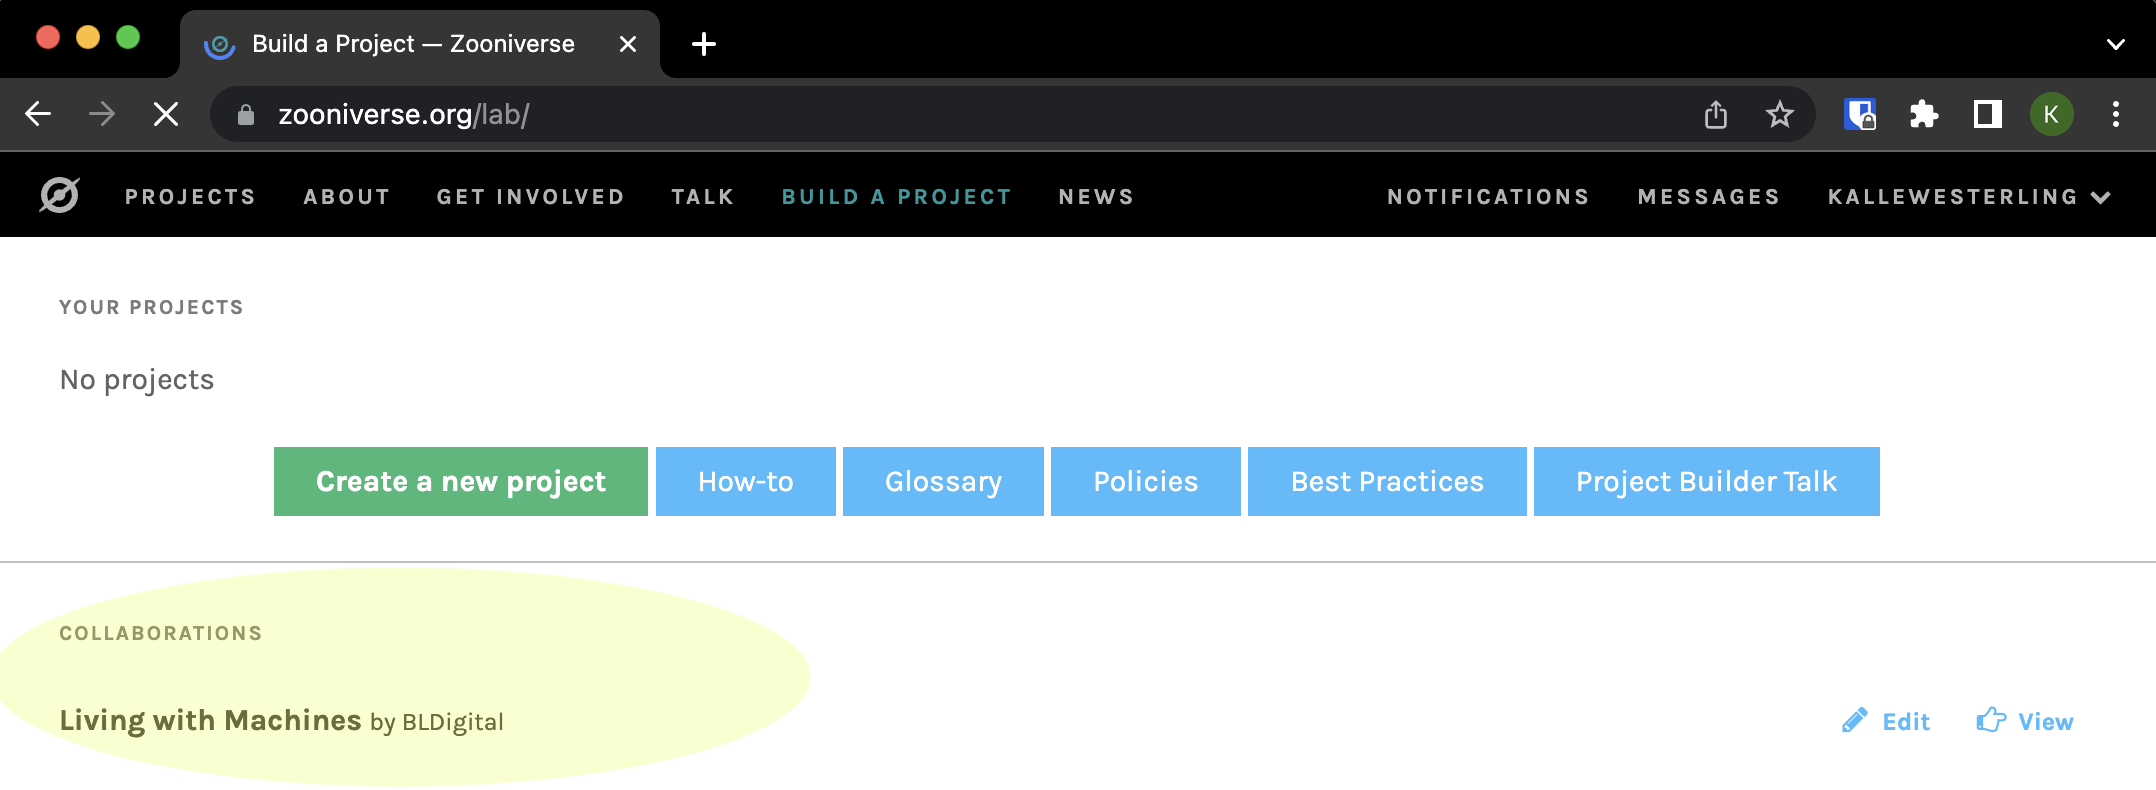
Next, navigate to the Zooniverse lab page. On the page, you will see the projects where you are a collaborator:
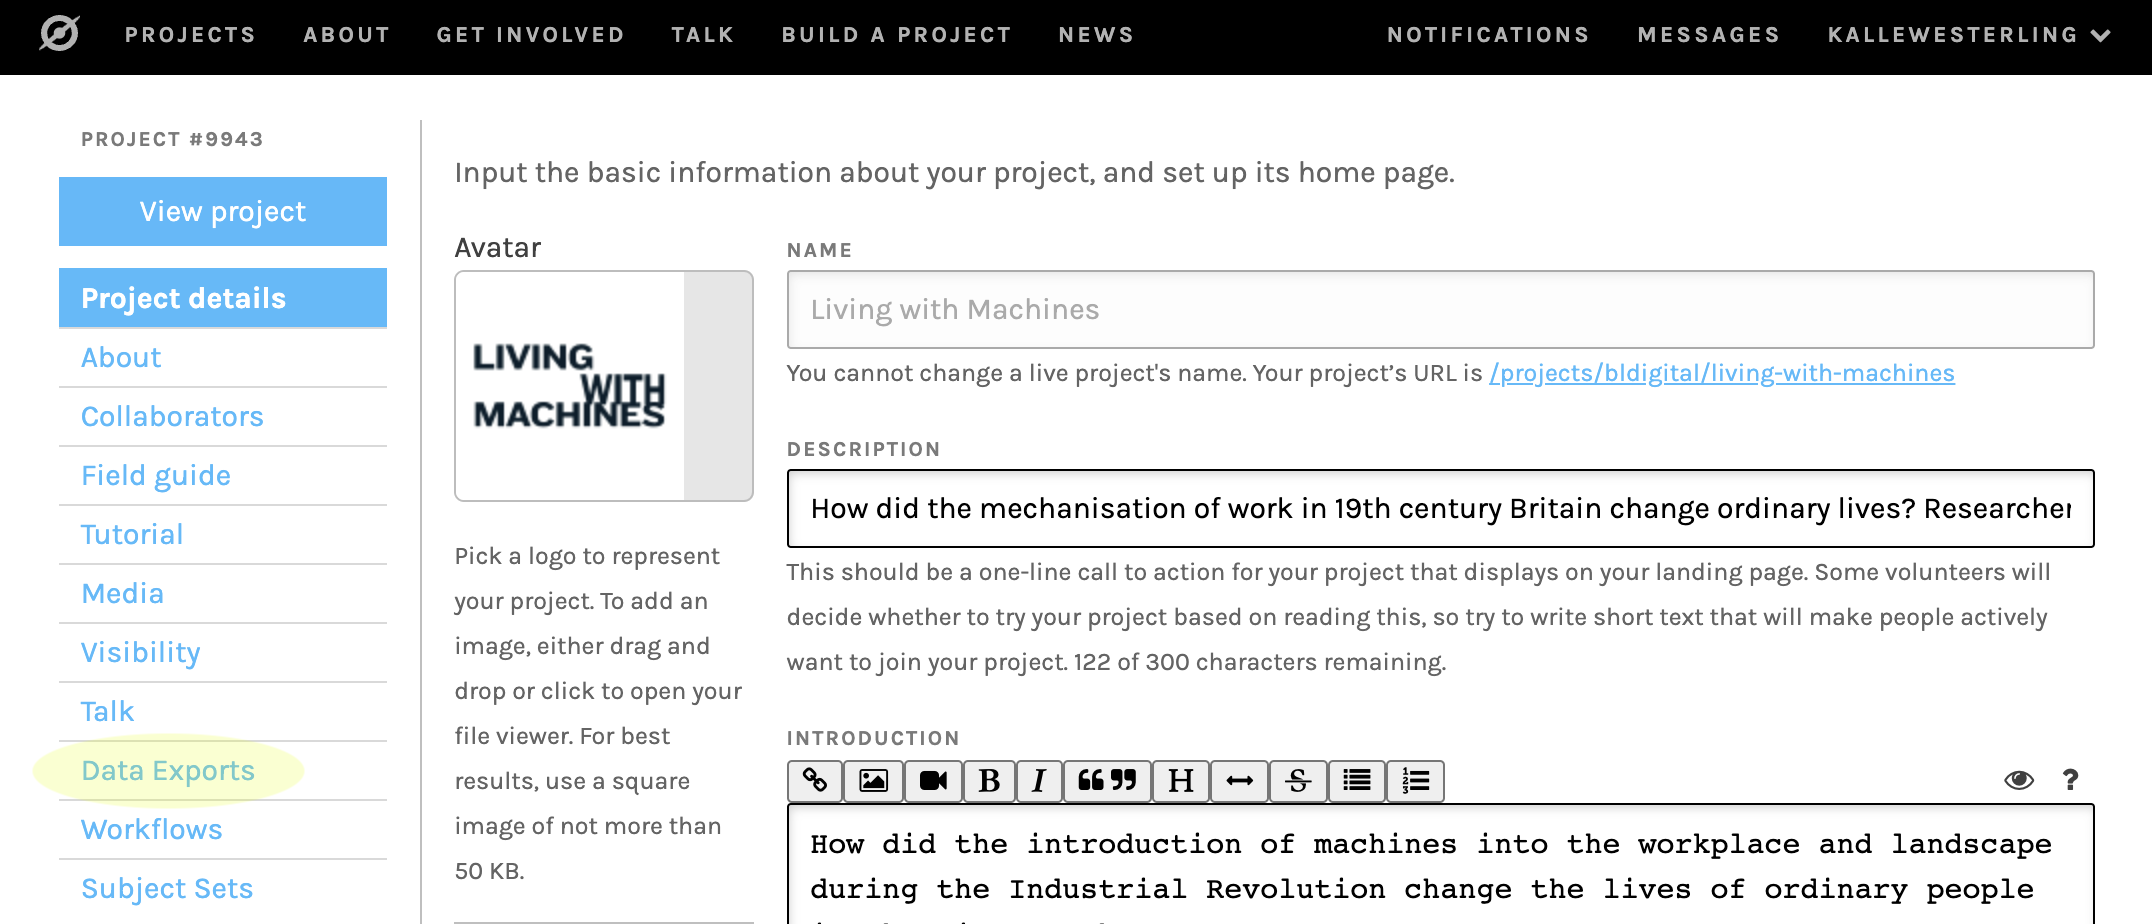
Next, click "Data Exports" in the right-hand menu bar:
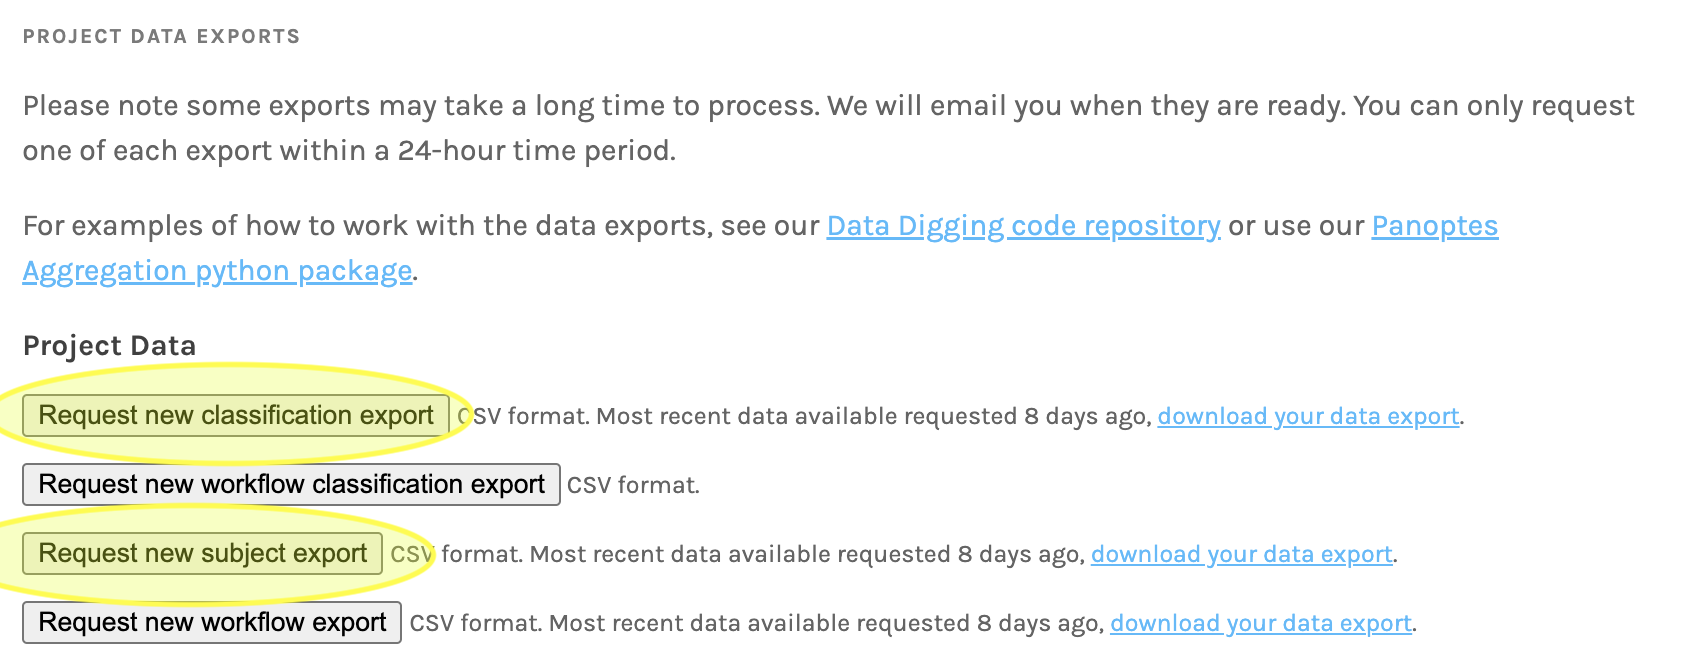
Next, you will want to press the two buttons for "Request new classification export" and "Request new subject export":
Your export might take a little while, but you will receive an email once your request is completed:
Note that clicking the link "Download from your lab data exports page" in the confirmation email will only take you back to the Data Exports page.
Once you are back to the page, you need to use the correct links on the page to download the relevant CSV files:
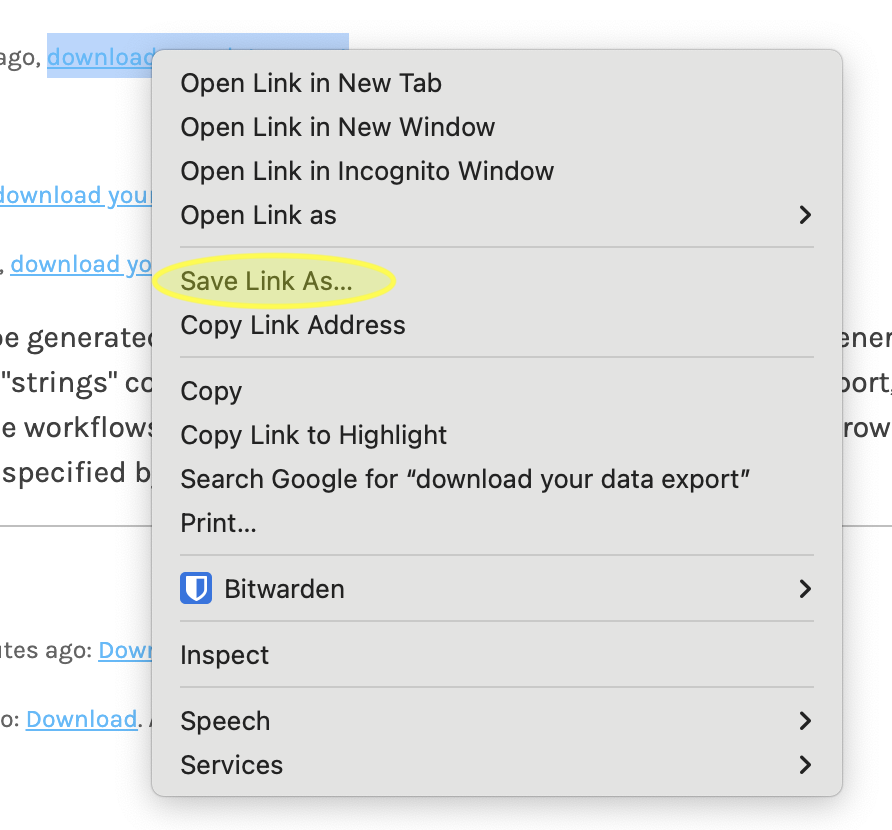
For each of those two files, right-click and choose "Save Link As..."
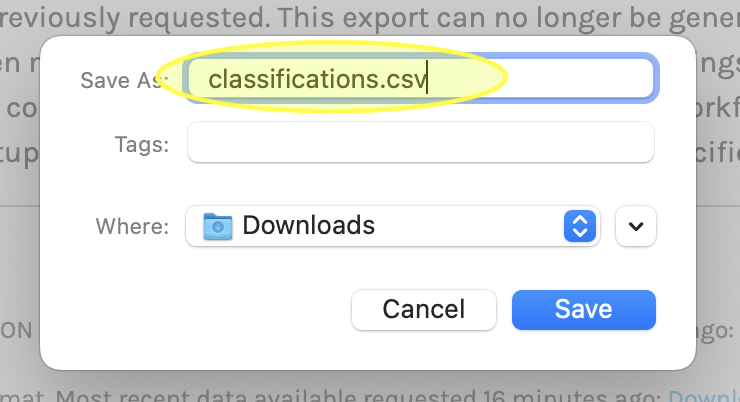
Finally, you can save the file wherever you want on your computer, but remember the correct path to the files as you will need to fill them out in the next cell! We suggest that you save the files with the names classifications.csv and subjects.csv in your Downloads folder as you will easily remember where you put them if you do so.
Now, in the first cell in our notebook, we will register the path to the classifications file (as the classifications_file variable) and the subject file (as the subjects_file variable). All that information is included in the notebook itself.
In this workshop, we will use Notebooks on Colab.
To open the Colab Notebook, follow this link:
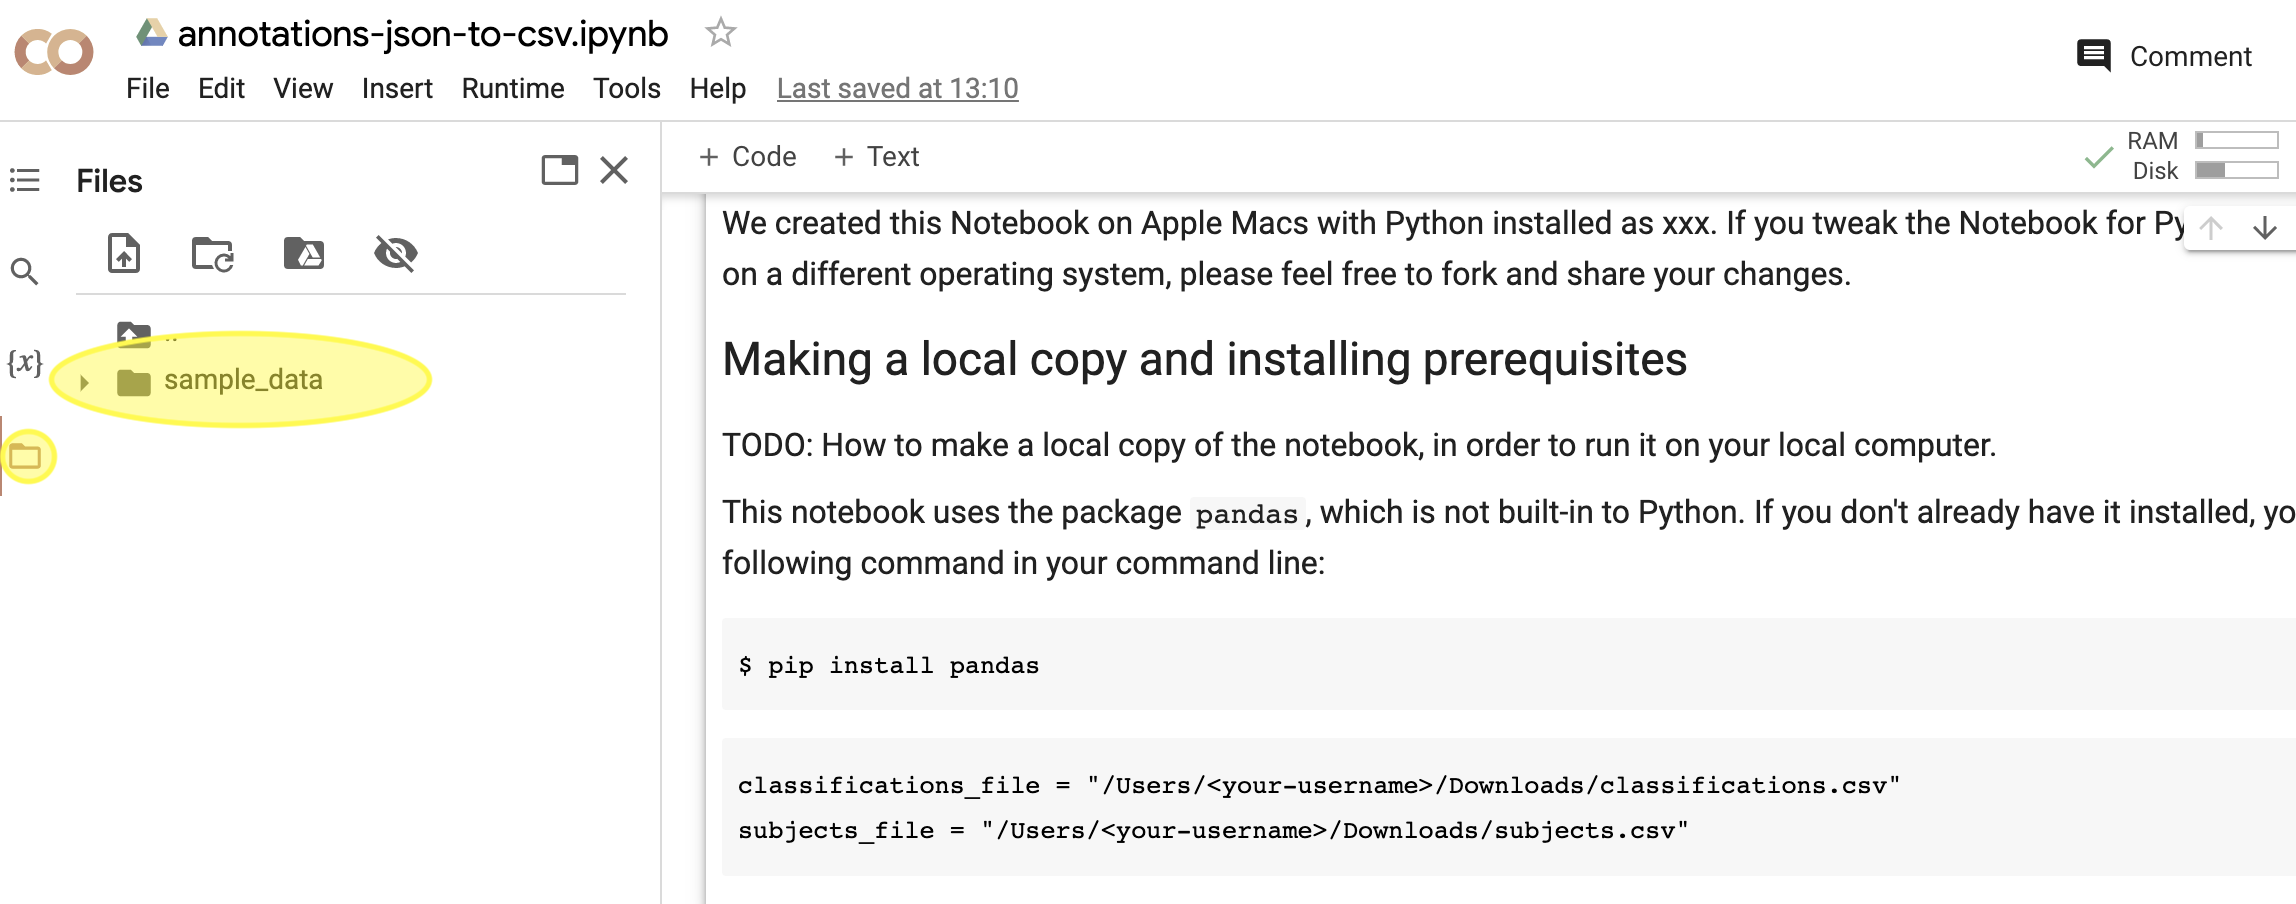
Once you are inside your Colab Notebook, you need to upload the data. On the left side of the Colab interface you will see a folder called Sample Data. If it is hidden you can click on the icon of the folder:
Drag and drop your files in the sample_data folder.
Now you are ready to start processing your data. To do so let’s move to the notebook.
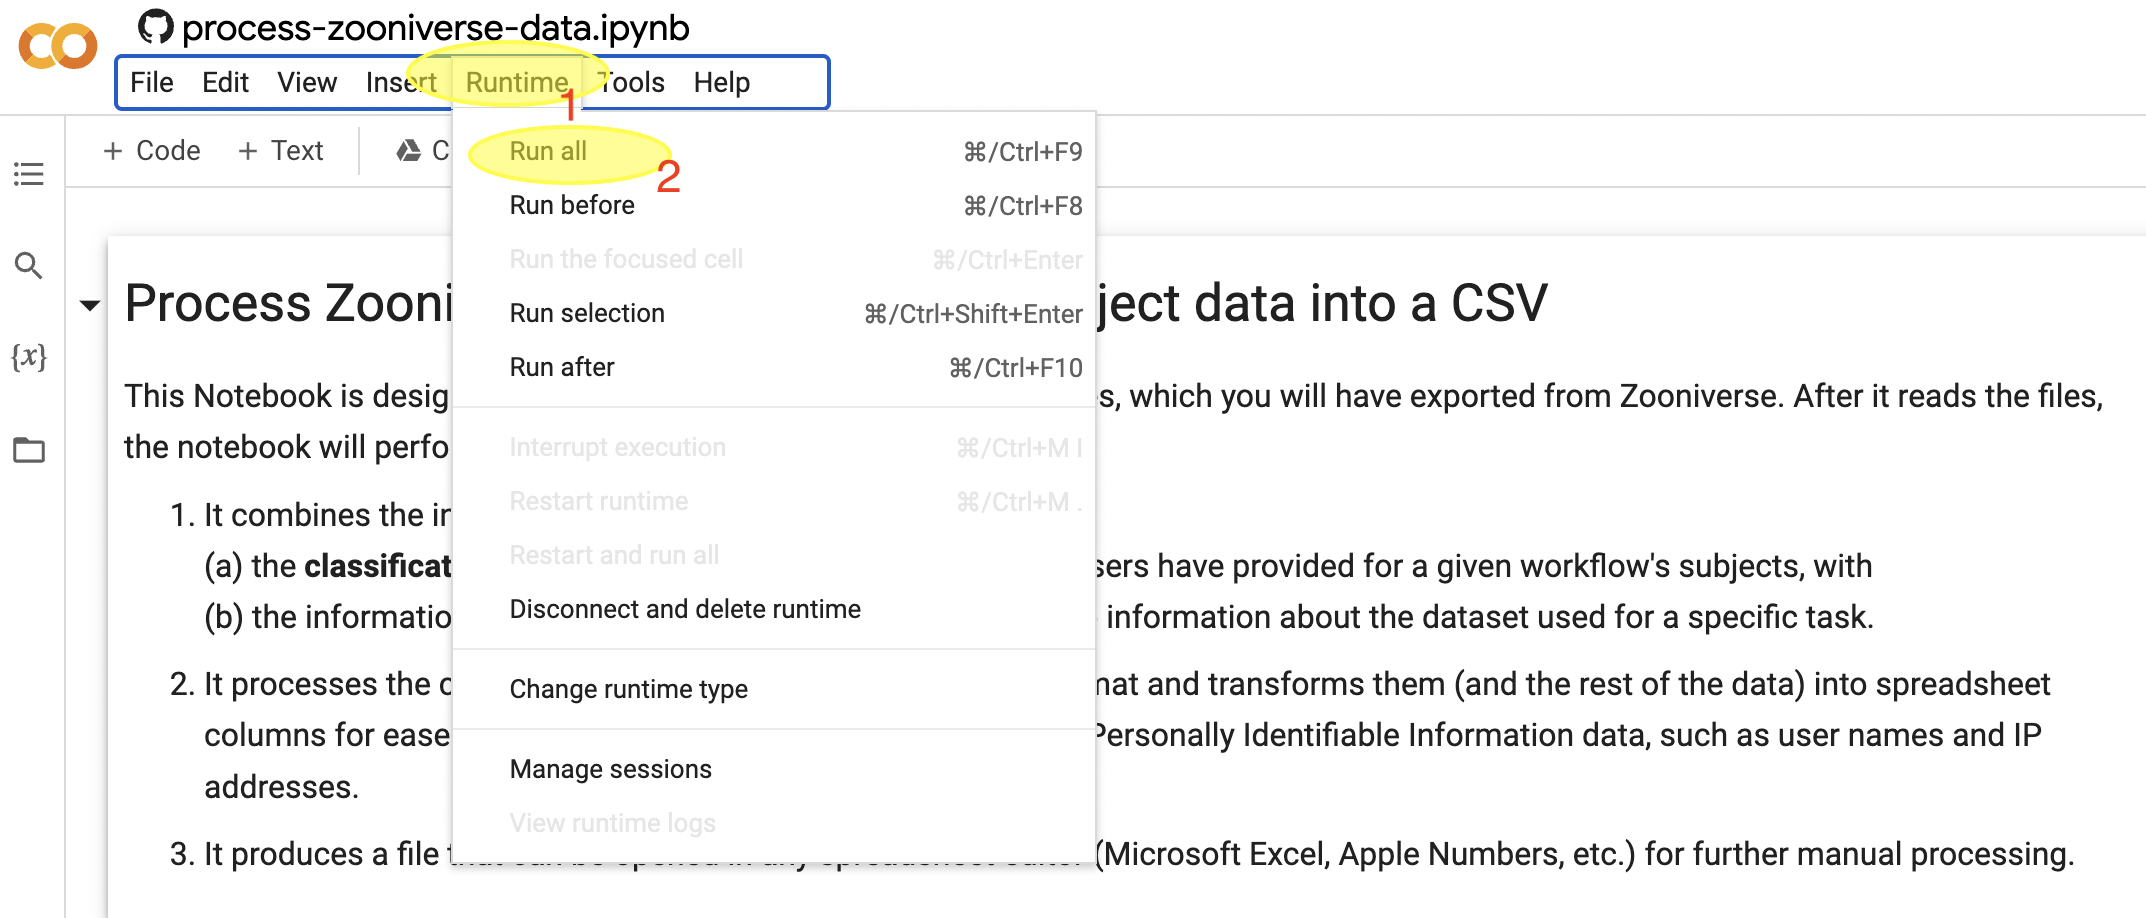
At this point, you simply need to click on Runtime and Run all (as suggested in the following screenshot)
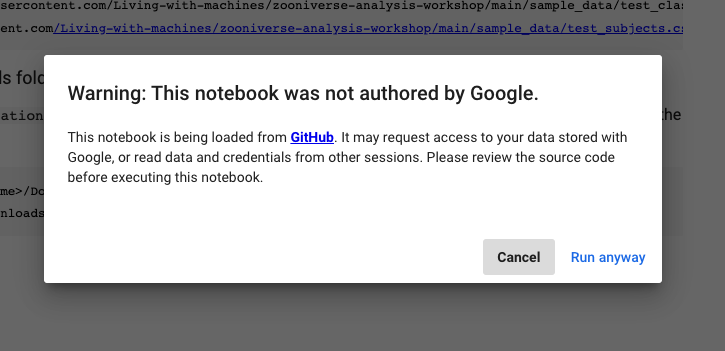
First, note that if you run the Colab, you will need to select "Run anyway" in this warning that will show up in your browser:
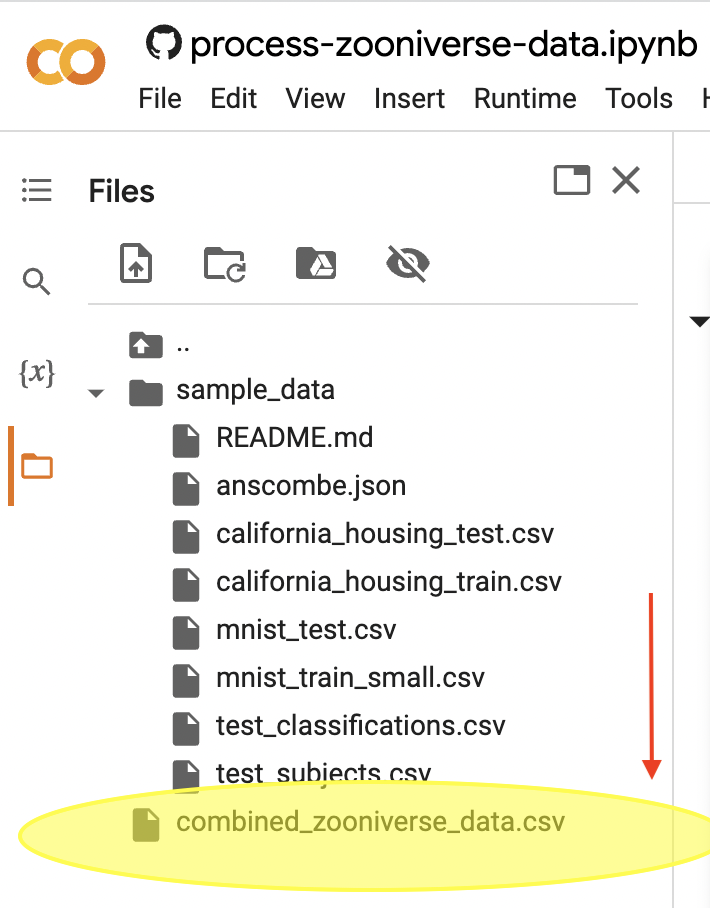
Once your notebook has finised processing the annotations, you'll see appearing your file on the Sample Data folder on the left side of your notebook. If you don't see it, just hover over the folder icon and the section will expand.
To download your annotations simply click on the three dots at the right and select download. This way you'll save a version of the processed annotations on your local machine.
