Java 17 or later
Maven 3.6 or later
Docker 20.10.14 or higher (to run locally)
If you have gone through the Explore Kalix Virtaully journey, you are all set to :
- Run locally in prod-like environment
- Deploy and run on Kalix Platform on Cloud Provider of your choice
However, if you would like to better understand the Kalix Developer Experience and how to build applications on Kalix, here is more details on the same-use.

eCommerce use case is a simple shopping cart example consisting of product stock and shopping cart.
Product stock models stock (simple quantity) of products that are being sold and Shopping Cart models list of products customer intends to buy.
In this exercise focus is on implementing Product Stock functionalities
Data model:
- quantity
Note: Product stock data model does not hold the productId because the HTTP/REST API is designed around productId itself. Operations:
- CREATE/READ/UPDATE/DELETE product stock
Kalix components are building blocks used to abstract functionalities.
In this use case we are going to use Kalix component called Entity.

Entity:
- component for modeling of data and data business logic operations
- removes complexities around data:
- caching
- concurrency
- distributed locking
- simplifies data modeling, business logic implementation with out-of-the box scalability, resilience
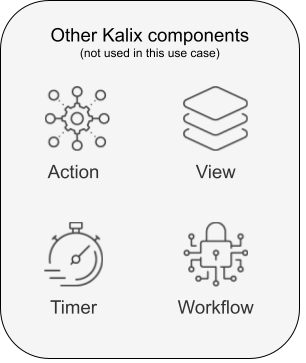
Kalix provides other components that are not used in this use case and more details can be found in Kalix documentation:

Product Stock Service
- implements Product Stock functionalities
- Kalix component used: Entity

ProductStock Entity
- models one product stock instance and business logic operations over that one instance
Data model
- quantity
API
- HTTP/RES
- Endpoints:
-
Create
POST /product-stock/{productId}/createRequest (JSON):
- quantity (int)
Response (String): "OK"
-
Read
GET /product-stock/{productId}/getRequest (JSON): No bodyResponse (JSON):
- quantity (int)
-
Update
PUT /product-stock/{productId}/updateRequest (JSON):
- quantity (int)
Response (String): "OK"
-
Delete
DELETE /product-stock/{productId}/deleteRequest (JSON): No body
Response (String): "OK"
-
Kalix Maven ArchType generates a new Maven development project from Kalix template
Execute in command line:
mvn archetype:generate \
  -DarchetypeGroupId=io.kalix \
  -DarchetypeArtifactId=kalix-spring-boot-archetype \
  -DarchetypeVersion=1.2.1
Use this setup:
Define value for property 'groupId': com.example
Define value for property 'artifactId': kalix-trial-shoppingcart
Define value for property 'version' 1.0-SNAPSHOT: :
Define value for property 'package' com.example: : com.example.shoppingcart
Maven ArchType generates Maven project:

pom.xmlwith all pre-configured Maven plugins and dependencies required development, testing and packaging of Kalix service codeMain, Java Class for bootstrapping Kalix serviceresourcesdirectory with minimal required configurationitdirectory with integration test example
Create ProductStock Java record in com.example.shoppingcart package.
Add helper methods for creating empty product stock structure and to validate if isEmpty.
public record ProductStock(Integer quantity){
    public static ProductStock empty(){
        return new ProductStock(null);
    }
    @JsonIgnore
    public boolean isEmpty(){
        return quantity == null;
    }
}
- Create
ProductStockEntityJava class incom.example.shoppingcartpackage thatextendskalix.javasdk.valueentity.ValueEntitywith inner typeProductStocktype - Add
productIdclass parameter - Add constructor for Kalix to inject
ValueEntityContextfrom whichentityIdis used setproductId - Annotate
ProductStockEntityclass with spring web bind annotation@RequestMappingand configure path withproductIdas in-path parameter - Annotate class with
@EntityKey("productId")to configure entity key toproductId - Annotate class with
@EntityType("product-stock")to assign reference name to the entity - Override
emptyStatemethod and returnemptyProductStockvalue
@EntityKey("productId")
@EntityType("product-stock")
@RequestMapping("/product-stock/{productId}")
public class ProductStockEntity extends ValueEntity<ProductStock>{
    private final String productId;
    public ProductStockEntity(ValueEntityContext context) {
            this.productId = context.entityId();
    }
    @Override
    public ProductStock emptyState() {
       return ProductStock.empty();
    }
}
- Annotate
ProductStockEntityclass with spring web bind annotation@RequestMappingand configure path withproductIdas in-path parameter - For each endpoints:
- To
ProductStockEntityclass add method per endpoint (create,get,update,delete) - Each method:
- input: HTTP request data structure (using spring web annotations)
- return:
ValueEntity.Effectwith HTTP response data structure as an inner type - using spring web annotation mappings for REST method and path mapping (
@PostMapping,...)
- To
@EntityKey("productId")
@EntityType("product-stock")
@RequestMapping("/product-stock/{productId}")
public class ProductStockEntity extends ValueEntity<ProductStock>{
   private final String productId;
   public ProductStockEntity(ValueEntityContext context) {
   		this.productId = context.entityId();
   }
   @Override
   public ProductStock emptyState() {
     return ProductStock.empty();
   }
   @PostMapping("/create")
   public Effect<String> create(@RequestBody ProductStock productStock){}
   @GetMapping("/get")
   public Effect<ProductStock> get(){}
   @PutMapping("/update")
   public Effect<String> update(@RequestBody ProductStock productStock){}
   @DeleteMapping("/delete")
   public Effect<String> delete(){}
}
Helper methods from ValueEntity class:
currentState()facilitates access to current value of the data for that product stock instance (e.g. productId: 111)effects()facilitates actions that Kalix needs to performupdateState()- to persist datathenReply()- to send response after persistence is successfulerror()- to send error response back- Kalix ensures that each method (create, get, update, delete) is executed in sequence for one product stock instance (e.g. productId: 111) ensuring consistency and resolving concurrent access.
Business logic for create is to persist product stock data if not yet exists. In other cases returns an ERROR.
@PostMapping("/create")
public Effect<String> create(@RequestBody ProductStock productStock){
   if(currentState().isEmpty())
       return effects().updateState(productStock).thenReply("OK");
   else
       return effects().error("Already created");
}
Business logic for get is to product stock data if exists and if not return not found error.
@GetMapping("/get")
public Effect<ProductStock> get(){
   if(currentState().isEmpty())
       return effects().error("Not found", Status.Code.NOT_FOUND);
   else
       return effects().reply(currentState());
}
Business logic for update is to update product stock data if product was already created. If product is not found, return NOT FOUND error.
@PutMapping("/update")
public Effect<String> update(@RequestBody ProductStock productStock){
   if(currentState().isEmpty())
       return effects().error("Not found", Status.Code.NOT_FOUND);
   else
       return effects().updateState(productStock).thenReply("OK");
}
Business logic for delete is delete data if product stock exists and return NOT FOUND error if not.
Here the soft delete is done by emptying the Product Stock.
@DeleteMapping("/delete")
public Effect<String> delete(){
   if(currentState().isEmpty())
       return effects().error("Not found", Status.Code.NOT_FOUND);
   else
       return effects().updateState(ProductStock.empty()).thenReply("OK");
}
Kalix comes with very rich test kit for unit and integration testing of Kalix code
Test kit provides help (custom assertions, mocks,...) with:
-
unit testing of individual Kalix components (e.g
Entity) in isolation -
integration testing in Kalix Platform simulated environment in isolation
-
Allows easy test automation with very high test coverage
- Create a new
test/javadirectories insrcdirectory - Create
com.example.shoppingcartpackage intest/java - Create
ProductStockEntityTestclass created package - Create
testCreatemethod withJUnit Jupiter Testannotation ValueEntityTestKitclass is used for unit testingValue Entitycomponent. Inner types areProductStockandProductStockEntity. It is for unit testing one product instance soproductIdneeds to be providedTestkitcall method is used for triggering each entity endpoint and result isValueEntityResultwith inner type as a HTTP result- result can be used for test assertion
isError- assert errorgetReply- assert replygetUpdatedState- assert persistent data
public class ProductStockEntityTest {
   @Test
   public void testCreate()throws Exception{
       var productId = UUID.randomUUID().toString();
       ProductStock productStock = new ProductStock(10);

       ValueEntityTestKit<ProductStock, ProductStockEntity> testKit = ValueEntityTestKit.of(productId, ProductStockEntity::new);

       ValueEntityResult<String> res = testKit.call(entity -> entity.create(productStock));
       assertFalse(res.isError());
       assertEquals("OK",res.getReply());
       ProductStock persistedProductStock = (ProductStock)res.getUpdatedState();
       assertEquals(productStock.quantity(),persistedProductStock.quantity());
   }
}
Run the unit test:
mvn test
Kalix test kit for integration testing runs code using test containers to simulate Kalix Platform runtime environment. Integration test uses spring reactive WebClient to interact with running code. IntegrationTest class is created during development project kick start and is pre-configured with WebClient Each endpoint is tested from the client perspective
public class IntegrationTest extends KalixIntegrationTestKitSupport {
 @Autowired
 private WebClient webClient;
 private Duration timeout = Duration.of(5, ChronoUnit.SECONDS);
 @Test
 public void test() throws Exception {
   var productId = UUID.randomUUID().toString();
   ProductStock productStock = new ProductStock(10);
   var res = webClient.post()
               .uri("/product-stock/%s/create".formatted(productId))
               .bodyValue(productStock)
               .retrieve()
               .toEntity(String.class)
               .block(timeout);
   var getProductStock = webClient.get()
           .uri("/product-stock/%s/get".formatted(productId))
           .retrieve()
           .toEntity(ProductStock.class)
           .block(timeout)
           .getBody();
   assertEquals(productStock.quantity(),getProductStock.quantity());
 }
}
Run the integration test:
mvn -Pit verify
Run Kalix service locally:
mvn kalix:runAll
This command runs the Kalix service locally and exposes it on localhost:9000.
Testing using CURL:
- Create product:
curl -XPOST -d '{
  "quantity": 10
}' http://localhost:9000/product-stock/apple/create -H "Content-Type: application/json"
Result:
"OK"
- Get product:
curl -XGET http://localhost:9000/product-stock/apple/get
Result:
{"quantity":10}
- Update product:
curl -XPUT -d '{
"quantity": 20
}' http://localhost:9000/product-stock/apple/update -H "Content-Type: application/json"
Result:
"OK"
- Delete product:
curl -XDELETE http://localhost:9000/product-stock/apple/delete
Result:
"OK"
-
Install Kalix CLI https://docs.kalix.io/setting-up/index.html#_1_install_the_kalix_cli
-
Kalix CLI
- Register (FREE)
kalix auth signupNote: Following command will open a browser where registration information can be filled in
2. Loginkalix auth loginNote: Following command will open a browser where authentication approval needs to be provided
- Create a project
kalix projects new kalix-trial-java-ecommerce --region=gcp-us-east1Note:
gcp-is-east1is currently the only available region for deploying trial projects. For non-trial projects you can select Cloud Provider and regions of your choice- Authenticate local docker for pushing docker image to
Kalix Container Registry (KCR)
kalix auth container-registry configureNote: The command will output
Kalix Container Registry (KCR)path that will be used to configuredockerImageinpom.xml
5. Extract Kalix userusernamekalix auth current-loginNote: The command will output Kalix user details and column
USERNAMEwill be used to configuredockerImageinpom.xml -
Configure
dockerImagepath inpom.xmlReplacemy-docker-repoindockerImageinpom.xmlwith:
Kalix Container Registry (KCR)path +/+USERNAME+/kalix-trial-java-ecommerce
Example whereKalix Container Registry (KCR)path iskcr.us-east-1.kalix.ioandUSERNAMEismyuser:
<dockerImage>kcr.us-east-1.kalix.io/myuser/kalix-trial-java-ecommerce/${project.artifactId}</dockerImage>
- Deploy service in Kalix project:
mvn deploy kalix:deploy
This command will:
- compile the code
- execute tests
- package into a docker image
- push the docker image to Kalix docker registry
- trigger service deployment by invoking Kalix CLI
- Check deployment:
kalix service list
Result:
kalix service list
NAME                                         AGE    REPLICAS   STATUS        IMAGE TAG
kalix-trial-shoppingcart                     50s    0          Ready         1.0-SNAPSHOT
Note: When deploying service for the first time it can take up to 1 minute for internal provisioning
- Proxy connection to Kalix service via Kalix CLI
kalix service proxy kalix-trial-shoppingcart
Proxy Kalix CLI command will expose service proxy connection on localhost:8080.
Testing using CURL:
- Create product:
curl -XPOST -d '{
  "quantity": 10
}' http://localhost:8080/product-stock/apple/create -H "Content-Type: application/json"
Result:
"OK"
- Get product:
curl -XGET http://localhost:8080/product-stock/apple/get
Result:
{"quantity":10}
- Update product:
curl -XPUT -d '{
"quantity": 20
}' http://localhost:8080/product-stock/apple/update -H "Content-Type: application/json"
Result:
"OK"
- Delete product:
curl -XDELETE http://localhost:8080/product-stock/apple/delete
Result:
"OK"