Node 18
cURL
Docker 20.10.14 or higher (to run locally)
If you have gone through the Explore Kalix Virtaully journey, you are all set to :
- Run locally in prod-like environment
- Deploy and run on Kalix Platform on Cloud Provider of your choice
However, if you would like to better understand the Kalix Developer Experience and how to build applications on Kalix, here is more details on the same-use.

eCommerce use case is a simple shopping cart example consisting of product stock and shopping cart.
Product stock models stock (simple quantity) of products that are being sold and Shopping Cart models list of products customer intends to buy.
In this exercise the focus is on implementing Product Stock functionalities
Data model:
- quantity
Note: Product stock data model does not hold the productId because the HTTP/REST API is designed around productId itself. Operations:
- CREATE/READ/UPDATE/DELETE product stock
Kalix components are building blocks used to abstract functionalities.
In this use case we are going to use a Kalix component called Entity.

Entity:
- component for modeling of data and data business logic operations
- removes complexities around data:
- caching
- concurrency
- distributed locking
- simplifies data modeling, business logic implementation with out-of-the box scalability, resilience
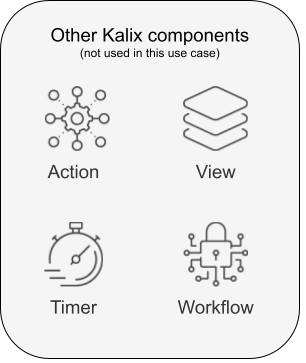
Kalix provides other components that are not used in this use case and more details can be found in Kalix documentation:

Product Stock Service
- implements Product Stock functionalities
- Kalix component used: Entity

ProductStock Entity
- models one product stock instance and business logic operations over that one instance
Data model
- quantity
API
- HTTP/RES
- Endpoints:
-
Create
POST /product-stock/{productId}/createRequest (JSON):
- quantity (int)
Response (JSON): {}
-
Read
GET /product-stock/{productId}/getRequest (JSON): No bodyResponse (JSON):
- quantity (int)
-
Update
PUT /product-stock/{productId}/updateRequest (JSON):
- quantity (int)
Response (JSON): {}
-
Delete
DELETE /product-stock/{productId}/deleteRequest (JSON): No body
Response (JSON): {}
-
Execute in command line:
npx @kalix-io/create-kalix-entity@1.1.0 kalix-trial-shoppingcart-ts --typescript
And then:
cd kalix-trial-shoppingcart-ts
npm install
Generated project structure:

package.jsonwith all pre-configured dependencies required development, testing and packaging of Kalix service codenode_modulesall modules required for development, testing and packaging of Kalix service codeprotodirectory with Kalix protobuf examples
Note: delete Kalix protobuf example files (counter_api.proto, domain/counter_domain.proto).
- Create directory
productstockinproto - Create protobuf file
productstock_domain.protoinsrc/main/protobuf/productstock - Add
ProductStockprotobuf definition that representsProductStockdata structure that is persisted:
syntax = "proto3";
package com.example.shoppingcart.productstock;
message ProductStock{
    int32 quantity = 1;
}
- Create protobuf file
productstock_api.protoinsrc/main/protobuf/productstock - Add protobuf definitions represending Product Stock API requests:
syntax = "proto3";

import "google/protobuf/empty.proto";
import "kalix/annotations.proto";
import "google/api/annotations.proto";

import "productstock/productstock_domain.proto";

package com.example.shoppingcart.productstock;

message CreateProductStockRequest {
  string product_id = 1 [(kalix.field).entity_key = true];
  int32 quantity = 2;
}

message UpdateProductStockRequest {
  string product_id = 1 [(kalix.field).entity_key = true];
  int32 quantity = 2;
}

message DeleteProductStockRequest {
  string product_id = 1 [(kalix.field).entity_key = true];
}

message GetProductStock {
  string product_id = 1 [(kalix.field).entity_key = true];
}
- Add protobuf definition for a
Product StockGRPC service with correspondingrpcmethods representing each endpoint
service ProductStockService {
  rpc Create(CreateProductStockRequest) returns (google.protobuf.Empty);
  rpc Get(GetProductStock) returns (ProductStock);
  rpc Update(UpdateProductStockRequest) returns (google.protobuf.Empty);
  rpc Delete(DeleteProductStockRequest) returns (google.protobuf.Empty);
  }
- Exposing HTTP/REST endpoints from GRPC service using GRPC Transcoding HTTP/JSON to GRPC
service ProductStockService {
  rpc Create(CreateProductStockRequest) returns (google.protobuf.Empty){
    option (google.api.http) = {
      post: "/product-stock/{product_id}/create"
      body: "*"
    };
  }
  rpc Get(GetProductStock) returns (ProductStock){
    option (google.api.http) = {
      get: "/product-stock/{product_id}/get"
    };
  }
  rpc Update(UpdateProductStockRequest) returns (google.protobuf.Empty){
    option (google.api.http) = {
      put: "/product-stock/{product_id}/update"
      body: "*"
    };
  }
  rpc Delete(DeleteProductStockRequest) returns (google.protobuf.Empty){
    option (google.api.http) = {
      delete: "/product-stock/{product_id}/delete"
    };
  }
}
Default ACL policy needs to be added.
- Create file
kalix_policy.protoinproto - Add this content to the file
syntax = "proto3";
import "kalix/annotations.proto";
option (kalix.file).acl = {
    allow: {}
};
Note: more info about ACL (Access Control List)
- Code generation from protobuf definitions
Kalix node module uses defined protobuf definitions to build required codebase where business logic can be developed in.
Kalix node module needs to be configured using custom kalix protobuf definition:
service ProductStockService {
  option (kalix.codegen) = {
    value_entity: {
      name: "com.example.shoppingcart.productstock.ProductStockEntity"
      entity_type: "product-stock"
      state: "com.example.shoppingcart.productstock.ProductStock"
    }
  };
value_entityconfigures key-value as a durable storage modelnameconfigures the name of theEntityclass that is being generatedentity_typeconfigures the entity type reference name that can be used to referenceEntityin other Kalix componentsstateconfigures the reference toProductStockprotobuf definition defined inproductstock_domain.proto
- Generate code using Kalix node module:
npm run build
Generated code:
lib/generatedfolder containing Kalix generated help resourcessrc/index.tsfile controlled by Kalix module that bootstrapssrc/productstockentity.tsskeleton file where business logic needs to be developed intest/productstockentity.test.tsskeleton mocha test file where unit tests need to be developed in
Generated file src/productstockentity.ts provides skeleton methods that need to be implemented for each endpoint.
We need to add GrpcStatus import to be able to use it in our business logic for returning NOT_FOUND error status:
import {GrpcStatus} from "@kalix-io/kalix-javascript-sdk";
Business logic for create is to persist product stock data if not yet exists. In other cases returns an ERROR.
Create(command, state, ctx) {
if(state == ProductStock.create({})) {
  ctx.updateState(ProductStock.create({quantiy: command.quantity}));
  return Reply.message({});
}
return Reply.failure("Already created");
}
Business logic for get is to get product stock data if it exists and if not return not found error.
Get(command, state, ctx) {
if(state == ProductStock.create({}))
  return Reply.failure("Not found", GrpcStatus.NotFound);
return Reply.message(state);
}
Business logic for update is to update product stock data if product was already created. If product is not found, return NOT FOUND error.
Update(command, state, ctx) {
if(state == ProductStock.create({})) {
  return Reply.failure("Not found", GrpcStatus.NotFound);
}
state.quantity = command.quantity;
ctx.updateState(state);
return Reply.message({});
}
Business logic for delete is delete data if product stock exists and return NOT FOUND error if not.
Here the soft delete is done by updating the state to ProductStock.create({}).
Delete(command, state, ctx) {
if(state == ProductStock.create({})) {
  return Reply.failure("Not found", GrpcStatus.NotFound);
}
state = ProductStock.create({});
ctx.updateState(state);
return Reply.message({});
}
Kalix comes with very rich test kit for unit and integration testing of Kalix code.
Test kit provides help (custom assertions, mocks,...) with:
-
unit testing of individual Kalix components (e.g
Entity) in isolation -
integration testing in Kalix Platform simulated environment in isolation
-
Allows easy test automation with very high test coverage
Kalix SDK uses MochaJS and for building unit tests and ChaiJS for assertion.
- Edit
test/productstockentity.test.ts - Delete all tests instead of
handle command Create - Add following test code:
describe("Create", () => {
    it("should...", async () => {
      const entity = new MockValueEntity(productstockentity, entityId);
      const productId = "prod1";
      let quantity = 10;
      const createResult = await entity.handleCommand("Create",
          {
              productId: productId,
              quantity: quantity
          }
      );
      expect(entity.error).to.be.undefined;
      expect(createResult).to.deep.equals({});
      // @ts-ignore
      expect(entity.state.quantity).to.deep.equal(quantity);
    });
});
MockValueEntity is used to mock the behaviour of an Entity.
- Run the unit test:
npm run test
Kalix test kit for integration testing runs code using test containers to simulate Kalix Platform runtime environment. Integration test uses generated grpc client.
- Create file
test/productstock.integration-test.ts - Add following test code:
import { IntegrationTestkit } from "@kalix-io/testkit";

const testkit = new IntegrationTestkit();

import {expect} from "chai"

import productstockentity from "../src/productstockentity";

testkit.addComponent(productstockentity);

function client() {
    return testkit.clients.ProductStockService;
}

describe("ProductStockService",  function () {
    this.timeout(60000);

    before(done => testkit.start(done));
    after(done => testkit.shutdown(done));

    it("Create", async () => {
        const productId = "prod1";
        let quantity = 1;
        await client().createAsync({productId: productId, quantity: quantity});

        const get = await client().getAsync({productId: productId});
        expect(get.quantity).to.deep.equal(quantity);
    });
})
Run the integration test:
npm run test
- Run the Kalix Proxy container:
docker-compose up
- Run Kalix service locally:
npm run start
This command runs the Kalix service locally and exposes it on localhost:9000.
Testing using CURL:
- Create product:
curl -XPOST -d '{
  "quantity": 10
}' http://localhost:9000/product-stock/apple/create -H "Content-Type: application/json"
Result:
"{}"
- Get product:
curl -XGET http://localhost:9000/product-stock/apple/get
Result:
{"quantity":10}
- Update product:
curl -XPUT -d '{
"quantity": 20
}' http://localhost:9000/product-stock/apple/update -H "Content-Type: application/json"
Result:
"{}"
- Delete product:
curl -XDELETE http://localhost:9000/product-stock/apple/delete
Result:
"{}"
-
Install Kalix CLI https://docs.kalix.io/setting-up/index.html#_1_install_the_kalix_cli
-
Kalix CLI
-
Register (FREE)
kalix auth signupNote: Following command will open a browser where registration information can be filled in
-
Login
kalix auth loginNote: Following command will open a browser where authentication approval needs to be provided
-
Create a project
kalix projects new ecommerce --region=gcp-us-east1Note:
gcp-is-east1is currently the only available region for deploying trial projects. For non-trial projects you can select Cloud Provider and regions of your choice -
Authenticate local docker for pushing docker image to
Kalix Container Registry (KCR)kalix auth container-registry configureNote: The command will output
Kalix Container Registry (KCR)path that will be used to configuredockerImageinpom.xml -
Extract Kalix user
usernamekalix auth current-login
Note: The command will output Kalix user details and column USERNAME will be used to configure dockerImage in pom.xml
3. Configure dockerImage path in package.json
Replace my-docker-repo in dockerImage in package.json with:
Kalix Container Registry (KCR) path + / + USERNAME + /ecommerce
Example where Kalix Container Registry (KCR) path is kcr.us-east-1.kalix.io and USERNAME is myuser:
"dockerImage": "kcr.us-east-1.kalix.io/myuser/ecommerce/kalix-trial-shoppingcart-ts"
- Deploy service in Kalix project:
npm run deploy
This command will:
- execute tests
- package into a docker image
- push the docker image to Kalix docker registry
- trigger service deployment by invoking Kalix CLI
- Check deployment:
kalix service list
Result:
kalix service list
NAME                                         AGE    REPLICAS   STATUS        IMAGE TAG
kalix-trial-shoppingcart-ts                  50s    0          Ready         0.0.1
Note: When deploying service for the first time it can take up to 1 minute for internal provisioning
- Proxy connection to Kalix service via Kalix CLI
kalix service proxy kalix-trial-shoppingcart-ts
Proxy Kalix CLI command will expose service proxy connection on localhost:8080.
Testing using CURL:
- Create product:
curl -XPOST -d '{
  "quantity": 10
}' http://localhost:8080/product-stock/apple/create -H "Content-Type: application/json"
Result:
"{}"
- Get product:
curl -XGET http://localhost:8080/product-stock/apple/get
Result:
{"quantity":10}
- Update product:
curl -XPUT -d '{
"quantity": 20
}' http://localhost:8080/product-stock/apple/update -H "Content-Type: application/json"
Result:
"{}"
- Delete product:
curl -XDELETE http://localhost:8080/product-stock/apple/delete
Result:
"{}"