NetFoundry helps you spin up automated, zero trust, network-as-code connections between Oracle Cloud and any other location without waiting for infrastructure, MPLS, or VPNs. This gives the business unprecedented speed, agility, and security with a cloud-based Total Cost of Ownership (TCO) built on the principles of Gen 2 Cloud (elastic, autonomous and secure by design).
For more information refer to the following Oracle NetFoundry blog (coming soon)
NetFoundry Zero Trust Networking Introduction
The following guide is intended to provide you guidance for your Oracle NetFoundry LiveLab environment. It provides simple network configuration steps to help partners & end-users learn about the building blocks of configuring a NetFoundry network. It will help outline each element within the NetFoundry network and provide instructions on how to configure a simple design connecting a Windows client to a web application in a Oracle Cloud on a private IPV4 network. (Any application will do but web is easy to test)
Assumptions
To get started you'll need to have the following:
- A NetFoundry Account/Organization. A seven day free trial is available to all who wish to demo the NetFoundry product and OCI.
NetFoundry Free Trial for Live Lab
- A working public cloud account with networking (such as Oracle/VCN subscription), or have the necessary privilege's to install a virtual machine and/or install software onto a machine in your on premises environment. (ESXi/Hyper-V/VirtualBox). This example will utilize Oracle Cloud Infrastructure.
Oracle Cloud Free Tier for Live Lab
Oracle Cloud VCN Documentation for Live Lab
- An internet connection with outbound connections to the below ports.
Software Components
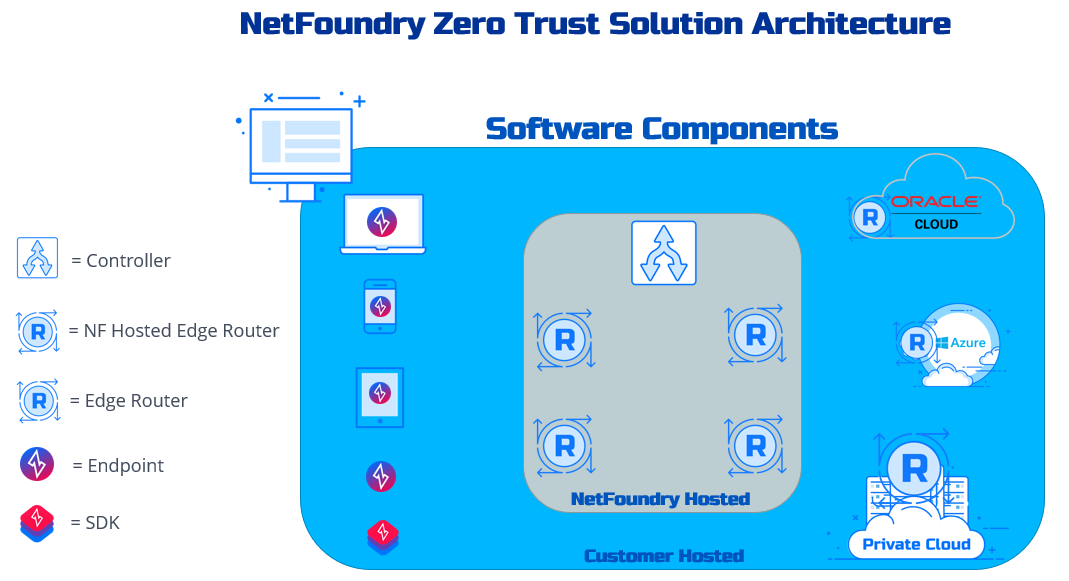
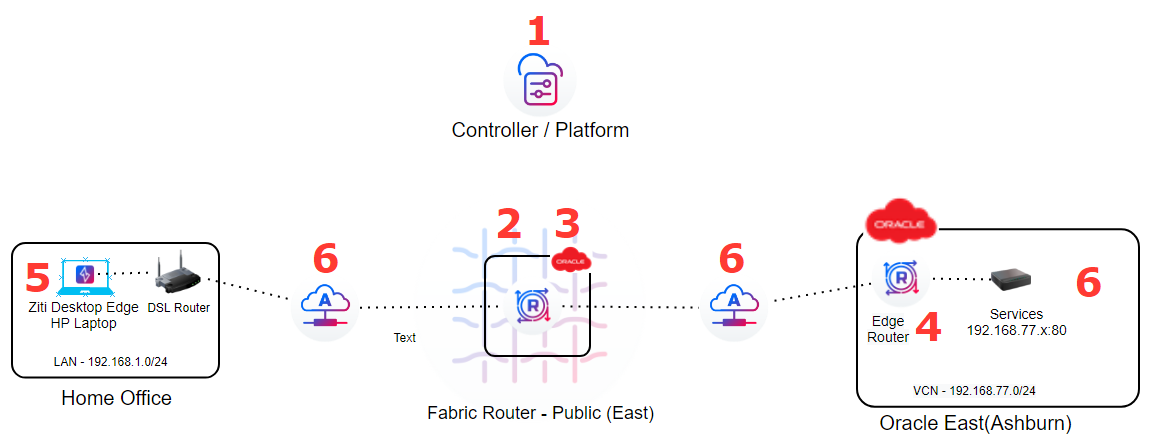
Building the NetFoundry SDN framework consists of 7 major elements:
Organization -- Platform customer/partner URL for organizational platform access - https://company.nfconsole.io. Network -- Dedicated Cloud based controller. Overlay only, not concerned with BGP, IP addressing and route peering. Edge Router Policy -- Transit policy providing access across the fabric. e.g. Which Hosted Edge routers to be used and which endpoints can transit these Hosted Edge Routers. Endpoints Hosted Edge Routers -- NetFoundry managed Global Fabric for middle mile transit. Deployed from the NetFoundry console. Automatically registered. Customer Hosted Edge Routers -- implemented for application termination. Deployed from Cloud Marketplace. Registered by customer manually or through instance deployment script. Endpoints for Windows, MAC, Linux or Mobile for application access or termination or both.
Attributes -- Method to group Endpoints, Edge Routers and Services. e.g. "@myendpoint" implies only that endpoint. "#it-admin" may imply a grouping of multiple IT admin endpoints. Same for services. e.g. @webserver1 & @webserver2 could be grouped into #webservers to ease administration for AppWAN membership.
Services -- IP/Hostname for applications residing in the VCN/VNET/VPC/VLAN. AppWAN -- Policies for providing Services to Endpoints.
Diagram below for logical reference:
Cloud application prep - Create Application in Cloud(Oracle Cloud example)
Identify an application sitting in your Cloud network or create a simple web app (Apache/80). We will provide this example of creating a web server in OCI that your NetFoundry client will access via a private VCN network IP address. If you already have an application in your network, you can skip to the next section(A, B & C).
From within your Cloud console, select

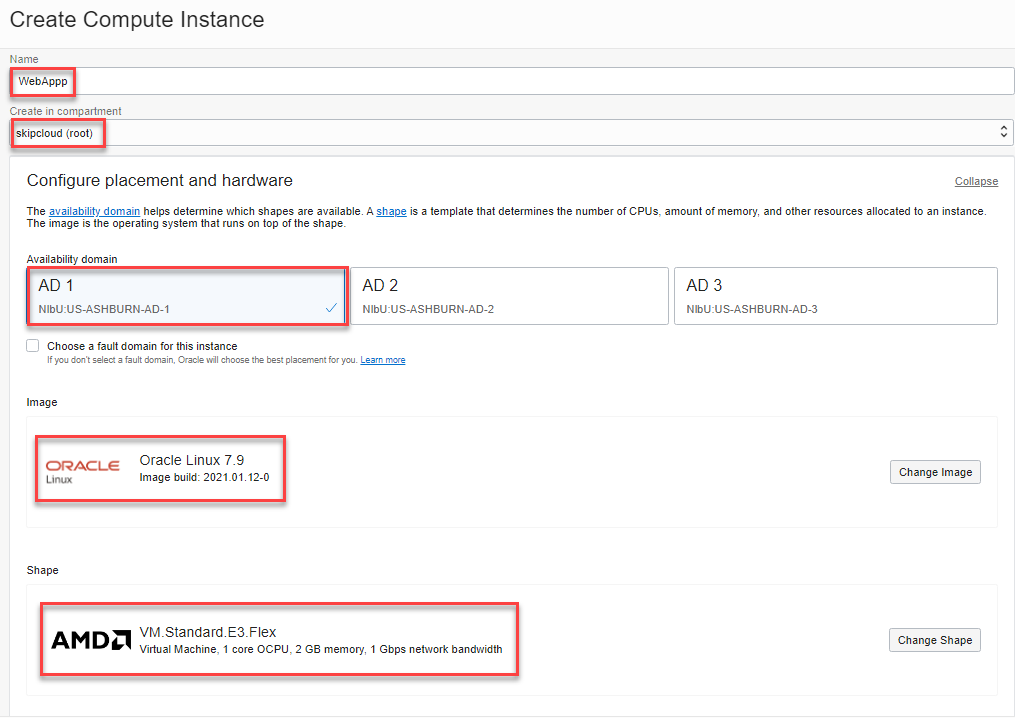
Select a name for your instance, select desired compartment and Availability domain. Oracle Linux is ok to use or choose an image of your liking. This example will use Oracle Linux 7.9 with 1 OCPU and 2 GB memory and apache web server.
Next, select the VCN, subnet and assign a public IP address. Select your public key for deployment.
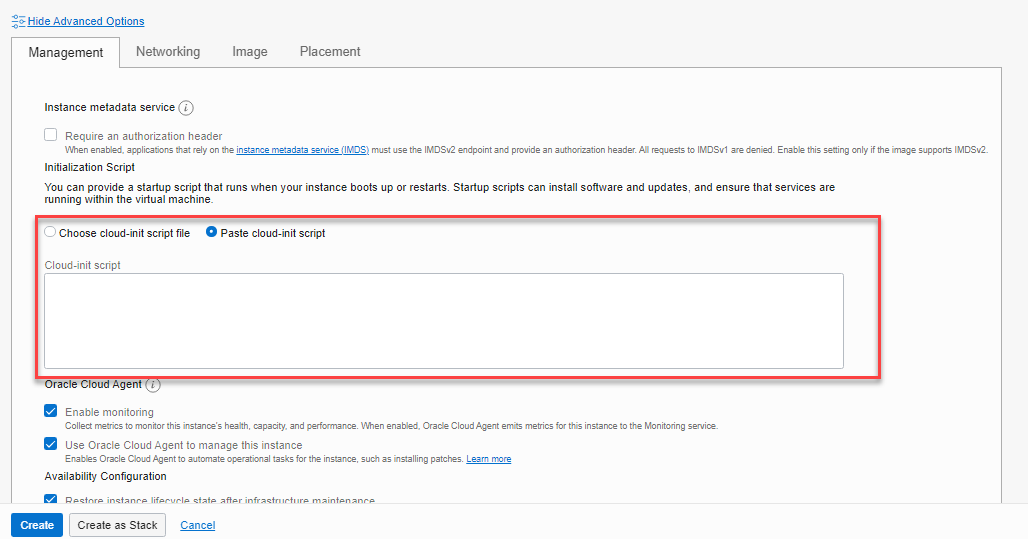
Next click "Show Advanced Options" and select Paste cloud-init script and paste the following into the field:
sudo yum install httpd
sudo systemctl enable httpd
sudo systemctl start httpd
**NOTE: you can configure the firewall to allow 80 or disable the built in instance firewall for testing. **
You should now have a running web server in your specified VCN.
**Steps to complete
-
Create Network
-
Create Hosted Edge Router
-
Create Edge Router Policy
-
Create Self Hosted Edge Routers
- Cloud Marketplace -
Create/Deploy Endpoints
-
Create Services/AppWAN**
Create Network (Steps 1, 2 & 3)
Once you have created your Organization after signing up for the 7 day trial or other, you are ready to create your first network.
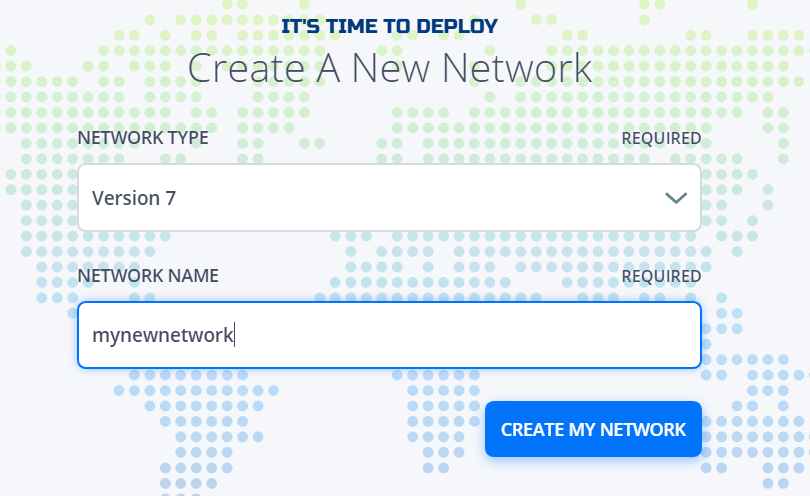
You will be sent an email to accept your invitation to join the organization. Once you have created your password and upon first login, you will be prompted to create your Network. This step will build your dedicated SDN Controller which behaves as the central element of the Control plane. Once you hit Create my Network, this will deploy a NetFoundry managed Cloud based controller which will take about 5-10 minutes to finish. NOTE: you will not be able to continue until this has finished.
While the system is building the Controller, you will see a Grey spinning globe in the upper left hand corner as below. Once completed, the globe will turn Green.
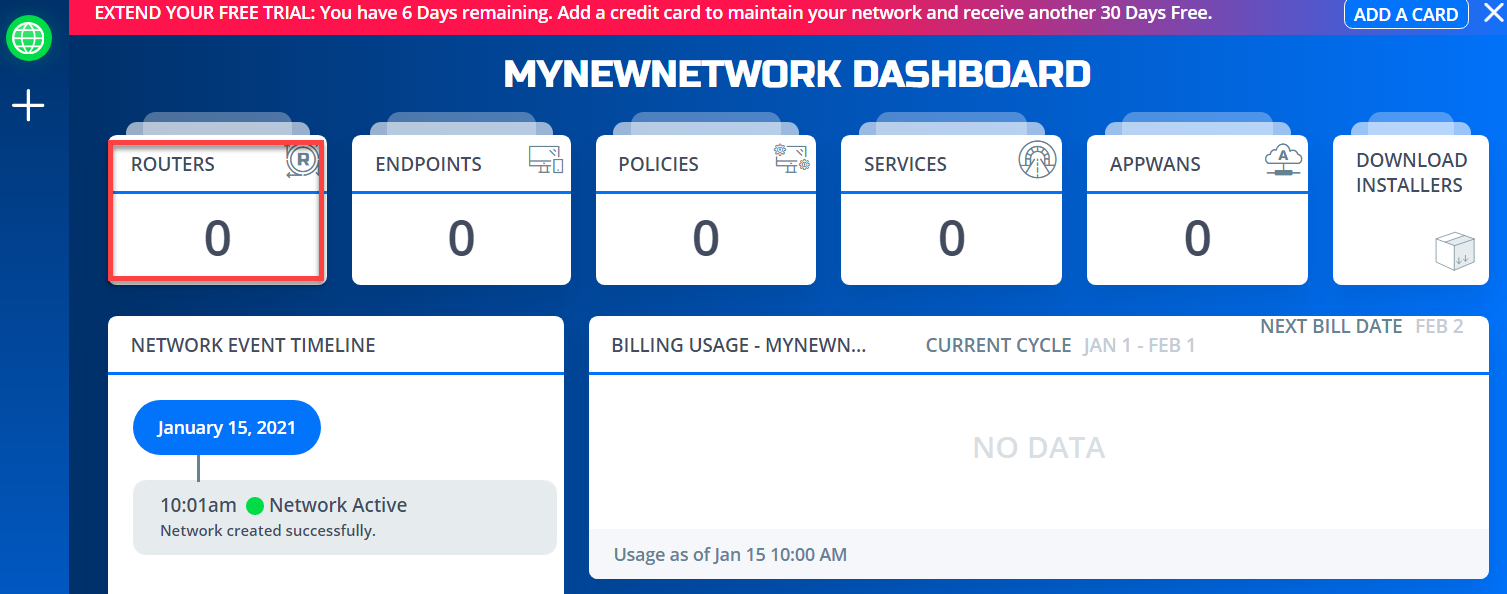
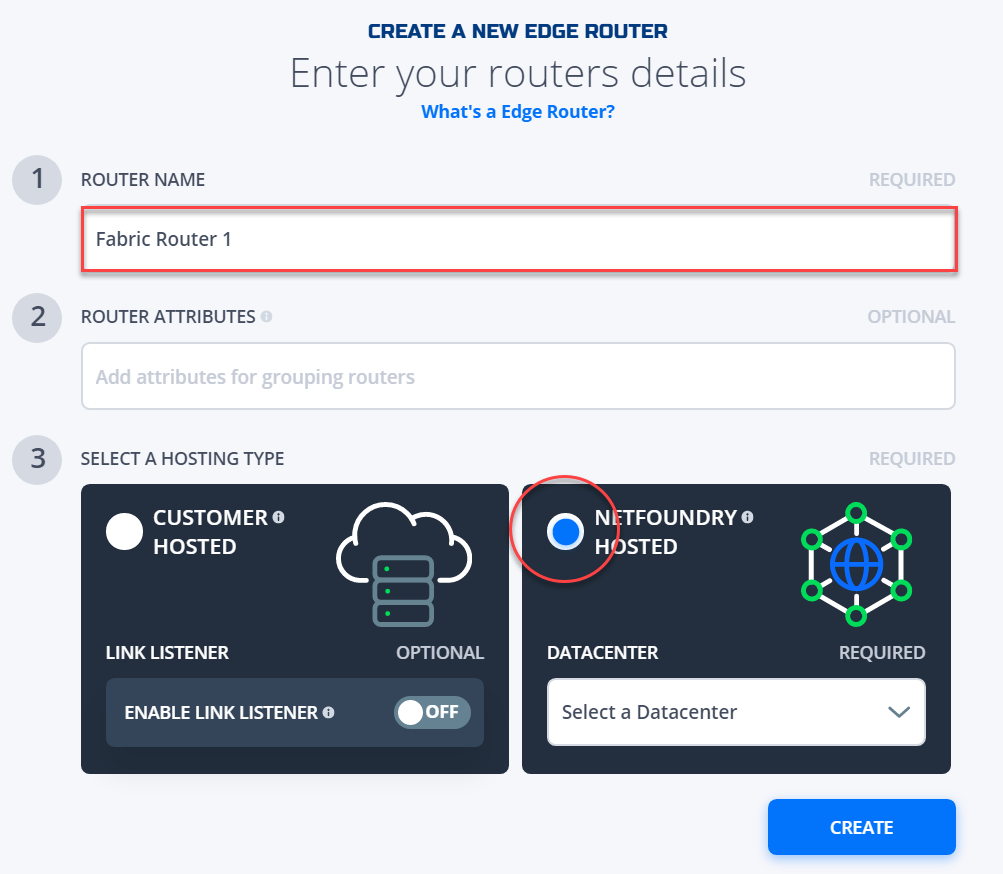
The next step (B) is to create the Fabric Router which essentially builds the transport mechanism for the "middle mile". Choose a location that is Geographically in region to your resources in the cloud. Choose Routers and select the + in the upper right corner of the page.
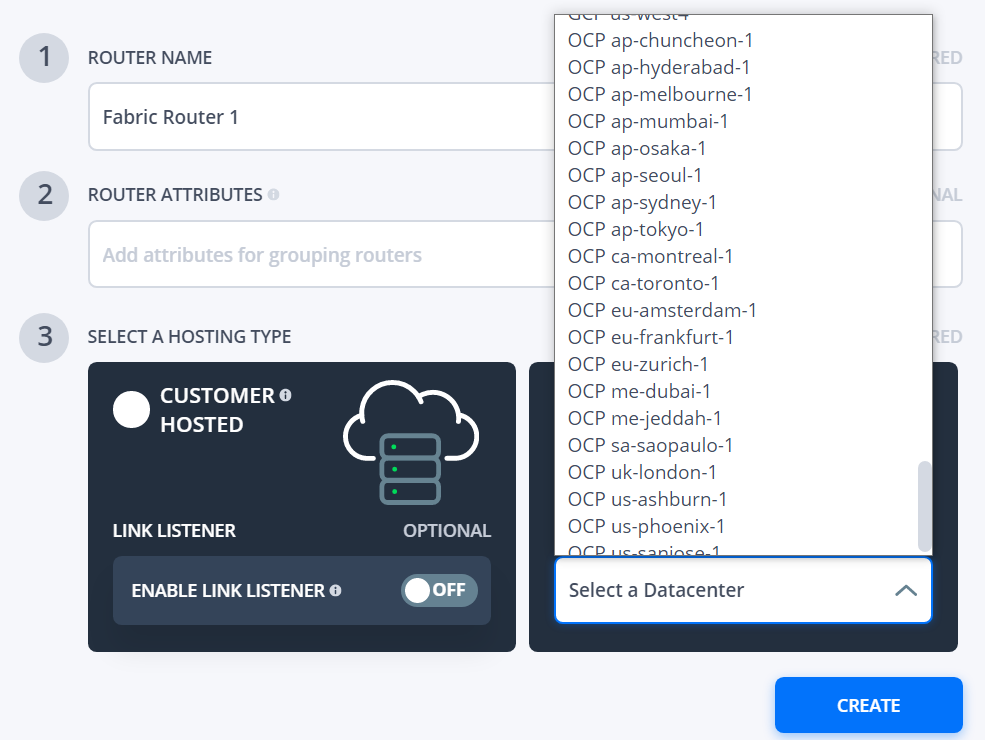
Select a name for your Router --- Consider using the the word "Fabric" in the name to indicate it is a NetFoundry managed transit instance. Leave the attribute blank. The default attribute will be @thenameofthisrouter. Select NetFoundry Hosted and choose an Oracle Data Center in or nearest your desired Cloud region and hit Create.
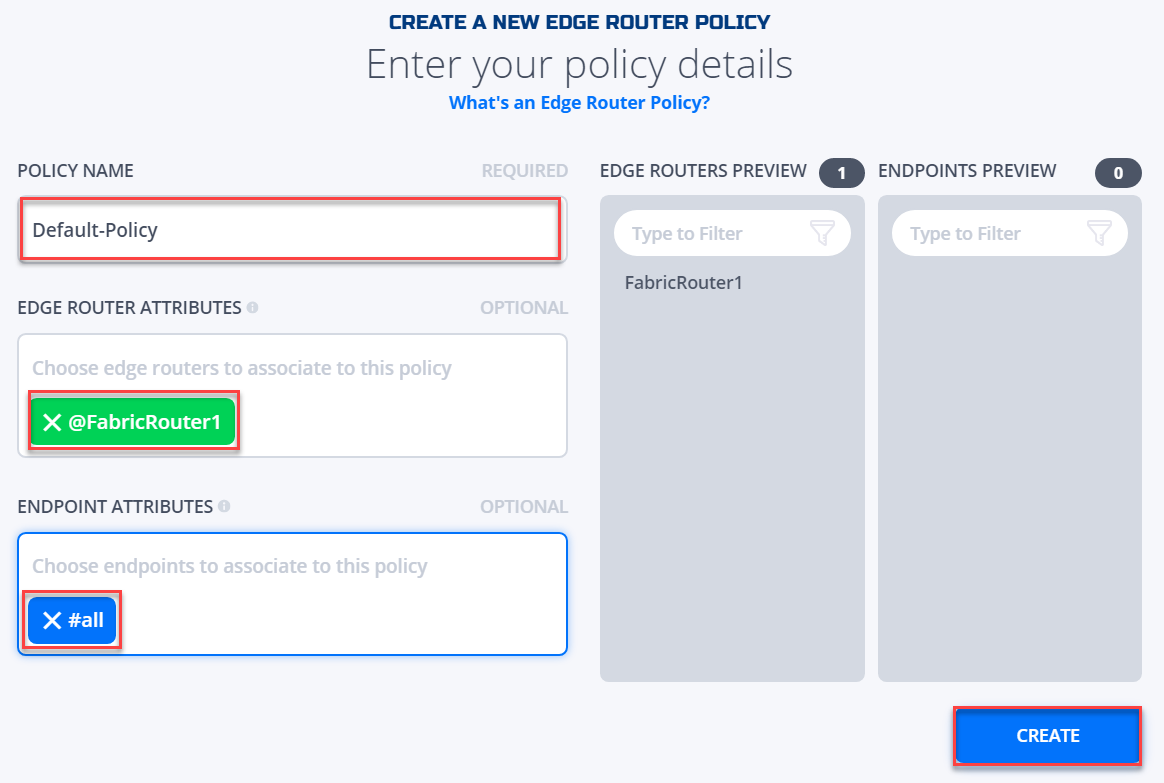
For Step C, we will create the Edge Router policy which allows Endpoints transit access to the customer edge network in the Cloud. From the Edge Routers screen, select Manage Edge Router Policies and hit the + in the upper right corner to add a policy.
Name the Policy something representing Default-Policy or Base-Policy. NOTE: It can be named anything you want but this may help with logical function representation.
Next click the mouse into the attributes field and select the @fabricrouter you created in the previous step. In the Endpoints Attributes field, type "#all" and hit enter. Then select Create. At this point your base network is complete. NOTE: by using #all in the endpoints field, you are allowing all endpoints to transit this Fabric via @FabricRouter1. For the purposes of a standard deployment and test this is a best practice. For advanced deployments you can utilize this feature to control transit for various endpoints.****
Create Customer Hosted Edge Router (Step 4)
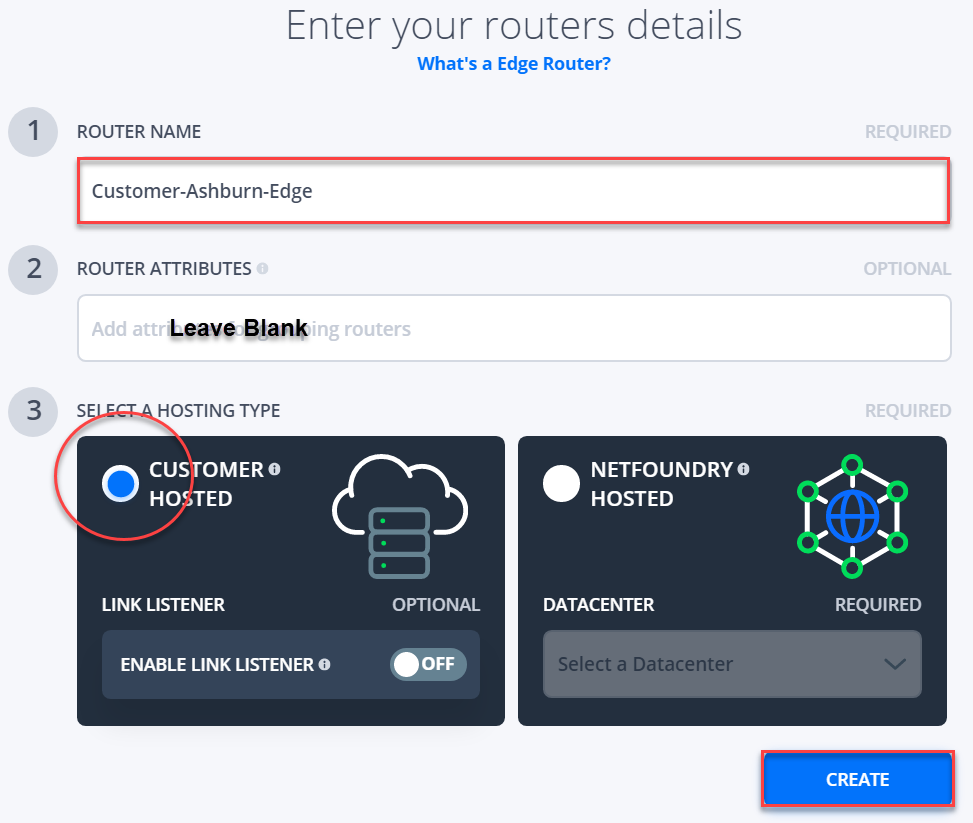
The next element we will deploy is the Edge Router in the customer VCN containing the WebApp we created for this exercise. From the NetFoundry console, in the Manage Edge Routers tab(section), let's create a new Edge Router. Provide a name representing something like "customer-location-edge",
leave the "Router Attributes" blank and finally selecting "Customer Hosted" and hit Create.
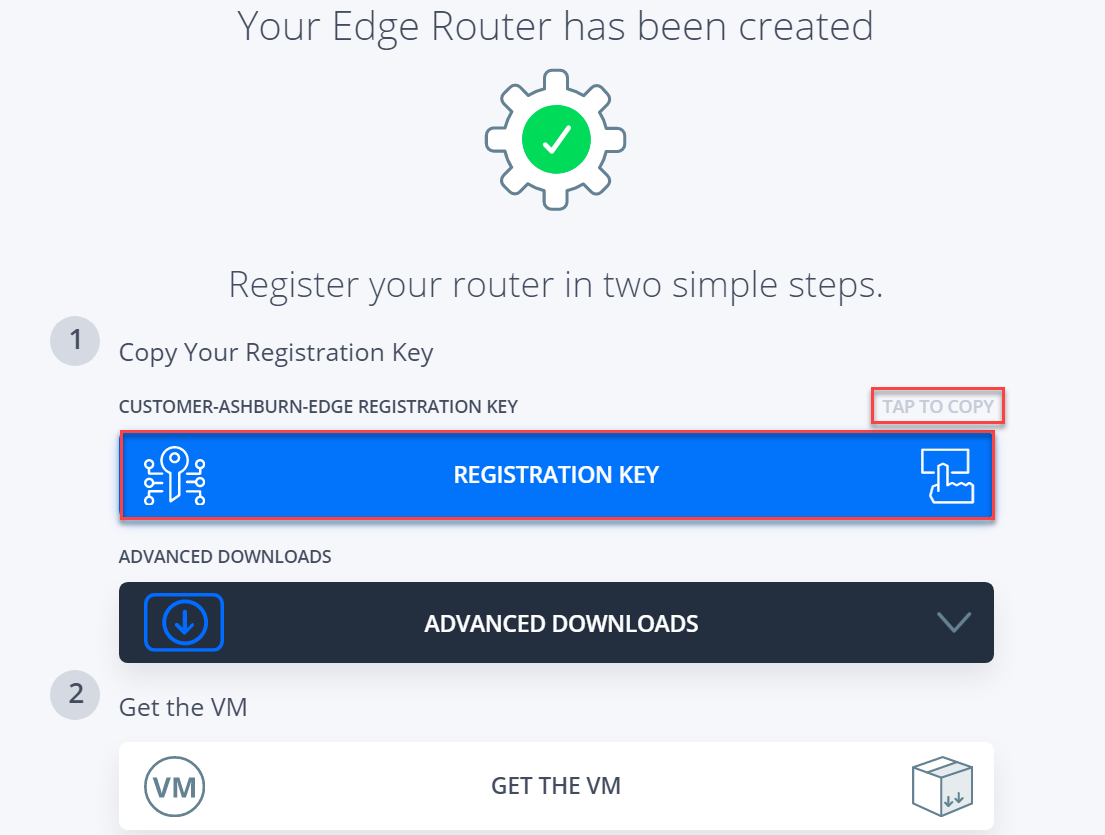
You will be provided a key for registration to be used in future step when creating the instance in the Cloud Marketplace.
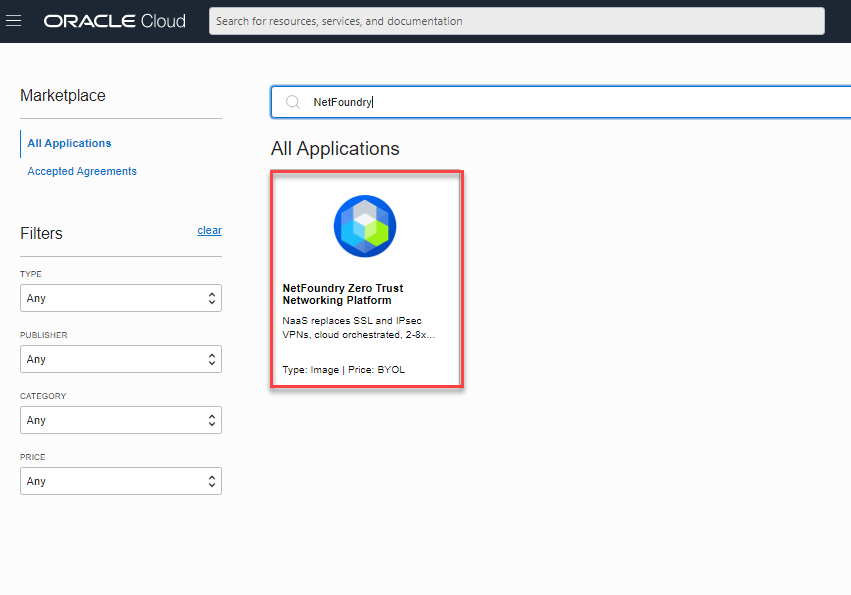
Now let's return to the Oracle Cloud console and create the Edge Router from the Marketplace.
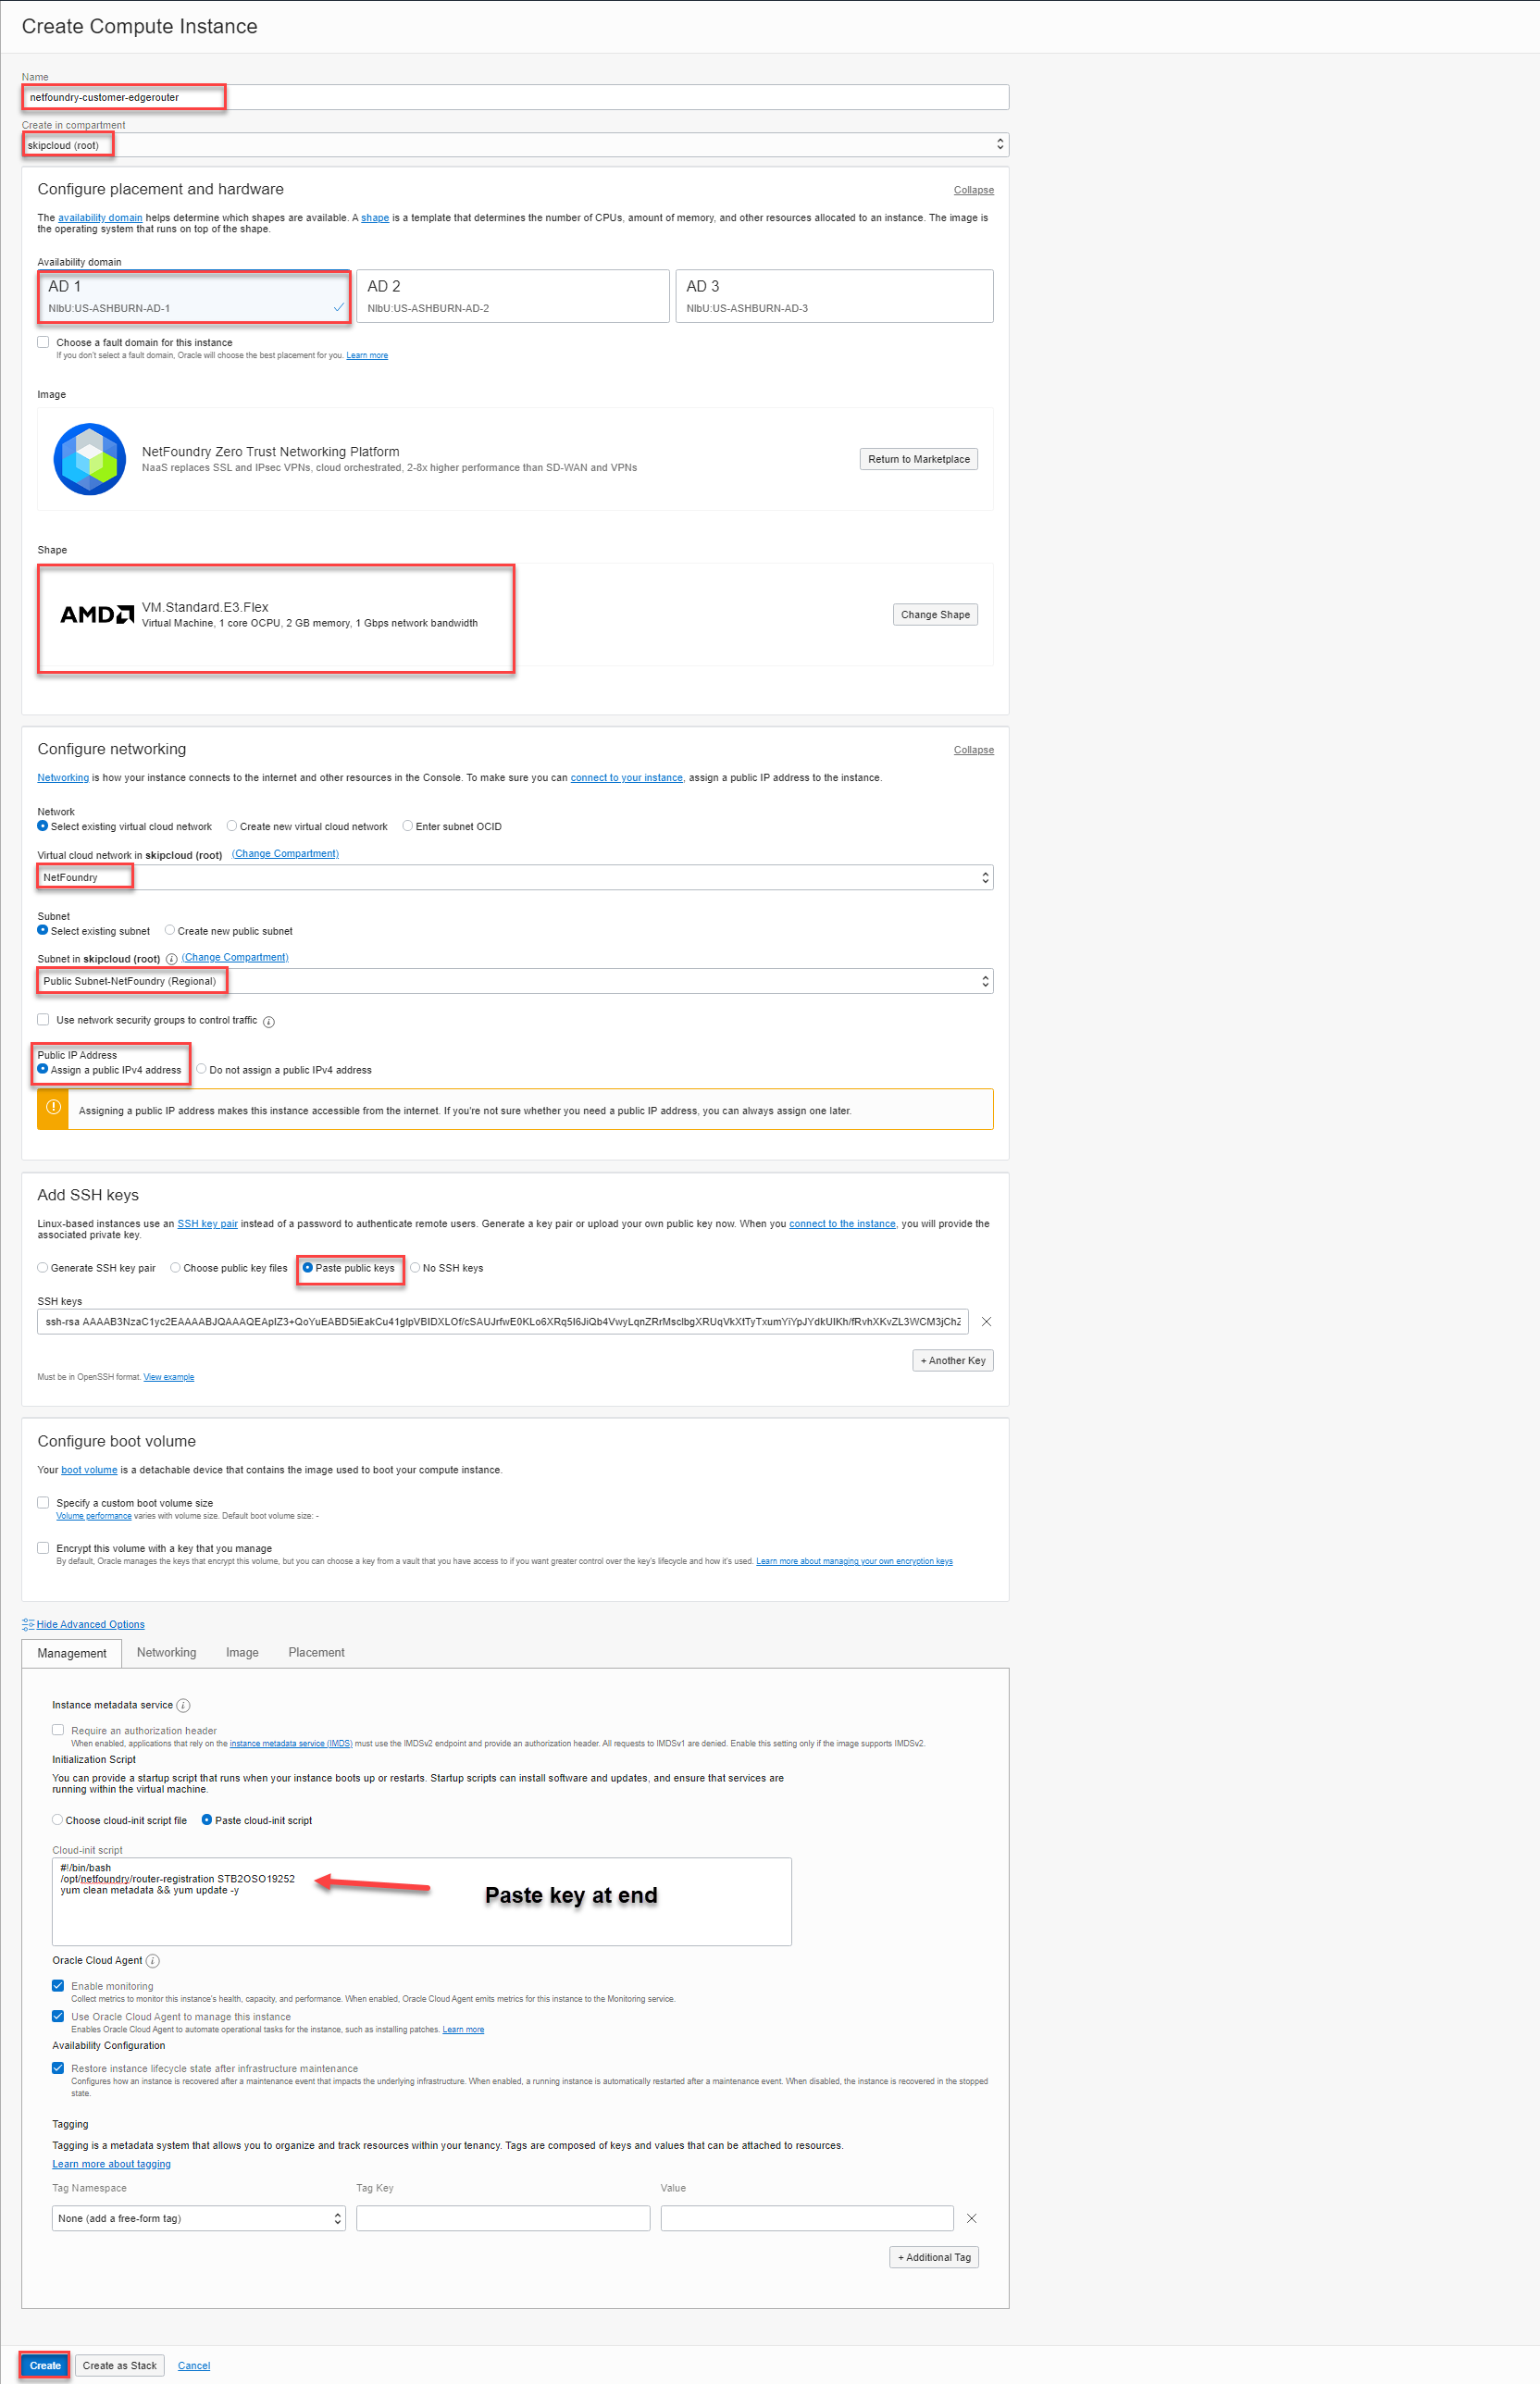
Again, select the compartment, Availability Region and select a shape with1 OCPU 2 GB Memory. Select the VCN, Public Subnet, select assign public IPV4 address, SSH keys and hit Show Advanced Options. You will select cloud-init script and paste the following into the script field. Append your registration key created in earlier step to the end of router-registration and hit Create. This will build the image in your VCN and register it for you. NOTE: If for some reason the router fails registration and does not show registered in the NetFoundry console after 10 minutes, it may be necessary to SSH to the instance and attempt registration manually with the same command. You can execute sudo systemctl status ziti-router to see if it is running afterwards.
#!/bin/bash
/opt/netfoundry/router-registration {key}
yum clean metadata && yum update -y
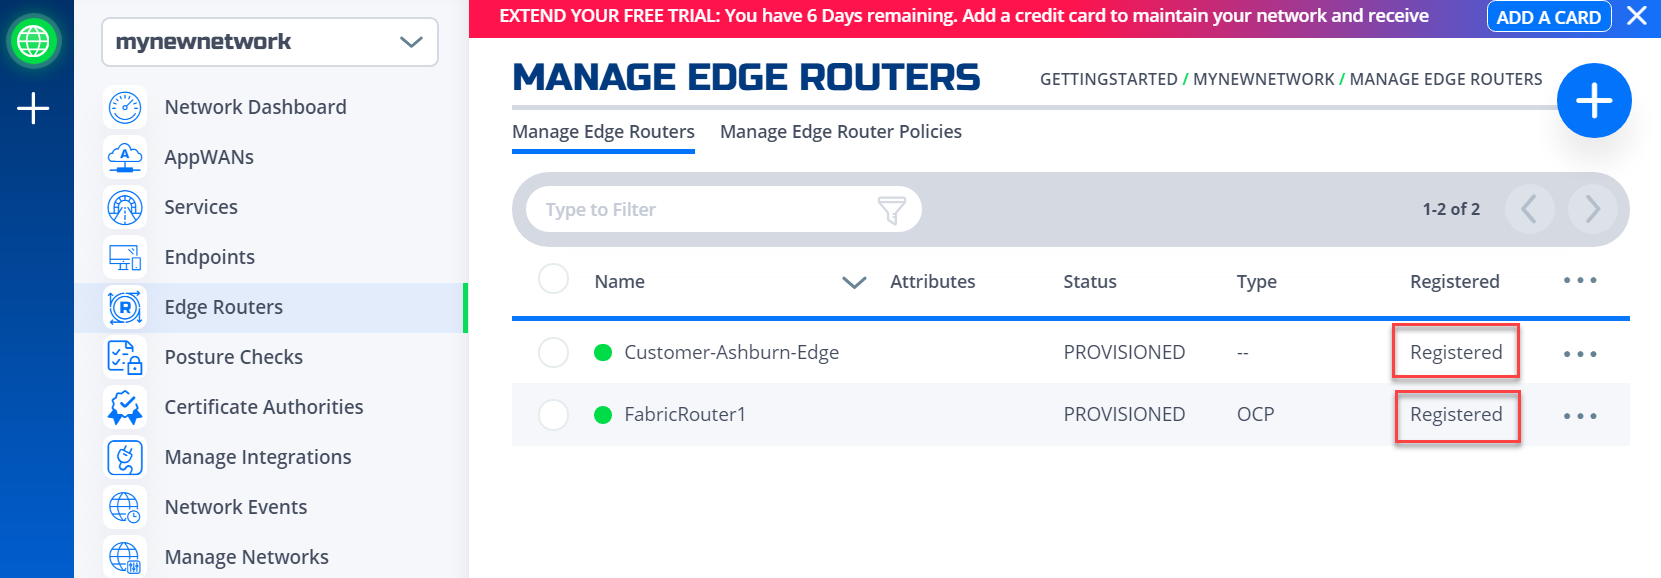
Once registered, you should now have 2 Edge Routers up and running in your Network as shown here:
Create Endpoint for user access - Windows (Step 5)
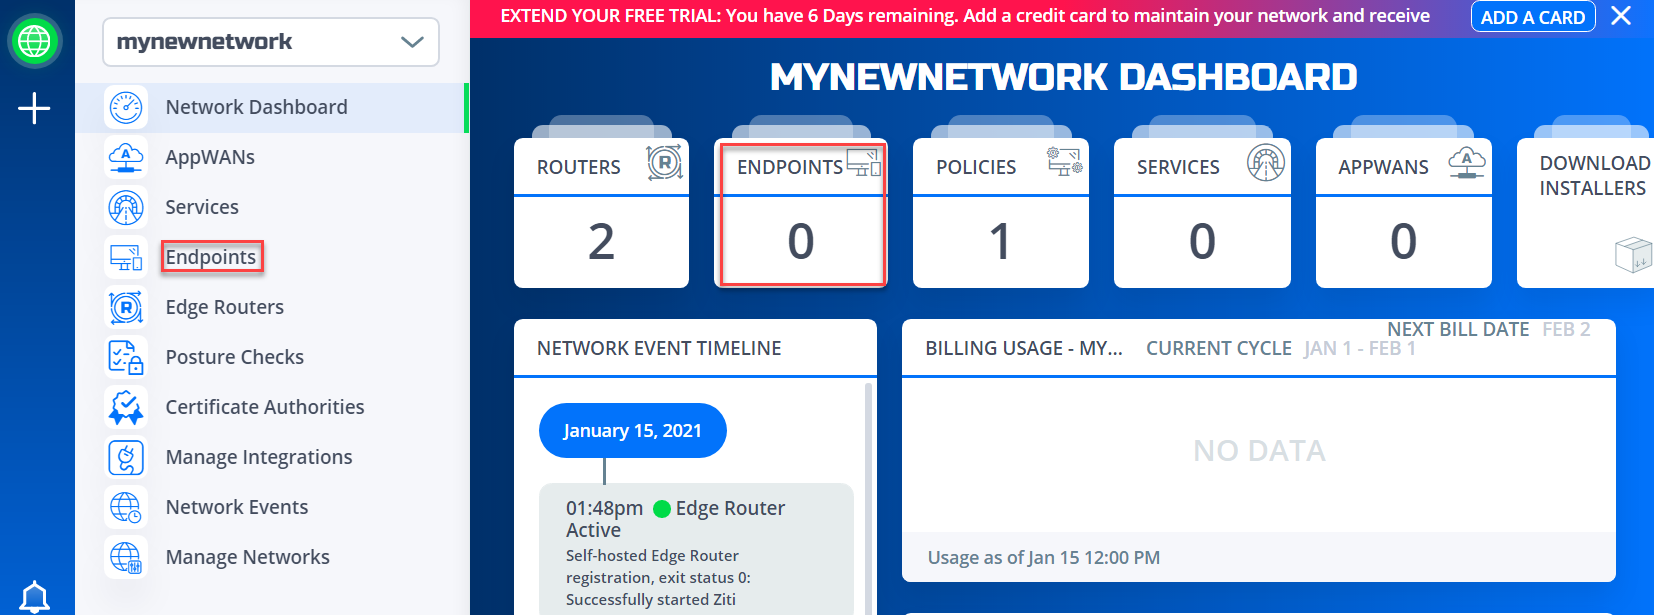
The next step in the process is to register your Laptop/Host as an endpoint in the Fabric. From the NetFoundry console. Select Endpoints from either location in the Network Dashboard.
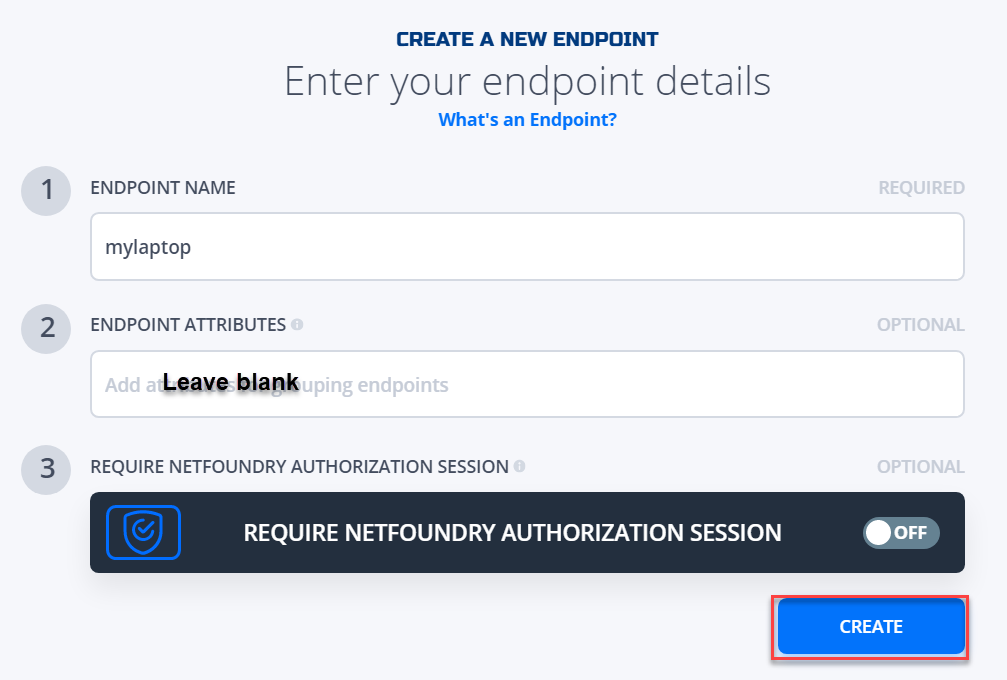
From the Endpoints page, select the + in the upper right corner to add Endpoint. Provide a name for your endpoint, leave "Endpoint Attributes" blank and hit Create.
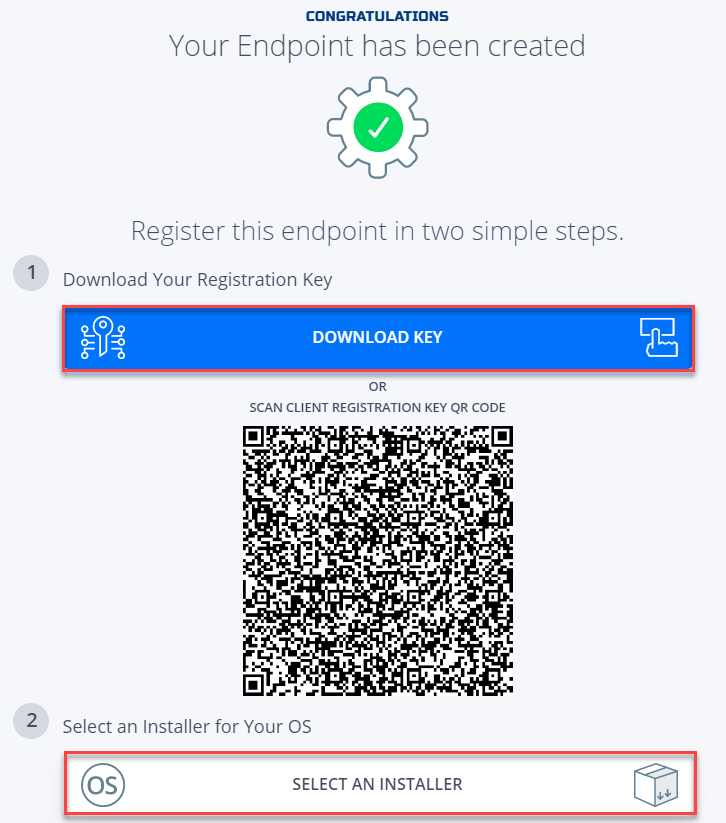
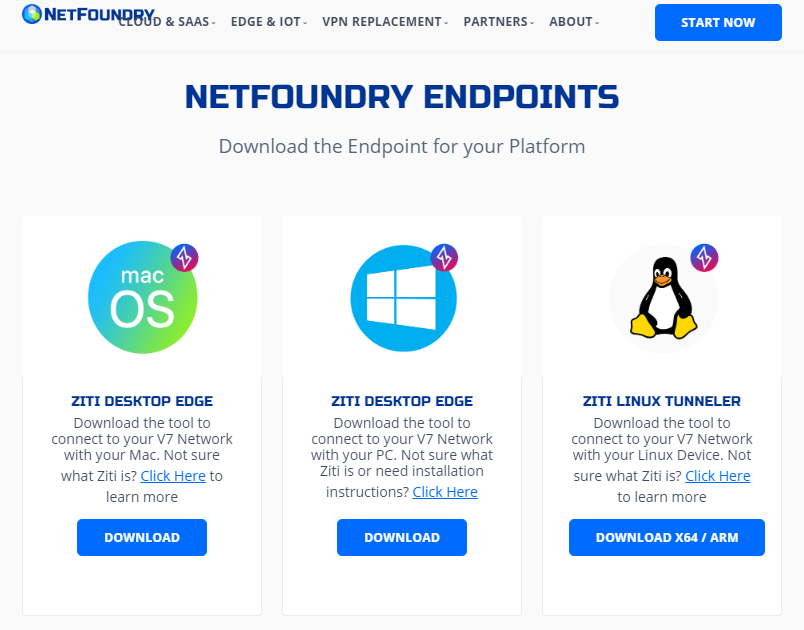
The next screen provides you the identity key and download location for the software. Save the mylaptop.jwt file somewhere you can easily find on your computer. Hit the "Select an Installer" to download the operating system specific version of the endpoint software. NOTE: The name of your file will be "what-ever-you-named-it.jwt".
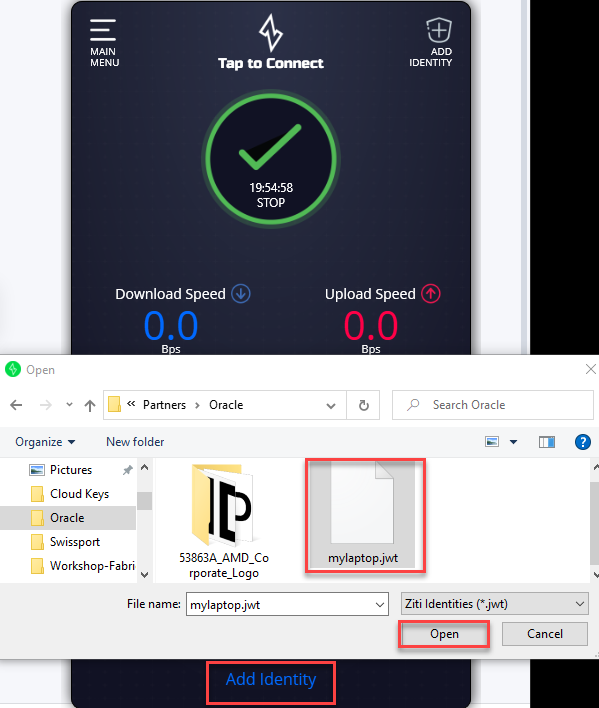
Once you have completed the installation of your software, it is now time to add the created identity to the software client. Open the software and select "Add Identity", then browse to the location of the mylaptop.jwt file previously downloaded and hit open. Your endpoint will now enroll and register on the network.
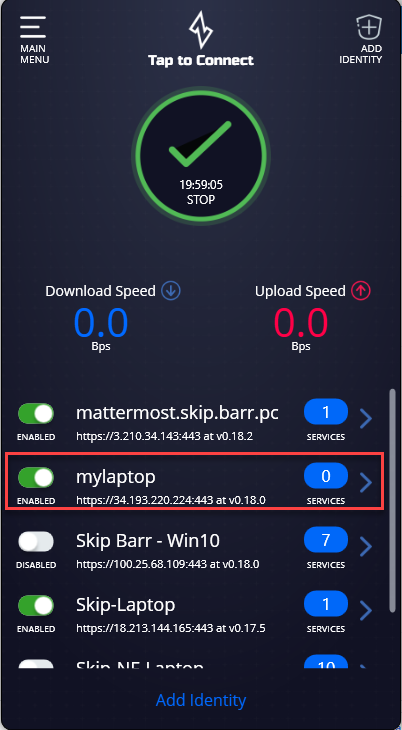
Now within the client application you will have your entry listed with No Services at this point.
NOTE: Author has several identities in different networks and should be disregarded.
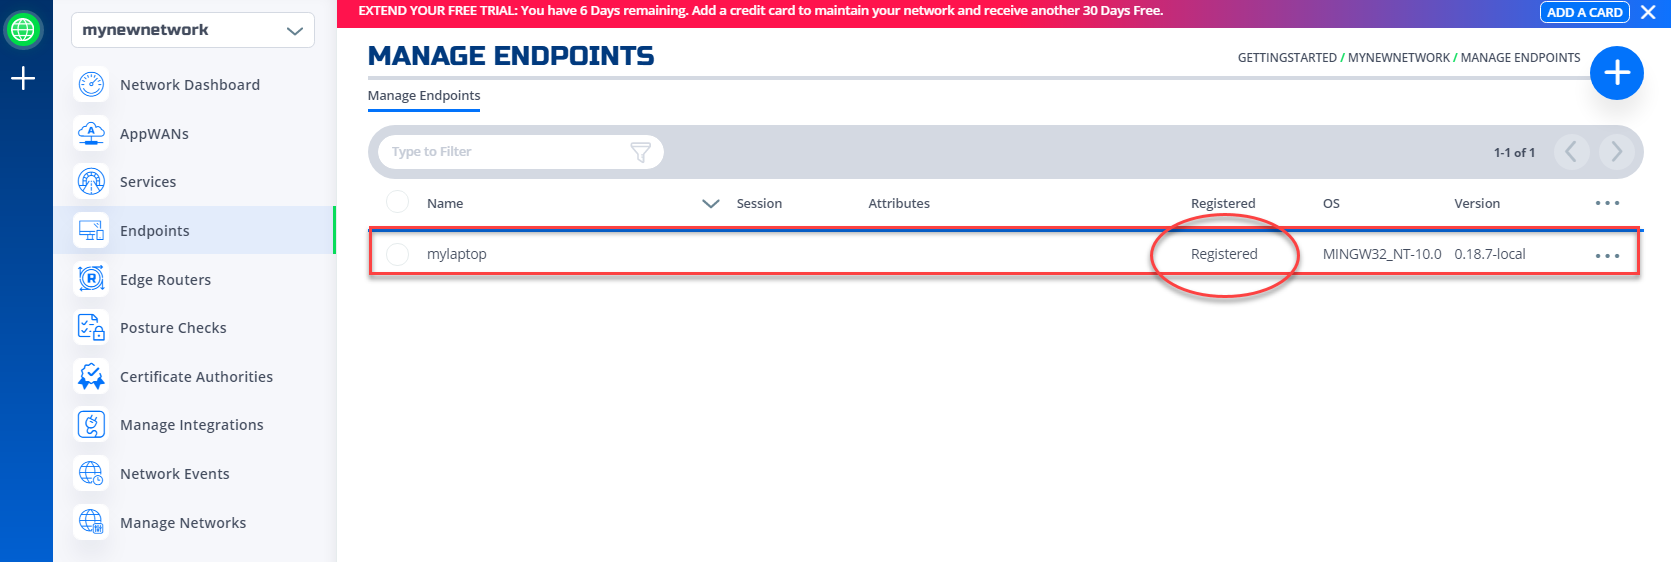
Returning back to the NetFoundry console and the Endpoints page. You will see your endpoint appear as registered. Allow 5 minutes.
Create Services and AppWAN (Step 6)
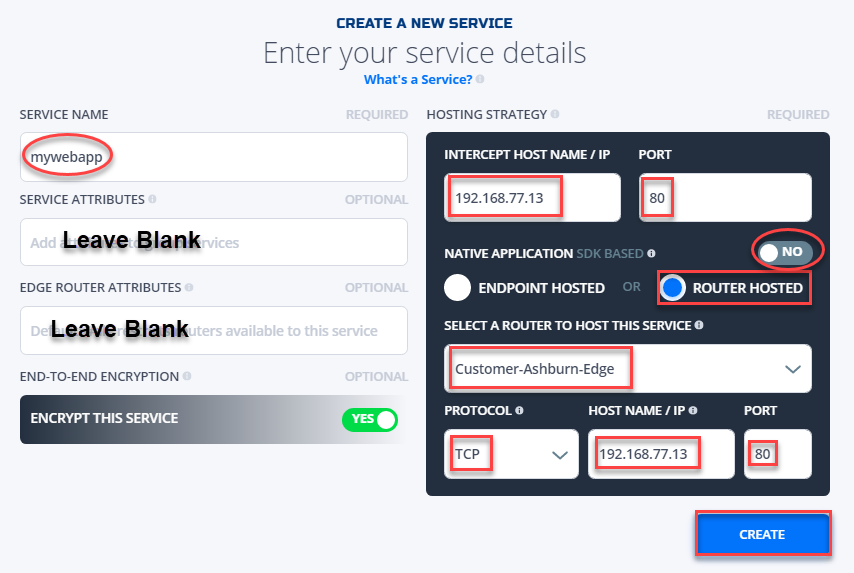
The final step is to create a service for the web app in our VCN and to build an AppWAN to allow our endpoint (mylaptop) access to this service (port 80) on the private VCN IP address. The customer edge router will be used to terminate the service as show in this example. From the NetFoundry dashboard, select services from either location and hit the + sign in the upper right corner.
From within the create service context menu, provide a name for your service, deselect native application SDK based on the right side and select router Hosted. Leave "Service Attributes" blank, leave "Edge Router Attributes" blank(default is #all). Select your edge router from the drop down list(not fabric router). Insert your private ip and port for the Intercept hostname/ip. Again at the bottom, select TCP and your IP/port 80. Hit Create.
Next select AppWAN from the Services/AppWAN screen and hit the + sign in the upper right corner.
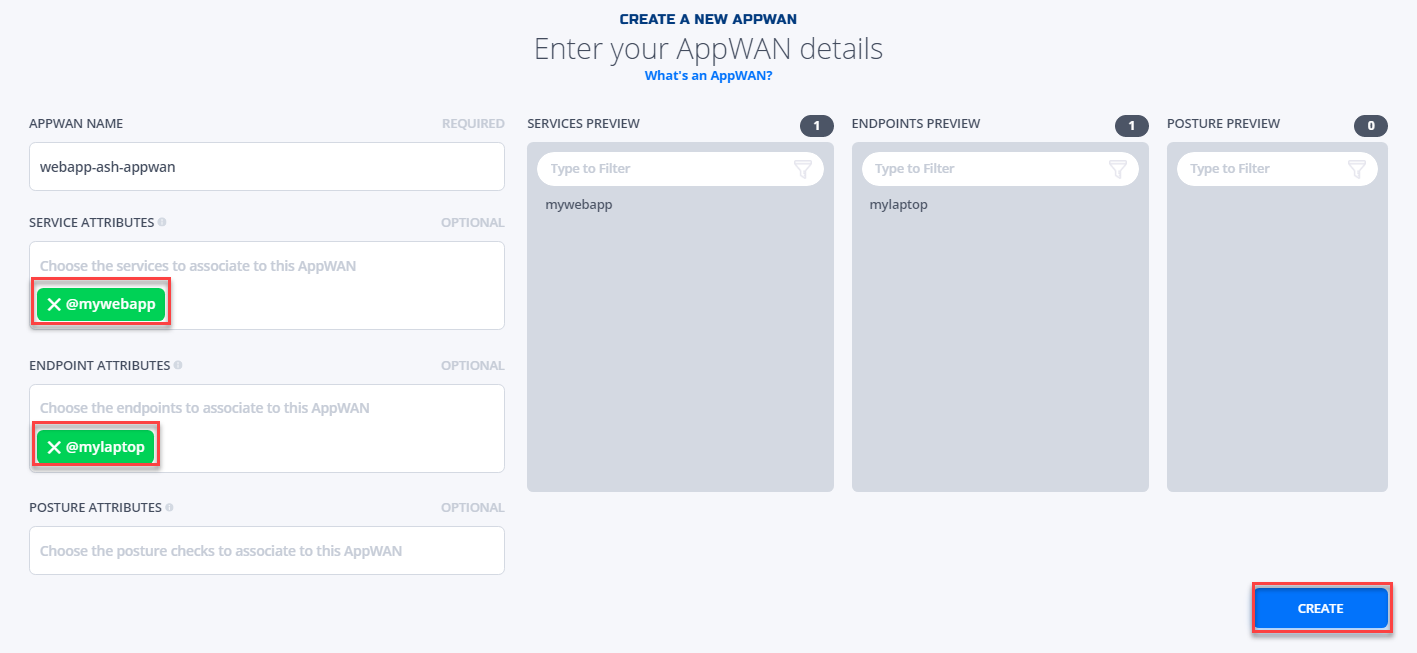
Within the AppWAN create page, select a name suggesting it's function/location e.g. webapp-ash-appwan. Mouse click in the service attributes and select the service created in the previous step. Mouse click in the Endpoint Attributes field and select your endpoint e.g. @mylaptop. Leave posture attributes blank. Hit Create.
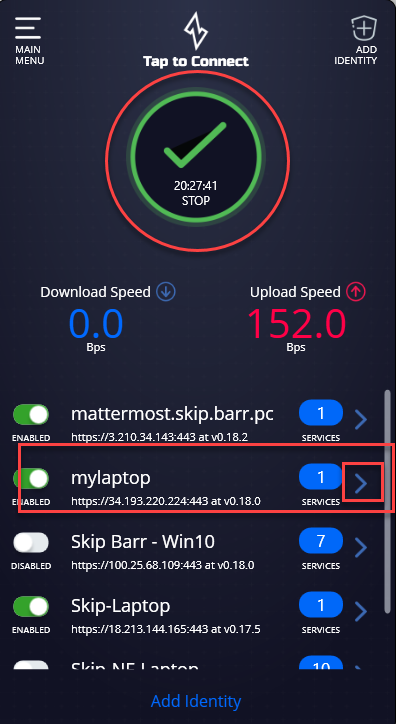
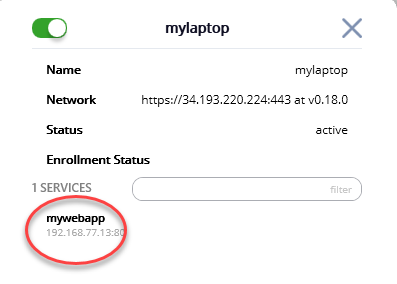
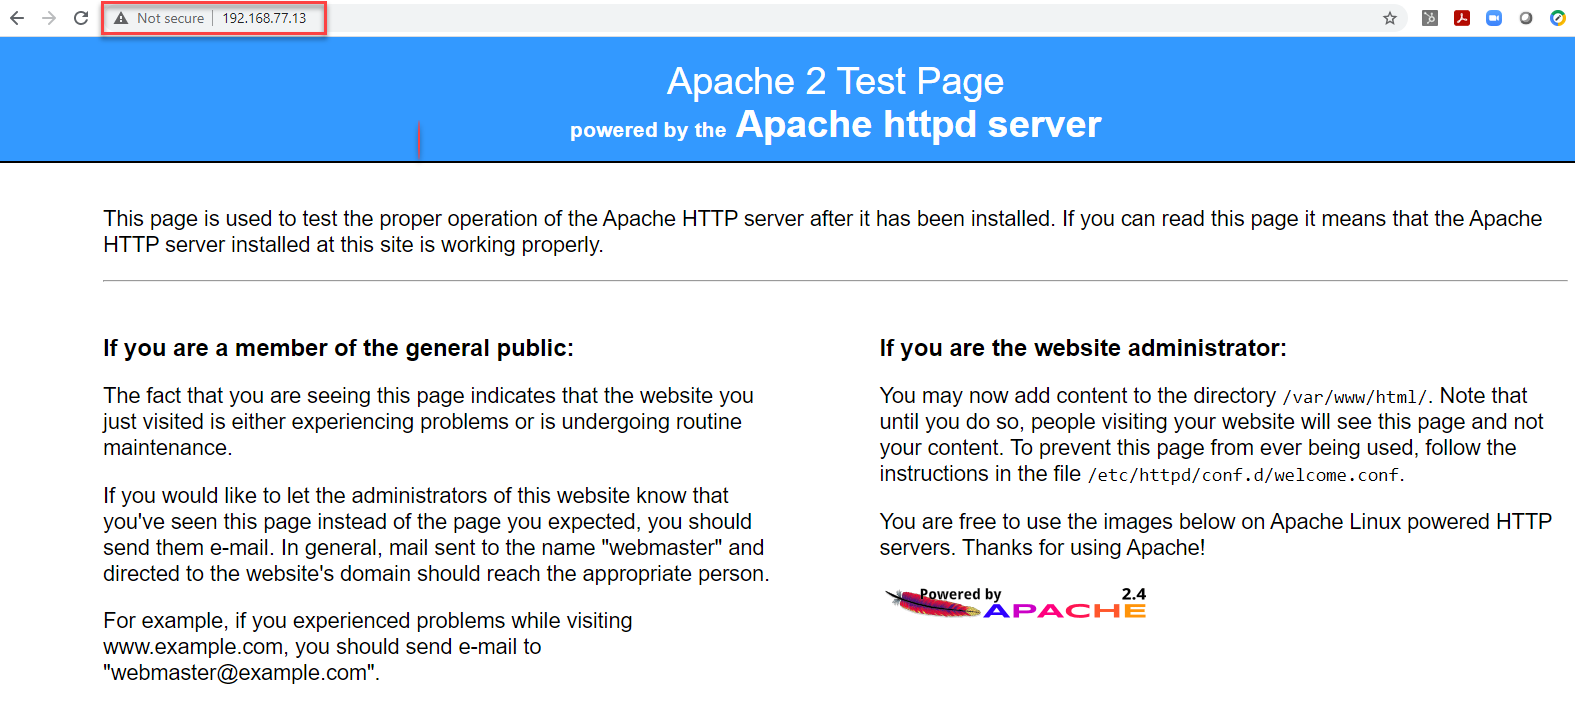
Now return to your endpoint client. You should see a service show up in a few minutes. Once the service has populated, you should now be able to use a browser to connect to the cloud web app by the private ip from the service you created.
If after 5 minutes it does not show up, Stop and Start the service by clicking the connect button at the top.
Note you can click the arrow next to your identity to see what the service looks like in your client.
Congratulations on spinning up your first complete network. If you no longer wish to be connected to the NetFoundry network you can disable the button to the left of your identity.****
