DAC
Disclaimer
ℹ️ This project serves as a Sample Application, that you can tweak or completely repurpose. It is community-supported and is maintained by members of the Okta team for developers and other IT professionals. okta-dac is not an official Okta product and does not qualify for any Okta support. Okta makes no warranties regarding this project. Anyone who chooses to use this project must ensure that their implementation meets any applicable legal obligations including any Okta terms and conditions.
ℹ️ It is recommended that you collaborate with your preferred Okta Solution Provider (link) to implement and adapt this app code sample within your existing portal. This app features frontend and backend components and like any web app hosted and running on your side, you should perform a code review, as well as security and scalability tests.
Introduction
This Sample Application demonstrates best practices for architecting multitenancy over a single Okta Org.
For a deep-dive into the architecture, refer to the documentation here.
TL;DR
When building a multitenant application, one key challenge is to build out functionality to manage user identities in each tenant, while segregating the administration of the tenants themselves in a self-service manner. Fortunately, Okta has many great features that support this scenario. In okta-dac, you will find sample implementation of key identity management functionality (for multitenant applications), which include:
- A "Super Admin" UI – accessible to users having a "Super Admin role" – that provides a overarching view of all tenants. Among its functions, the Super Admin UI allows you to:
- List all and add new tenants
- Select applications that a tenant gets access to
- Define the username domain(s) for the tenant(s). Usernames are confined to specific domains, so that usernames in one tenant do not collide with those from another (in our implementation of this sample multitenant app, the same username cannot exist in multiple tenants). Domains are also used to automatically configure routing-rules for idp-discovery functionality in the byob-dashboard companion app.
- A "Tenant Admin" UI – accessible to users having a "Tenant Admin role" – that provides the following functionality:
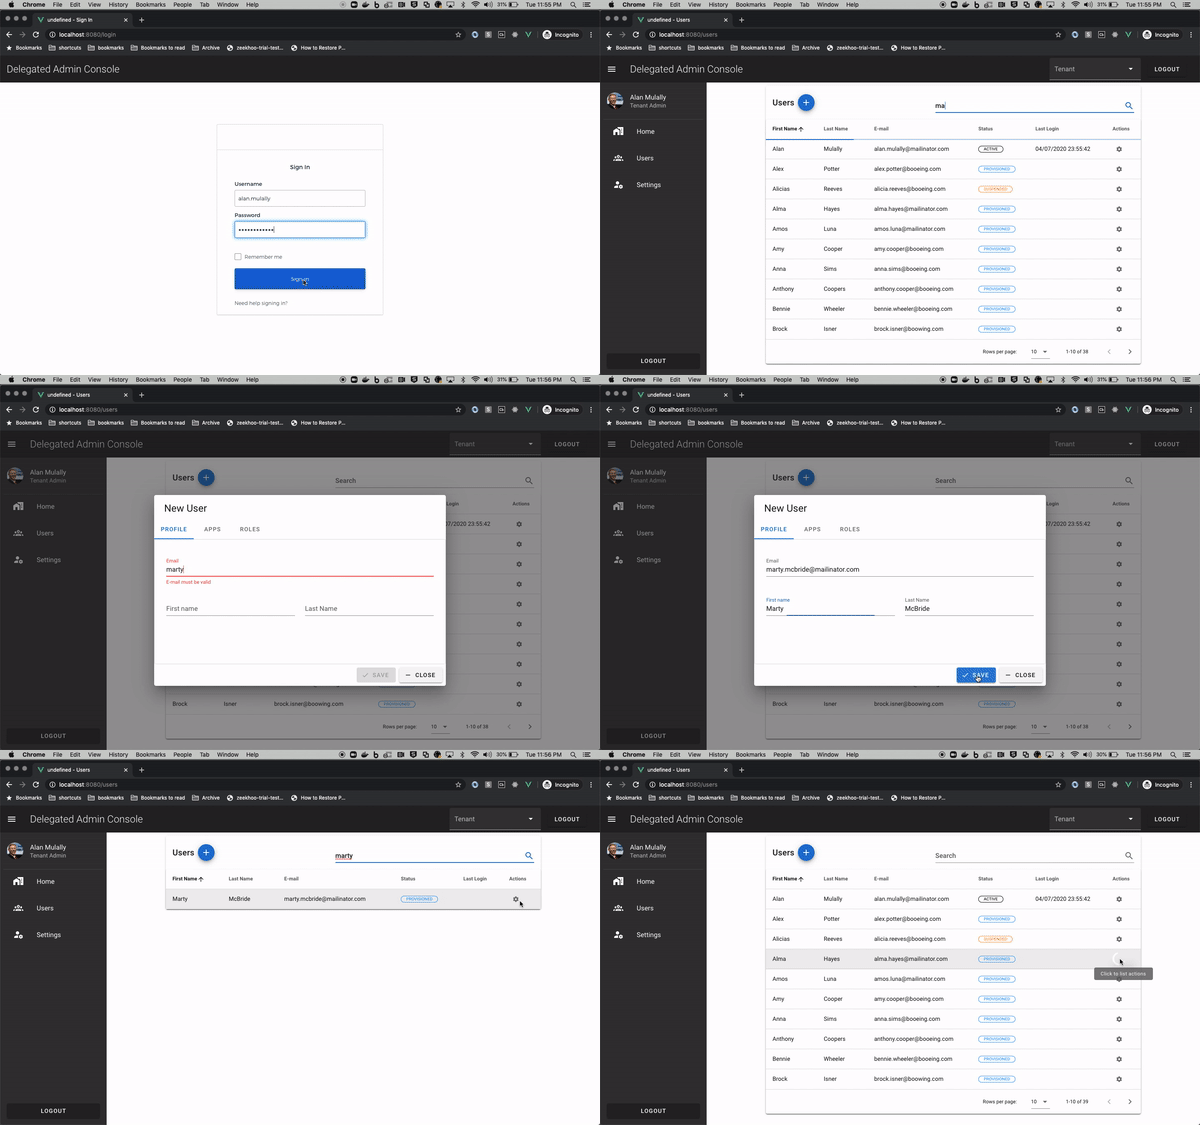
- Manage users in the tenant (Add users, update users, manage user statuses, etc.)
- Assign apps to individual users
- Assign apps "en-masse"
- Self configure inbound SAML to the tenant
- Self verify domain names
- The SPA is built in Vue.js and uses
- Vuetify 2.x Material Design Component Framework
- Okta Vue.js SDK 2.0.x
- Okta Sign-in Widget 4.1.x
- The API is developed using Serverless framework
Setup
Setting up the required configurations in Okta; the API Gateway and lambda functions (in AWS, for the REST APIs) are quite involved. So we've leveraged Terraform and Serverless, and provided a Makefile:
Prerequisites
- Terraform ==
v0.13.x - NPM >=
6.12.x - Serverless >=
1.75.x
-
macOS Catalina issues: You must be able to run
npm install.- The Makefiles runs
npm installcommands. You should make sure that your machine is able to run this command without any issues. - If you are getting the error "gyp: No Xcode or CLT version detected!" on macOS Catalina, follow these steps
- The Makefiles runs
-
Install terraform v0.13.x
- The terraform files uses v0.13 syntax. If you have an older version of terraform, you need to upgrade. If you can't upgrade, skip terraform and do these manual steps:
-
Install Serverless
e.g. via npm:
npm install -g serverlessNote: if you get WARN/ERR on MacOS, run:
sudo npm install -g serverless -
Install vuecli
e.g. via npm:
npm install @vue/cli -gNote: if you get WARN/ERR on MacOS, run:
sudo npm install -g @vue/cli --unsafe-perm -
Create a Named Profile in AWS. Steps
-
Enable Programmatic Access for Okta. Steps
Environment Variables
-
Copy the file
/terraform/terraform.tfvars.templateinto/terraform/terraform.tfvarsand edit it with your Org variables:org_name = "<org subdomain>" base_url = "<oktapreview.com || okta.com>" api_token = "<OKTA_API_TOKEN>" app_url = "http://localhost:8080" superuser_login = "" environment = "dev" aws_region = "us-east-1" aws_profile = "(see Prerequisites Step 5.)" aws_ssm_prefix = "dac"Where the above variables are:
Variable Description Default Value org_name Okta Org subdomain name (e.g. "atko") base_url Base URL for the Okta org (okta.com or oktapreview.com) "okta.com" api_token OKTA_API_TOKEN, per Prerequisites Step 6. app_url Base URL for the SPA. "http://localhost:8080" superuser_login Enter the Super Admin username you use to login to your Org environment Stage configured in API Gateway (dev, prod, ...) "dev" aws_region Region to deploy AWS components. "us-east-1" aws_profile Profile configured in AWS CLI. per Prerequisites Step 5. aws_ssm_prefix Prefix for parameters created in AWS Parameter Store. "dac"
Make
Once /terraform/terraform.tfvars is populated correctly, run Make:
make all
The above will:
- Run the provided Terraform scripts to configure your Okta Org
- Deploy the API using Serverless
- Create the local env file (
.env.development.local) for the SPA
If you didn't see any errors during make, you're almost ready to go. But there are a couple manual steps to complete:
(Required) Manual Step 1
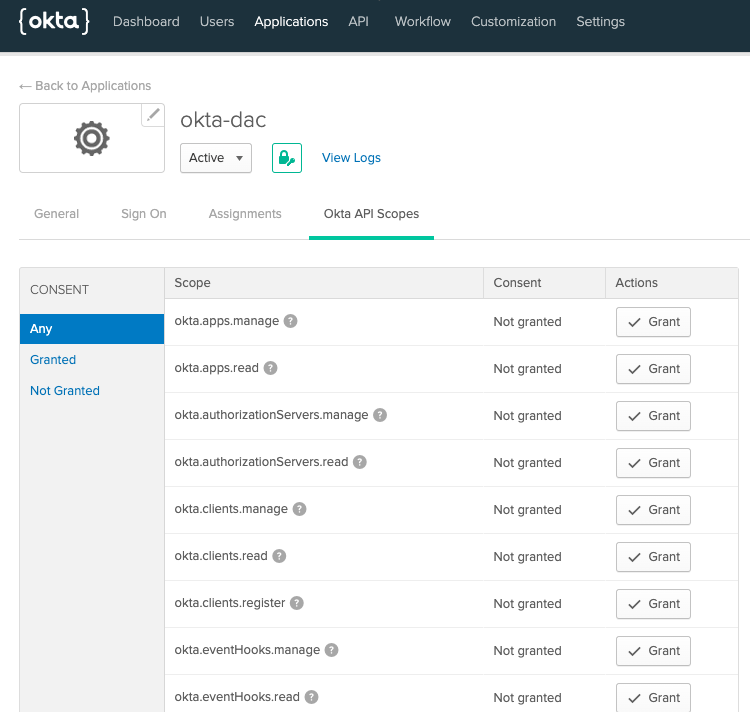
Terraform currently does not support granting Okta API Scopes. These scopes are required for okta-dac to properly function.
- Login to your Org's Admin Console. Search for the
okta-dacapp - Navigate to the Okta API Scopes tab and Grant the following scopes:
okta.groups.manageokta.users.manage
(Required) Manual Step 2
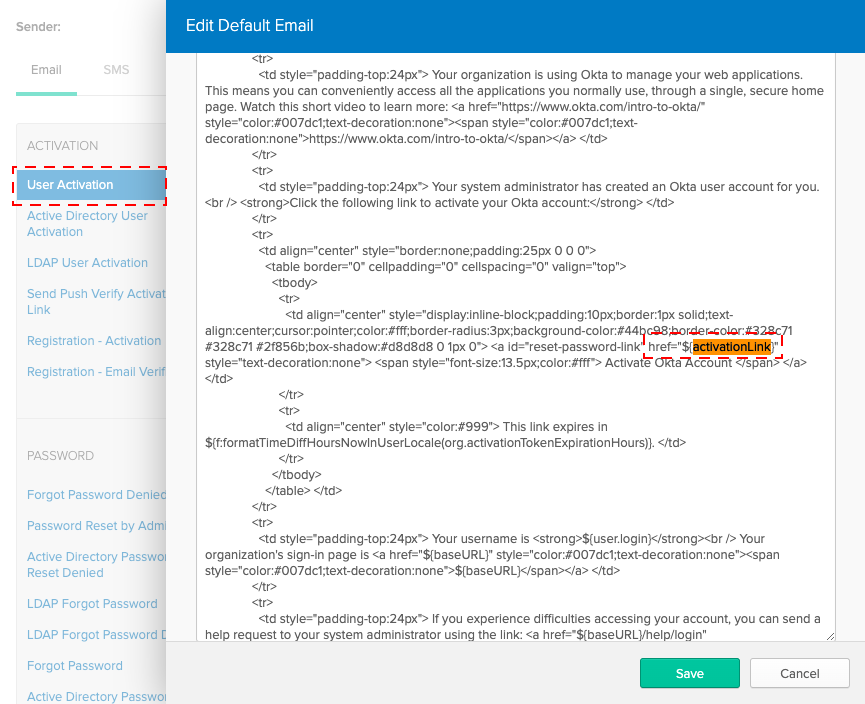
Terraform currently does not support updating email templates so you have to do the following manually to get the welcome email to be redirect to the user activation path of the locally running app: localhost:8080/activate.
- Update the User Activation email template: Replace
${activationLink}withhttp://localhost:8080/activate/${activationToken}
Run
cd into the dac-spa folder and run
npm run serve
Then, open your browser to http://localhost:8080 and login
Step-by-step Options
If you would rather do things step by step, do not run make all. Deploying this project has 3 parts:

