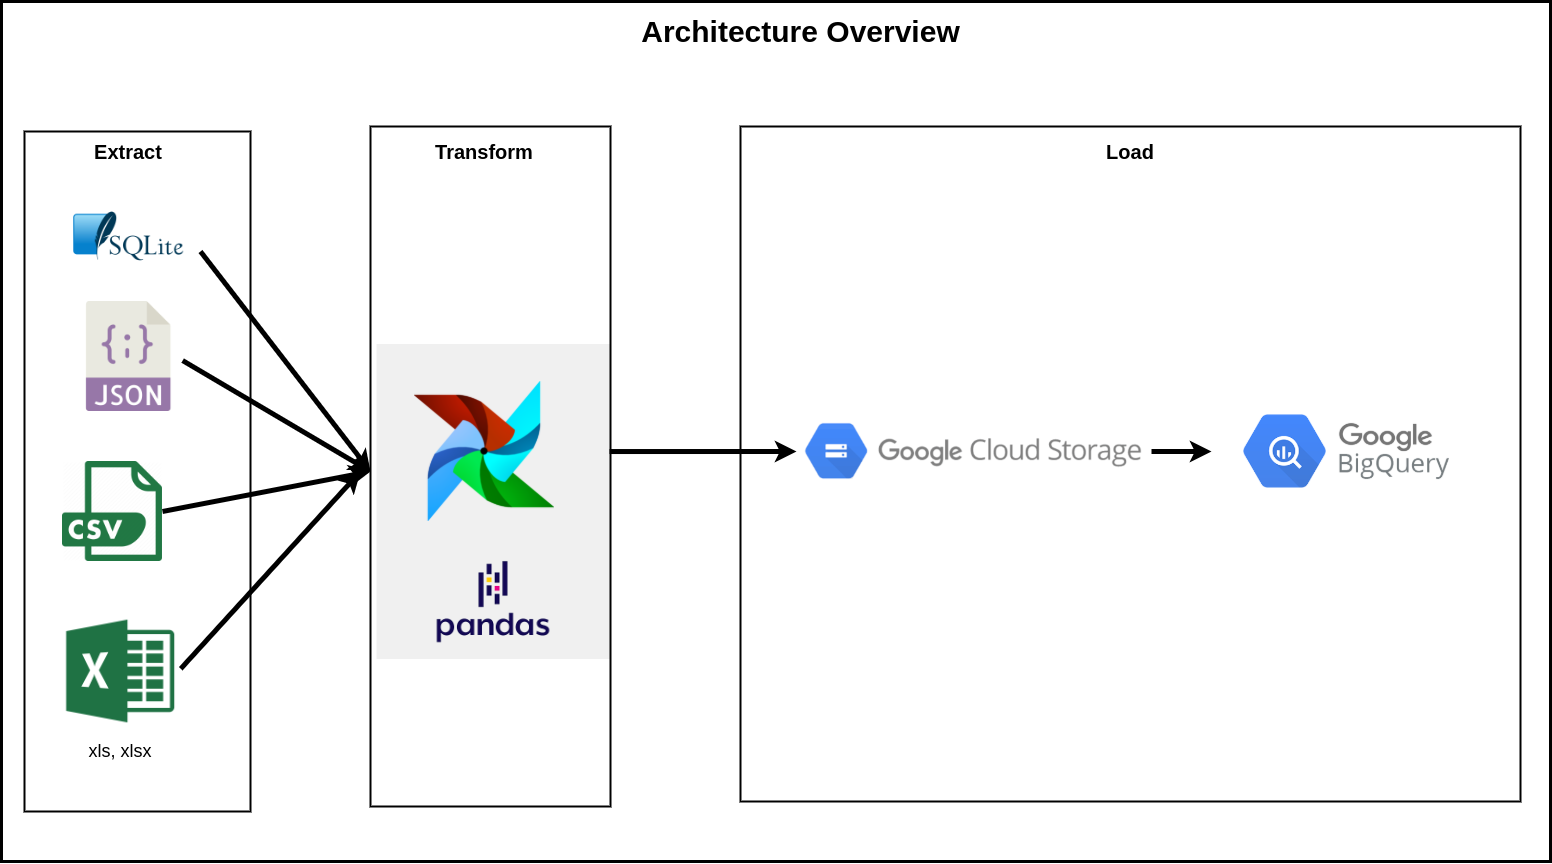
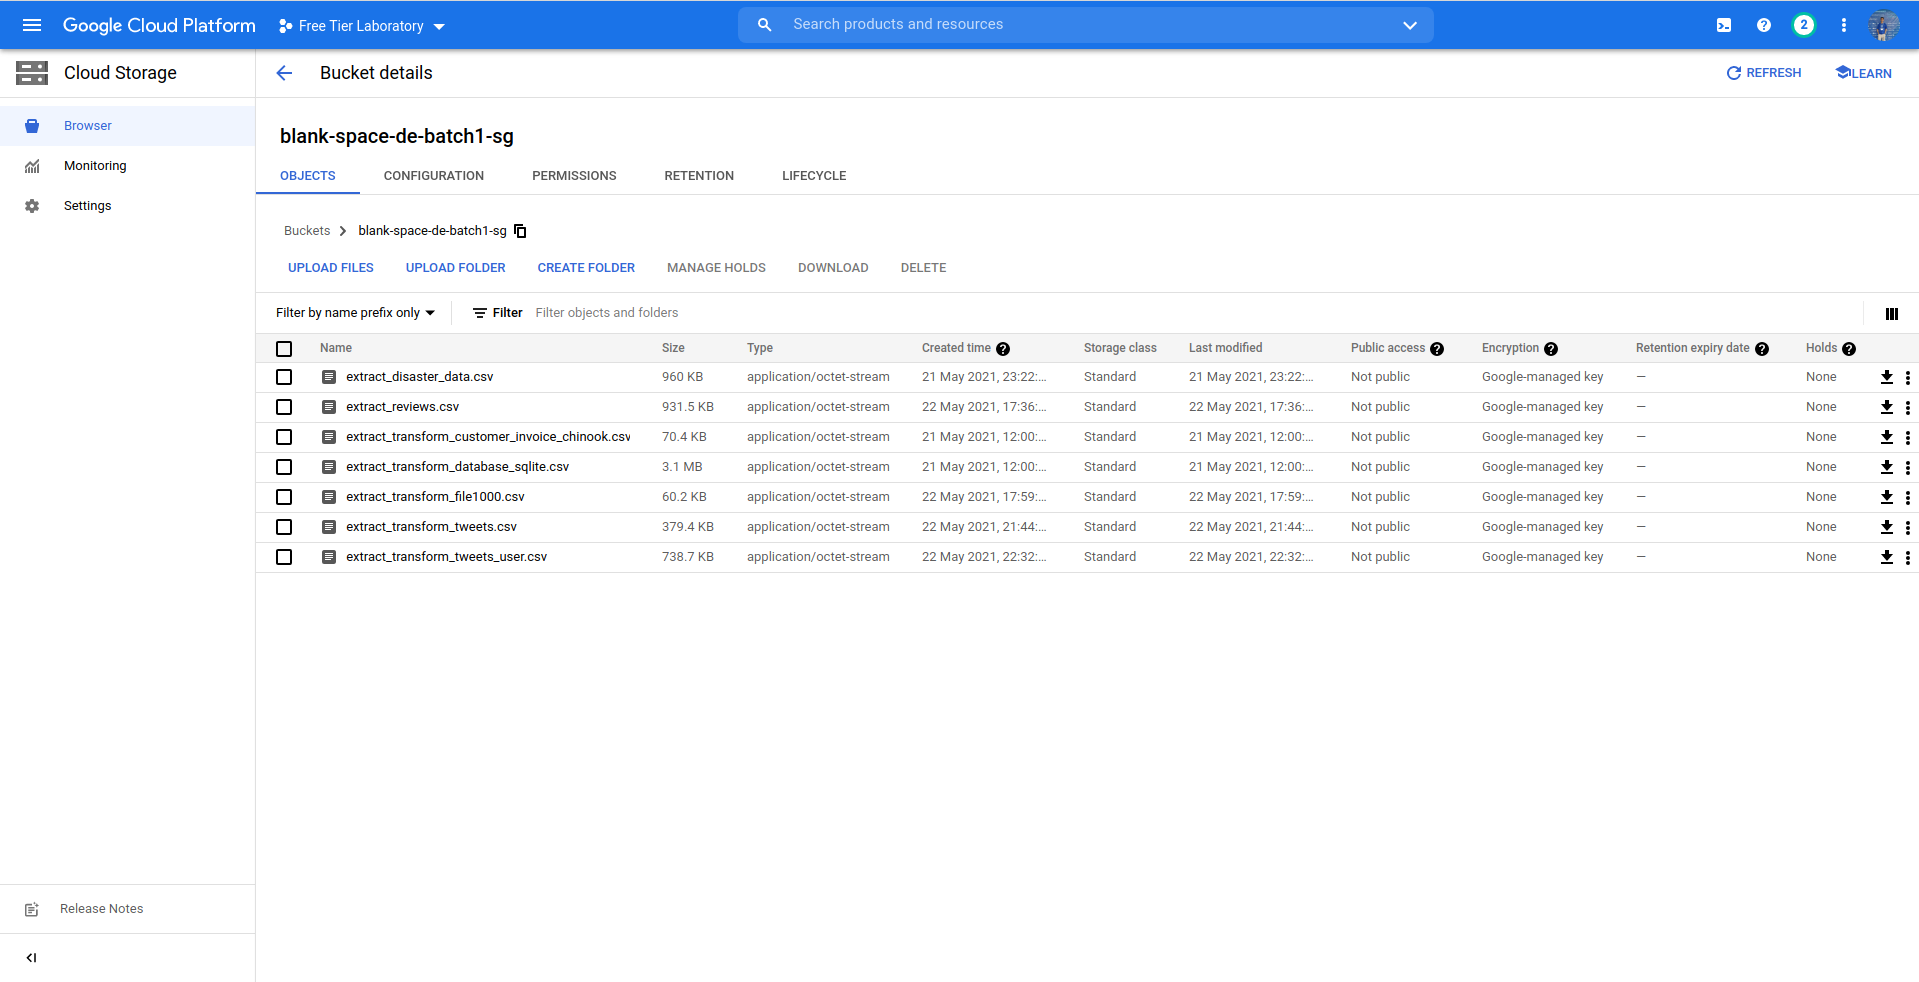
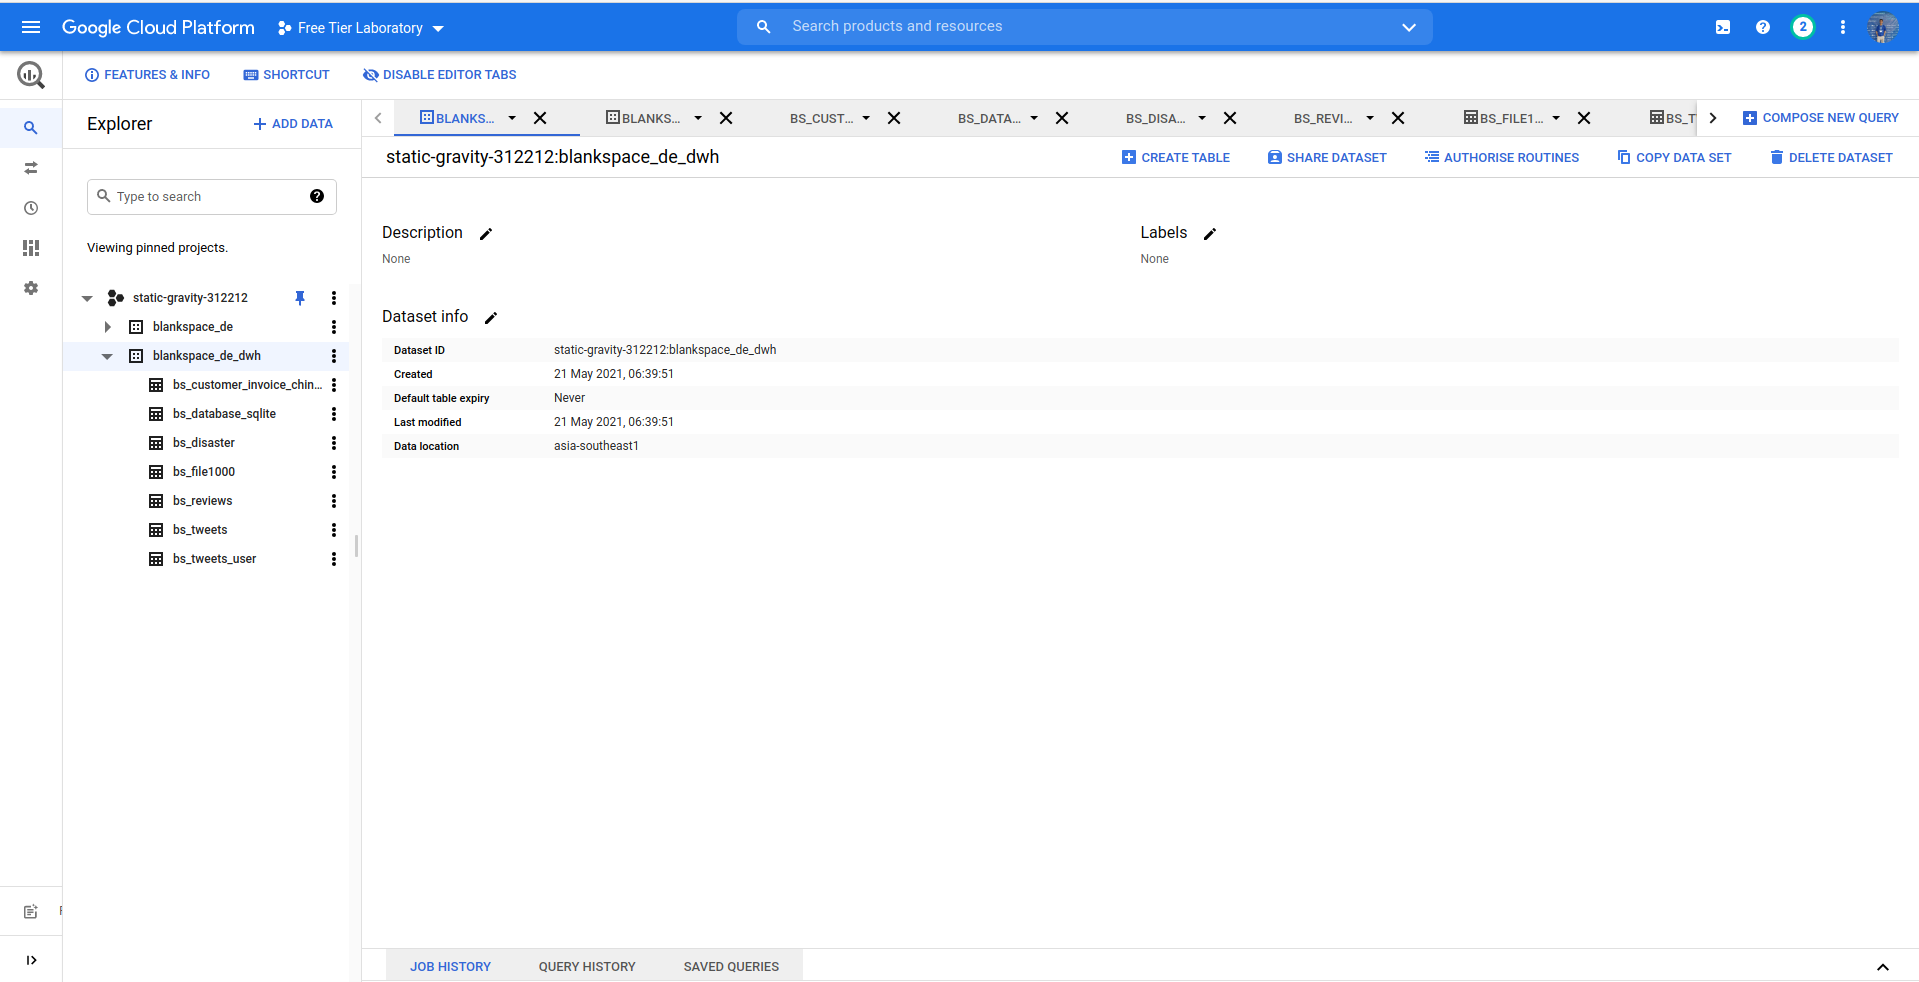
ETL from flat file data sources to Data Warehouse.
- SQLite
- Comma separated values (CSV)
- Excel (xls, xlsx)
- JSON
- Python (v3.8.5)
- Airflow (v2.0.2)
- Google Cloud Storage (GCS)
- BigQuery
This repo is using Native Airflow that is intended to get understanding on how to setup Airflow from scratch and for the sake of learning. Here is the steps to setup:
-
(Highly recommended) Create virtual environment and activate it by running
python -m venv venv source ./venv/bin/activate -
Install
apache-airflowwith some libraries contraints that compatible withAIRFLOW_VERSIONandPYTHON_VERSIONto prevent any system break because of incompatibilityAIRFLOW_VERSION=2.0.2 PYTHON_VERSION="$(python --version | cut -d " " -f 2 | cut -d "." -f 1-2)" CONSTRAINT_URL="https://raw.githubusercontent.com/apache/airflow/constraints-${AIRFLOW_VERSION}/constraints-${PYTHON_VERSION}.txt" pip install "apache-airflow==${AIRFLOW_VERSION}" --constraint "${CONSTRAINT_URL}"
-
Run
export AIRFLOW_HOME=$(pwd)to setAIRFLOW_HOMEvariable to your current directory, but this is optional. The default value isAIRFLOW_HOME=~/airflow -
Run
airflow db initto initialize SQLite Database which stores Airflow metadata based on yourAIRFLOW_HOMEvariable -
Create user account by running
AIRFLOW_USERNAME=admin
AIRFLOW_FIRSTNAME=Data
AIRFLOW_LASTNAME=Engineer
AIRFLOW_EMAIL=dataengineer@company.org

airflow users create \
 --username "${AIRFLOW_USERNAME}" \
 --firstname "${AIRFLOW_FIRSTNAME}" \
 --lastname "${AIRFLOW_LASTNAME}" \
 --role Admin \
 --email "${AIRFLOW_EMAIL}"
You will need to input your password when executing this command. And its your freedom to change the
USERNAME,FIRSTNAME,LASTNAME, andEMAILvariable based your needs. If you curious on checking this username onairflow.db, let me show it to you.Here is the output:
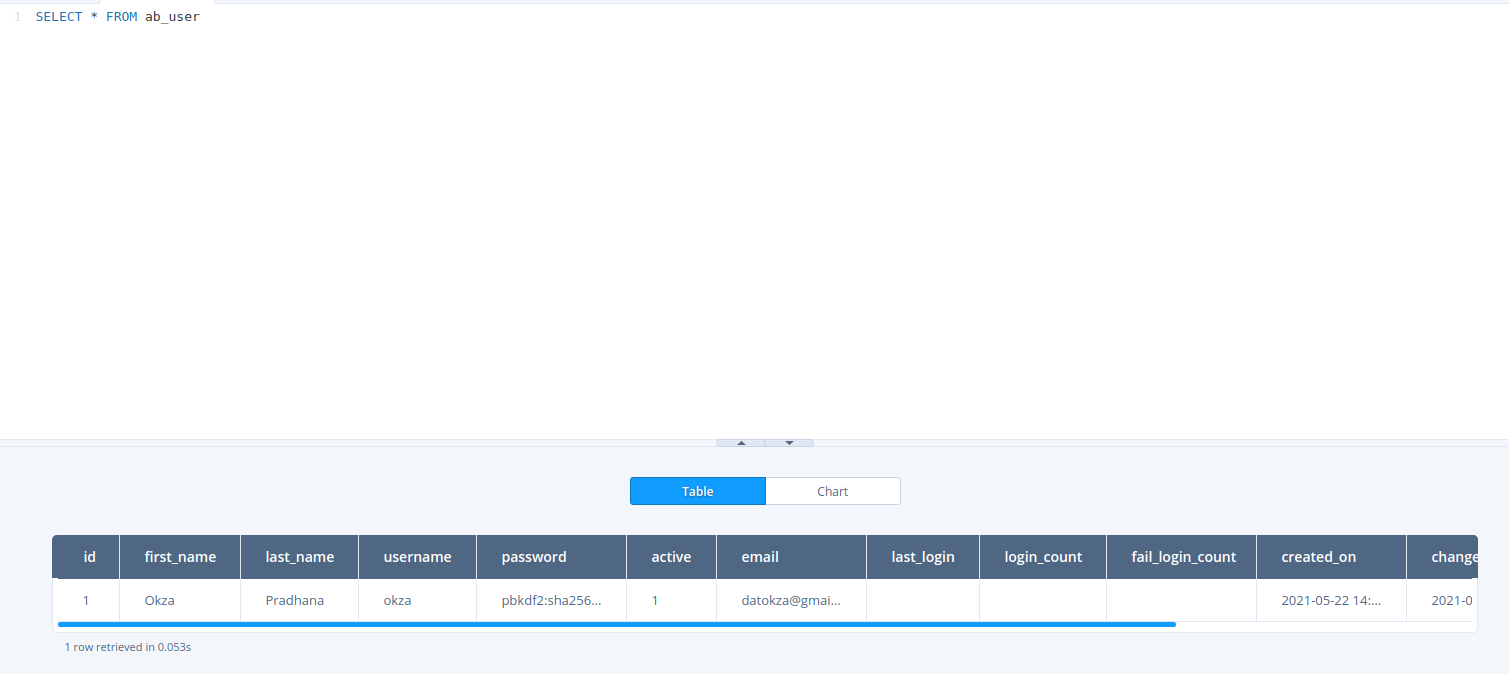 I'm using https://lana-k.github.io/sqliteviz/#/editor to display the SQLite data, dont be afraid as your SQLite file wont persist there.
 -
On same terminal, start the Airflow webserver with:
airflow webserver --port 8080
-
Open new terminal, run the scheduler to make your
dagscan do their tasks. Notice that you have to set theAIRFLOW_HOMEvariable again if you have set the variable before:export AIRFLOW_HOME=$(pwd) airflow scheduler
-
Voila! Just open
http://localhost:8080/on your browser to see the Airflow web
Shortly, you may run install.sh to perform the installation. Again, you can edit install.sh based on needs.
More on: https://airflow.apache.org/docs/apache-airflow/stable/start/local.html
But if you wish to use the Docker Airflow instead you can lookup to docker-compose.yaml file and refer to this tutorial: https://airflow.apache.org/docs/apache-airflow/stable/start/docker.html .
If you need to install other dependecies other than what have been installed by the airflow docker image, please refer to this page: https://airflow.apache.org/docs/apache-airflow/1.10.13/production-deployment.html#extending-the-image
This project is used some of GCP services which is GCS and BigQuery, and we need to do some stuff on them.
-
On your GCP console, go to BigQuery. You can find it on Big Data > BigQuery
-
Fill the Dataset field such as. In this project we only need to set:
-
Click
CREATE DATA SET
- Back to your GCP console, choose Cloud Storage. You can find it on Storage > Cloud Storage
- Click
CREATE BUCKETbutton. Then fill some fields such as:- Name your bucket (example: blank-space-de-batch1)
- Choose where to store your data
- I would suggest to choose Region option because it offers lowest latency and single region. But if you want to get high availability you may consider to choose other location type options.
- Then choose nearest location from you
- Leave default for the rest of fields.
- Click
CREATE - Your bucket will be created and showed on GCS Browser
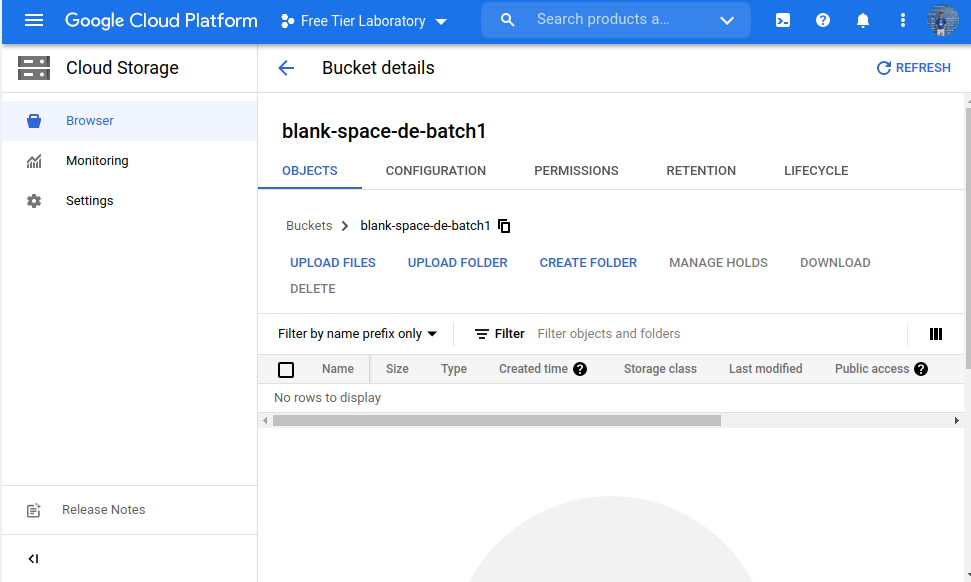
To recognized by Google Cloud Platform and interact with them. We have to set our service account.
- Go to GCP Console again, then navigate to Products > IAM & Admin > Service Accounts
- Click
CREATE SERVICE ACCOUNTbutton - Fill Service account details by filling
Service account nameandService account descriptionthen clickCREATE
Example: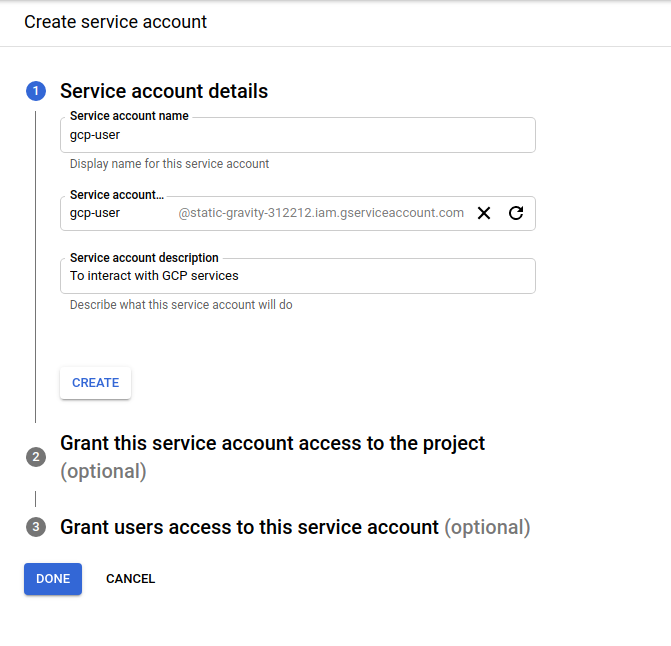
- Click
DONE - Your service account can be seen on the main page

- As you can see this service account doesn't have key yet. Thus we need to create first. On Action column click the icon then choose Manage keys
- On Keys page, click
ADD KEYand choose Create new key. - Choose
JSONas the key type then clickCREATE - The key will be automatically created & downloaded to your computer.

Notes
This json key will be needed when adding/editing Airflow Connections later. Thus please keep it safe.
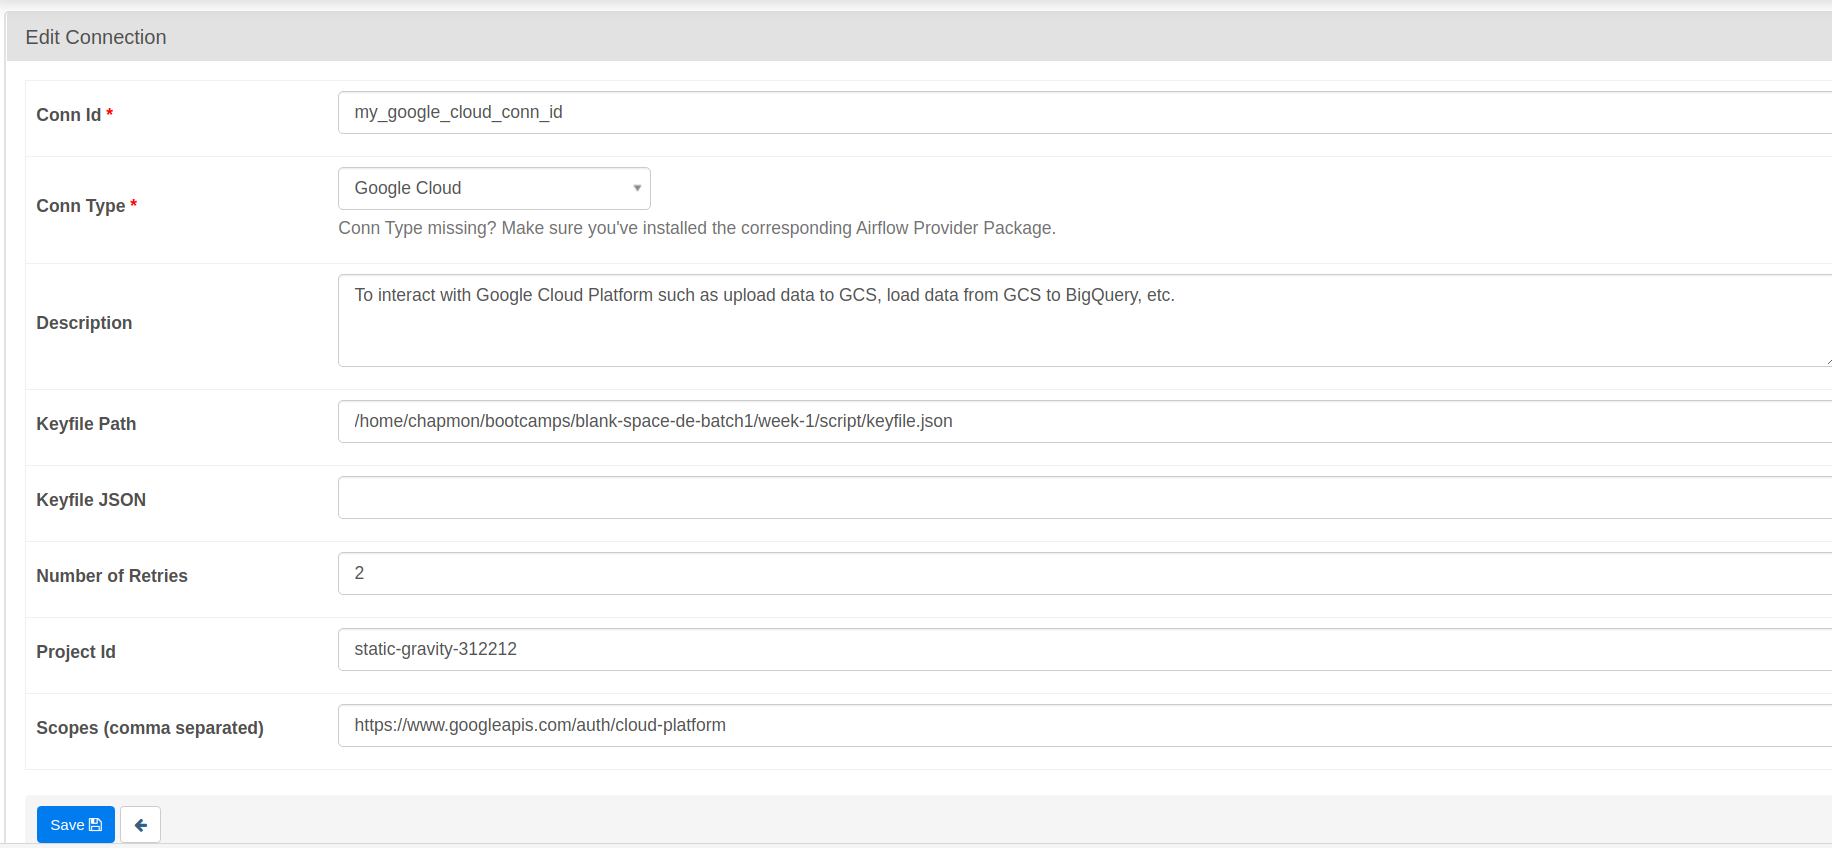
To connect our Airflow with external system, we need to setup connections on Airflow.
- On http://localhost:8080, go to Admin > Connections
- Add or Edit current Connection. Search for Google Cloud conn type
- Input fields needed there:
- Conn Id (example: my_google_cloud_conn_id)
- Conn Type: Google Cloud
- Description (example: To interact with Google Cloud Platform such as upload data to GCS, load data from GCS to BigQuery, etc. )
- Keyfile Path. This path is where your service account key is located. Refer to that path and fill this field with those file path.
- Keyfile JSON. If you use Keyfile Path, leave this blank
- Number of Retries. Default value is 5, but I set to 2.
- Project Id. Set this value to your GCP Project Id.
- Scopes (comma separated). People on forum recommends to fill this with https://www.googleapis.com/auth/cloud-platform
- Click
Savebutton - Done! Everytime your Airflow connector needs
GCP conn_id, just fill it with your Conn Id
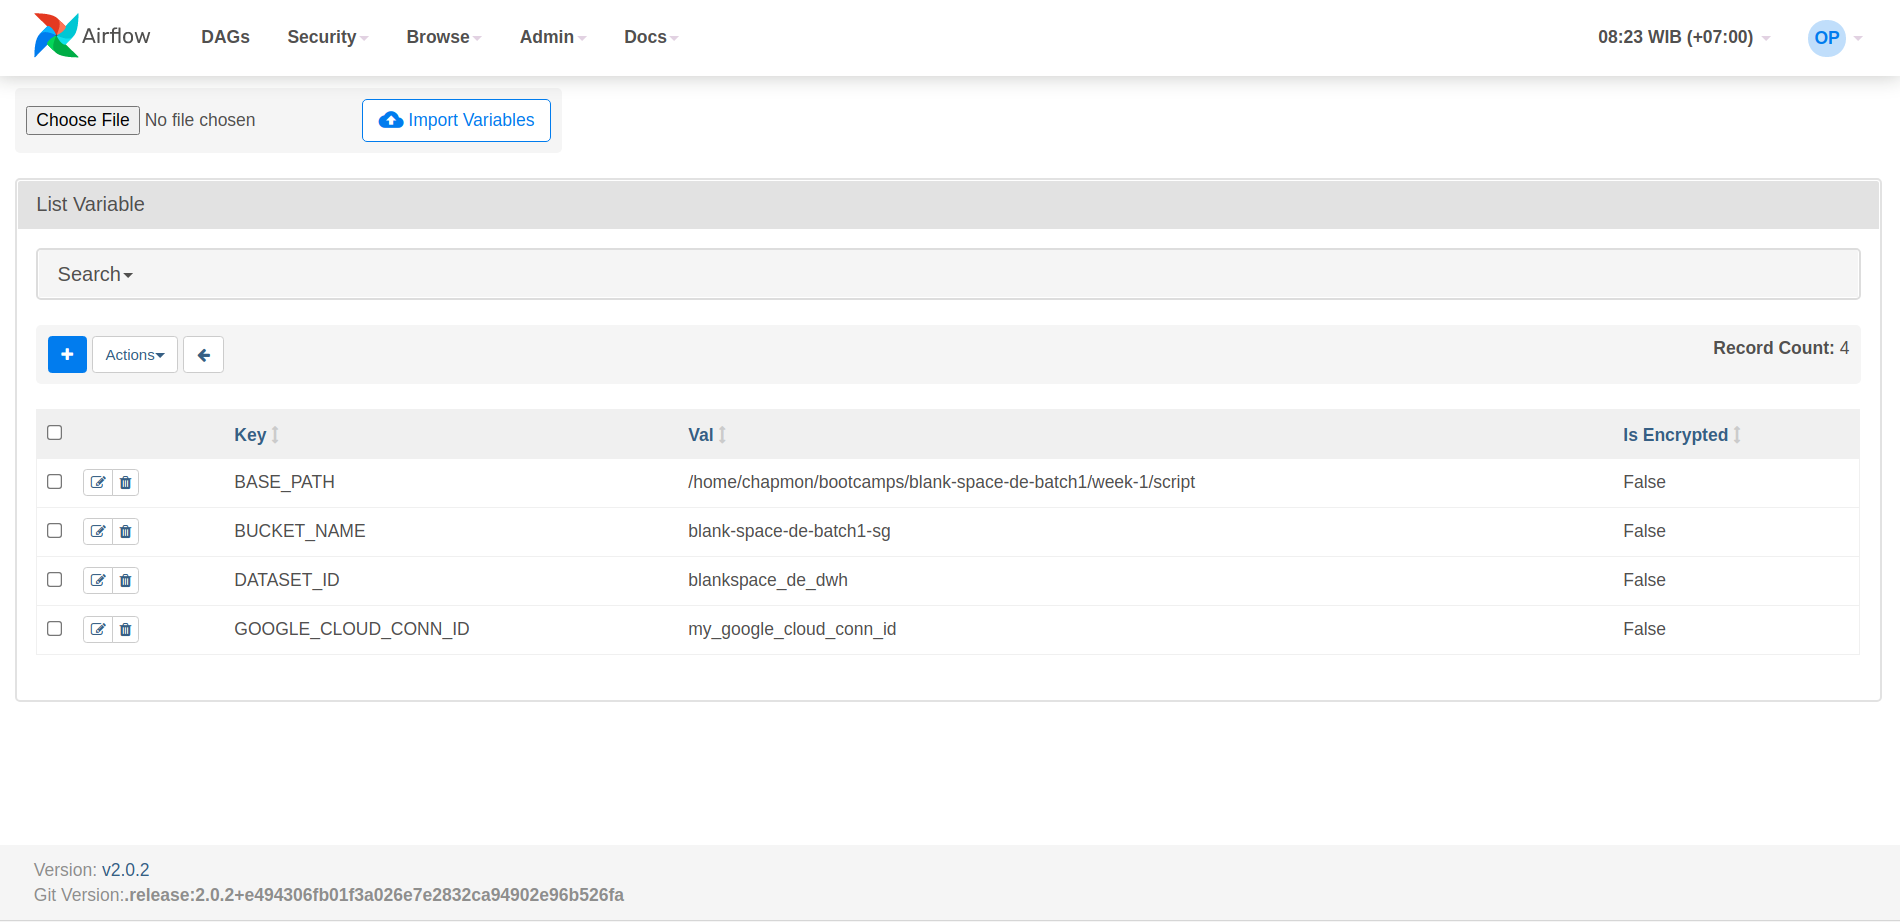
Airflow Variables is very important if you want to set global value which can accessed to your DAGs. Here's how to do it:
- On http://localhost:8080 go to Admin > Variables
- Click the Plus (+) icon. Or you can just Import Variables which is json file containing key value of variables.
- At very least, this projects must have this Variables:
- BASE_PATH
- BUCKET_NAME
- DATASET_ID
- GOOGLE_CLOUD_CONN_ID
- Done! Now your DAGs can access this variable by using:
from airflow.models.variable import Variable

DATASET_ID = Variable.get("DATASET_ID")
...
Everytime you want to run Native Airflow on your computer. Do this:
- Activate your virtual environment by executing
source venv/bin/activate - Run
airflow webserver --port 8080at your current terminal - Run
airflow scheduleron your other terminal. - Go to http://localhost:8080
