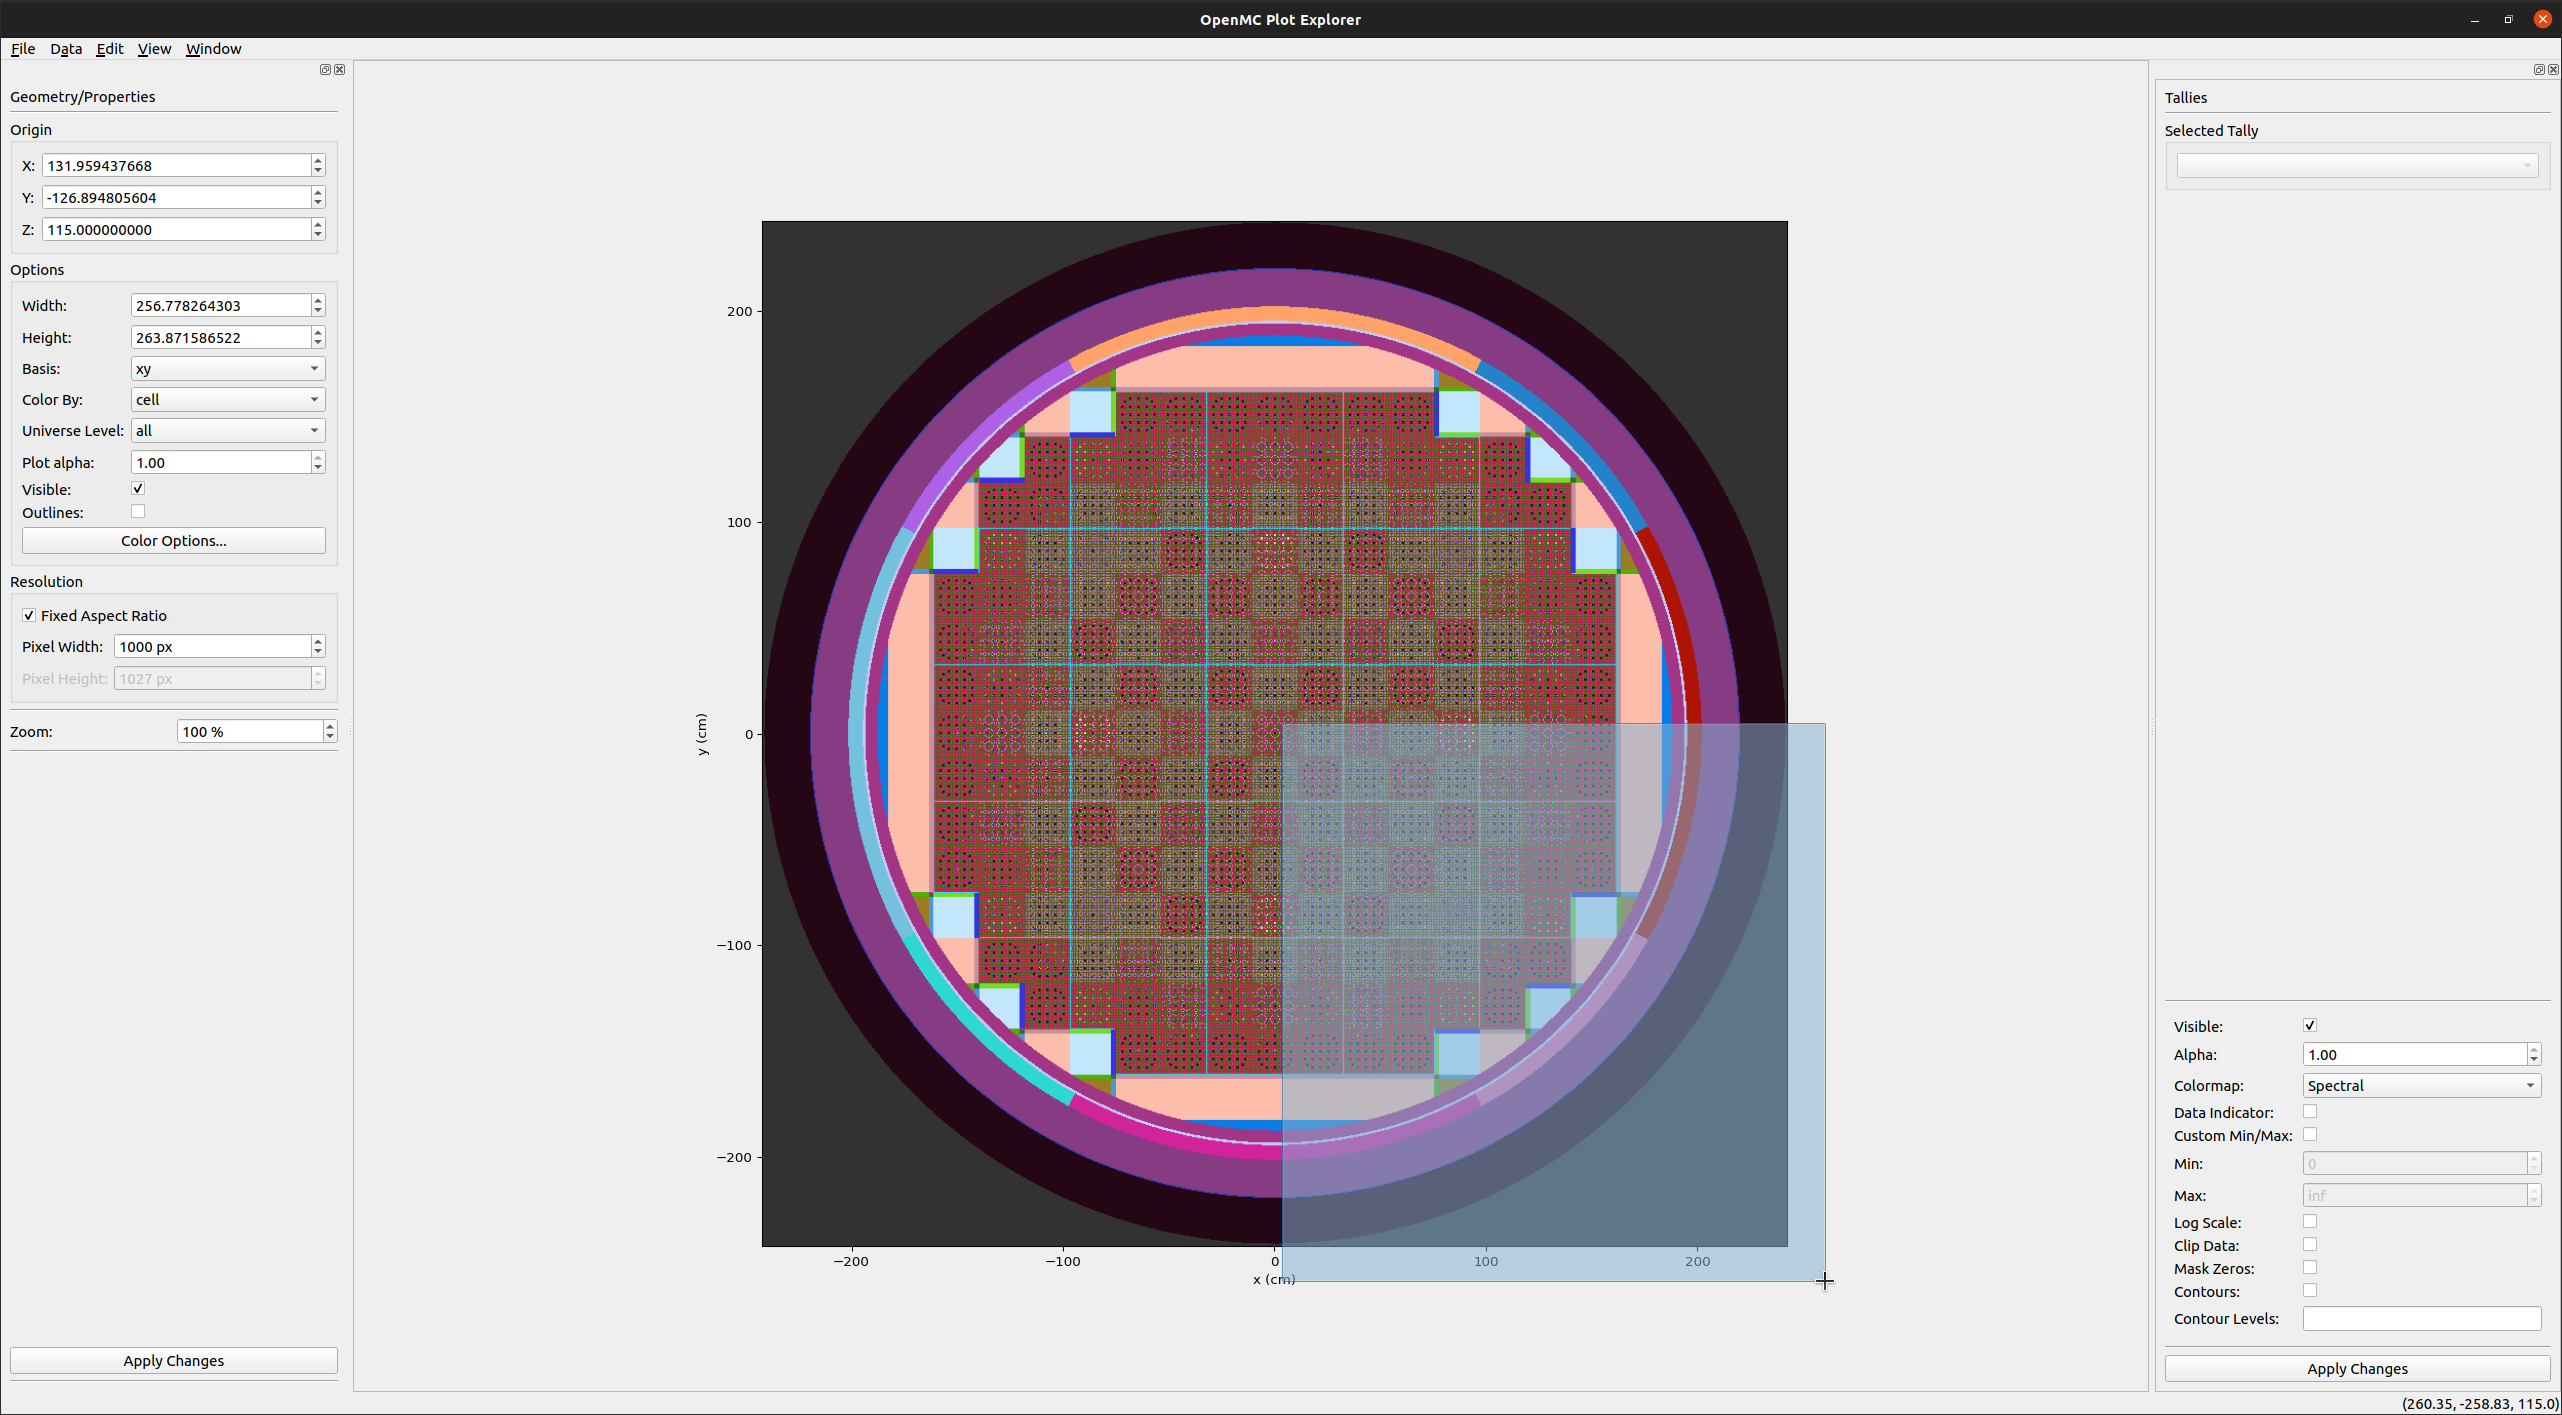
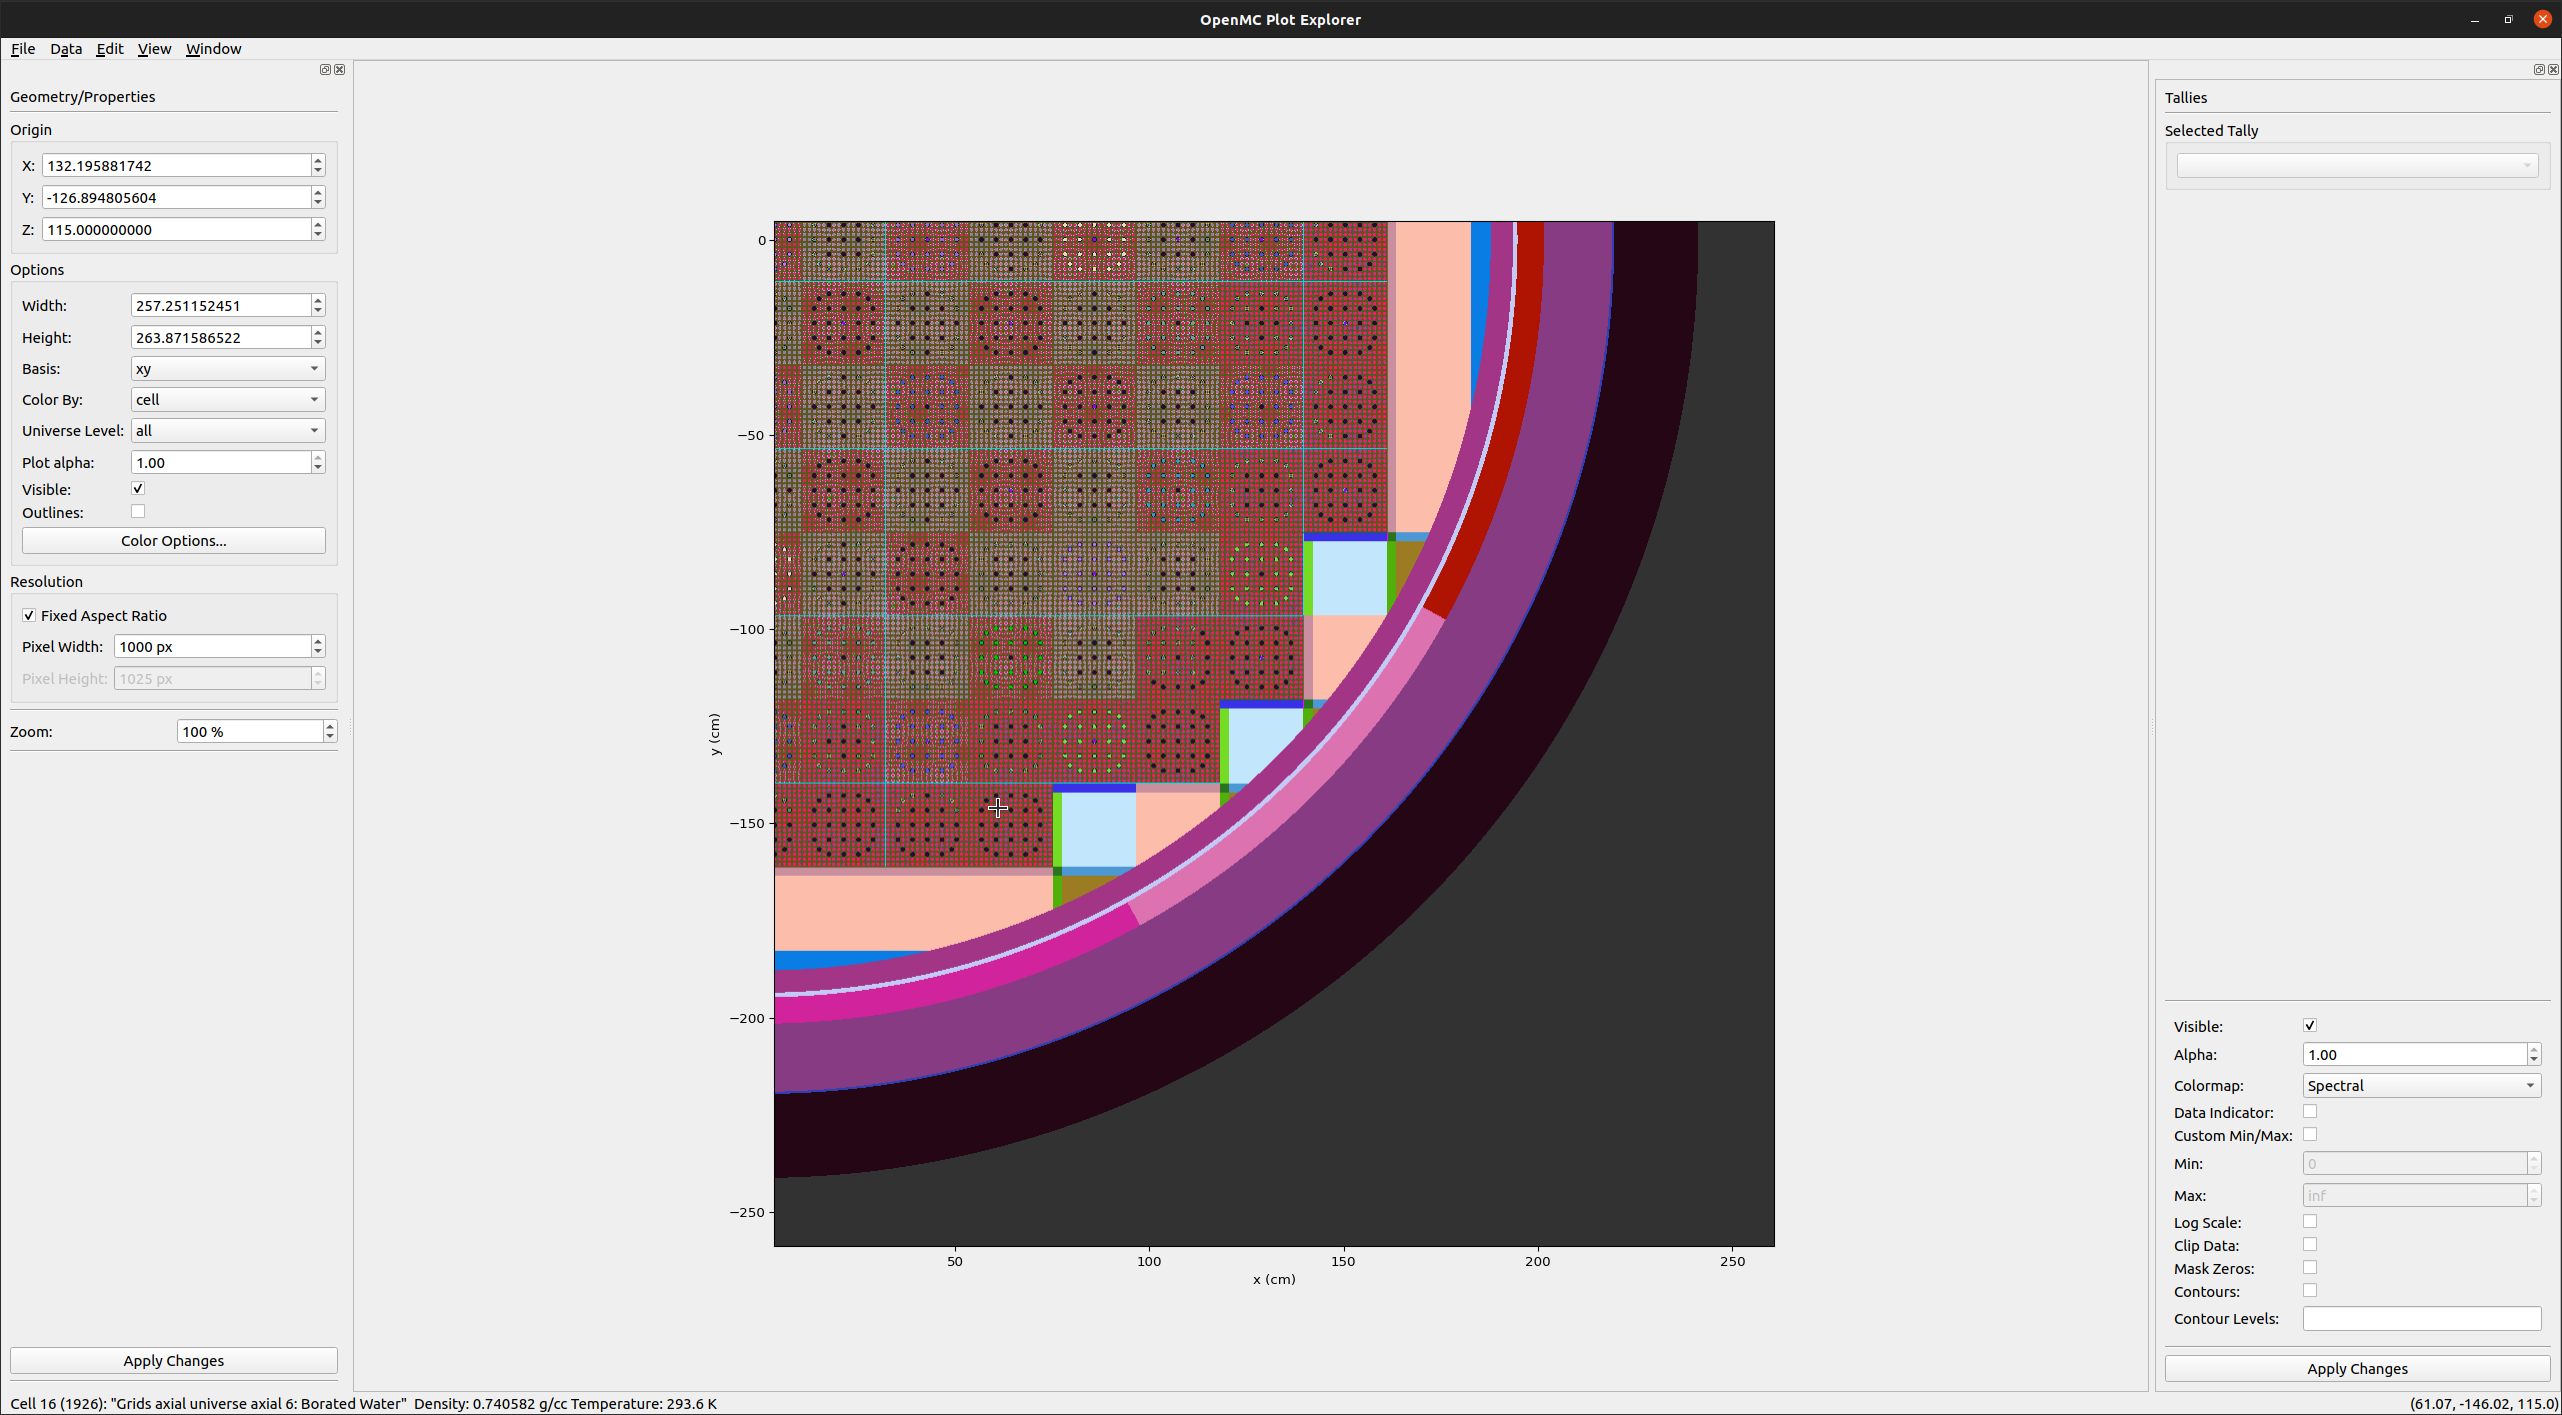
A graphical interface for visualizing and navigating OpenMC models.
Originally created by @landonjmitchell at the University of Chicago (original repository).
OpenMC, Matplotlib, NumPy, PySide6
This package is available from PyPI and conda-forge. To install from PyPI run the following command from the terminal:
python -m pip install openmc-plotterAlternatively, conda can be used to install the plotter (recommended option for conda enviroments):
conda install -c conda-forge openmc-plotterFrom a directory containing an OpenMC model run:
$ openmc-plotter <path_to_openmc_model_dir>or simply run
$ openmc-plotterfrom the directory containing the model.
Once the viewer has opened, press ? to view a variety of keyboard shortcuts.
Plot view (.pltvw) files generated in interactive sessions (see Saving and Exporting)
can be used to generate images from the command line without opening the plotter GUI.
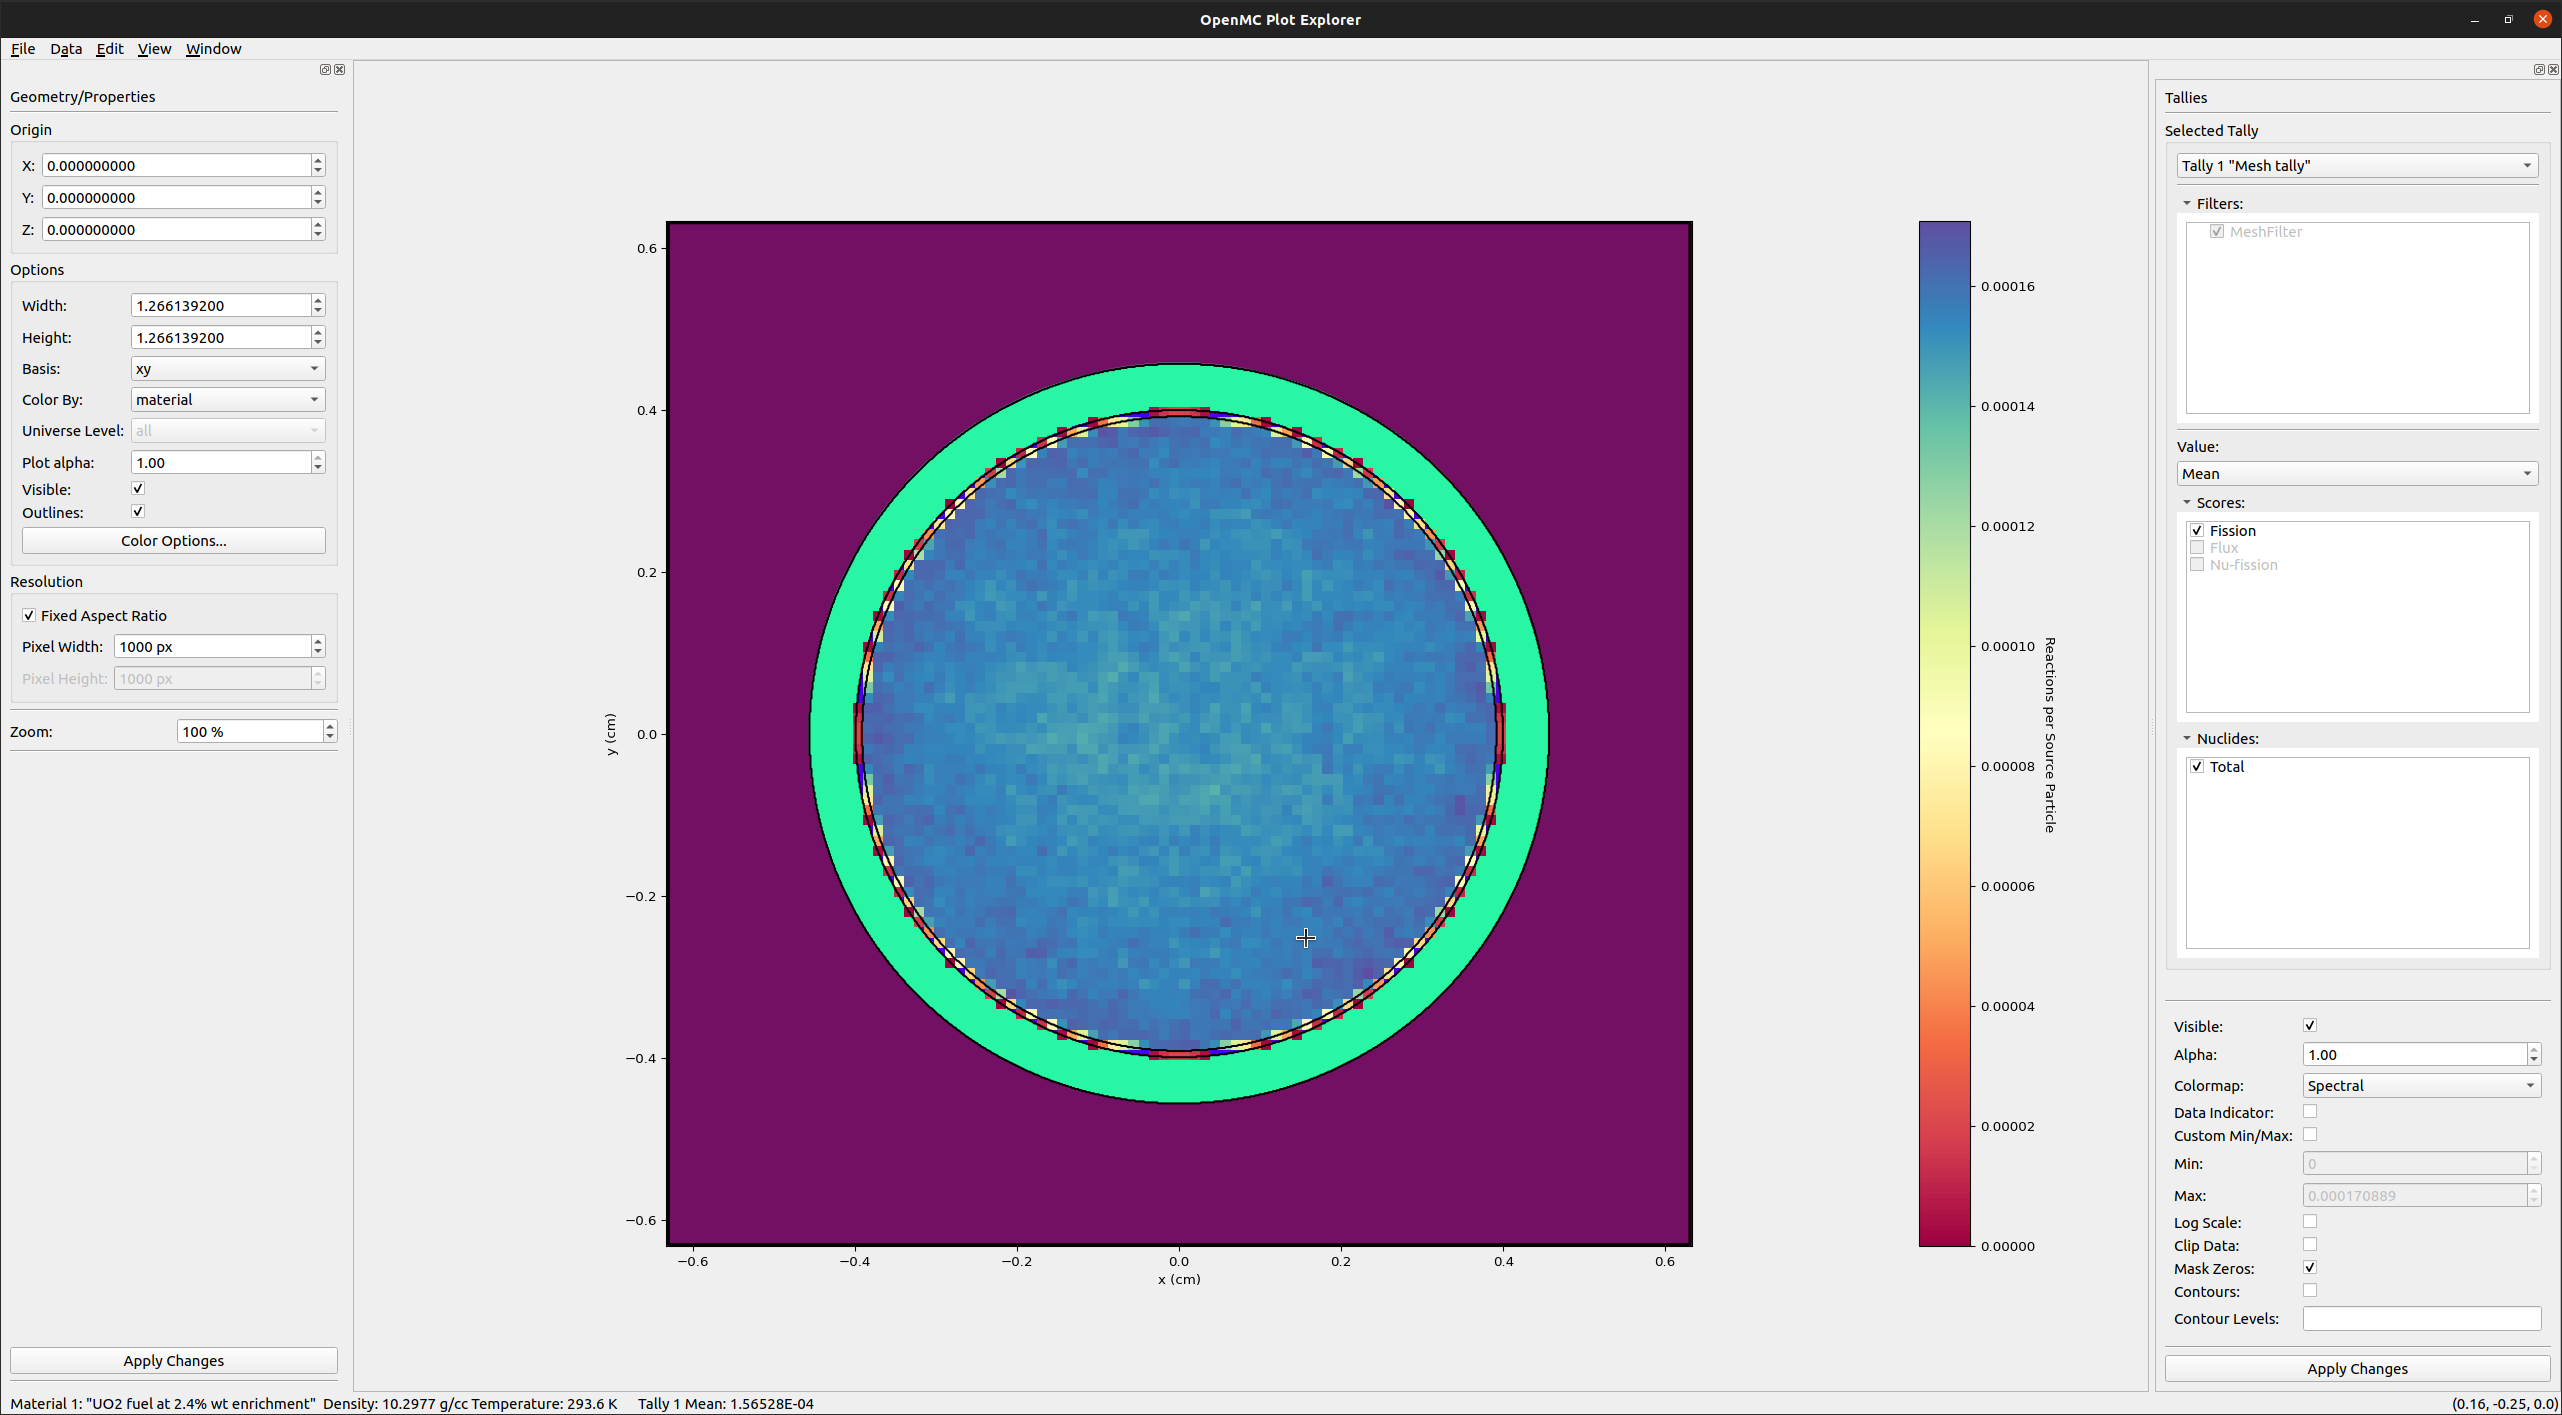
$ openmc-plotter -b view1.pltvw view1.pltvw view1.pltvwThe plotter also provides the ability to view tallies with spatial filters (mesh filter, cell filter, etc.). After loading a statepoint file from the "Edit" menu, tallies can be displayed on top of the geometry.
Filters, scores, and nuclides on the tally can be enabled/disabled to isolate data.
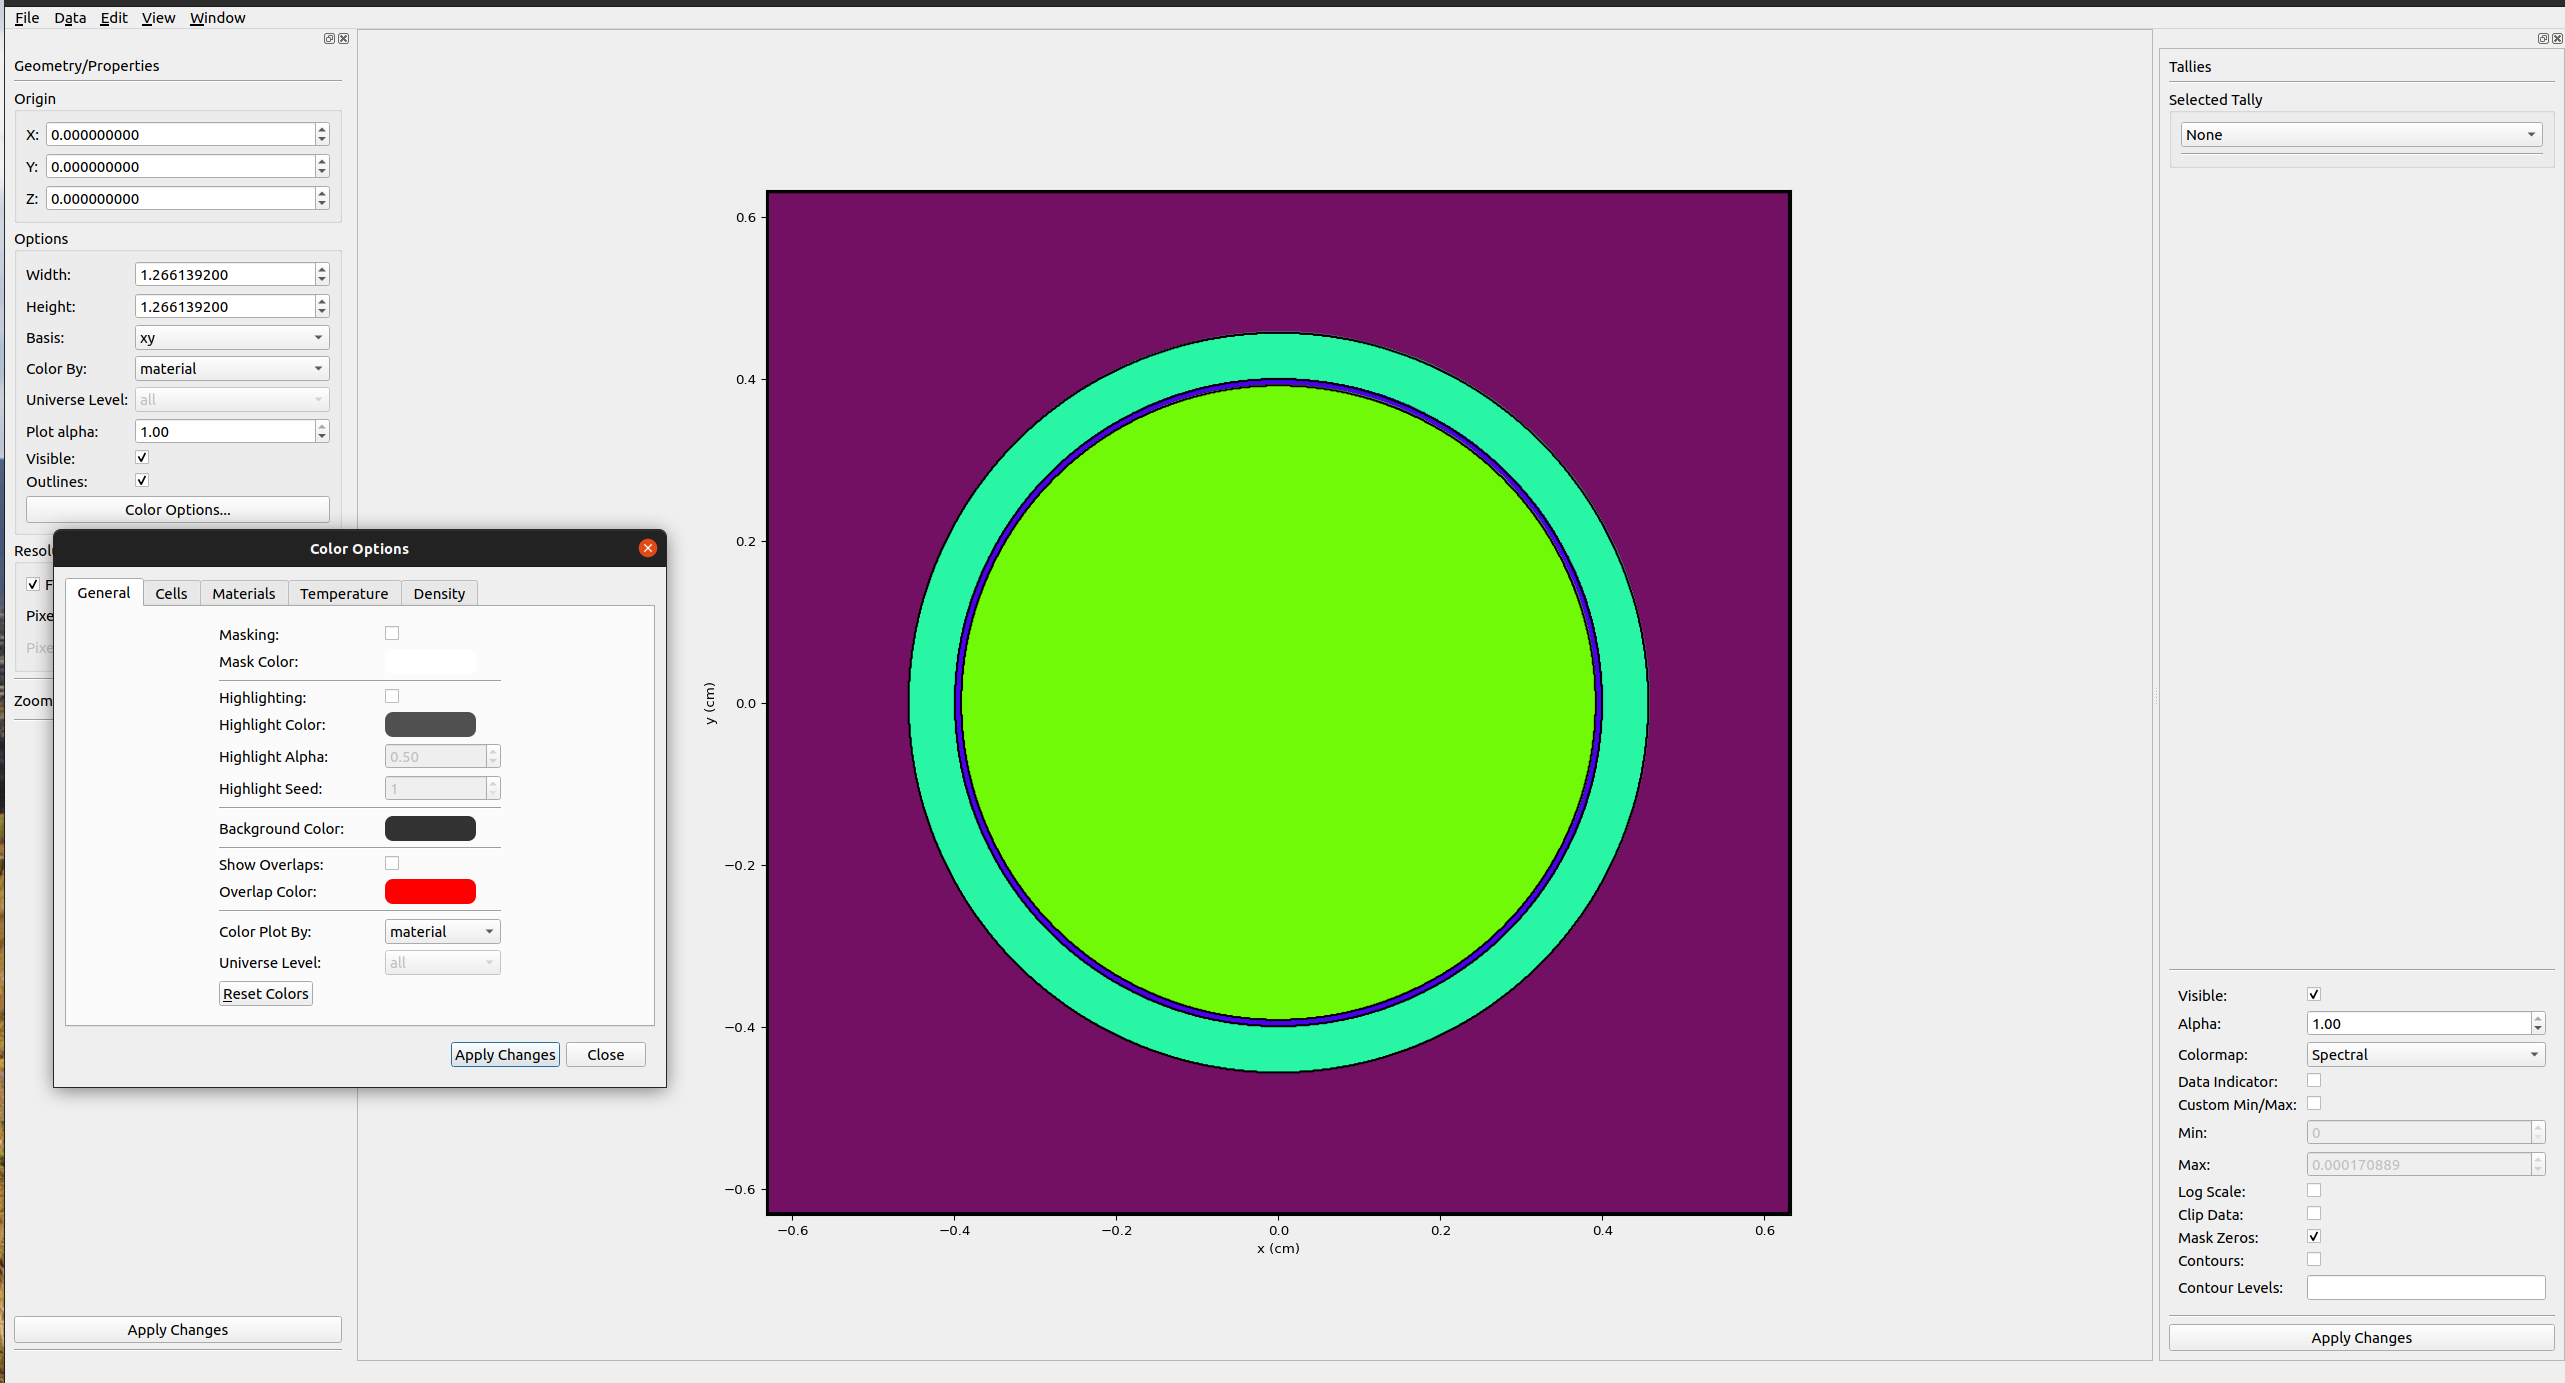
Cell and material colors can be customized in the color dialog menu. Overlap coloring can be enabled as well to debug problems in the geometry definition.
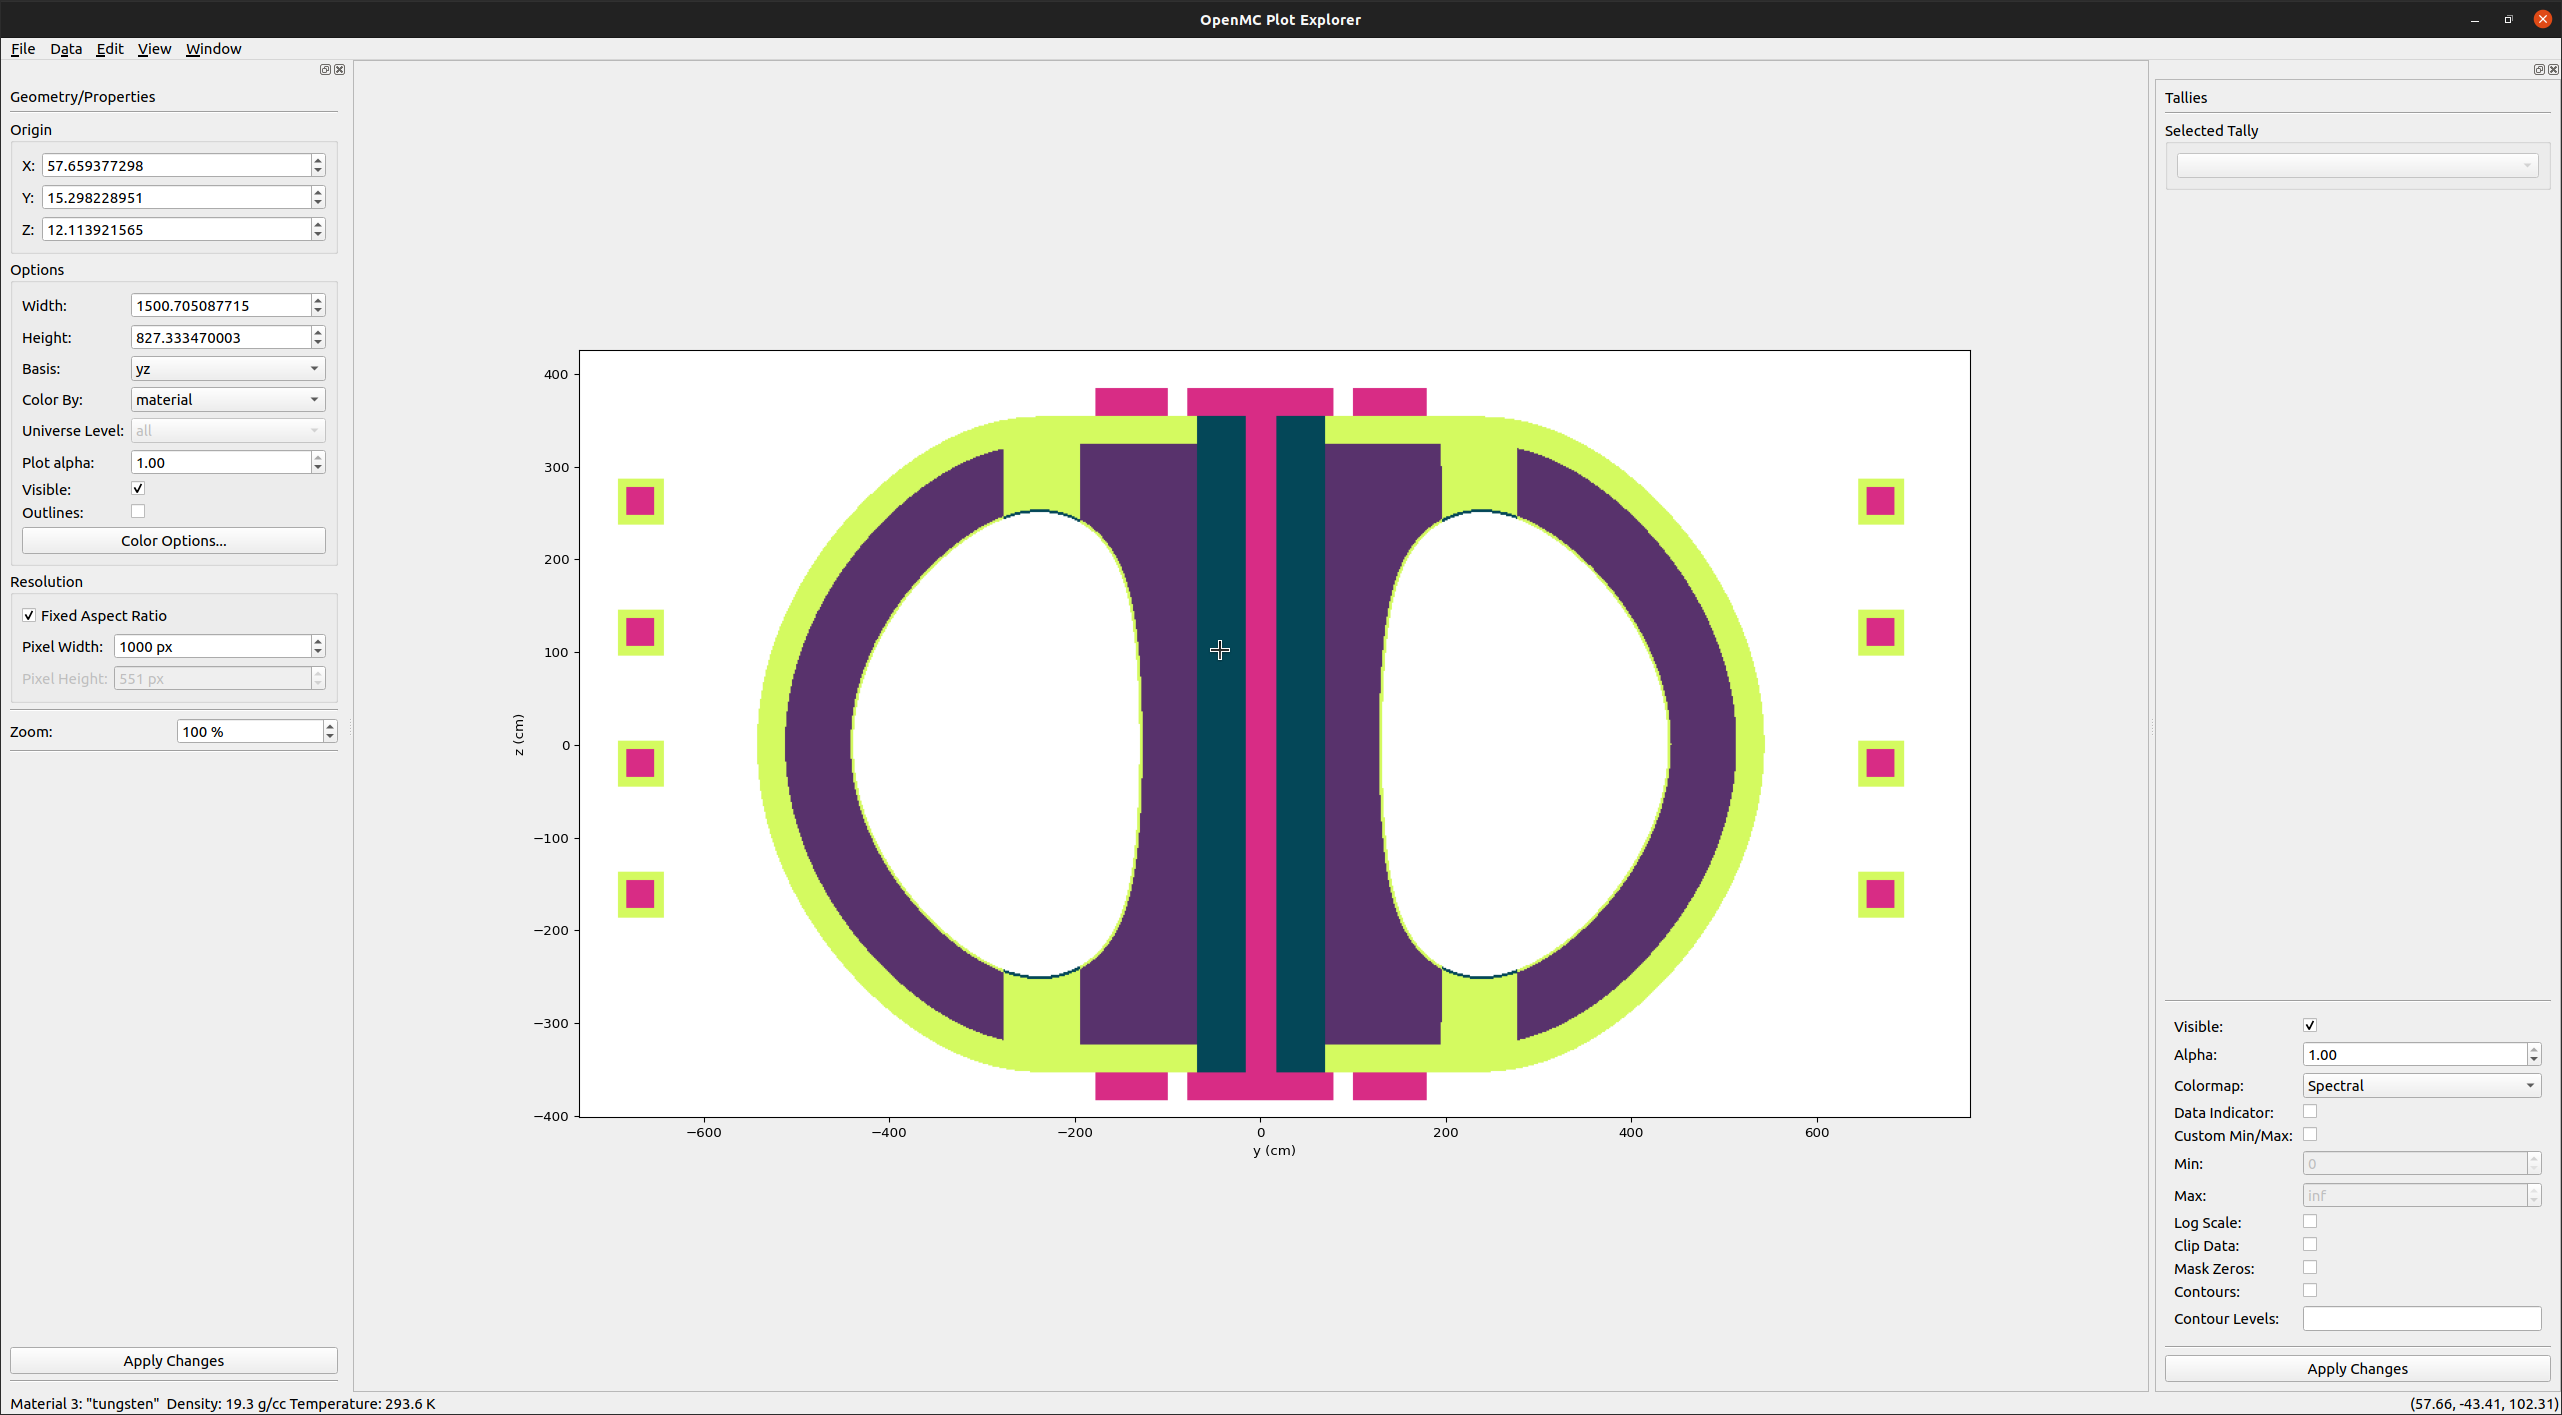
The plotter can also present the CAD-based tesellation geometry enabled by the Direct Accelerated Geometry Monte Carlo (DAGMC) toolkit. Below is the cross section of a tokamake model generated using paramak:
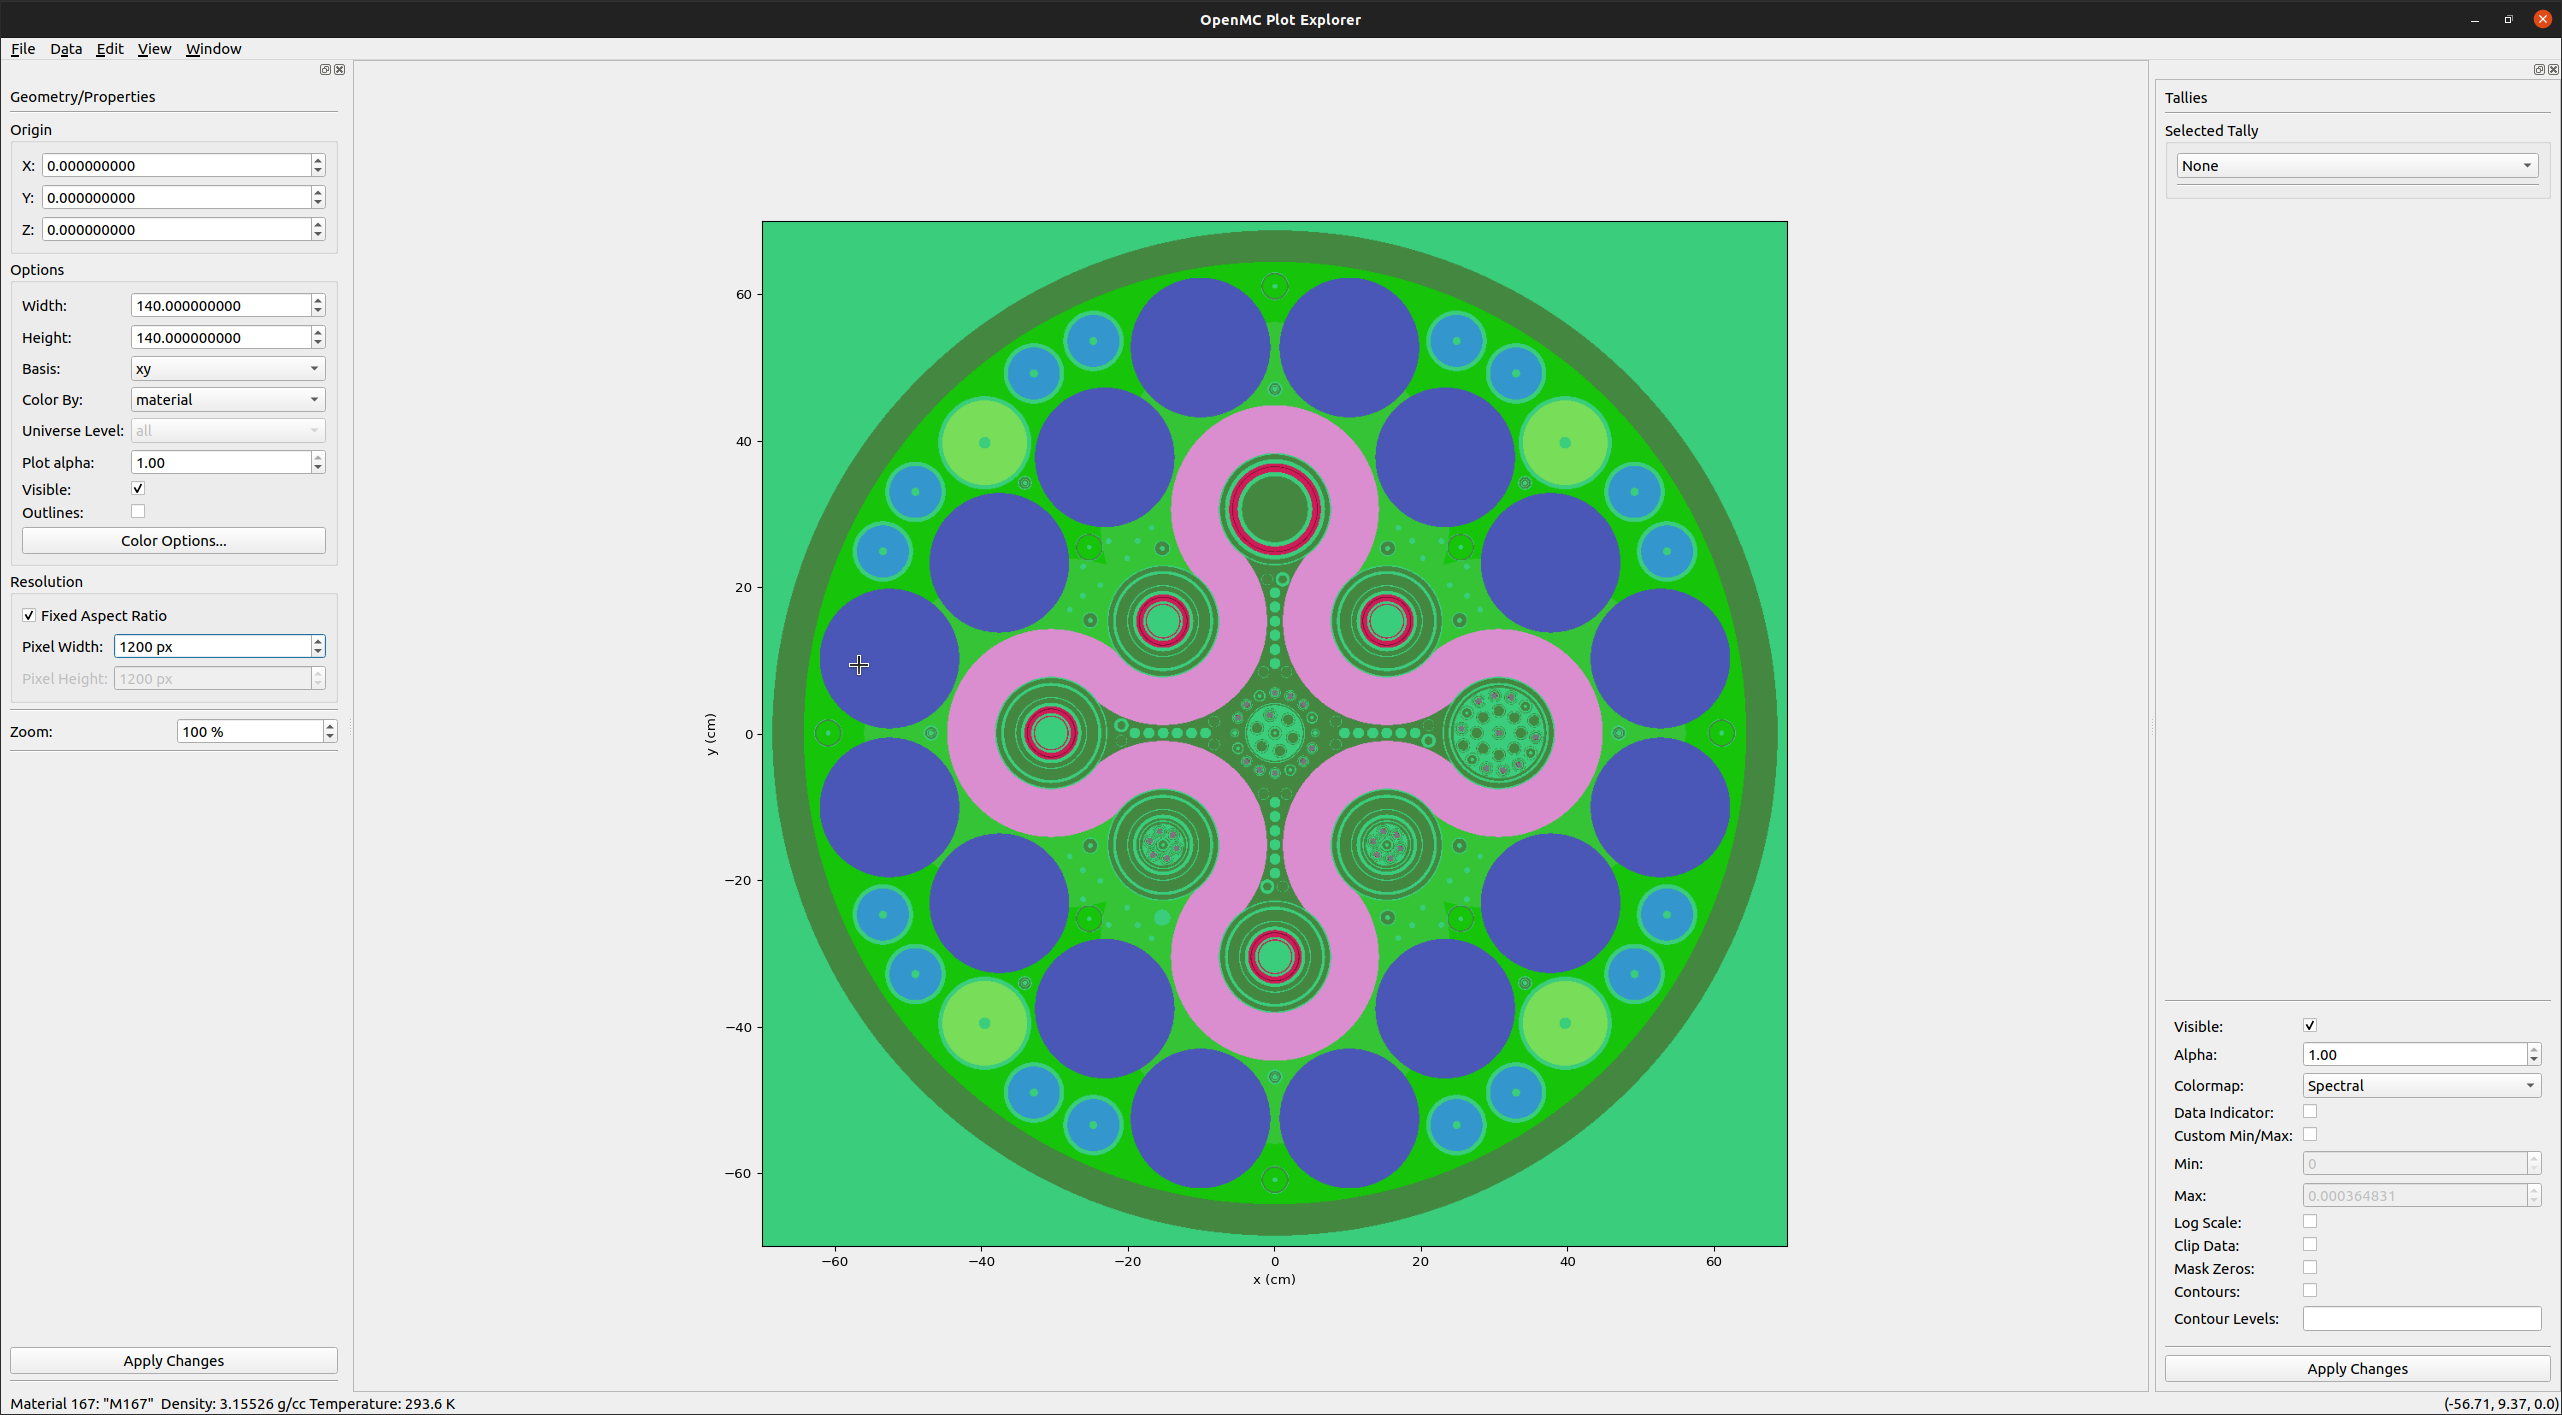
As well as a DAGMC model of the Advanced Test Reactor (ATR):
-
Any image displayed in the plotter can be saved in any format supported by the user's Matplotlib installation.
-
Tally and geometry data (material/cell IDs) can be exported to a VTK file under "File->Export"
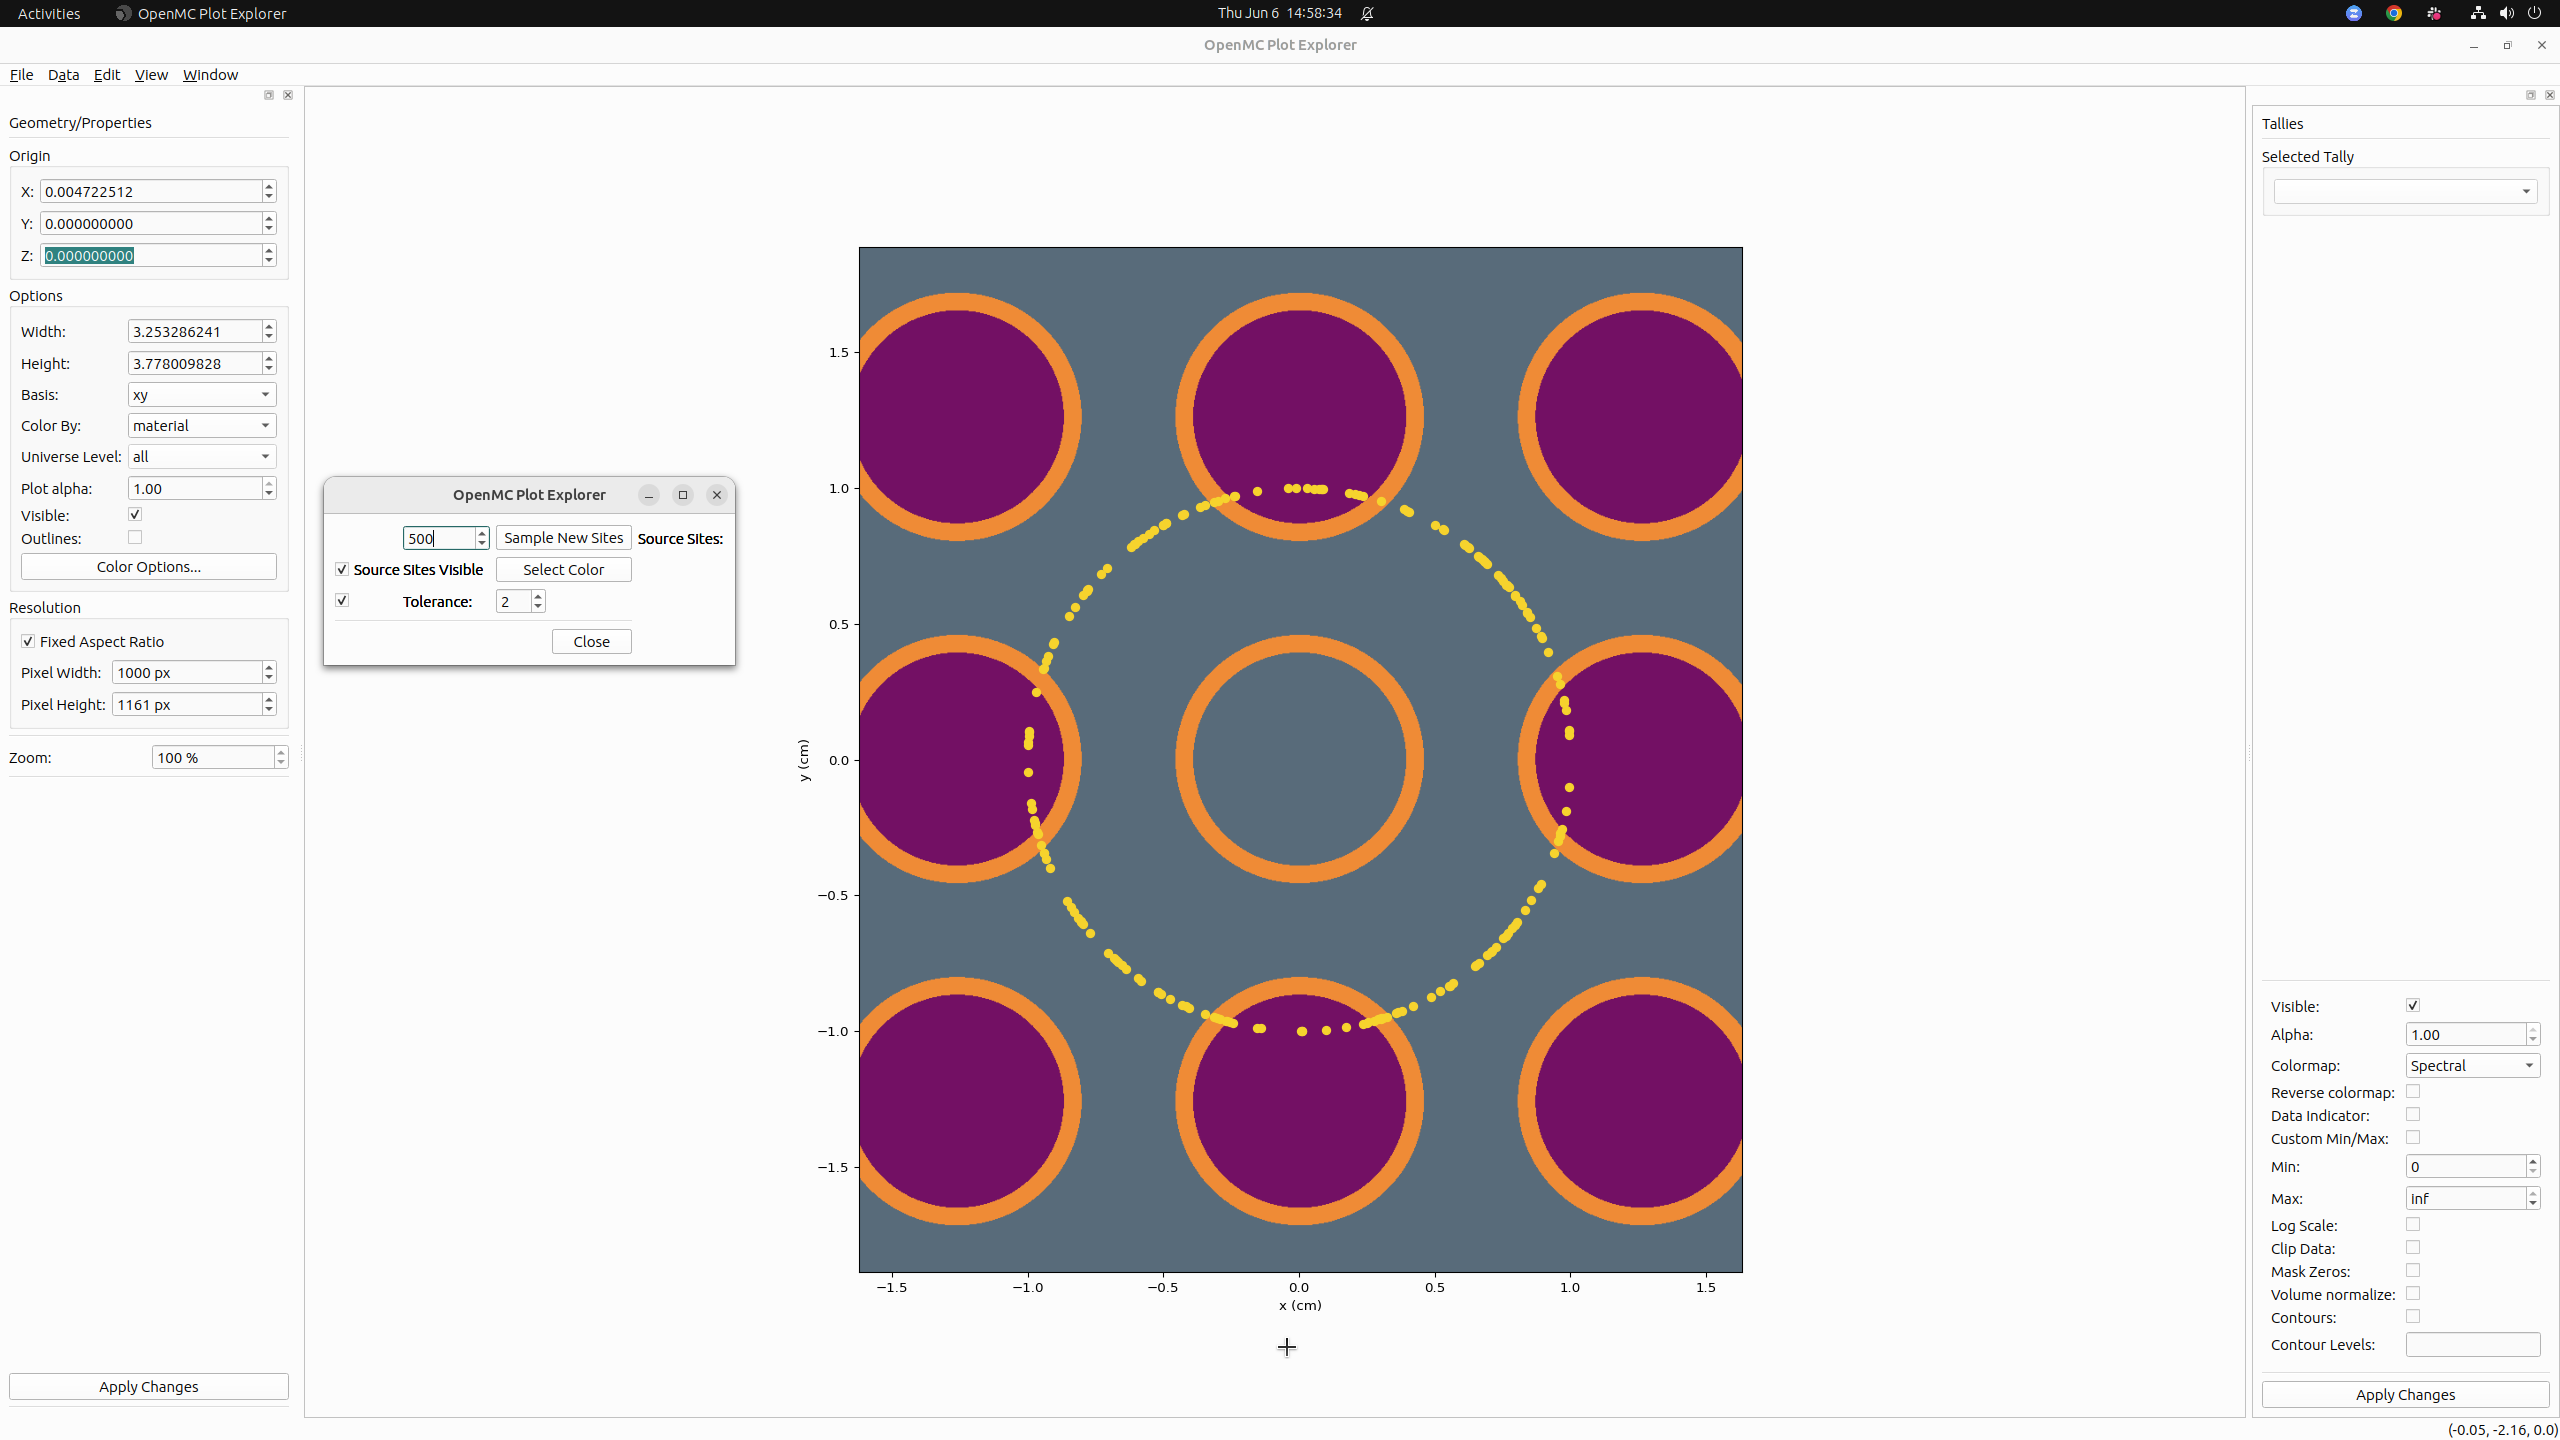
Source locations from an externally defined source can be visualized in the plotter to verify source definitions. These source sites are gathered as generated by the transport model. A tolerance can be provided to filter out source sites that are too far from the slice plane, otherwise source locations are projected onto the slice plane.
-
File→Save Image As... : Save an image file of the current plot.
-
File→Save View Settings... : Save a .pltvw pickle file containing the current plot settings.
-
File→Open View Settings... : Open and load a .pltvw pickle file containing a previously saved view.
-
File→Quit : Quit the application.
-
Edit→Apply Changes : Apply any un-applied plot setting changes, and reload plot image.
-
Edit→Undo : Undo last applied plot settings changes, and reload plot image.
-
Edit→Redo : Redo last applied plot settings changes, and reload plot image.
-
Edit→Restore Default Settings : Restore to default plot settings and reload plot image.
-
Edit→Basis→xy : Change plot basis to xy, apply changes, and reload plot.
-
Edit→Basis→xz : Change plot basis to xz, apply changes, and reload plot.
-
Edit→Basis→yz : Change plot basis to yz, apply changes, and reload plot.
-
Edit→Color By→Cell : Change plot settings to be colored by cell, apply changes, and reload plot.
-
Edit→Color By→Material : Change plot settings to be colored by material, apply changes, and reload plot.
-
Edit→Enable Masking : Enable/Disable masking, apply changes, and reload plot.
-
Edit→Enable Highlighting : Enable/Disable highlighting, apply changes, and reload plot.
-
Edit→Enable Overlap Coloring : Enable/Disable display of geometry overlaps, apply changes, and reload plot.
-
View→Hide[Show] Dock : Hide/Show Dock.
-
View→Zoom... : Open dialog to input new zoom value.
-
Window→Main Window : Activate, bring main window to front.
-
Window→Color Options : [Open], activate, bring color options dialog to front.
- X, Y, Z : Set the active plot origin to the values entered for each dimension.
- Width : Set the width of the active plot in plot units.
- Height : Set the height of the active plot in plot units.
- Basis : Set the basis of the active plot.
- Color By : Select how the active plot is colored.
- Color Options... : Open the color options dialog.
- Fixed Aspect Ratio : Check to prevent plot image stretching/warping.
- Pixel Width: Set width in pixels of active plot.
- Pixel Height : Set height in pixels of active plot.
- Apply Changes : Apply changes made to active plot, reload plot image.
- Zoom : Set zoom level of plot image.
-
Mouse Hover : Display plot coordinates in bottom-right of status bar. Display cell/material ID and name (if any) in bottom-left of status bar.
-
Left Mouse Button Drag : Crop active plot to selection, apply changes, and reload plot image.
-
Shift + Left Mouse Button Drag : De-crop active plot so that the current plot dimensions fit within selected area, apply changes, and reload plot image.
-
Note: To cancel selection, reduce selection size to less than 10 pixels in either dimension and release. Active plot Origin, width, and height values will be returned to current plot settings.
-
Double-Click Left Mouse Button : Set origin to point clicked, apply changes, and reload plot image.
-
Shift + Scroll : Increase/Decrease zoom level of plot image.
-
Right-Click on plot background → activate context menu:
- Edit Background Color... : Select a new color for plot background, apply changes, and reload plot image.
See menu bar for other context menu options.
-
Right-Click on plot overlap region → activate context menu:
- Edit Overlap Color... : Select a new color for overlap regions, apply changes, and reload plot image.
-
Right-click on plot cell/material : Activate context menu:
- Displays cell/material ID and name (if defined).
- Edit Cell/Material Color... : Select a new color for the selected cell/material, apply changes, and reload plot image.
- Mask Cell/Material : Mask/Unmask selected cell/material, apply changes, and reload plot image.
- Highlight Cell/Material : Highlight/Unhighlight selected cell/material, apply changes, and reload plot image.
See menu bar for other context menu options.
- Masking : Enable/Disable masking on active plot.
- Mask Color : Select color of masked components on active plot.
- Highlighting : Enable/Disable highlighting on active plot. Enabling highlighting will disable custom cell/material color selection.
- Highlight Color : Select overlay color of non-highlighted cells/materials.
- Highlight Alpha : Set alpha transparency level of non-highlighted color overlay.
- Highlight Seed : Select seed for randomized colorization of cells/materials when highlighting is enabled.
- Background Color : Select color of plot background for active plot.
- Show Overlaps : Display overlap regions on the plot.
- Overlap Color : Customize the displayed color of overlap regions.
- Color Plot By : Select how the active plot is to be colored.
- Double-click Name field to edit cell/material name. Edited names will not be reflected in .xml files.
- Double-click Color field to select a color for the cell/material in the active plot.
- Double-click SVG/RBG field to enter a new color for the cell/material. May be entered as SVG color, or RGB value (with or without parentheses).
- Right-click Color or SVG/RGB field to clear. This will reset the color to the default value.
- Click Mask field to mask/unmask cell/material in active plot.
- Click Highlight field to highlight/unhighlight cell/material in active plot.
- Apply Changes : Apply changes made to active plot, reload plot image.
- Close : Close the color options dialog.
Note: Fields appear dynamically based on whether Masking/Highlighting are enabled or disabled.
Application windows are restored to their previous locations and sizes. If the .xml files match those of the previous sessions, the plot model will be restored to its previous state.
Application status, including window size and location, will be saved. The current state of the plot model, including current plot and up to 10 previous/subsequent plots (i.e. for undo/redo) will be saved. Active plot changes that have not been applied will be lost.
- openmc-plotter: primary executable. contains the major program logic used to interact with the application.
- plotmodel.py: contains the underlying data structure of the plot model and application state.
- plotgui.py: contains the bulk of the graphical elements of the application.
- overlays.py: contains screen overlays seen in the GUI. Just keyboard shortcuts for now.
- plot_colors.py: module with convenience functions for generating and modifying RGB/RGBA colors
- assets: directory containing icons and images for the application
The plot slice image in the central area of the application.
Plot settings that are changed as dock and color dialog fields are changed. Not necessarily reflected in the plot image.
Plot settings currently displayed in the plot image.
Applying changes causes the active plot to become the current plot, and a new plot image to be generated.

