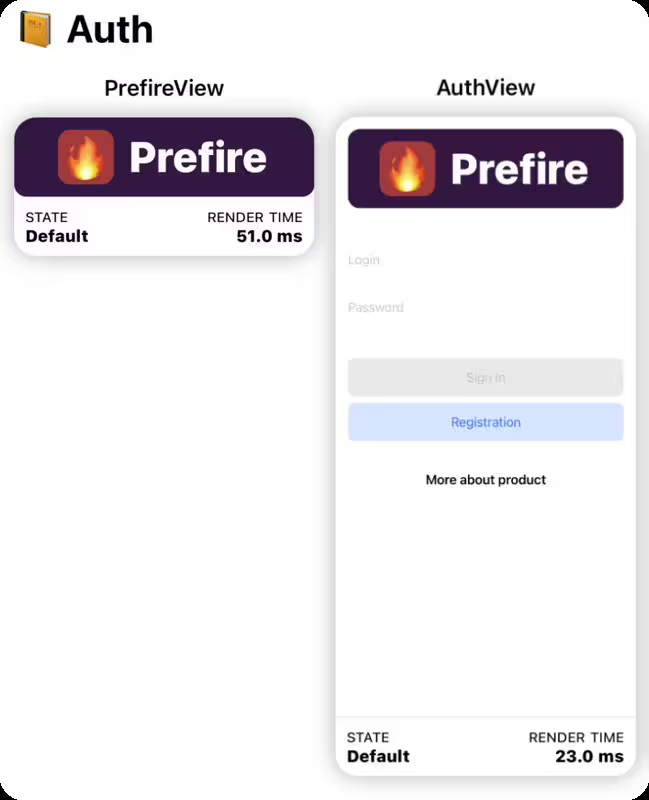
A library for easily generating automatic Playbook (Demo) view and Tests using SwiftUI Preview
Works with: UI-components, screens and flows
Do you like SwiftUI Preview and use it? Then you must try 🔥Prefire!
You can try 🔥Prefire starting from example project.
- ✅ Easy to use: Get started with the example project.
- ✅ Fully automatic generation based on Sourcery
- ✅ Generation Playbook (Demo) views
- ✅ Generation Snapshot tests based on swift-snapshot-testing
- ✅ Generation Accesability Snapshot tests
- ✅ Support for Xcode Plugin
Prefire can be installed for an Xcode Project or only for one Package.
You can integrate Prefire as an Xcode Build Tool Plug-in if you're working on a project in Xcode.
- Add
Prefireas a package dependency to your project without linking any of the products.
- Select the target to which you want to add linting and open the
Build Phasesinspector. OpenRun Build Tool Plug-insand select the+button. From the list, selectPrefirePlaybookPluginorPrefireTestsPlugin, and add it to the project.
You can integrate Prefire as a Swift Package Manager Plug-in if you're working with
a Swift Package with a Package.swift manifest.
- Add Prefire as a package dependency to your
Package.swiftfile.
dependencies: [
    .package(url: "https://github.com/BarredEwe/Prefire", from: "1.0.0")
]- Add Prefire to a target using the
pluginsparameter.
.target(
    plugins: [
        // For Playbook (Demo) view
        .plugin(name: "PrefirePlaybookPlugin", package: "Prefire")
    ]
),
.testTarget(
    plugins: [
        // For Snapshot Tests
        .plugin(name: "PrefireTestsPlugin", package: "Prefire")
    ]
)To generate tests and playbook, simply mark your preview using the PrefireProvider protocol:
struct Text_Previews: PreviewProvider, PrefireProvider {
    static var previews: some View { ... }
}
If you use the #Preview macro, 🔥Prefire will automatically find it!
If you don't need it, mark view - .prefireIgnored():
#Preview {
    Text("")
        .prefireIgnored()
}
If you want to disable the automatic get of all previews, use the setting preview_default_enabled: false. Then to include preview in the test, you need to call the .prefireEnabled():
#Preview {
    Text("")
        .prefireEnabled()
}To use Playbook, simply use PlaybookView
- If you want to see a list of all the Views, use
isComponent: true - If you want to sort by UserStory, use
isComponent: false
import Prefire

struct ContentView: View {
    var body: some View {
        PlaybookView(isComponent: true, previewModels: PreviewModels.models)
    }
}Just run generated tests 🚀 All tests will be generated in the DerivedData folder.
Plugin PrefireTestsPlugin will handle everything for you 🛠️
For detailed instruction, check out swift-snapshot-testing or examine an example project.
Prefire provide new commands for previews:
-
You can set the delay, precision and perceptualPrecision parameters for the snapshot:
.snapshot(delay: 0.3, precision: 0.95, perceptualPrecision: 0.98)
static var previews: some View {
    TestView()
        .snapshot(delay: 0.3, precision: 0.95, perceptualPrecision: 0.98)
}
-
Function for connecting preview together in one Flow:
.previewUserStory(.auth)
static var previews: some View {
    PrefireView()
        .previewUserStory(.auth)
}

static var previews: some View {
    AuthView()
        .previewUserStory(.auth)
}
For example Authorization flow:
LoginView,OTPViewandPincodeView
-
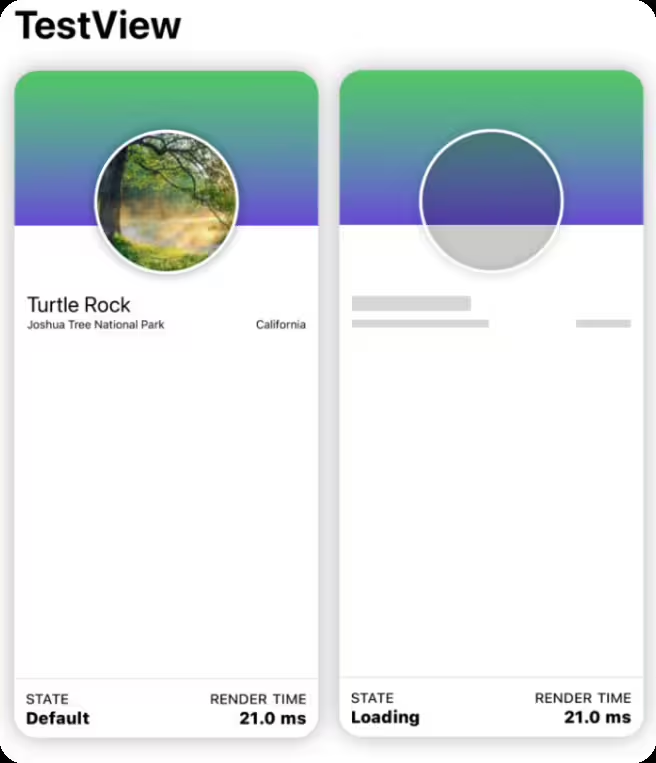
If a preview contains more than one
View, you can markStatefor these views..previewState(.loading)
static var previews: some View {
    TestView("Default")

    TestView("Loading")
        .previewState(.loading)
}
To further customize Prefire, you can create a .prefire.yml file in the root directory of your project. Here's an example of its content:
test_configuration:
  - target: PrefireExample
  - test_file_path: PrefireExampleTests/PreviewTests.generated.swift
  - template_file_path: CustomPreviewTests.stencil
  - simulator_device: "iPhone15,2"
  - required_os: 16
  - snapshot_devices:
  	- iPhone 14
  	- iPad
  - preview_default_enabled: true
  - imports:
    - UIKit
    - SwiftUI
  - testable_imports:
    - Prefire

prefire_configuration:
  - preview_default_enabled: true
  - imports:
    - UIKit
    - Foundation
  - testable_imports:
- SwiftUItarget- Your project Target for Snapshot tests. Default: FirstTargettest_file_path- Filepath to generated file. Default: DerivedDatatemplate_file_path- Stencil file for generated file. Optional parameter. Default: Templates/PreviewTests.stencil from the packagesimulator_device- Device for Snapshot testing. Optional parameter.required_os- iOS version for Snapshot testing. Optional parameter.snapshot_devices- the list of devices snapshots should be generated for. Thesimulator_devicespecified above will still be required and used, but snapshotting will take on the traits of thesnapshot_devices. ThedisplayScalewill default to2.0and device specific safe areas will be.zero. Optional parameter.preview_default_enabled- Do I need to automatically add all previews based on the new syntax to the tests. Default: trueimports- Additional imports for the generated Playbook/Tests. Optional parameter.testable_imports- Additional@testableimports for the generated Playbook/Tests. Optional parameter.
- Swift 5.6 or higher
- Xcode 14.0 or higher
- iOS 14 or higher
NavigationView in Preview not supported for Playbook
- Consider using other views or layouts for your Playbook needs.
Running Prefire via CI
- To run Prefire via Continuous Integration (CI), you need to configure permissions:
defaults write com.apple.dt.Xcode ideskippackagepluginfingerprintvalidationbool YES
Xcode is unable to generate tests in a custom path.
- To resolve this, you’ll need to disable the sandbox for file generation by running the following command in your terminal:
defaults write com.apple.dt.Xcode IDEPackageSupportDisablePluginExecutionSandbox -bool YES


