This repository hosts the application that you create by following the "Complete Guide to Angular User Authentication with Auth0".
That security guide helps developers learn how to secure a Angular application by implementing user authentication. It enhances a Angular application to practice the following security concepts:
- Add user login and logout.
- Retrieve user information.
- Protect application routes.
- Call protected endpoints from an API.
The guide uses the Auth0 Angular SDK to secure Angular applications, which provides Angular developers with an easier way to add user authentication to Angular applications using Observables and HTTP Interceptors.
Install the client project dependencies:
npm installIf you haven't already, sign up for a free Auth0 account.
Once you sign in, Auth0 takes you to the Dashboard. In the left sidebar menu, click on "Applications".
Then, click the "Create Application" button. A modal opens up with a form to provide a name for the application and choose its type.
-
Name: Auth0 Angular Sample
-
Application Type: Single Page Web Applications
Click the "Create" button to complete the process. Your Auth0 application page loads up.
Your Angular application will redirect users to Auth0 whenever they trigger an authentication request. Auth0 will present them with a login page. Once they log in, Auth0 will redirect them back to your Angular application. For that redirecting to happen securely, you must specify in your Auth0 Application Settings the URLs to which Auth0 can redirect users once it authenticates them.
As such, click on the "Settings" tab of your Auth0 Application page and fill in the following values:
Allowed Callback URLs
http://localhost:4040Allowed Logout URLs
http://localhost:4040Allowed Web Origins
http://localhost:4040Scroll down and click the "Save Changes" button.
Open the Angular starter project, auth0-angular-sample, and create a auth_config.json file under the project directory:
touch auth_config.jsonPopulate auth0-angular-sample as follows:
{
  "domain": "YOUR_AUTH0_DOMAIN",
  "clientId": "YOUR_AUTH0_CLIENT_ID",
  "audience": "https://express.sample",
  "serverUrl": "http://localhost:6060"
}
Head back to your Auth0 application page. Follow these steps to get the domain and clientId values:
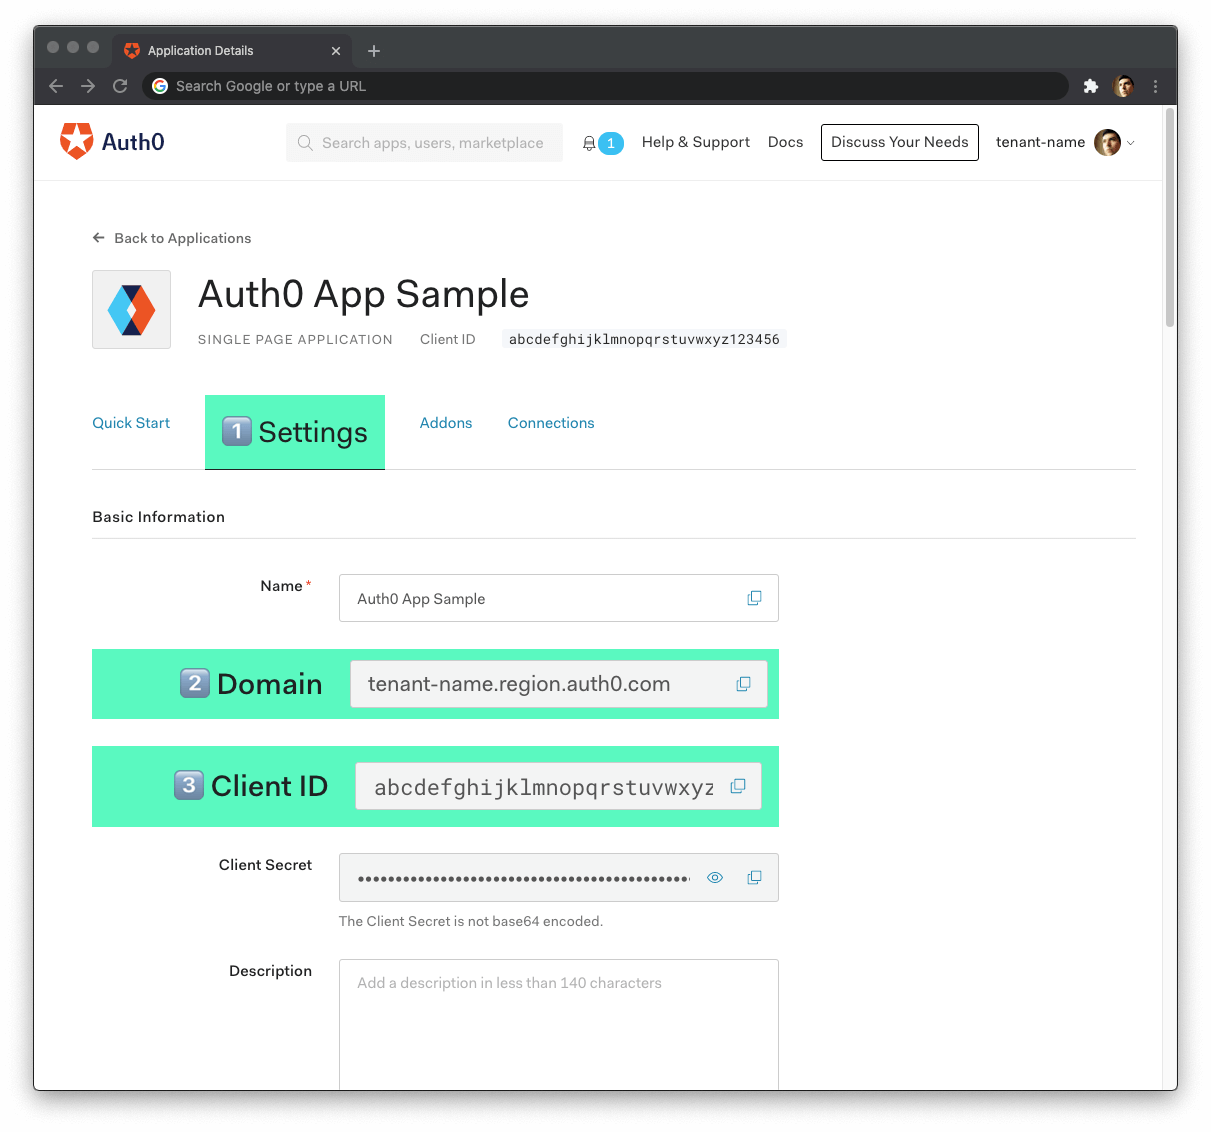
-
Click on the "Settings" tab, if you haven't already.
-
Use the "Domain" value from the "Settings" as the value of
domaininauth_config.json. -
Use the "Client ID" value from the "Settings" as the value of
clientIdinauth_config.json.
Run the client project:
npm startThe application runs by on port 4040 to mitigate conflicting with other client applications you may be running.
Visit http://localhost:4040/ to access the starter application.
You can set up this Express demo server to test making secure API calls from your Angular application.
Clone the auth0-express-js-sample repo:
git clone git@github.com:auth0-blog/auth0-express-js-sample.gitMake the auth0-express-js-sample directory your current directory:
cd auth0-express-js-sampleInstall the Node.js project dependencies:
npm installHead to the APIs section in the Auth0 Dashboard, and click the "Create API" button.
Then, in the form that Auth0 shows:
- Add a Name to your API:
Auth0 Express Sample- Set its Identifier value:
https://express.sample- Leave the signing algorithm as
RS256as it's the best option from a security standpoint.
With these values in place, hit the "Create" button.
Keep this page open as you'll be using the values next.
Create a .env file for the API Server under the auth0-express-js-sample directory:
touch .envPopulate this auth0-express-js-sample/.env file as follows:
SERVER_PORT=6060
CLIENT_ORIGIN_URL=http://localhost:4040
AUTH0_AUDIENCE=
AUTH0_DOMAIN=
Head back to your Auth0 API page, and follow these steps to get the Auth0 Audience:
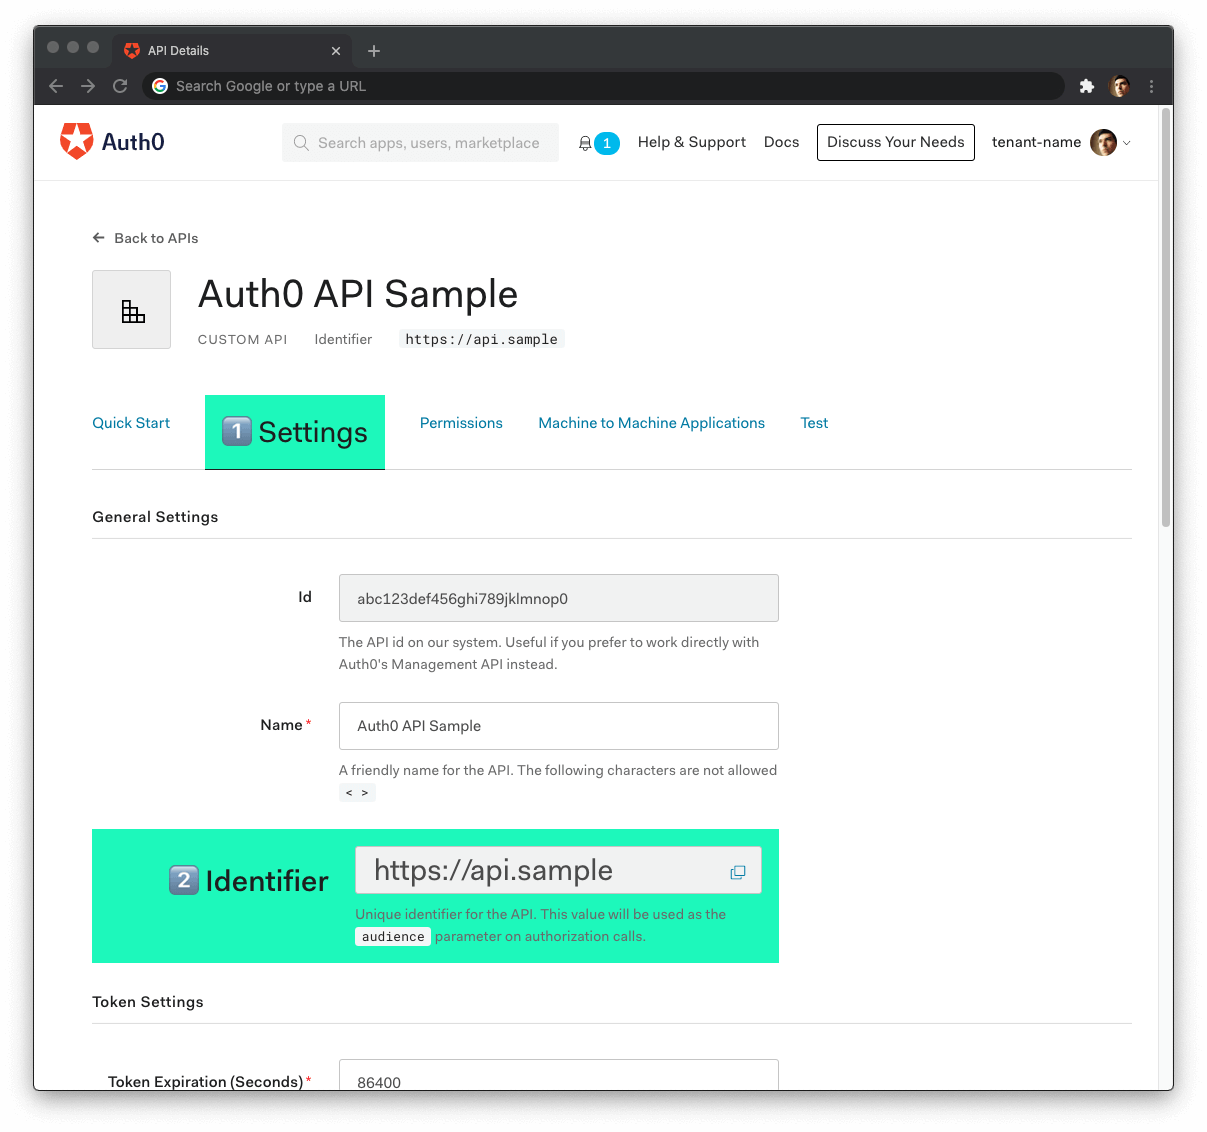
-
Click on the "Settings" tab.
-
Locate the "Identifier" field and copy its value.
-
Paste the "Identifier" value as the value of
AUTH0_AUDIENCEin.env.
Now, follow these steps to get the Auth0 Domain value:
- Click on the "Test" tab.
- Locate the section called "Asking Auth0 for tokens from my application".
- Click on the cURL tab to show a mock
POSTrequest. - Copy your Auth0 domain, which is part of the
--urlparameter value:tenant-name.region.auth0.com. - Paste the Auth0 domain value as the value of
AUTH0_DOMAINin.env.
Tips to get the Auth0 Domain
- The Auth0 Domain is the substring between the protocol,
https://and the path/oauth/token.- The Auth0 Domain follows this pattern:
tenant-name.region.auth0.com.- The
regionsubdomain (au,us, oreu) is optional. Some Auth0 Domains don't have it.
With the .env configuration values set, run the API server by issuing the following command:
npm start